
As with previous versions of SharePoint, MOSS 2007 organizes information as web sites. These sites can be accessed either through your company’s intranet or from the Internet. After installing and configuring MOSS 2007, a default top-level site will automatically be created. Your next job is to modify the top-level site and begin constructing your site collection. A site in SharePoint is the same as any web site you have ever accessed: a collection of web pages interrelated to allow a group or organization to share information, organize data, and conduct collaborative meetings and discussions.
A top-level site is the main web interface into your organization. Think of it as http://www.microsoft.com or http://intranet.microsoft.com. This site is the access point that allows your company and any partners entry into your information and communication channels in MOSS 2007.
Subsites are subsidiary web sites or child sites that are referenced through the top-level site. Often, subsites are created for specific teams or projects within your company. If your company designs and supports various software suites, a subsite could be created for a specialized group to develop a new application within a suite. Any subsite can have numerous subsites underneath it. A top-level site with an underlying tree structure of subsites is called a site collection. The top-level site and subsites are all organized under portal hierarchy, meaning that there can be numerous site collections per portal site.
It is also possible to create a site collection as a single action, rather than creating sites individually. The portal site administrator can create site collections that are not part of the portal site’s main navigation. Creating site collections from the Site Directory lets you organize your sites based on your company’s business structure or by working group, rather than the default portal hierarchy.
Each user on a site can also configure a personal site called My Site. My Site provides the individual with a private workspace that is not accessible by anyone else. The user can allow access by others if desired. Before moving on, let’s take a look at the different ways sites can be created.
Tip
My Site collections are discussed in Chapter 21.
Sites can be created in a number of ways:
Using administrative privileges
Using self-service site creation
Using the command line
Using a program
With a compatible web design application
On a broader scale, site creation can be differentiated by:
Creating top-level site and subsites
Creating separate site collections
Before you begin creating sites, it’s important to know which features you need to meet your goals. Your first choice is to create either one top-level site and several subsites as a single site collection or several independent top-level sites and subsites under each top-level site in multiple site collections. Figure 5-1 and Figure 5-2 illustrate the differences.
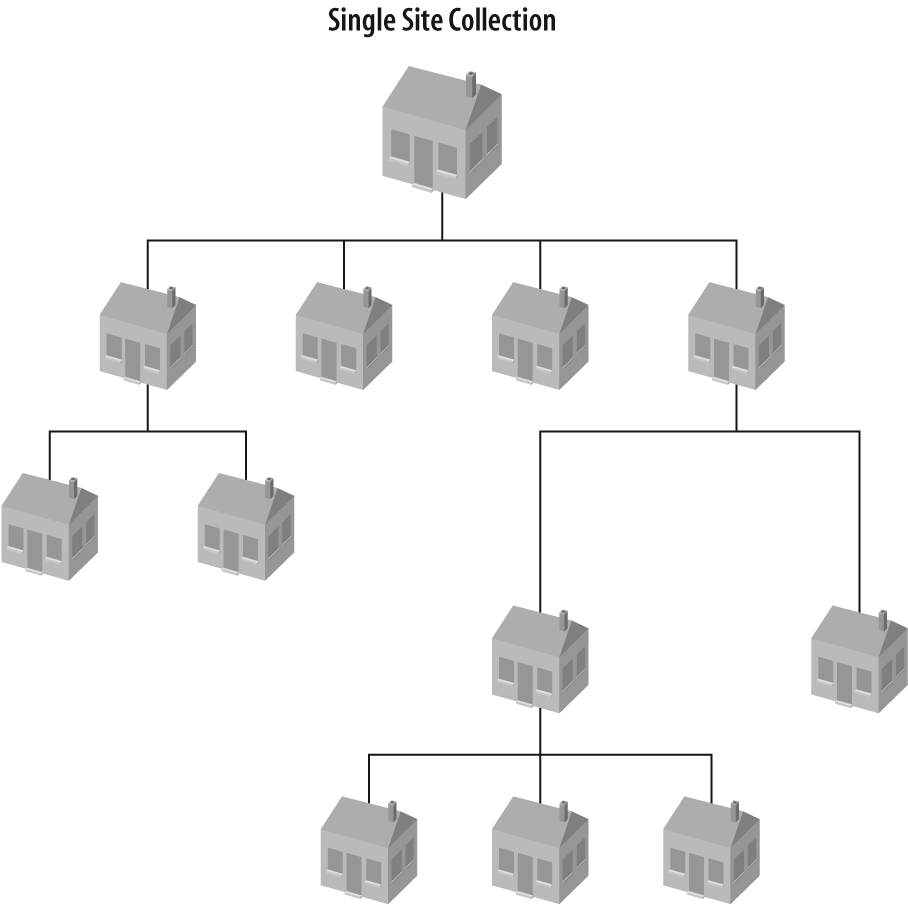
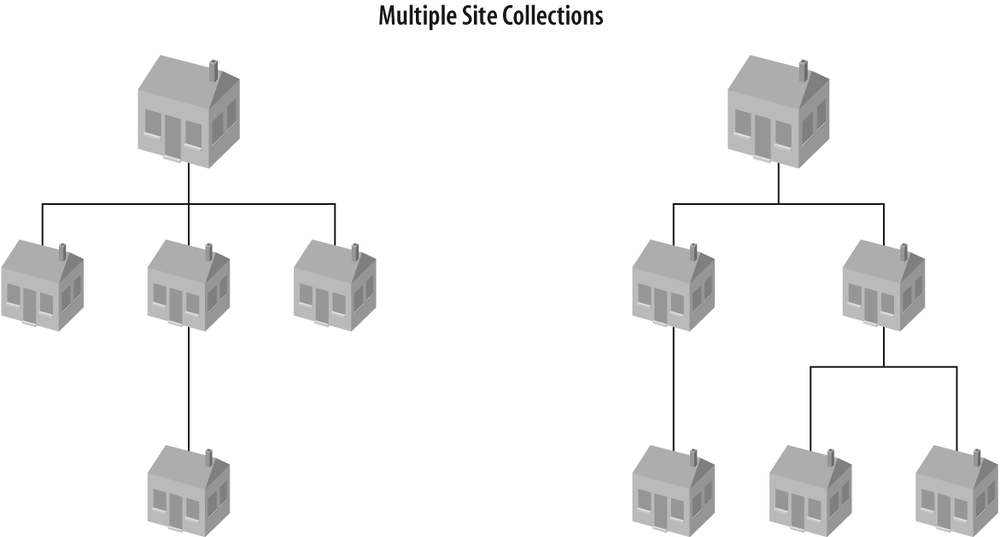
Figure 5-2. Two separate site collections, each one containing a top-level site and several subsites
Security is the primary driver of your choice of site structure. Separate site collections don’t share the same navigation structure, elements, or parent permissions and must be administered separately. Table 5-1 demonstrates the differences.
Table 5-1. Single and multiple site collection features
|
Single site collection |
Multiple site collections |
|---|---|
|
Shares navigation. |
Do not share navigation. |
|
Subsites inherit permissions from parent site. |
Permissions are not inherited among site collections. |
|
Lists are shared within the site collection. |
Lists are not shared among site collections. |
|
Design elements are shared within the site collection. |
Design elements are not shared among site collections. |
|
The site collection resides in the same database. |
Site collections can reside in separate databases. |
|
The entire site collection must be backed up and restored. |
An individual site collection can be backed up and restored without affecting other site collections. |
|
The scope of workflow spans the site collection. |
The scope of workflow is limited to within individual site collections. |
|
The search scope spans the site collection. |
The search scope is limited to within individual site collections. |
Creating multiple site collections under your portal isn’t absolutely necessary for the sake of security, and each subsite can have a different set of permissions from the parent site. However, if you want to make sure that no user in a group shares any access whatsoever to the data of another group, create a site collection for each group.
Once SharePoint 2007 is installed on Windows Server 2003, the default site is created and located at http://server_name/Pages/Default.aspx” (default_sharepoint_site). This is your top-level site. You can modify the content and presentation of this site to make it consistent with your business type and image. All sites you create under this site will be part of your organization’s site collection.
Tip
See Chapter 7 for more information about customizing the appearance of your site collection.

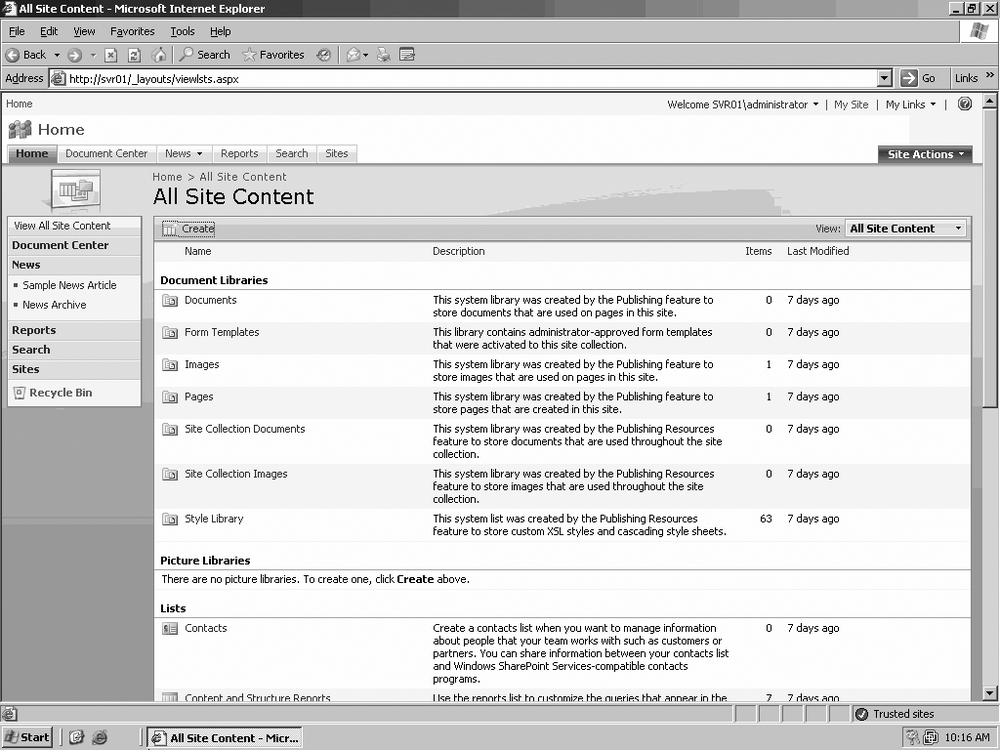
Before creating new sites or modifying the default site, take a few minutes and tour the features of this site. Start with the lefthand Quick Launch menu and click the first link, View All Site Content.
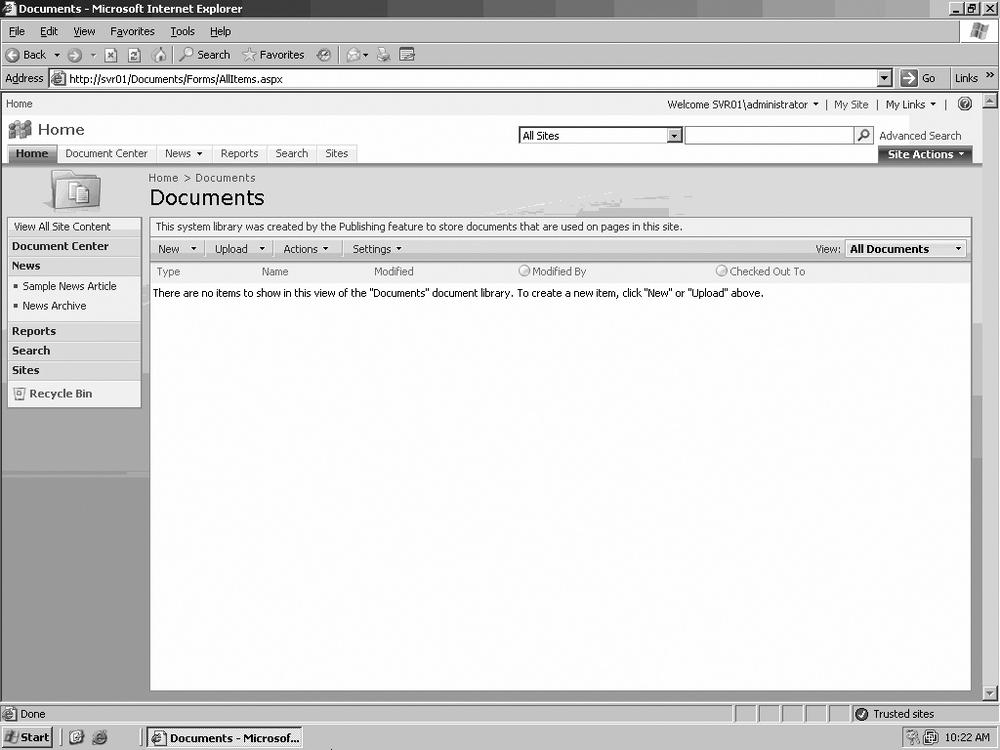
As you can see in Figure 5-4, all of the standard Libraries, Lists, Discussion Boards, Surveys, and Sites and Workspaces already exist and are ready for you to use. For example, if you click on the Documents library, you are taken to an empty repository (Figure 5-5). No documents are created there by default, but you can easily upload documents from any source accessible on the server or the network. The Sites and Workspaces listed in the following sections are available to use with the default portal site.
Whereas the Documents Library in All Site Content acts as a collection point for all documents relevant to your site collection, the Document Center Site (Figure 5-6) exists as a management interface, allowing you to organize work related to site documents, announce upcoming tasks involving documentation, and assign work teams to these tasks.
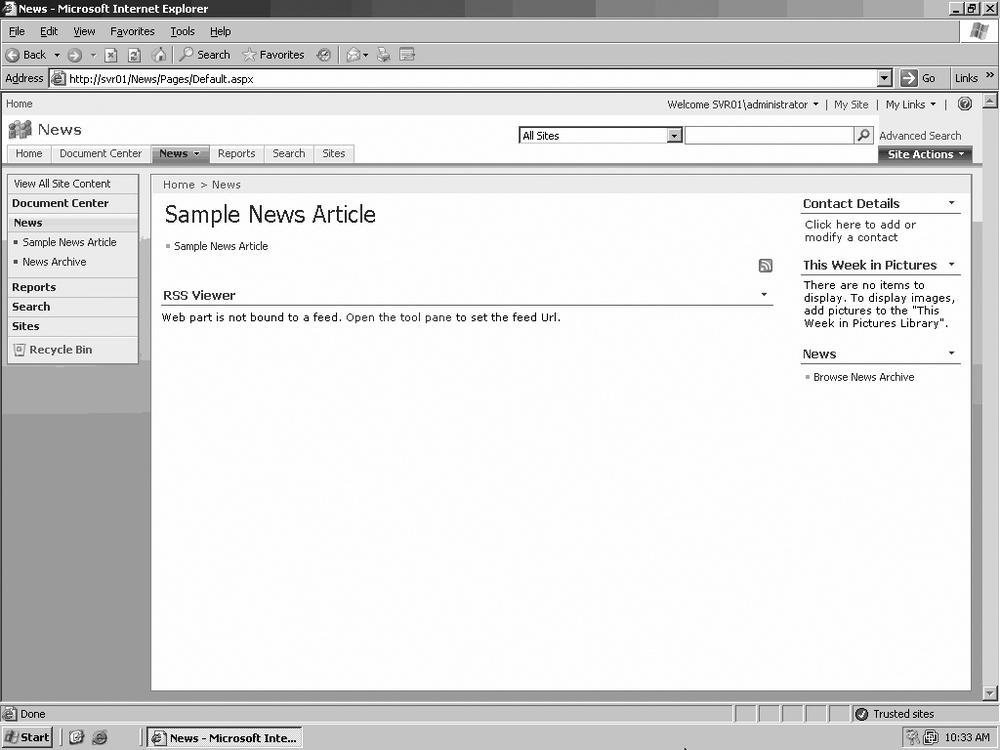
You have a full-featured News site available to you. Included on this site is a sample news article, a news archive, and an RSS Viewer Web Part already added to the page (Figure 5-7).
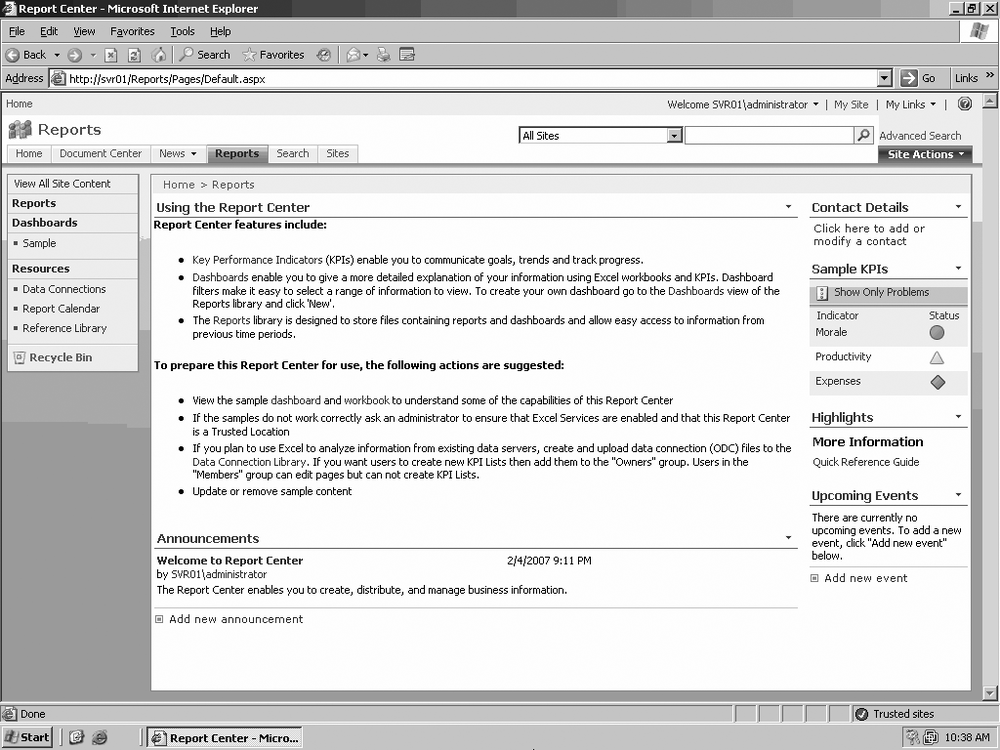
The Report Center (Figure 5-8) is at the heart of the MOSS 2007 Business Intelligence solution.
Tip
Learn more about Business Intelligence in Chapter 15.
The Report Center provides a single interface to organize a variety of business information types from sources scattered across the local network and the Internet.
A built-in search engine is available, allowing you to look for and locate resources on your site (Figure 5-9).

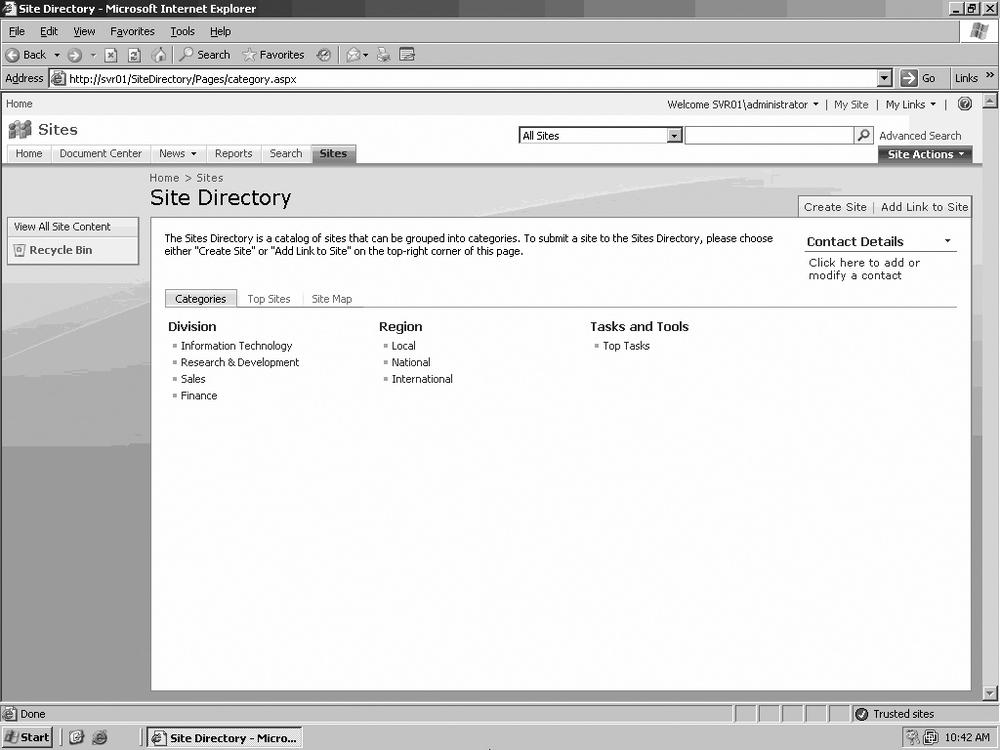
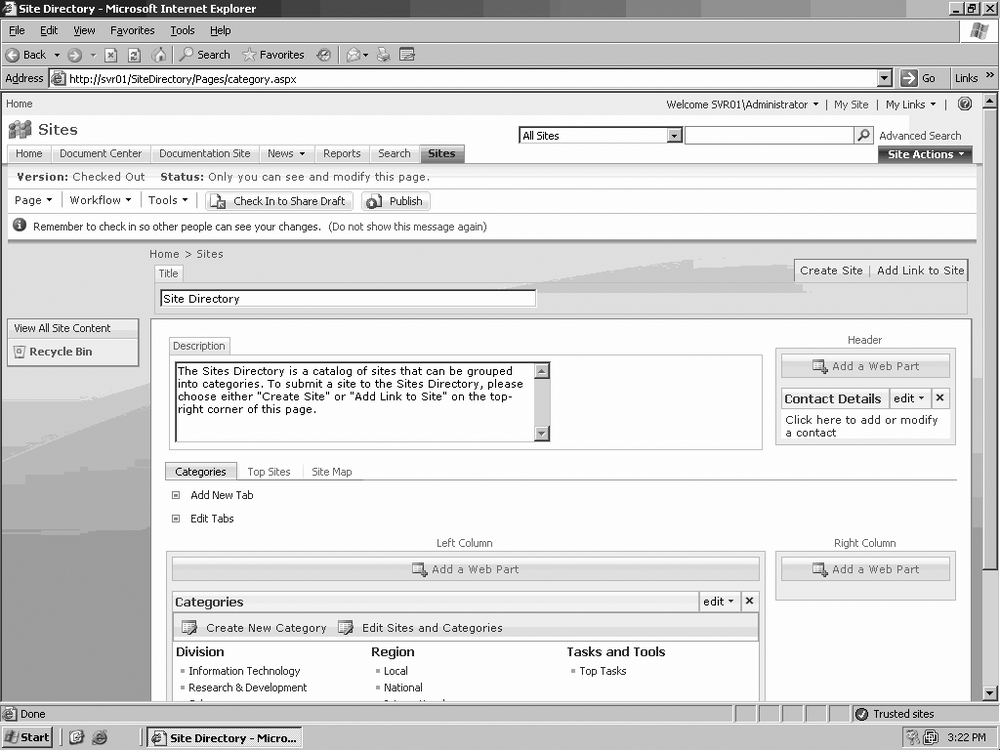
The Site Directory (Figure 5-10) is the organizational interface to the site collection. From this page, you can manage all of the sites in the site collection and create new sites.
SharePoint provides a variety of site templates for different purposes. Before you create a site, you should plan out the structure by mapping your business needs to your site and subsite definitions. A good place to start is to revisit your organization’s business goals. Determine which subset of your goals you want to address in the creation of this site or site collection.
Determining who will be using this site will help you decide what kind of security to establish, as well as the type and presentation of content material, which could include news, reports, and galleries. The target audience will also drive the level of site or sites you will create. For example, you will most likely create a top-level site for your entire organization and then subsites and My Sites for customers, the general public, teams, and individuals.
Tip
My Sites are addressed in Chapter 21.
The content for your top-and lower-level sites will vary depending on the intended audience of each site. You can create several types of Workspace sites to manage the content for each type of user. Workspace sites include:
Document Workspace
Basic Meeting Workspace
Blank Workspace
Decision Workspace
Social Workspace
Multipage Meeting Workspace
Tip
Workspace sites are presented in detail in Chapter 9 and Chapter 10.
You can also use site templates to control content on your sites. When creating a new site, SharePoint provides the following default site template categories:
Collaboration
Meetings
Enterprise
Publishing
Each template category contains several different site template types.
Tip
Find out more about site templates in Chapter 7.

Site navigation types are yet another way you can organize access to site content. Types of site navigation tools include:
View All Site Content
Quick Launch
Tree View
Top link bar
Content breadcrumb bar
Global breadcrumb bar
If you are going to create a site for your company’s management team, obviously you want only the management team to have access. There are a number of tools available in MOSS 2007 that you can use to create security groups and permissions. You can use them to limit access to any site based on the target audience.
Tip
Discover more information about creating and managing groups and site security in Chapter 22.
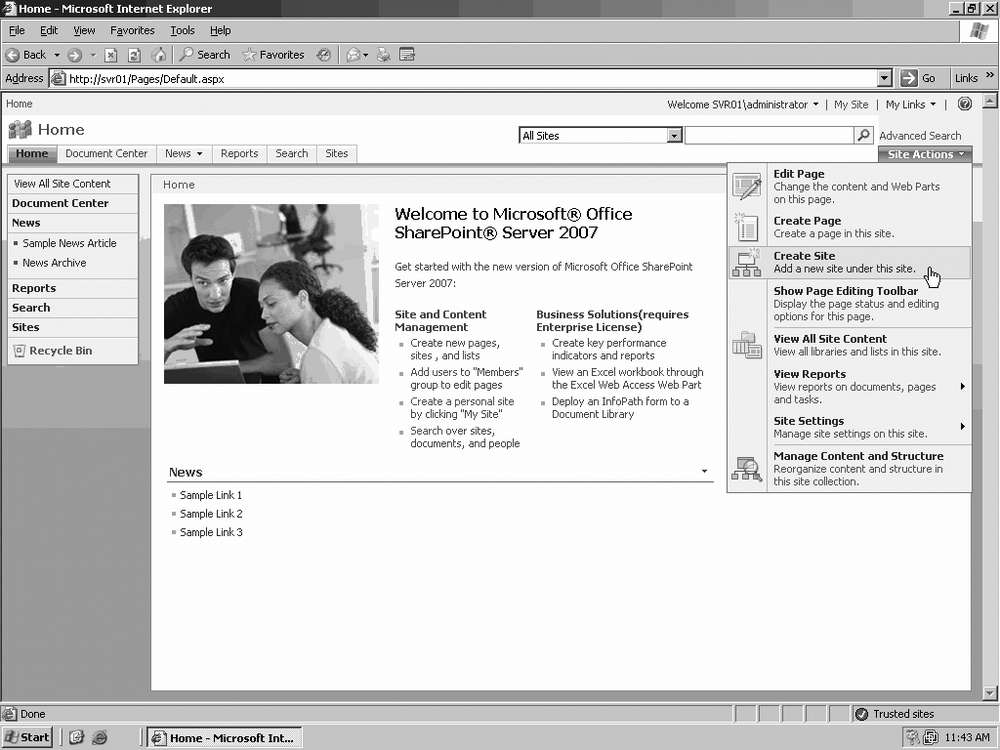
There are several ways you can initiate site creation. One way is to use the Site Actions link (Figure 5-11), which is available from any page on your top-level site. The link is located near the upper-righthand corner of the page. Follow these steps:
Click Site Actions.
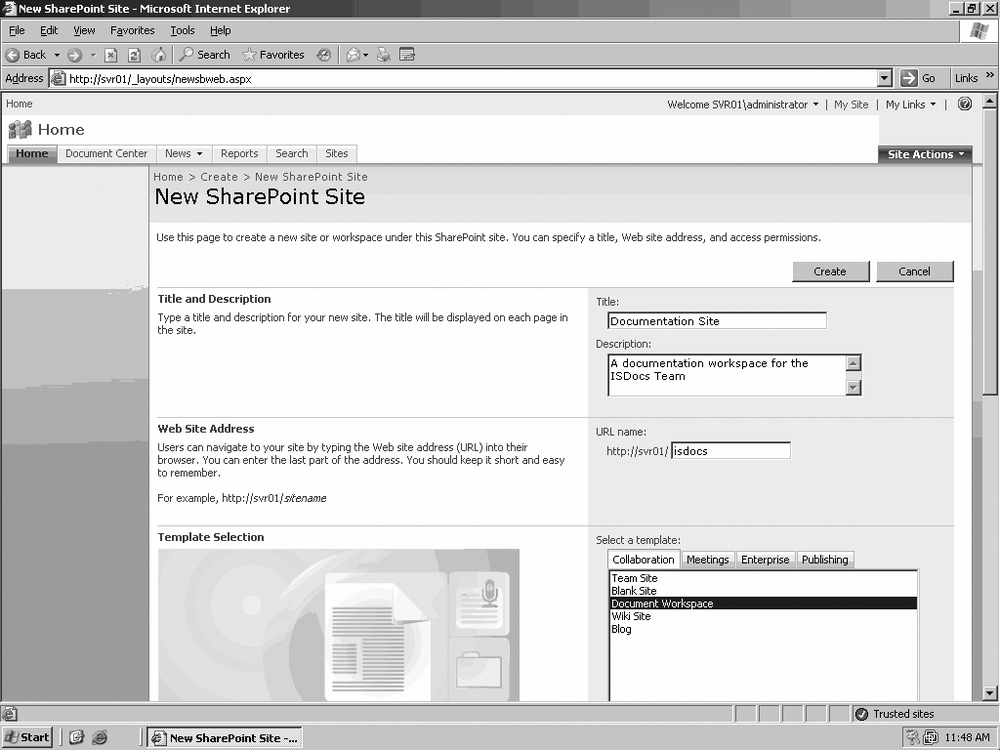
Click Create Site from the menu selections. This will open up the New SharePoint Site page (Figure 5-12).
In the Title field on the New SharePoint Site page, type the name of the site.
In the Description field, type a brief description of the site’s purpose.
In the Web Site Address section, complete the URL for the site.
In the Template Selection section, choose a template, such as Collaboration.
In the template, select the type of site.
In the Permissions section (Figure 5-13), select the type of user permissions you want.
In the Navigation Inheritance section, determine which type of site navigation to use.
In the Site Categories section, decide whether to show this site in the site directory and whether to assign this site to one or more category types, and then click the appropriate checkboxes.
Scroll to the bottom of the page and click Create.
Your first subsite of the top-level site has now been created (Figure 5-14) and is ready to be modified and receive content. This is the first site you’ve added to your site collection. Links to this site are now displayed on the top and sidebar menus on the top-level site.
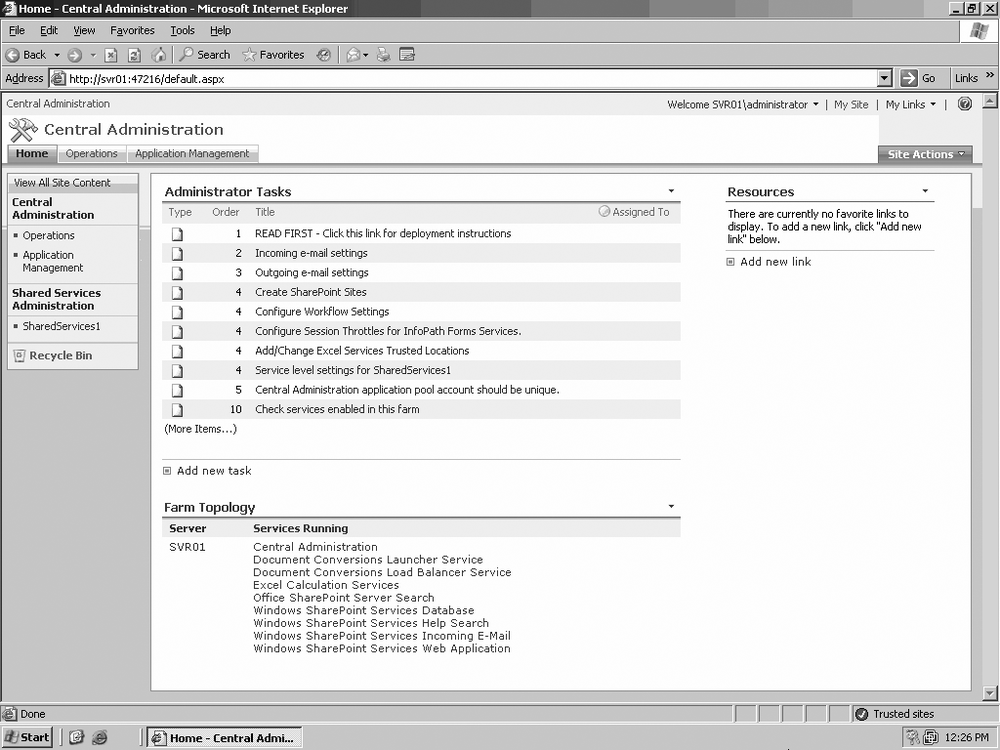
Self-Service Site Creation allows you to delegate the creation of SharePoint sites to users other than the administrator. This service also lets you create sites and site collections from inside the Site Directory, rather than from the top-level site home page or from Site Actions. You can enable Self-Service Site Creation only from the Central Administration page (Figure 5-15) at the top-level site.

Tip
The default URL for the Central Administration site is http://server_name:47216/default.aspx. There is no direct link from the top-level SharePoint site. The port number referenced in the URL can actually be any port number between 1 and 65535.
Also note, when you attempt to access the Central Administration page, you may be required to authenticate using the username and password of your administrator account.
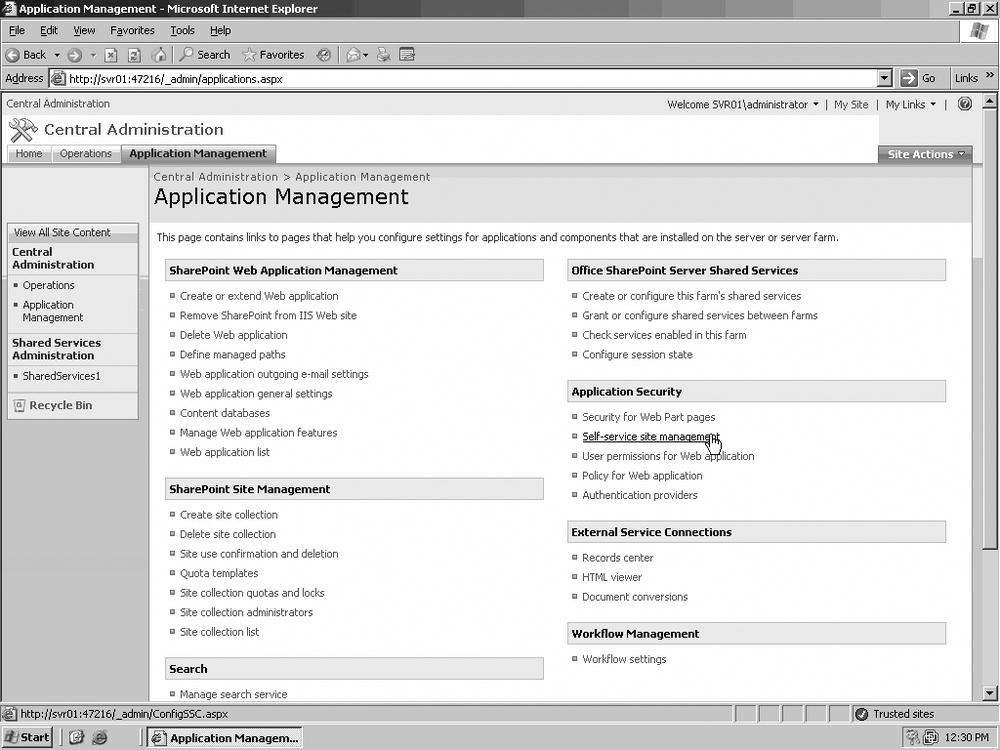
Click Application Management.
On the Application Management page (Figure 5-16) under Application Security, click “Self-service site management.”
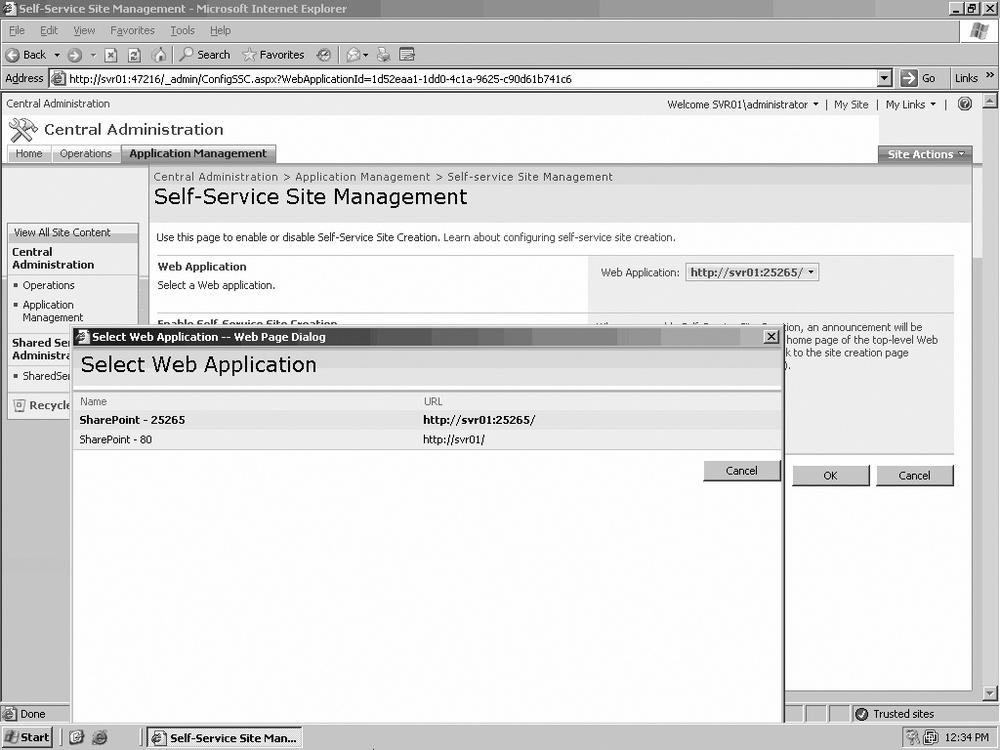
On the Self-Service Site Management page, click Web Application to change it.
On the Select Web Application page, choose the web application you want enabled for Self-Service Site Creation (Figure 5-17).
Click OK.

Creating sites and site collections from the Site Directory has several advantages. Creating a site, as we saw in the previous example, forces you to organize sites by site hierarchy rather than by some other structure. Although most Internet and intranet sites are organized this way, it may not be the optimal structure for your company. Using the Site Directory allows you to organize your sites by department or product type.
In the top navigation bar, click Sites.
On the Site Directory page, click Create Site, which is located in the upper-lefthand corner of the pane.
On the New SharePoint Site page, to create a Site Collection, replace the URL:
http://server_name/SiteDirectory/_layouts/newsbweb.aspx with:
http://server_name/SiteDirectory/_layouts/scsignup.aspx Continue configuring the page using the steps in the previous section, “Create a New Site Using Site Actions.”
After you click Create, your new Site Collection is created (Figure 5-18).
Once you’ve created sites and site collections from the Site Directory, you can use the Directory to manage those sites. As a SharePoint administrator, you can use the Directory as your central interface to view the site collection structure, edit sites and site content, approve or reject new site creations, and delete sites.
There are two ways you can view the site collection structure from the Site Directory.
The first way is to click Site Map in the Site Directory. (See Figure 5-19.)
Notice that in Figure 5-19, you can see all of the default sites created when SharePoint was installed, as well as the Documentation Site and Software Development Site Collection created earlier in this chapter.
The second method of viewing the site collection structure from the Directory requires following these steps:
Notice that in this view (Figure 5-20), you can only see the sites and site collections that were created, not the default sites. You can also see the My Site setup, which is discussed in more detail in Chapter 21.
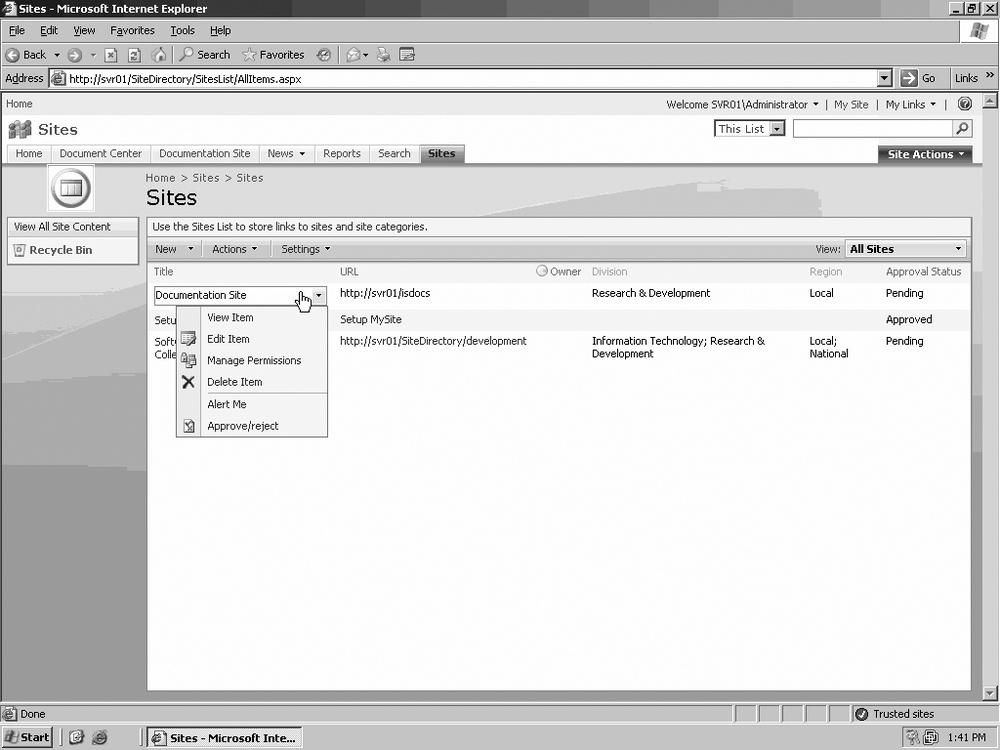
You can edit some of the features of these sites from this page by clicking to the right of a site title and then choosing an option from the menu (Figure 5-21).

As you’ve just seen, one of the actions you can perform on the Sites page is to either approve or reject a pending site. With Self-Service Site Creation enabled, users other than the administrator can create a new site. However, once a site is created, its status is not final until an administrator either approves or rejects it. The approval process allows the administrator control of which sites will remain as part of the site collection.
To approve or reject a site:
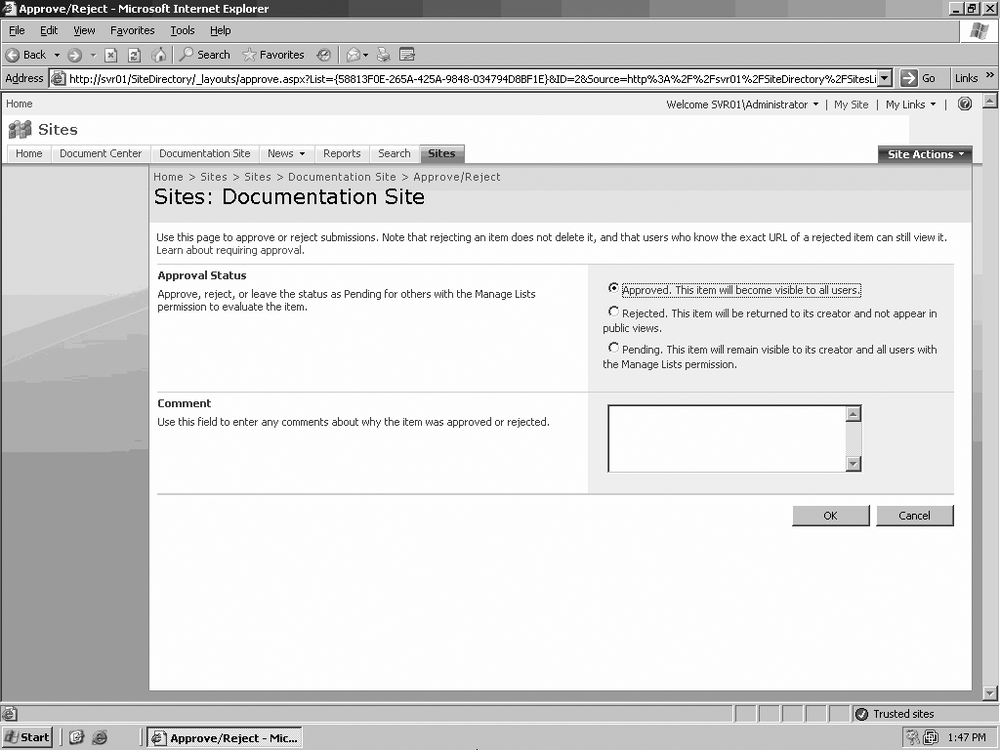
On the Sites page (Figure 5-22), click to the right of the site you want to approve or reject.
Select Approve/Reject.
Select either Approve or Reject (the default selection is Pending).
Click OK to finalize your choice.
While still pending, the site was visible only to users with Manage Lists permissions or higher. Once approved, the site is visible to all users. If a site is rejected, it is not visible to any users and is returned to its creator.

Sites aren’t always meant to be permanent. Some sites are created for the lifespan of a particular project, and once that project is over, the site can be terminated. Deleting a site is a fairly simple process:
On the Sites page, click to the right of the title to open the menu.
Select Delete Item.
Click OK when the confirmation dialog box appears.
The site is deleted and removed from the Sites list.

Of all the sites you’ll create in your Enterprise environment, there are sure to be certain key sites you’ll want users to know about and be able to find easily. You can promote a site to Top Site on the Sites page found under Lists:
On the Sites page, click to the right of the title of the site you want to promote.
Select Edit Item.
Scroll down the page until you see the Top Site category.
Click the checkbox.
Click OK.
When you return to the Site Directory, click on Top Sites. The site you promoted will be on the list.
You can modify a wide variety of settings directly from within the site:
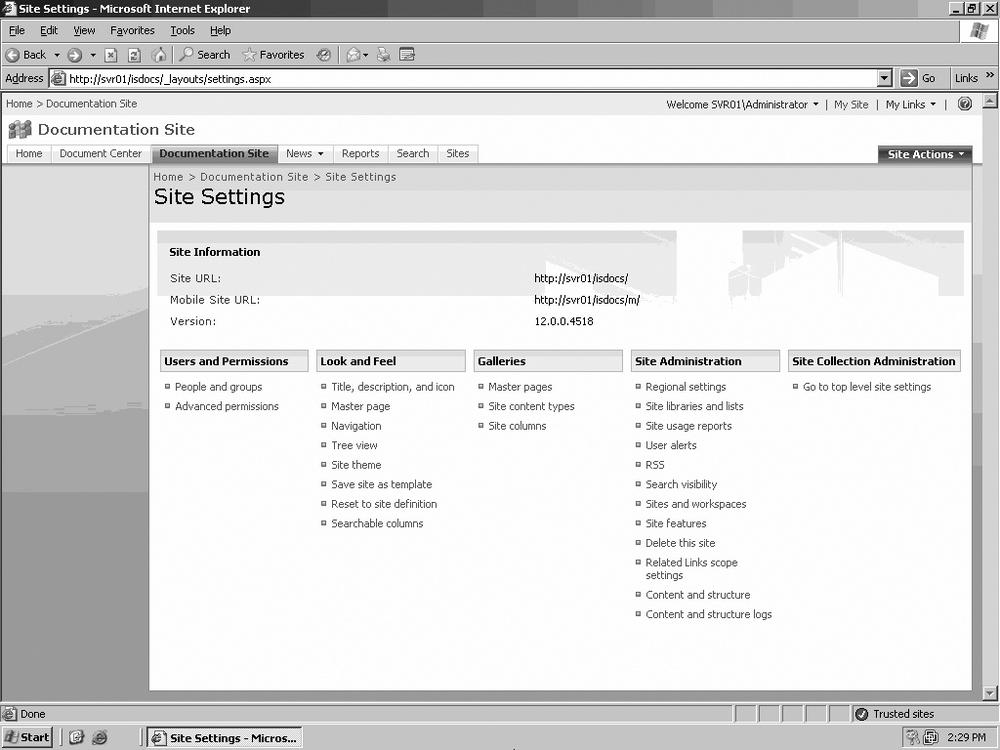
From the top-level site, click the link to the site you want to edit.
Click Site Actions, and select Site Settings from the menu (Figure 5-23).
You can select the links under any of the categories to edit the site.
As you may have noticed, the default categories available on the site creation page are pretty limited. Fortunately, SharePoint gives you the option to show additional categories.
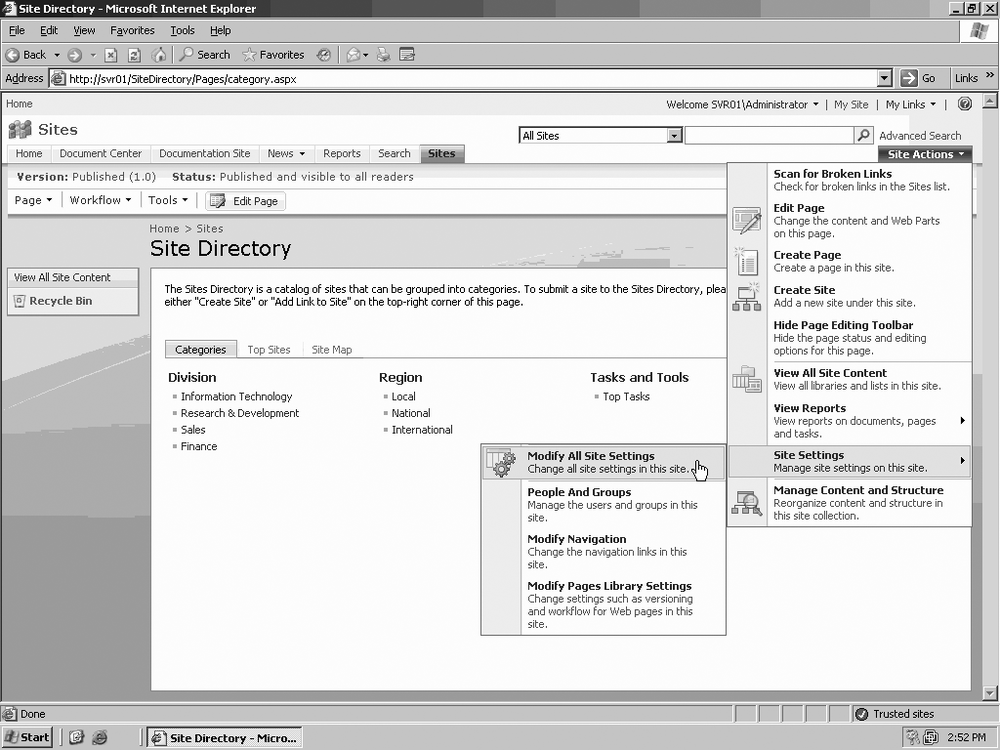
In the Site Directory, click Site Actions.
On the Menu, select Site Settings, and then select Modify All Site Settings (Figure 5-24). This takes you to the same page you visited in the previous section of this chapter, "Editing a Site Directly from the Site.”
In the Site Administration column, click “Site Libraries and Lists.”
On the “Site Libraries and Lists” page, click Customize Sites.
On the Customize Sites page, in the Views section, click Site Creation Categories. (It’s near the bottom of the page, so depending on your screen resolution, you may have to scroll down to see it.)
In the Columns section (Figure 5-25), select the checkboxes for any category you want to appear on the Create Site page. (Notice that the default selections Division and Region are already checked.)
In the Position from Left column, you can use the drop-down arrows to choose the order in which each category will appear from left to right.
When you are finished, click OK.
Just as the default categories on the Create Site page are limited, so are those available on the Site Directory page. SharePoint allows you to add or edit the categories on this page to suit your needs.
On the Site Category page, click Site Actions.
Select Edit Page from the menu.
In the Categories box (Figure 5-26), click Create New Category. Figure 5-27 demonstrates the options for a new category.
Type the name of the new category in the “Column name” field.
Under the Title field, select the Choice radio button.
Add a description in the Description field.
Select Yes under “Require that this column contains information.”
In the “Type each choice on a separate line” field, replace the text “Enter Choice #1,” “Enter Choice #2,” and “Enter Choice #3” with your selections. Type each selection on a separate line in the box.
Under “Display choices using,” click “Checkboxes (allow multiple selections).”
Select the “Add to default view” checkbox.
Click OK.

When you return to the Site Directory page, you will see the new category added, along with the selections under it.
Select Edit Page from the menu.
In the Categories box, click Edit Sites and Categories.
On the Sites page, click Settings and then select List Settings from the menu (Figure 5-28).
On the Customize Sites page, under Columns, click the name of the category you want to edit.
On the Change Columns page, modify the available settings and options.
Tip
You are editing the same page that you originally configured, as shown in Figure 5-27.
Click OK to save your changes.

When you create a site under your top-level site, links are automatically generated to the new sites. If sites are moved in the hierarchy and the links aren’t modified to reflect the move, those links will be broken and will not lead you to the site. SharePoint offers you the option of scanning for broken links in the Site Directory:
In the Site Directory, click Site Actions and then select “Scan for Broken Links.”
On the Broken Site Directory Links page, click the menu arrow under View and choose an option. The available options are:
All Sites
Broken Sites
Categories
Rejected Sites
Site Creation Categories
Submitted Sites
Click OK to start the scan. The scan will return the number of broken site links, nonbroken site links, and unknown links.
When the scan is finished, click OK.

You will be taken to the Sites page using the Broken Links view. If there are no broken links, this view will be empty.
Tip
You’ll learn more about views and filters in Chapter 13.
As you can see, you have a great deal of latitude in how you create and organize your main site and site collections. All the sites in your collection can have a common purpose, or they can be separately configured to serve the needs of different departments or different companies. You can even create public and private site collections so that SharePoint can serve as your organization’s Internet portal for customers and you can simultaneously reserve a separate collection to service the internal needs of your business. SharePoint sites are as dynamicas your business: when your needs change, so can your site. MOSS 2007 leaves you in full control of how your sites provide for your requirements and goals.