Chapter 2: Getting Yer Blog On
In This Chapter
![]() Choosing a blogging tool
Choosing a blogging tool
![]() Setting up your blog
Setting up your blog
![]() Changing the look of your blog
Changing the look of your blog
![]() Putting your first post in print
Putting your first post in print
Blogging is defined, in part, by the tools you use to publish the words you write. These tools tend to be extremely easy to set up, but you still have to do a little work.
This chapter helps you select the best tool for your purpose and then set up the tool and perhaps customize it. After you accomplish all those tasks, you write your first post.
Choosing Your Blog Platform
First things first: Choose your tool. All blogging tools have certain characteristics in common:
• They work in your web browser.
• They publish your written material on a website.
• They enable site visitors to then write comments in response to your entries (called blog posts).
• They include a way for visitors to subscribe to your blog by using the RSS feature. (For more about that, see the section “Creating your RSS feed,” later in this chapter.)
Apart from those similarities, though, the various blogging platforms differ widely. The following sections describe four of the most popular ones in detail and then list a few others that you might want to investigate.
Blogger and WordPress.org: Easy and free
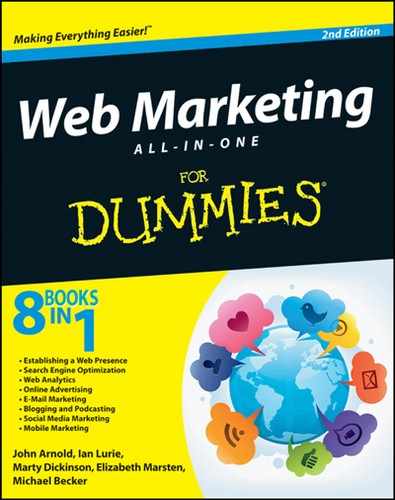
Blogger.com is a basic blogging service owned by Google. You can sign up in a few quick steps and start publishing your first posts in a few minutes. Figure 2-1 shows the Blogger authoring tools.
Figure 2-1: Writing a post in Blogger.
WordPress.com is a hosted version of the now-ubiquitous WordPress blogging toolset. In this sense, hosted means that WordPress has its own web servers, with WordPress already set up, so you don’t have to install anything. Like Blogger, it’s easy to use and offers a helpful, prebuilt solution. You can see what a WordPress.com blog looks like in Figure 2-2.
WordPress.com and Blogger’s strengths are listed here:
• They’re easy to use. They’re really easy to use. The moment you set up your blog, you have commenting and subscriptions and all the other basic features of a successful blog.
• You don’t have to install any software.
• They’re free.
• You can use lots of prebuilt designs.
• You’re not responsible for maintaining the code that powers the site, because upgrades happen automatically.
Figure 2-2: A blog hosted on WordPress.com.

However, both WordPress.com and Blogger have some drawbacks, too:
• No customization: If either of these blogging platforms were a car, the hood would be welded shut. You can’t customize either one to any great degree. Even WordPress.com Premium, which allows you to modify the look and feel a bit, won’t let you add plug-ins or make changes to the underlying blogging software.
• SEO weakness: Both systems have some drawbacks from a search engine optimization (SEO) standpoint. Because your blog isn’t part of your website, it doesn’t help you add useful content to your site. See Book II for more information about SEO.
• No quick updates: Someone else is responsible for maintaining the code. You get the idea: If something goes wrong, it may be a little while before it gets fixed.
Blogger and WordPress.com are helpful places to start. If you later decide to make blogging a part of your Internet marketing strategy, you’ll probably move to a more customizable solution.
TypePad is another hosted blogging solution with features similar to WordPress.com and Blogger. Although TypePad isn’t as popular as Blogger or WordPress.com, it’s worth a careful look if you want to set up a blog quickly. You can use TypePad Micro for free, or pay a fee to have more control over your blog’s design.
 Most people start with a hosted system like Blogger and then move to a custom system. When you make that change, a little research pays off.
WordPress installed: A sports car
WordPress also offers its blogging platform in a software program that you can install on your own website. And that means you can run WordPress on your own server. Some businesses even use WordPress to drive their entire website (see Book I, Chapter 4). You can find it at www.wordpress.org.
The software is free. If you know your way around a web server, you can install it in about ten minutes. If not, many web hosts are willing to set up a WordPress blog for you.
WordPress installed looks and works like WordPress.com, with a few critical differences:
• You can customize WordPress installed. The entire blog is built on PHP, a common web programming language.
• You can take advantage of how other folks have already customized WordPress installed. Hundreds of plug-ins (extensions built to add new capabilities to WordPress) are all available on the WordPress.org website.
• You can maximize SEO with WordPress installed. By using a few plug-ins, you can make WordPress an SEO powerhouse. Don’t worry about this concept yet; just understand that the option exists later on, if you want it.
• You can make your WordPress installed blog part of your website. If you install WordPress on the same server that hosts your website, your blog can live at www.yoursite.com/blog or a similar URL, as shown in Figure 2-3.
WordPress installed has some challenges, though:
• You’re totally responsible for your installation. If you want an upgrade, you have to do it. If something goes wrong, you have to either fix it or pay someone else to fix it.
• You need to know a bit about installing software on a server. Or, you have to hire someone else who knows about it. Some hosting providers can set it up for free for you, but you’ll still need to take the time to learn how to use it or pay your provider to put the finishing touches on the setup. The cost is low, but it’s still a cost.
Figure 2-3: Neat! A blog integrated into a website!

WordPress is like a popular sports car: It is by far the most often-used installed blogging platform on the planet. A huge community helps support you if you decide to use it, but it’s not intended for the web novice. You need to either gain expertise or hire someone with that expertise. Otherwise, you end up in a ditch.
For all the ins and outs on WordPress installed, check out WordPress For Dummies, by Lisa Sabin-Wilson (published by John Wiley & Sons, Inc.).
Other blog options
You have many other options for blogs or blog-style sites. Here are a few:
• Joomla! (available at www.joomla.org) is a free, PHP-driven blogging and content management system (CMS) that offers an amazing array of tools in a single package.
• ExpressionEngine (www.expressionengine.com) is a CMS and blogging tool in one.
• Textpattern (www.textpattern.com) is a flexible, textile-based content manager that’s PHP driven and open source.
• LiveJournal (www.livejournal.com) is a hosted blogging system that you don’t have to install, much like WordPress hosted and Blogger.
• Tumblr (www.tumblr.com) is another hosted blogging system that, at the time of this writing, is enormously popular. It’s a fun system if you want to get started fast.
• Drupal (www.drupal.org) is a broader social “plumbing” system — a CMS plus comments, membership, accounts, and messaging — that includes blog features.
 This list isn’t exhaustive, by any means. For even more blogging choices, search for blogging software.
Getting Your Blog Set Up
After you choose your blog tool, you need to take the next steps: First set up an account. Then design your blog’s look and feel, configure comments, set up pinging, and create your RSS feed.
Blog account setup
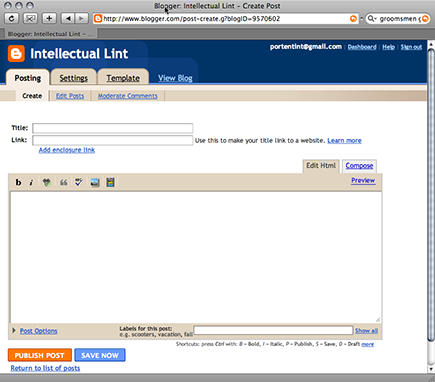
Depending on the platform you choose, you might need to simply set up an account, as shown in Figure 2-4. In that case, you just need to visit the blogging site and enter some basic information.
Figure 2-4: Setting up a blog on Blogger doesn’t take much effort.
If you’re using an installed blogging tool, you need to
1. Download the required software and install it (or pay someone else to do it for you).
2. Configure it for your server and website.
3. Set up your login and password.
4. Make a short post and comment to ensure that everything is working properly.
Picking your blog look
After the basic setup is complete, make your blog look just the way you want. You have a few options, from the easiest to the most difficult.
Easy: Use a preinstalled template
Most blogging systems come with a set of templates that you can easily select. If you’re happy using one of these templates, changing the look of your blog is as easy as choosing from a group, as shown in Figure 2-5.
Installed platforms such as WordPress and Movable Type are supplied with a few templates, too.
Figure 2-5: Choosing a blog design.

Intermediate: Download a new template and install it
Hundreds of free blog templates are available. You just have to download and install them on your blog.
On most hosted blog systems, this task is a relatively straightforward cut-and-paste operation. On an installed blog, you might have to download some files and then upload them to your server.
Whatever you do, if you use a free template, provide a credit to the author. The author gave you a great design for free — give him something in return.
Hard: Download a new template, install it, and customize it
You can also find a template that’s close to what you want, install it on your blog, and then tweak it until it’s just right.
 In most cases, completing this task requires a solid knowledge of HTML and style sheets.
Superhard: Create your own
If you’re truly determined, you can create your own fully customized template. Every blogging platform, from Blogger to WordPress, offers ways to customize the look and feel of your blog.
So, you can create your own, perfect look and then use the blogging platform’s special template language or system to build the look into your site.
 Creating your own template requires a lot of HTML expertise and the patience of a saint. It’s challenging; however, it can also be a heck of a lot of fun and an excellent way to learn your way around your own site. Just realize that you might spend days creating a template. Having the perfect look (one that’s perfect in your eyes, anyway) might be worth your while. Figure 2-6 shows off a blog with a customized design.
Many qualified professionals can help you with this type of customization. Check your blogging platform’s site for a list of specialists. Chances are good that one of them can refer you to a developer.
Configuring comments
After your blog looks the way you want, make sure that you’re handling comments the way you want. The key is moderation, reviewing comments before they’re published.
Figure 2-6: A cus- tomized design.
Most blogs provide a few options for comment moderation:
• Don’t
• Let anyone publish a comment with no moderation. Bad idea. Don’t use this option unless you want your blog stuffed with links to sites hawking pharmaceuticals.
• Refuse to allow anyone to publish comments. That’s also a bad idea. A blog without comments isn’t really a blog.
• Do
• Review all comments before publishing. This option keeps things simple. You review every comment before you click Publish, which helps you understand the process.
• Allow trusted commenters to publish without approval. If you set a specific commenter as Trusted, your blog publishes that person’s comments without moderation. As your site receives increasingly more visitors — and more folks writing comments — this option might make your life a lot easier.
Pick the option that makes the most sense for you. Consider starting with reviewing all comments before publishing because it gives you the most flexibility.
Setting up pinging
When you write a new post on your blog, your blogging software can send a ping. A ping is a short message sent to major blogging search engines and directories that says, “Hey, I have a new story here!”
Pinging isn’t what it used to be. However, it’s still a great way to push content to search engines and blog syndication services. It’s almost no effort, so it’s still worth doing.
A timely ping sends the basic information about your new post to sites such as Technorati and Weblogs.com. Those sites then publish the post title and a short snippet from the post itself.
Pings can be an effective traffic generator, and they involve zero effort after you set them up.
Your blogging software probably includes a ping configuration page, such as the one shown in Figure 2-7. Note that it might be called Web Services Settings or Pinging, depending on the blog software.
Figure 2-7: Setting up pinging in Movable Type.
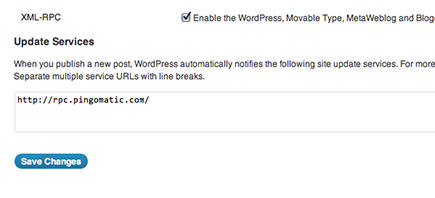
Paste the pinging service addresses you want to have included. From then on, your blog automatically pings those services when you publish. Here’s a good starting list of pinging services:
http://rpc.blogrolling.com/pinger
http://rpc.technorati.com/rpc/ping
http://rpc.icerocket.com:10080
Ping sites change all the time, so you’ll want to check these addresses before you enter them into your blog’s pinging configuration.
If you don’t have a pinging tool built into your blog, that’s okay. Visit www.pingomatic.com and use its simple form to ping new posts. It takes only a moment, and the instant exposure is an excellent traffic generator.
Creating your RSS feed
Every blog should have at least one RSS feed.
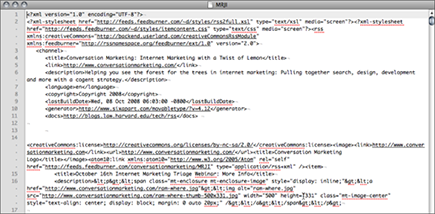
RSS stands for (among other things) really simple syndication. It’s not a technology; it’s a format: a common way to publish the headlines and a summary of each post on your blog or the complete post. If you looked at an RSS feed in raw text format, it would look like the nonsense shown in Figure 2-8.
Figure 2-8: An RSS feed — not pretty.
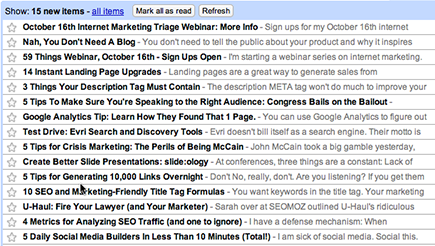
Look at the same text with any standard RSS feed reader, and — voilà! — you see what’s shown in Figure 2-9.
Figure 2-9: Ah, that makes more sense.
Visitors can subscribe to your RSS feed by using one of hundreds of easy-to-use RSS feed readers, including Google Reader (www.google.com/reader) and Microsoft Outlook. They then see an updated list of recent articles on your blog, without having to visit the blog. It’s a helpful way for visitors to keep track of lots of blogs at one time.
You can use your blog’s built-in RSS generation to provide the RSS feed. That strategy works fine. But the FeedBurner service (now owned by Google) lets you take it a step further. FeedBurner lets you turn your single simple feed into a marketing tool. Using FeedBurner, you can
• Add advertising to your RSS feed
• Deliver your feed in multiple formats for best compatibility
• Track subscriptions
• Add nifty features, such as E-mail a Friend, directly in your feed
• Add e-mail subscriptions
• Leap tall buildings in a single bound
Okay, maybe not the last one.
But FeedBurner can truly make your life easier. And, it’s free.
To burn your feed using FeedBurner, follow these steps:
1. Visit www.feedburner.com.
2. Create an account and log in.
3. Find your blog’s feed address.
Check your blog documentation if you’re stumped.
4. Paste that address into the Burn a Feed Right This Instant field and then click Next.
FeedBurner provides a new address for your feed.
5. In your blog, replace the old feed address with the new FeedBurner address.
Your blogging tool now points subscribers to the FeedBurner feed instead.
Writing Your First Post
Phew. The blog is set up. Your RSS feed is set up. It’s time to take a break!
Not so fast. Didn’t you forget something? Oh, yeah — a post!
Writing your first post can be difficult. You want it to be perfect, of course. You want to explode onto the blogging scene and into stardom.
But, because that’s not going to happen (sorry, it’s just not), you should have some fun instead and have a stress-free launch. Here are tips for a first post:
• Don’t aim for perfection. Aim for from-the-heart writing instead. Just say what your aspirations are for your blog.
• Don’t write about how you don’t know what to write. Everyone knows what writer’s block is like. You don’t need to remind us.
• Do create a time capsule. Write a first post that you can look back on later to create a sense of why you started this project in the first place.
• Do publish it right away. It’s always good to edit. But don’t spend days or even weeks trying to make that post just right. You have to go live sometime.
The most important thing about that first post, though, is getting it done. It won’t be your best, and that’s totally okay. Blogging is about practice and improvement. Get started!