
Chapter 17. Building Components
Components enable you to reuse application logic across multiple pages or even across multiple applications. For example, you can write a method named GetProducts() once and use the method in all the pages in your website. By taking advantage of components, you can make your applications easier to maintain and extend.
For simple applications, you do not need to take advantage of components; however, as soon as your application contains more than a few pages, you’ll discover that you are repeating the same work over and over again. Whenever you discover that you need to write the same method more than once, you should immediately rip the method out of your page and add the method to a component.
In this chapter, you learn how to build components in .NET Framework. First, you get an overview of writing components: You learn how to create simple components and use them in the pages in your application. In particular, you learn how to define component methods, properties, and constructors. You also learn how to take advantage of overloading, inheritance, and interfaces.
Next, you learn how to build component libraries that can be shared across multiple applications. You examine different methods of compiling a set of components into assemblies. You also learn how you can add a component library to the Global Assembly Cache.
Finally, we discuss architectural issues involved in using components. The final section of this chapter shows you how to build a simple three-tiered application that is divided into distinct User Interface, Business Logic, and Data Access layers.
Note
Let’s clarify the terminology. In this book, I use the word component as a synonym for the word class. Furthermore, by the word object, I mean an instance of a class.
I am ignoring a special meaning for the word component in .NET Framework. Technically, a component is a class that implements the System.ComponentModel.IComponent interface. I am ignoring this special meaning of the word component in favor of the common language use of the word.
Building Basic Components
Let’s start by building a super simple component. The HelloWorld component is contained in Listing 17.1.
Listing 17.1. HelloWorld.cs

Visual Web Developer Note
When using Visual Web Developer, you create a component by selecting Website, Add New Item, and then selecting the Class item (see Figure 17.1). The first time you add a component to a project, Visual Web Developer prompts you to create a new folder named App_Code. You want your new component to be added to this folder.
Figure 17.1. Creating a new component with Visual Web Developer.

The HelloWorld component consists of a single method named SayMessage() that returns the string Hello World!.
Make sure that you save the HelloWorld.cs file to your application’s App_Code folder. If you don’t save the component to this folder, you can’t use the component in your pages. Next, you need to create a page that uses the new component. This page is contained in Listing 17.2.
Listing 17.2. ShowHelloWorld.aspx

In the Page_Load() event handler, an instance of the HelloWorld component is created. Next, the result returned by a call to the SayMessage() method is assigned to a Label control. When you open the page in your browser, you see the message Hello World!.
This process of creating the component is simple. You don’t need to perform any special registration, and you don’t need to compile anything explicitly. Everything just works magically.
Components and Dynamic Compilation
You are not required to explicitly compile (build) the component because ASP.NET Framework automatically compiles the component for you. Any component that you add to the App_Code folder is compiled dynamically in the same way as an ASP.NET page. If you add a new component to the App_Code folder and request any page from your website, the contents of the App_Code folder are compiled into a new assembly and saved to the Temporary ASP.NET Files folder, located at the following path:
C:WINDOWSMicrosoft.NETFramework[version]
Temporary ASP.NET Files[application name]
Whenever you modify the component, the existing assembly in the Temporary ASP.NET Files folder is deleted. The App_Code folder is compiled again when you make a new page request.
You can add as many subfolders to the App_Code folder as you need to organize your components. The ASP.NET Framework finds your component no matter how deeply you nest the component in a subfolder.
One significant drawback of this process of dynamic compilation is that any errors in any component contained in the App_Code folder prevent any pages from executing. Even if a page does not use a particular component, any syntax errors in the component raise an exception when you request the page.
Tip
If a component contains an error, and you want to temporarily hide the component from ASP.NET Framework, change the file extension to an extension that ASP.NET Framework does not recognize, such as HelloWorld.cs.exclude. Visual Web Developer uses this method to hide a component when you right-click a component and select the menu option Exclude From Project.
Mixing Different Language Components in the App_Code Folder
You don’t have to do anything special if all the components in the App_Code folder are written in the same language. For example, if you use Visual Basic .NET to create all your components, the ASP.NET Framework automatically infers the language of your components and everything just works.
However, if you mix components written in more than one language in the App_Code folder—for example, Visual Basic .NET and C#—you must perform some extra steps.
First, you need to place components written in different languages in different subfolders. You can name the subfolders anything you want. The point is to not mix different language components in the same folder.
Furthermore, you need to modify your web configuration file to recognize the different subfolders. For example, if you create two subfolders in the App_Code folder named VBCode and CSCode, you can use the web configuration file in Listing 17.3 to use components written in both VB.NET and C#.
Listing 17.3. Web.Config

When the contents of the App_Code folder are compiled, two assemblies are created: one that corresponds to the VBCode folder and one that corresponds to the CSCode folder. You don’t need to indicate the language used for each folder—ASP.NET Framework infers the language for you.
There is nothing wrong with mixing components written in different languages in the same ASP.NET page. After a component is compiled, .NET Framework treats VB.NET and C# components in the same way.
Declaring Methods
The simple HelloWorld component in Listing 17.1 contains a single method named SayMessage(), which returns a string value. When writing components with Visual Basic .NET, you create methods by creating either a subroutine or a function. Use a subroutine when a method does not return a value, and use a function when a method does return a value.
The SayMessage() method in Listing 17.1 is an instance method. In other words, you must create a new instance of the HelloWorld class before you can call the SayMessage() method like this:
HelloWorld objHelloWorld = new HelloWorld();
lblMessage.Text = objHelloWorld.SayMessage();
In the first line, a new instance of the HelloWorld component is created. The SayMessage() method is called from this instance. For this reason, the SayMessage() method is an instance method.
As an alternative to creating an instance method, you can create a static method. The advantage of a static method is that you do not need to create an instance of a component before calling it. For example, the SayMessage() method in the modified HelloWorld component in Listing 17.4 is a static method.
Listing 17.4. StaticHelloWorld.cs
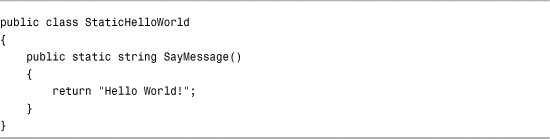
The StaticHelloWorld component defined in Listing 17.3 is exactly the same as the HelloWorld component created in Listing 17.1 with one change: The SayMessage() method includes a static modifier.
The page in Listing 17.5 uses the StaticHelloWorld component to display the Hello World! message.
Listing 17.5. ShowStaticHelloWorld.aspx

The page in Listing 17.5 does not create an instance of the StaticHelloWorld component. The SayMessage() method is called directly from the StaticHelloWorld class.
The advantage of using static methods is that they save you typing. You don’t have to go through the pain of instantiating a component before calling the method. Many classes in .NET Framework include static methods. For example, String.Format(), Int32.Parse(), and DateTime.DaysInMonth() methods are all static methods.
There is nothing wrong with mixing both static and instance methods in the same component. For example, you might want to create a Product component that has a static GetProducts() method and an instance SaveProduct() method.
The one significant limitation of using a static method is that a static method cannot refer to an instance field or property. In other words, static methods must be stateless.
Declaring Fields and Properties
You can define a property for a component in two ways: the lazy way and the virtuous way. The lazy way to create a property is to create a public field. If you declare any field with the Public access modifier, the field can be accessed from outside the component. For example, the component in Listing 17.6 contains a public field named Message.
Listing 17.6. FieldHelloWorld.cs

The Message field is declared near the top of the FieldHelloWorld class definition. The Message field is returned by the SayMessage() method.
The page in Listing 17.7 uses the FieldHelloWorld component to display a message.
Listing 17.7. ShowFieldHelloWorld.aspx
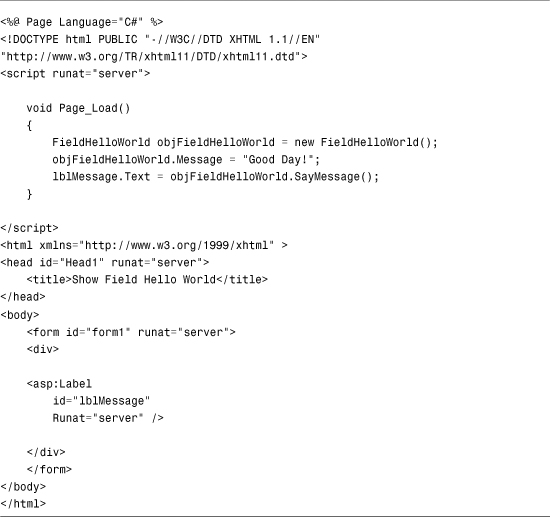
In the Page_Load() event handler in Listing 17.7, an instance of the FieldHelloWorld class is created, a value is assigned to the Message field, and the SayMessage() method is called.
There are a couple of serious disadvantages to creating properties by creating public fields. First, .NET Framework recognizes properties as separate entities. Several methods in .NET Framework recognize properties but not fields.
For example, you can refer to component properties and not fields when using the Eval() method in a databinding expression. If you want to bind a collection of Product objects to a GridView control, you should expose the properties of the Product component as true properties and not as fields.
The other disadvantage of fields is that they do not provide you with a chance to validate the value assigned to the field. For example, imagine that a property represents a database column and the column accepts no more than five characters. In that case, you should check whether the value assigned to the property is less than five characters.
The component in Listing 17.8 uses a property instead of a field. (It does things the virtuous way.)
Listing 17.8. PropertyHelloWorld.cs


The component in Listing 17.8 contains a property named Message and a private backing field named _message. The Message property contains both a getter (get) and a setter (set). The getter is called when you read the value of the Message property, and the setter is called when you assign a value to the Message property.
The getter simply returns the value of the private _message field. The setter assigns a value to the private _message field. The setter throws an exception if the length of the value assigned to the _message field exceeds five characters.
Note
In Listing 17.8, the private field is named _message. The underscore character (_) has no programmatic significance. By convention, private members of a class are named with a leading underscore, but there is nothing wrong with following some other convention.
Note
The version of C# included with .NET Framework 3.5 and 4 supports the automatic properties feature. Automatic properties provide you with a shorthand syntax for creating a property with a backing field. To learn more about automatic properties, see Chapter 20, “Data Access with LINQ to SQL.”
The page in Listing 17.9 uses the PropertyHelloWorld component.
Listing 17.9. ShowPropertyHelloWorld.aspx

If you open the page in Listing 17.9 in your web browser, you get a big, fat error message (see Figure 17.2). Because a string longer than five characters is assigned to the Message property in the Page_Load() method, the Message property raises an exception.
Figure 17.2. Assigning more than five characters.

You can also create read-only properties when the situation warrants it. For example, the component in Listing 17.10 returns the current server time. It would not make sense to assign a value to this property, so the property is declared as read-only.
Listing 17.10. ServerTime.cs

Note
You can create static fields and properties in the same way as you create shared methods, by using the static keyword. Any value you assign to a static field or property is shared among all instances of a component.
I recommend that you avoid using static fields and properties when building ASP.NET applications. Using static fields and properties raises nasty concurrency issues in a multithreaded environment such as ASP.NET. If you insist on creating a static field or property, make it read-only.
Declaring Constructors
A constructor is a special class method called automatically when you create a new instance of a class. Typically, you use the constructor to initialize private fields contained in the class.
When creating a constructor in C#, you create a method with the same name as the class name. For example, the class in Listing 17.11 displays a random quotation (see Figure 17.3). The collection of random quotations is created in the component’s constructor.
Figure 17.3. Displaying a random quotation.

Listing 17.11. Quote.cs

The collection named _quotes is declared in the body of the class. That way, you can refer to the _quotes field in both the constructor and the GetQuote() method.
Note
You can create static constructors by using the static keyword when declaring a constructor. A static constructor is called once before any instance constructors.
Overloading Methods and Constructors
When a method is overloaded, a component contains two methods with exactly the same name. Many methods in .NET Framework are overloaded, including String.Replace(), Random.Next(), and Page.FindControl().
For example, here is a list of the three overloaded versions of the Random.Next() method:
• Next()—Returns a random number between 0 and 2,147,483,647.
• Next(upperbound)—Returns a number between 0 and the upper bound.
• Next(lowerbound, upperbound)—Returns a number between the lower bound and the upper bound.
Because all three methods do the same thing—they all return a random number—it makes sense to overload the Next() method. The methods differ only in their signatures. A method signature consists of the order and type of parameters that a method accepts. For example, you can’t overload two methods that have exactly the same set of parameters (even if the names of the parameters differ).
Overloading is useful when you want to associate related methods. Overloading is also useful when you want to provide default values for parameters. For example, the StoreProduct component in Listing 17.12 contains three overloaded versions of its SaveProduct() method.
Listing 17.12. StoreProduct.cs

You can call any of the three SaveProduct() methods in Listing 17.12 to save a new product. You can supply the new product with a name, a name and a price, or a name, a price, and a description.
Visual Web Developer Note
When typing an overloaded method in Source view, the Intellisense pops up with all the different sets of parameters that you can use with the overloaded method (see Figure 17.4).
Figure 17.4. Typing an overloaded method in Visual Web Developer.

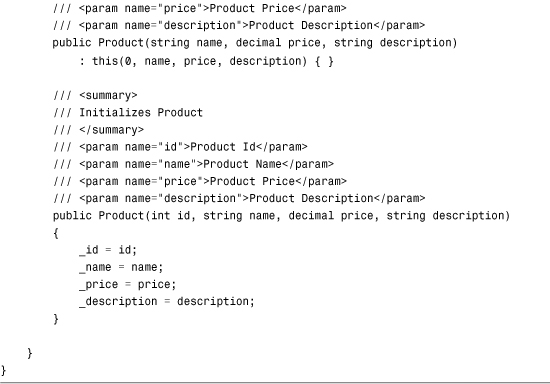
Because a constructor is just a special method, you also can use overloading when declaring constructors for a class. For example, the ProductConstructor class in Listing 17.13 contains three overloaded constructors that can be used to initialize the Product class.
Listing 17.13. ProductConstructor.cs

When you instantiate the component in Listing 17.13, you can instantiate it in any of the following ways:
![]()
Declaring Namespaces
A namespace enables you to group logically related classes. You are not required to provide a class with a namespace. To this point, all the components you have seen created have been members of the global namespace. However, several advantages result from grouping components into namespaces.
First, namespaces prevent naming collisions. If two companies produce a component with the same name, namespaces provide you with a method of distinguishing the components.
Second, namespaces make it easier to understand the purpose of a class. If you group all your data access components into a DataAccess namespace and all your business logic components in a BusinessLogic namespace, you can immediately understand the function of a particular class.
In an ASP.NET page, you import a namespace like this:
<%@ Import Namespace="System.Collections" %>
In a C# component, on the other hand, you import a namespace like this:
using System.Collections;
You can create your own custom namespaces and group your components into namespaces by using the namespace statement. For example, the component in Listing 17.14 is contained in the AspUnleashed.SampleCode namespace.
Listing 17.14. Namespaced.cs
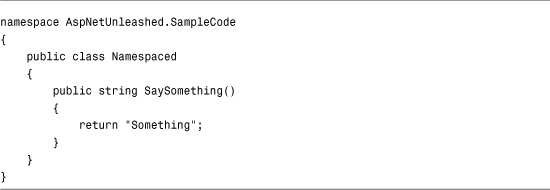
The file in Listing 17.14 uses the Namespace statement to group the Namespaced component into the AspUnleashed.SampleCode namespace. Components in different files can share the same namespace, and different components in the same file can occupy different namespaces.
The periods in a namespace name have no special significance. The periods are used to break up the words in the namespace, but you could use another character, such as an underscore character, instead.
Microsoft recommends a certain naming convention when creating namespaces:
CompanyName.TechnologyName[.Feature][.Design]
So, if your company is named Acme Consulting and you are building a data access component, you might add your component to the following namespace:
AcmeConsulting.DataAccess
Of course this is simply a naming convention. No serious harm will come to you if you ignore it.
Creating Partial Classes
You can define a single component that spans multiple files by taking advantage of a feature of .NET Framework called partial classes.
For example, the files in Listings 17.15 and 17.16 contain two halves of the same component.
Listing 17.15. FirstHalf.cs

Listing 17.16. SecondHalf.cs

The private _message field is defined in the first file, but this private field is used in the GetMessage() method in the second file. When the GetMessage() method is called, it returns the value of the private field from the other class. Both files define a class with the same name. The class declaration includes the keyword Partial, which marks the classes as partial classes.
Note
Partial classes are the basis for code-behind pages in the ASP.NET Framework. The code-behind file and the presentation page are two partial classes that get compiled into the same class.
Inheritance and Abstract Classes
When one class inherits from a second class, the inherited class automatically includes all the nonprivate methods and properties of its parent class. In other words, what’s true of the parent is true of the child, but not the other way around.
Inheritance is used throughout .NET Framework. For example, every ASP.NET page inherits from the base System.Web.UI.Page class. The only reason that you can use properties such as the IsPostback property in an ASP.NET page is that the page derives from the base Page class.
All classes in .NET Framework derive from the base System.Object class. The Object class is the great-grandmother of every other class. This means that any methods or properties of the Object class, such as the ToString() method, are shared by all classes in the Framework.
You can take advantage of inheritance when building your own components. You indicate that one class inherits from a second class when you declare a class. For example, the file in Listing 17.17 includes three components: a BaseProduct class, a ComputerProduct class, and a TelevisionProduct class.
Listing 17.17. Inheritance.cs

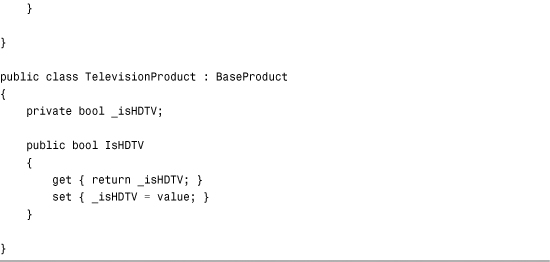
Both the ComputerProduct and TelevisionProduct components inherit from the BaseProduct component. Because the BaseProduct class includes a Price property, both inherited components automatically inherit this property.
When inheriting one class from another, you also can override methods and properties of the base class. Overriding a method or property is useful when you want to modify the behavior of an existing class.
To override a property or method of a base class, the property or method must be marked with the C# virtual or abstract keyword or the Visual Basic .NET Overridable or MustOverride keyword. Only methods or properties marked with the virtual or abstract keyword can be overridden.
For example, the file in Listing 17.18 contains two components: a ProductBase class and a OnSaleProduct class. The second class inherits from the first class and overrides its Price property. The Price property of the OnSaleProduct component divides the price by half.
Listing 17.18. OnSaleProduct.cs


The base keyword (MyBase in Visual Basic) is used in Listing 17.18 to refer to the base class (the ProductBase class).
Finally, you can use the abstract keyword when declaring a class to mark it as a class that requires inheritance. You cannot instantiate an abstract class. To use an abstract class, you must derive a new class from the abstract class and instantiate the derived class.
Abstract classes are the foundation for the ASP.NET Provider Model. Personalization, Membership, Roles, Session State, and Site Maps all use the Provider Model. For example, the MembershipProvider class is the base class for all Membership Providers. The SqlMembershipProvider and ActiveDirectoryMembershipProvider classes both derive from the base MembershipProvider class.
Note
Chapter 27, “Using ASP.NET Membership,” discusses the MembershipProvider classes in detail, which is responsible for saving and loading membership information such as application usernames and passwords.
The base MembershipProvider class is an abstract class. You cannot use this class directly in your code. Instead, you must use one of its derived classes. However, the base MembershipProvider class provides a common set of methods and properties that all MembershipProvider-derived classes inherit.
The base MembershipProvider class includes a number of methods and properties marked as abstract. A derived MembershipProvider class is required to override these properties and methods.
The file in Listing 17.19 contains two components. The first component, the BaseEmployee component, is an abstract class that contains an abstract property named Salary. The second component, the SalesEmployee, inherits the BaseEmployee component and overrides the Salary property.
Listing 17.19. Employees.cs

Declaring Interfaces
An interface is a list of properties and methods that a class must implement. If a class implements an interface, you know that the class includes all the properties and methods contained in the interface.
For example, the file in Listing 17.20 contains an interface named IProduct and two components named MusicProduct and BookProduct.
Listing 17.20. Products.cs

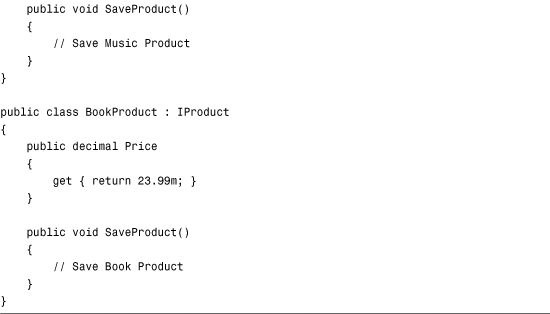
Both components in Listing 17.17 are declared as implementing the IProduct interface. (The colon can mean implements or inherits.) Furthermore, both components include the SaveProduct() method and the Price property. Both components are required to have this method and property because they are declared as implementing the IProduct interface.
Interfaces are similar to abstract classes with two important differences. First, a component can inherit from only one class. On the other hand, a component can implement many different interfaces.
Second, an abstract class can contain application logic. You can add methods to an abstract class that all derived classes inherit and can use. An interface, on the other hand, cannot contain any logic. An interface is nothing more than a list of methods and properties.
Using Access Modifiers
C# supports the following access modifiers, which you can use when declaring a class, method, or property:
• Public—A public class, method, or property has no access restrictions.
• Protected—A protected method or property can be accessed only within the class itself or a derived class.
• Internal—An internal class, method, or property can be accessed only by a component within the same assembly (dll file). Because ASP.NET pages are compiled into different assemblies than the contents of the App_Code folder, you cannot access an internal member of a class outside of the App_Code folder.
• Private—A private class, method, or property can be accessed only within the class itself.
Visual Basic .NET supports the following access modifiers (also called access levels), which you can use when declaring a class, method, or property:
• Public—A Public class, method, or property has no access restrictions.
• Protected—A Protected method or property can be accessed only within the class itself or a derived class.
• Friend—A Friend class, method, or property can be accessed only by a component within the same assembly (dll file). Because ASP.NET pages are compiled into different assemblies than the contents of the App_Code folder, you cannot access a Friend member of a class outside of the App_Code folder.
• Protected Friend—A Protected Friend method or property can be accessed within the class itself or a derived class, or any other class located in the same assembly.
• Private—A Private class, method, or property can be accessed only within the class itself.
Using access modifiers is useful when you develop a component library that might be used by other members of your development team (or your future self). For example, you should mark all methods that you don’t want to expose from your component as private.
Intellisense and Components
Visual Web Developer automatically pops up with Intellisense when you type the names of classes, properties, or methods in Source view. You can add comments that appear in Intellisense to your custom components to make it easier for other developers to use your components.
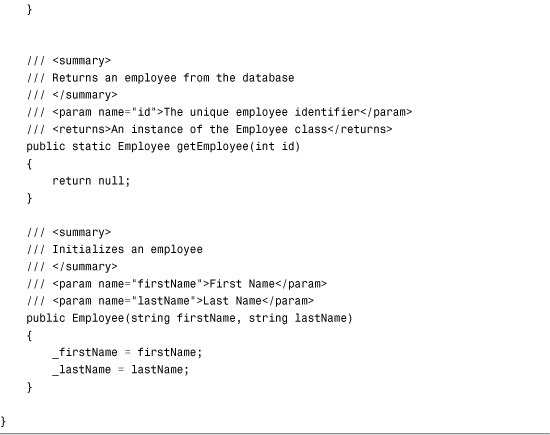
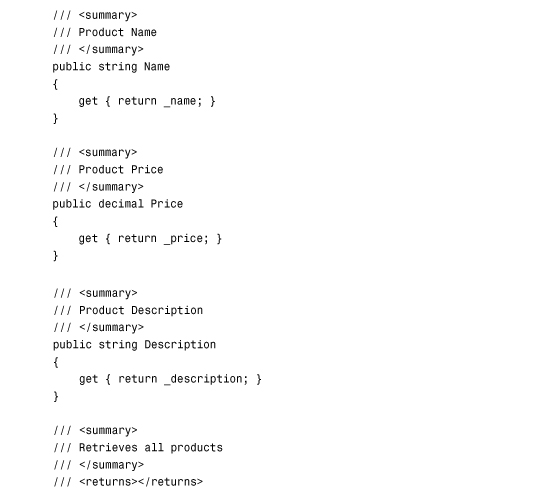
If you add XML comments to a component, the contents of the XML comments appear automatically in Intellisense. For example, the component in Listing 17.21 includes XML comments for its class definition, property definitions, and method definition (see Figure 17.5).
Figure 17.5. Adding comments to a component.

Listing 17.21. Employee.cs

Note
You can generate an XML documentation file—a file that contains all the XML comments—for the components contained in a folder by using the /doc switch with the C# or Visual Basic command-line compiler. The command-line compiler is discussed in the second part of this chapter, “Building Component Libraries.”
Using ASP.NET Intrinsics in a Component
When you add code to an ASP.NET page, you are adding code to an instance of the Page class. The Page class exposes several ASP.NET intrinsic objects such as the Request, Response, Cache, Session, and Trace objects.
If you want to use these objects within a component, you need to do a little more work. Realize that when you create a component, you are not creating an ASP.NET component. In this chapter, we create .NET components, and a .NET component can be used by any type of .NET application, including a Console application or Windows Forms application.
To use the ASP.NET instrinsics in a component, you need to get a reference to the current HtppContext. The HttpContext object is the one object available behind the scenes through the entire page processing life cycle. You can access the HttpContext object from any user control, custom control, or component contained in a page.
Note
The HttpContext object includes an Items collection. You can add anything to the Items collection and share the thing among all the elements contained in a page.
To get a reference to the current HttpContext object, you can use the static (shared) Current property included in the HttpContext class. For example, the component in Listing 17.22 uses the HttpContext object to use both the Session and Trace objects.
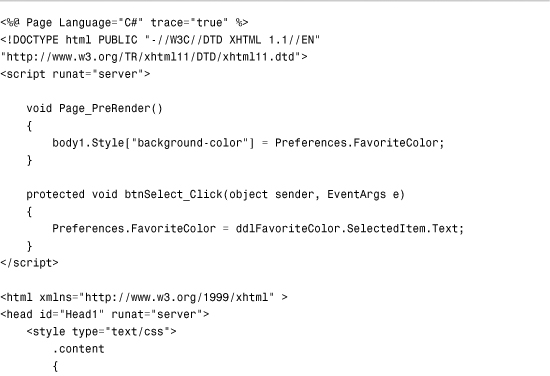
Listing 17.22. Preferences.cs

The Preferences component contains a single property named FavoriteColor. The value of this property is stored in Session state. Anytime this property is modified, the Trace object writes a warning.
You can use the Preferences component in the page contained in Listing 17.23.
Listing 17.23. ShowPreferences.aspx
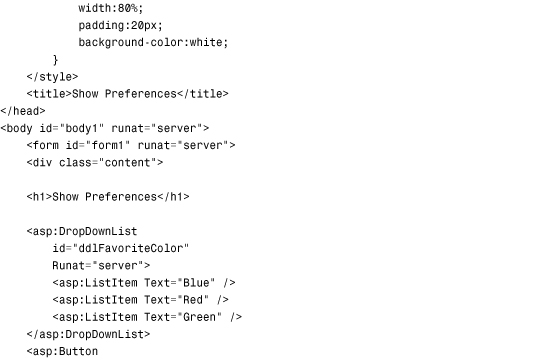
After you open the page in Listing 17.23, you can select your favorite color from the DropDownList control. Your favorite color is stored in the Preferences object (see Figure 17.6).
Figure 17.6. Selecting a favorite color.

Building Component Libraries
One of the advertised benefits of using components is code reuse. You write a method once, and then you never need to write the same method again.
One problem with the components that have been created to this point is that they have all been application-specific. In other words, you cannot reuse the components across multiple websites without copying all the source code from one App_Code folder to another.
If you want to share components among multiple websites, you can no longer take advantage of dynamic compilation. To share components, you need to compile the components explicitly in a separate assembly.
Compiling Component Libraries
You can use a number of methods to compile a set of components into an assembly:
• The command-line compiler
• C# or Visual Basic Express
• The full version of Visual Studio 2010
These options are explored in turn.
Using the C# Command-Line Compiler
You can use the C# or Visual Basic command-line compiler to compile a source code file, or set of source code files, into an assembly. The C# compiler is located at the following path:
C:WindowsMicrosoft.NETFrameworkv4.0.30319csc.exe
The Visual Basic command-line compiler is located at the following path:
C:WindowsMicrosoft.NETFrameworkv4.0.30319vbc.exe
Note
If you have installed .NET Framework SDK, you can open the SDK Command Prompt from the Microsoft .NET Framework SDK program group. When the command prompt opens, the paths to the C# and Visual Basic .NET compiler are added to the environment automatically.
You can use the csc.exe tool to compile any C# source file like this:
csc /t:library SomeFile.cs
The /t (target) option causes the compiler to create a component library and not a Console or Windows application. When you execute this command, a new file named SomeFile.dll is created, which is the compiled assembly.
As an alternative to compiling a single file, you can compile all the source code files in a folder (and every subfolder) like this:
csc /t:library /recurse:*.cs /out:MyLibrary.dll
The /recurse option causes the compiler to compile the contents of all the subfolders. The /out option provides a name for the resulting assembly.
Using Visual C# Express
You can download a trial edition of Visual C# Express from the Microsoft website (http://www.microsoft.com/express/windows/). Visual C# Express enables you to build Windows applications, Console applications, and class libraries.
To create a class library that you can use with an ASP.NET application, you create a Class Library project in Visual C# Express (see Figure 17.7). When you build the project, a new assembly is created.
Figure 17.7. Creating a Class Library in C# Express.

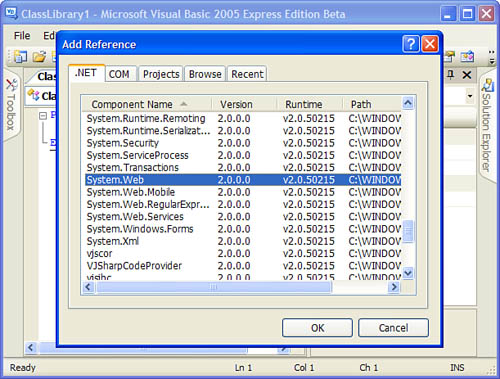
If you need to use ASP.NET classes in your class library, such as the HttpContext class, you need to add a reference to the System.Web.dll assembly to your Class Library project. Select Project, Add Reference and add the System.Web.dll from the .NET tab (see Figure 17.8).
Figure 17.8. Adding a reference to System.Web.dll.
Note
If you are a VB.NET developer, you can download Visual Basic Express from the MSDN website at http://www.microsoft.com/express/windows/.
Using Visual Studio 2010
The easiest way to create a class library that you can share among multiple ASP.NET applications is to use the full version of Visual Studio 2010 instead of Visual Web Developer. Visual Studio 2010 was designed to enable you to easily build enterprise applications. Building class libraries is one of the features you get in Visual Studio 2010 that you don’t get in Visual Web Developer Express.
Visual Studio 2010 enables you to add multiple projects to a single solution. For example, you can add both an ASP.NET project and a Class Library project to the same solution. When you update the Class Library project, the ASP.NET project is updated automatically (see Figure 17.9).
Figure 17.9. A solution that contains multiple projects.

Adding a Reference to a Class Library
Now that you understand how you can create a class library in a separate assembly, you need to know how you can use this class library in another project. In other words, how do you use the components contained in an assembly within an ASP.NET page?
You can make an assembly available to an ASP.NET application in two ways. You can add the assembly to the application’s /Bin folder or you can add the assembly to the Global Assembly Cache.
Adding an Assembly to the Bin Folder
In general, the best way to use an assembly in an ASP.NET application is to add the assembly to the application’s root Bin folder. There is nothing magical about this folder. The ASP.NET Framework automatically checks this folder for any assemblies. If the folder contains an assembly, the assembly is referenced automatically by the ASP.NET application when it is compiled dynamically.
If you use Visual Web Developer, you can select the menu option Website, Add Reference to add a new assembly to your application’s Bin folder (see Figure 17.10). Alternatively, you can simply copy an assembly into this folder. (If the folder doesn’t exist, just create it.)
Figure 17.10. Adding an assembly reference with Visual Web Developer.

When you add an assembly to an ASP.NET application’s Bin folder, the assembly is scoped to the application. This means that you can add different versions of the same assembly to different applications without worrying about any conflicts.
Furthermore, if you add an assembly to the Bin folder, you can take advantage of XCopy deployment. In other words, if you need to move your website to a new server, you can simply copy all the files in your website from one server to another. As long as you copy your Bin folder, the assembly is available at the new location.
Adding an Assembly to the Global Assembly Cache
All the assemblies that make up the .NET Framework class library are contained in the Global Assembly Cache. For example, the Random class is located in the System.dll assembly, and the System.dll assembly is contained in the Global Assembly Cache. Any assembly located in the Global Assembly Cache can be referenced by any application running on a server.
The Global Assembly Cache’s physical location is at the following path:
C:WINDOWSassembly
Before you can add an assembly to the Global Assembly Cache, you must add a strong name to the assembly. A strong name is similar to a GUID. You use a strong name to provide your assembly with a universally unique identifier.
Note
Technically, a strong name consists of the name, version number, and culture of the assembly. The strong name also includes the public key from a public/private key pair. Finally, the strong name includes a hash of the assembly’s contents so that you know whether the assembly has been modified.
You can generate a strong name by using the sn.exe command-line tool like this:
sn.exe -k KeyPair.snk
Executing this command creates a new file named KeyPair.snk, which includes a new random public/private key pair.
You can compile an assembly that includes a strong name by executing the Visual Basic .NET command-line compiler like this:
csc /t:library /keyfile:KeyPair.snk /recurse:*.cs /out:MyLibrary.dll
The resulting assembly is strongly named with the public key from the KeyPair.snk file. The /keyfile option associates the key file with the assembly. In this case, the name of the resulting assembly is MyLibrary.dll.
An alternative method of associating a strong name with an assembly is to use the <Assembly: AssemblyKeyFile> attribute. You can add this attribute to any of the source files that get compiled into the assembly. For example, you can drop the file in Listing 17.24 into the folder that you are compiling, and it associates the public key from the KeyPair.snk file with the compiled assembly.
Listing 17.24. AssemblyInfo.cs

The file in Listing 17.24 actually includes two attributes. The first attribute associates the KeyPair.snk public key with the assembly. The second attribute associates a version number with the assembly. The version number consists of four sets of numbers: major version, minor version, build number, and revision number.
After you add the file in Listing 17.24 to a folder that contains the source code for your components, use the following command to compile the folder:
csc /t:library /recurse:*.cs /out:MyLibrary.dll
After you associate a strong name with an assembly, you can use the GacUtil.exe command-line tool to add the assembly to the Global Assembly Cache. Executing the following statement from a command prompt adds the MyLibrary.dll assembly to the Global Assembly Cache:
GacUtil.exe /i MyLibrary.dll
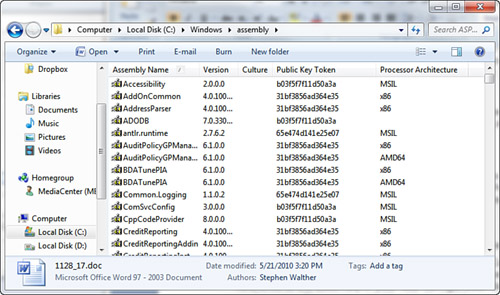
You can verify that the MyLibrary.dll assembly has been added successfully to the Global Assembly Cache by opening your Global Assembly Cache folder located at the following path:
C:WINDOWSassembly
You should see the MyLibrary.dll assembly listed in the Assembly Name column (see Figure 17.11). Note the Version and the PublicKeyToken columns. You need to know the values of these columns to use the assembly in an application.
Figure 17.11. Viewing the Global Assembly Cache.
After you install an assembly in the Global Assembly Cache, you can use the assembly in your ASP.NET Pages and App_Code components by adding a reference to the assembly in your web configuration file. The web configuration file in Listing 17.25 adds the MyLibrary.dll assembly to your application.
Listing 17.25. Web.Config

The web configuration file in Listing 17.25 adds the MyLibrary assembly. You must supply the Version, Culture, and PublicKeyToken associated with the assembly. You need to substitute the correct values for these properties in Listing 17.25 before you use the file with an assembly that you have compiled. (Remember that you can get these values by opening the c:WINDOWSassembly folder.)
Note
When using Visual C# Express or Visual Studio 2010, you can create a strong name automatically and associate the strong name with an assembly. Right-click the name of your project in the Solution Explorer window and select Properties. Next, select the tab labeled Signing.
In general, you should avoid adding your assemblies to the Global Assembly Cache because using the Global Assembly Cache defeats XCopy deployment. Using the Global Assembly Cache makes it more difficult to back up an application. It also makes it more difficult to move an application from one server to another.
Architectural Considerations
If you embark on a large ASP.NET project, you quickly discover that you spend more time writing code for components than writing code for your pages. This is not a bad thing. Placing as much of your application logic as possible in components makes it easier to maintain and extend your application. However, the process of organizing the components itself can become time consuming. In other words, you start to run into architectural issues concerning the best way to design your web application.
The topic of architecture, like the topics of politics and religion, should not be discussed in polite company. People have passionate opinions about architecture, and discussions on this topic quickly devolve into people throwing things. Be aware that all statements about proper architecture are controversial.
With these disclaimers out of the way, in this section I provide you with an overview of one of the most common architectures for ASP.NET applications. In this section, you learn how to build a three-tiered ASP.NET application.
Building Multitier Applications
One common architecture for an application follows an n-tier design model. When using an n-tier architecture, you encapsulate your application logic into separate layers. In particular, it is recommended that an application should be divided into the following three application layers:
• User Interface
• Business Logic
• Data Access
The idea is that the User Interface layer should contain nothing but user interface elements such as HTML and ASP.NET controls. The User Interface layer should not contain any business logic or data access code.
The Business Logic layer contains all your business rules and validation code. It manages all data access for the User Interface layer.
Finally, the Data Access layer contains all the code for interacting with a database. For example, all the code for interacting with Microsoft SQL Server should be encapsulated in this layer.
The advantage of encapsulating your application logic into different layers is that it makes it easier to modify your application without requiring you to rewrite your entire application. Changes in one layer can be completely isolated from the other layers.
For example, imagine that (one fine day) your company decides to switch from using Microsoft SQL Server to using Oracle as its database server. If you have been careful to create an isolated Data Access layer, you would need to rewrite only your Data Access layer. It might be a major project, but you would not need to start from scratch.
Or imagine that your company decides to create a Silverlight version of an existing ASP.NET application. Again, if you have been careful to isolate your User Interface layer from your Business Logic layer, you can extend your application to support a Silverlight interface without rewriting your entire application. The Siverlight application can use your existing Business Logic and Data Access layers.
This is all abstract, so let’s examine a particular sample. We create a simple product management system that enables you to select, insert, update, and delete products. However, we do it the right way by dividing the application into distinct User Interface, Business Logic, and Data Access layers.
Creating the User Interface Layer
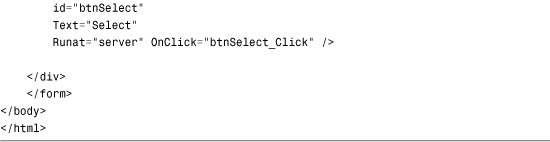
The User Interface layer is contained in Listing 17.26. The User Interface layer consists of a single ASP.NET page. This page contains no code whatsoever.
Listing 17.26. Products.aspx


The page in Listing 17.26 contains a GridView, DetailsView, and ObjectDataSource control. The GridView control enables you to view, update, and delete the products contained in the Products database table (see Figure 17.12). The DetailsView enables you to add new products to the database. Both controls use the ObjectDataSource as their data source.
Figure 17.12. The Products.aspx page.

The page in Listing 17.26 does not interact with a database directly. Instead, the ObjectDataSource control binds the GridView and DetailsView controls to a component named AcmeStore.BusinessLogicLayer.Product. The Product component is contained in the Business Logic layer.
Note
The page in Listing 17.26 does not contain any validation controls. I omitted adding validation controls for reasons of space. In a real application, you would want to toss some RequiredFieldValidator and CompareValidator controls into the page.
Creating the Business Logic Layer
The ASP.NET pages in your application should contain a minimum amount of code. All your application logic should be pushed into separate components contained in either the Business Logic or Data Access layers.
Your ASP.NET pages should not communicate directly with the Data Access layer. Instead, the pages should call the methods contained in the Business Logic layer.
The Business Logic layer consists of a single component named Product, which is contained in Listing 17.27. (A real-world application might contain dozens or even hundreds of components in its Business Logic layer.)
Listing 17.27. BLL/Product.cs


The Product component contains four public methods named SelectAll(), Update(), Insert(), and Delete(). All four of these methods use the SqlDataAccessLayer component to interact with the Products database table. The SqlDataAccessLayer is contained in the Data Access layer.
For example, the SelectAll() method returns a collection of Product objects. This collection is retrieved from the SqlDataAccessLayer component.
The Insert(), Update(), and Delete() methods validate their parameters before passing the parameters to the Data Access layer. For example, when you call the Insert() method, the length of the Name parameter is checked to verify that it is less than 50 characters.
The Business Logic layer does not contain any data access logic. All this logic is contained in the Data Access layer.
Creating the Data Access Layer
The Data Access layer contains all the specialized code for interacting with a database. The Data Access layer consists of the single component in Listing 17.28. (A real-world application might contain dozens or even hundreds of components in its Data Access layer.)
Listing 17.28. DALSqlDataAccessLayer.cs


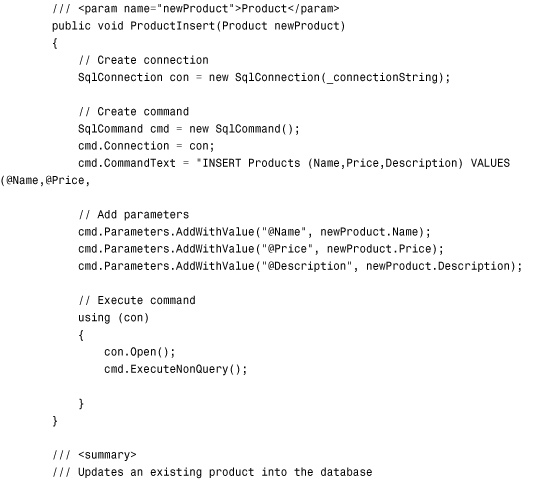


The SqlDataAccessLayer component in Listing 17.28 grabs the database connection string that it uses when communicating with Microsoft SQL Server in its constructor. The connection string is assigned to a private field so that it can be used by all the component’s methods.
The SqlDataAccessLayer component has four public methods: ProductSelectAll(), ProductInsert(), ProductUpdate(), and ProductDelete(). These methods use the ADO.NET classes from the System.Data.SqlClient namespace to communicate with Microsoft SQL Server.
Note
In this section, the Data Access layer was built using ADO.NET. It could just have as easily been built using LINQ to SQL. We discuss LINQ to SQL in Chapter 20.
The SqlDataAccessLayer component is not completely isolated from the components in the Business Logic layer. The ProductSelectAll() method builds a collection of Product objects, which the method returns to the Business Logic layer. You should strive to isolate each layer as much as possible. However, in some cases, you cannot completely avoid mixing objects from different layers.
Summary
In this chapter, you learned how to build components in .NET Framework. In the first part, you were given an overview of component building. You learned how to take advantage of dynamic compilation by using the App_Code folder. You also learned how to create component properties, methods, and constructors. You also examined several advanced topics related to components such as overloading, inheritance, MustInherit classes, and interfaces.
In the second half of this chapter, you learned how to build component libraries. You saw different methods for compiling a set of components into an assembly. You also examined how you can add components to both an application’s Bin folder and the Global Assembly Cache.
Finally, you had a chance to consider architectural issues related to building applications with components. You learned how to build a three-tiered application, divided into isolated User Interface, Business Logic, and Data Access layers.