
Chapter 31. Working with the HTTP Runtime
In This Chapter
• Creating a Custom BuildProvider
• Creating a Custom ExpressionBuilder
• Working with HTTP Applications and HTTP Modules
• Summary
This chapter tackles a number of advanced topics by digging deeper into the mechanics of how an ASP.NET page is processed. In this first section, you learn how to create a custom BuildProvider, which is a .NET class that generates source code from a file automatically. You learn how to create a custom BuildProvider that builds custom data access components automatically.
Next, you learn how to create a custom ExpressionBuilder, which is responsible for parsing an expression into code. For example, when you use the <%$ ConnectionStrings:MyDatabase %> syntax to refer to a connection string, you use the ConnectionStringExpressionBuilder in the background. In this chapter, you learn how to build a custom ExpressionBuilder that looks up values from an XML file.
You also learn how to work with HTTP Handlers. An HTTP Handler is a .NET class that executes whenever a request is made for a file at a certain path. For example, you can use a custom HTTP Handler to retrieve an image from a database table whenever someone requests a file with the extension .gif or .jpeg.
Finally, you will see how to create custom HTTP Modules. An HTTP Module is a .NET class that executes with each and every request. For example, you can implement a custom authentication system by creating a custom HTTP Module. You also can use a custom HTTP Module to create a custom logging module.
Creating a Custom BuildProvider
When you write an ASP.NET page and save the page to your computer’s file system, the ASP.NET page gets compiled dynamically into a .NET class in the background. The page is compiled dynamically by a BuildProvider.
The ASP.NET Framework includes a number of BuildProviders. Each BuildProvider is responsible for compiling a file with a particular extension located in a particular type of folder. For example, there are BuildProviders for Themes, Master Pages, User Controls, and Web Services.
When a BuildProvider builds, it builds a new class in the Temporary ASP.NET Files folder. Any class added to the folder becomes available to your application automatically. When you use Visual Web Developer, any public properties and methods of the class appear in Intellisense.
You can create your own BuildProviders. This can be useful in a variety of different scenarios. For example, imagine that you find yourself building a lot of ASP.NET pages that display forms. You can tediously build each ASP.NET page by hand by adding all the necessary form and validation controls. Alternatively, you can create a new BuildProvider that takes an XML file and generates the form pages for you automatically.
Or imagine that you are spending a lot of time building data access components. For example, every time you need to access a database table, you create a new component that exposes properties that correspond to each of the columns in the database table. In this case, it would make sense to create a custom BuildProvider that generates the data access component automatically.
Creating a Simple BuildProvider
Let’s start by creating a simple BuildProvider. The new BuildProvider will be named the SimpleBuildProvider. Whenever you create a file that has the extension .simple, the SimpleBuilderProvider builds a new class with the same name as the file in the background. The dynamically compiled class also includes a single method named DoSomething() that doesn’t actually do anything.
The SimpleBuildProvider is contained in Listing 31.1.
Listing 31.1. App_CodeCustomBuildProvidersSimpleBuildProvider.cs

All BuildProviders must inherit from the base BuildProvider class. Typically, you override the BuildProvider class GenerateCode() method. This method is responsible for generating the class that gets added to the Temporary ASP.NET Files folder.
An instance of the AssemblyBuilder class is passed to the GenerateCode() method. You add the class that you want to create to this AssemblyBuilder by calling the AssemblyBuilder.AddCodeCompileUnit() method.
In Listing 31.1, a CodeSnippetCompileUnit is used to represent the source code for the class. Any code that you represent with the CodeSnippetCompileUnit is added, verbatim, to the dynamically generated class. This approach is problematic.
Unfortunately, you can use the SimpleBuildProvider in Listing 31.1 only when building a C# application;.it doesn’t work with a Visual Basic .NET application. Because the code represented by the CodeSnippetCompileUnit is C# code, using the SimpleBuildProvider with a Visual Basic .NET application would result in compilation errors. The SimpleBuildProvider would inject C# code into a Visual Basic .NET assembly.
The proper way to write the SimpleBuildProvider class would be to use the CodeDom, which enables you to represent .NET code in a language neutral manner. When you represent a block of code with the CodeDom, the code can be converted to either C# or Visual Basic .NET code automatically. You learn how to use the CodeDom when we build a more complicated BuildProvider in the next section. For now, just realize that we are taking a shortcut to keep things simple.
When you add the SimpleBuildProvider to your project, it is important that you add the file to a separate subfolder in your App_Code folder and you mark the folder as a separate code folder in the web configuration file. The SimpleBuildProvider is located in the sample code on the book’s website.
You must add a BuildProvider to a separate subfolder because a BuildProvider must be compiled into a different assembly than the other code in the App_Code folder. This makes sense because a BuildProvider is actually responsible for compiling the other code in the App_Code folder.
The web configuration file in Listing 31.2 defines the CustomBuildProviders folder and registers the SimpleBuildProvider.
Listing 31.2. Web.Config

The web configuration file in Listing 31.2 associates the SimpleBuildProvider with the file extension .simple. Whenever you add a file with the .simple extension to the App_Code folder, the SimpleBuildProvider automatically compiles a new class based on the file.
Note
Build Providers execute at different times depending on the type of folder. Build Providers associated with the App_Code folder execute immediately after a new file is saved. Build Providers associated with the Web or App_Data folders execute when a file is requested.
For example, adding the file in Listing 31.3 to your App_Code folder causes the SimpleBuildProvider to create a new class named Mike.
Listing 31.3. App_CodeMike.simple

The actual content of the file that you create doesn’t matter. The SimpleBuildProvider ignores everything about the file except for the name of the file.
You can see the new file created by the SimpleBuildProvider by navigating to the Sources_App_Code folder contained in the folder that corresponds to your application in the Temporary ASP.NET Files folder. The contents of the auto-generated file are contained in Listing 31.4.
Listing 31.4. mike.simple.72cecc2a.cs

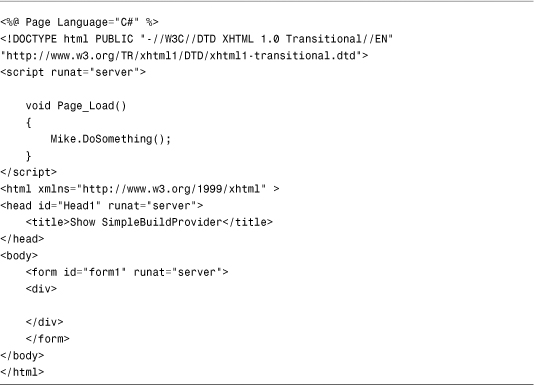
Any class added to the Temporary ASP.NET Files folder is available in your application automatically. For example, the page in Listing 31.5 uses the Mike class.
Listing 31.5. ShowSimpleBuildProvider.aspx
The Mike class appears in Intellisense. For example, if you type Mike followed by a period, the DoSomething() method appears (see Figure 31.1).
Figure 31.1. Using a BuildProvider to generate a class dynamically.

Creating a Data Access Component BuildProvider
In the previous section, we created a simple but useless BuildProvider. In this section, we create a complicated but useful BuildProvider.
In this section, we create a DataBuildProvider, which generates a data access component automatically from an XML file. For example, if you add the XML file in Listing 31.6 to your project, the DataBuildProvider generates the class in Listing 31.7 automatically.
Listing 31.6. App_CodeMovie.data

Listing 31.7. movie.data.72cecc2a.cs
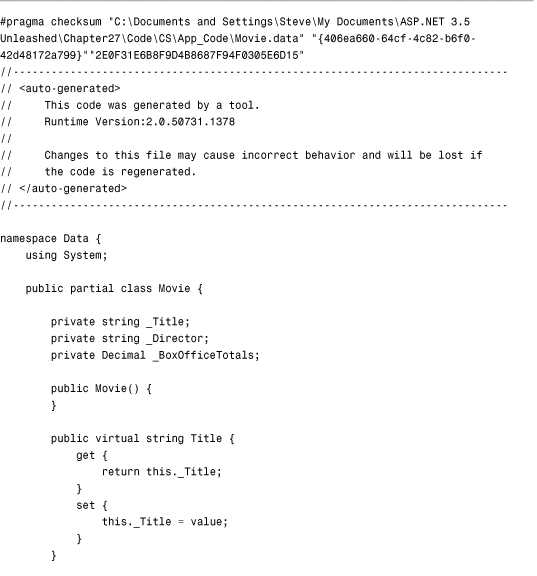

The XML file in Listing 31.6 contains the name of a database table (Movies) and contains a list of columns from the database table. When you add the file in Listing 31.6 to your project, the class in Listing 31.7 is generated automatically.
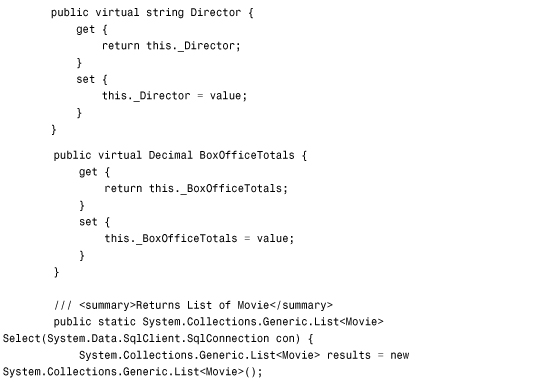
The data access component in Listing 31.7 contains a property that corresponds to each of the columns listed in the Movie.data file. Furthermore, each property has the data type specified in the Movie.data file.
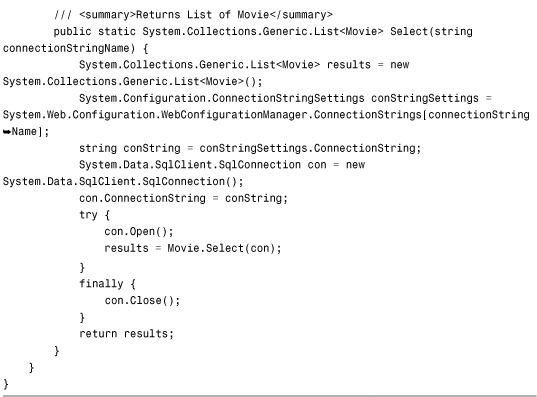
Furthermore, the Movie data access component includes two Select() methods. You can retrieve all the records from the Movies database table in two ways: by passing an open SqlConnection object to the Select() method or by passing the name of a connection string defined in the web configuration file to the Select() method.
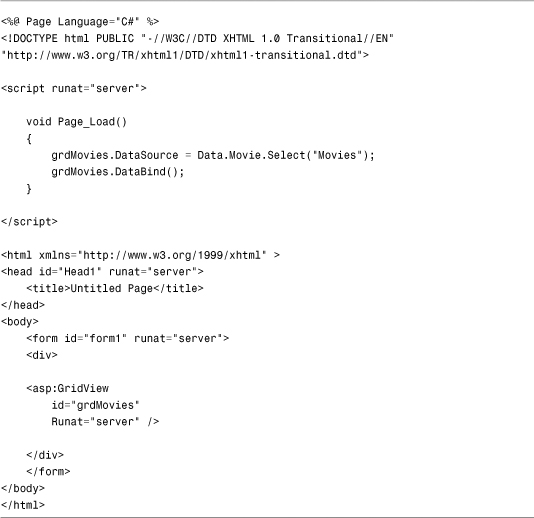
The page in Listing 31.8 illustrates how you can use the Movie data access component within an ASP.NET page (see Figure 31.2).
Figure 31.2. Displaying data returned by a dynamically generated data access component.

Listing 31.8. ShowDataBuildProvider.aspx
Unlike the SimpleBuildProvider created in the previous section, the DataBuildProvider uses the CodeDom to represent code. This means that you can use the DataBuildProvider in both Visual Basic .NET and C# applications. The DataBuildProvider generates the data access component in different languages automatically. For example, if you use the DataBuildProvider in a C# application, the BuildProvider generates the code in Listing 31.6 in C#.
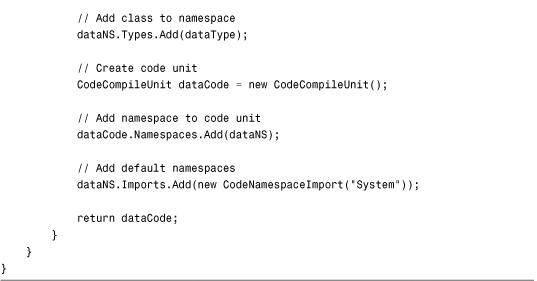
Unfortunately, the code for the DataBuildProvider is much too long to include here. The entire code is included on the code download from the website that accompanies the book. The file in Listing 31.9 contains part of the DataBuildProvider code.
Listing 31.9. DataBuildProvider.cs (Partial)
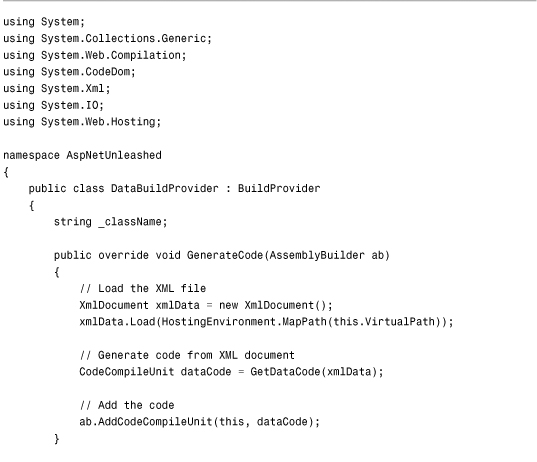

The DataBuildProvider’s GenerateCode() method loads a .data file into an XmlDocument. The VirtualPath property represents the path of the file being built. For example, if you add a file named Products.data to your project, the VirtualPath property would represent the path to the Products.data file.
Next, the code for the data access component is created from the XML file by the GetDataCode() method, which makes heavy use of the CodeDom to generate the code in a language-neutral manner. Working with the CodeDom is a strange and tedious experience. You must build up a block of code by building a code tree. In Listing 31.9, a CodeCompileUnit named dataCode is created. A CodeNamespace named dataNS that represents a namespace is created and added to the CodeCompileUnit. And a CodeTypeDeclaration named datatype that represents a class is added to the namespace. After the class is created, the methods and properties are added to the class block by block.
Creating a Custom ExpressionBuilder
An ExpressionBuilder class generates one expression from another expression. Typically, you use an ExpressionBuilder to look up a particular value given a particular key.
The ASP.NET Framework includes the following ExpressionBuilder classes:
• AppSettingsExpressionBuilder—Retrieves values from the appSettings section of the web configuration file.
• ConnectionStringsExpressionBuilder—Retrieves values from the connectionStrings section of the web configuration file.
• ResourceExpressionBuilder—Retrieves values from resource files.
The ConnectionStringsExpressionBuilder has been used throughout this book whenever a connection string has needed to be retrieved.
You use the following syntax when working with an ExpressionBuilder:
<%$ ConnectionStrings:MyDatabase %>
The <%$ and %> tags mark an expression that should be parsed by an ExpressionBuilder. The prefix ConnectionStrings is mapped to the particular ExpressionBuilder class responsible for parsing the expression. ExpressionBuilders must always be used with control properties. For example, you cannot display a connection string in a page like this:
<%$ ConnectionStrings:MyDatabase %>
Instead, you must display the connection string like this:
<asp:Literal
Id="ltlConnectionString"
Text='<%$ ConnectionStrings:MyDatabase %>'
Runat="server" />
You can create a custom ExpressionBuilder when none of the existing ExpressionBuilder classes do what you need. For example, you might want to store your application settings in a custom section of the web configuration file. In that case, you might want to create a custom ExpressionBuilder that grabs values from the custom configuration section.
Creating a Lookup ExpressionBuilder
In this section, you learn how to extend ASP.NET Framework by building a custom ExpressionBuilder class. We create a Lookup ExpressionBuilder that looks up string values from an XML file.
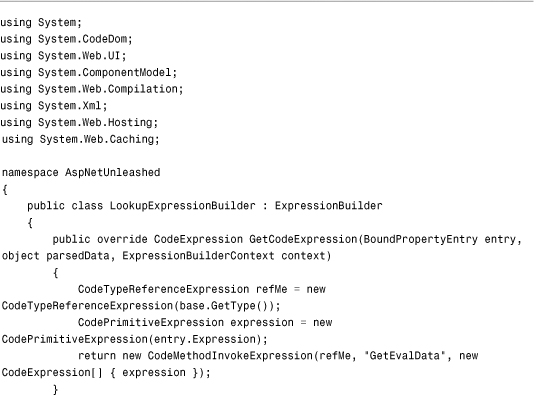
The LookupExpressionBuilder class is contained in Listing 31.10.
Listing 31.10. App_CodeLookupExpressionBuilder.cs
Before you can use the LookupExpressionBuilder class, you need to register it in the web configuration file. The web configuration file in Listing 31.11 includes an <expressionBuilders> section that registers the LookupExpressionBuilder class for the prefix lookup.
Listing 31.11. Web.Config

The LookupExpressionBuilder uses an XML file named Lookup.config to contain a database of lookup values. This file contains key and value pairs. A sample Lookup.config file is contained in Listing 31.12.
Listing 31.12. Lookup.config

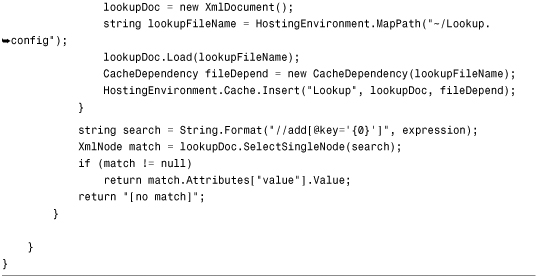
Finally, the page in Listing 31.13 uses the LookupExpressionBuilder. It contains a Literal control that displays the value of a lookup expression named WelcomeMessage (see Figure 31.3).
Figure 31.3. Displaying text generated by an ExpressionBuilder.

Listing 31.13. ShowLookupExpressionBuilder.aspx
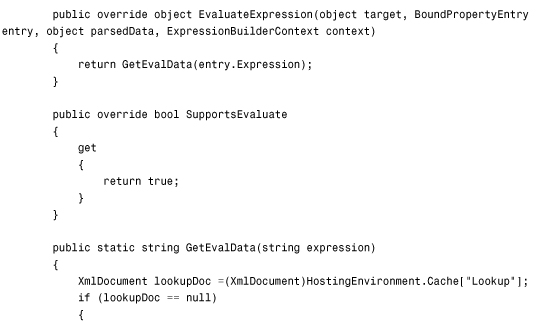
You create a custom ExpressionBuilder by inheriting a new class from the base ExpressionBuilder class. The ExpressionBuilder class has the following methods:
• GetCodeExpression—Returns the code that evaluates an expression.
• EvaluateExpression—Evaluates the expression in the case of no-compile ASP.NET pages.
• ParseExpression—Returns a parsed version of the expression.
The ExpressionBuilder class also supports the following property:
• SupportsEvaluate—When true, the ExpressionBuilder can be used in no-compile ASP.NET pages.
When you use an ExpressionBuilder in a normal ASP.NET page, the ExpressionBuilder returns code that is integrated into the compiled ASP.NET page. The GetCodeExpression() method returns a block of code injected into the compiled ASP.NET page class that gets created in the Temporary ASP.NET Files folder.
Because an ExpressionBuilder might be used with either a Visual Basic .NET or C# ASP.NET page, the code returned by the GetCodeExpression() method must be language neutral. This means that you must represent the code that gets executed with the CodeDom.
In Listing 31.11, the GetCodeExpression() method returns an instance of the CodeMethodInvokeExpression class. This class represents an expression that invokes a class method. In this case, the CodeMethodInvokeExpression class represents the expression LookupExpressionBuilder.GetEvalData(). In other words, the ExpressionBuilder adds code to the compiled ASP.NET page class that invokes the GetEvalData() method contained in Listing 31.10.
As an alternative to creating a normal ASP.NET page, you can create something called a no-compile ASP.NET page, which is not compiled dynamically. You create a no-compile ASP.NET page by adding the following attribute to a <%@ Page %> directive:
<%@ Page CompilationMode="Never" %>
If you want an ExpressionBuilder to work with no-compile ASP.NET pages, you must return the value True from the ExpressionBuilder.SupportsEvaluate property and implement the EvaluateExpression() method. The EvaluateExpression is executed at runtime when the no-compile ASP.NET page is requested. In Listing 31.11, the EvaluateExpression() method simply calls the GetEvalData() method.
Creating HTTP Handlers
An HTTP Handler is a .NET class that executes whenever you make a request for a file at a certain path. Each type of resource that you can request from an ASP.NET application has a corresponding handler. For example, when you request an ASP.NET page, the Page class executes. The Page class is actually an HTTP Handler because it implements the IHttpHandler interface.
Other examples of HTTP Handlers are the TraceHandler class, which displays application-level trace information when you request the Trace.axd page, and the ForbiddenHandler class, which displays an Access Forbidden message when you attempt to request source code files from the browser.
You can implement your own HTTP handlers. For example, imagine that you want to store all your images in a database table;however, you want use normal HTML <img> tags to display images in your web pages. In that case, you can map any file that has a .gif or .jpeg extension to a custom image HTTP handler. The image HTTP handler can retrieve images from a database automatically whenever an image request is made.
Or imagine that you want to expose an RSS feed from your website. In that case, you can create an RSS HTTP Handler that displays a list of blog entries or articles hosted on your website. You can create an HTTP Handler in two ways. You can either create something called a Generic Handler, or you can implement the IHttpHandler interface in a custom class. This section explores both methods of creating an HTTP Handler.
Creating a Generic Handler
The easiest way to create a new HTTP Handler is to create a Generic Handler. When you create a Generic Handler, you create a file that ends with the extension .ashx. Whenever you request the .ashx file, the Generic Handler executes.
You can think of a Generic Handler as a lightweight ASP.NET page. A Generic Handler is like an ASP.NET page that contains a single method that renders content to the browser. You can’t add any controls declaratively to a Generic Handler. A Generic Handler also doesn’t support events such as the Page Load or Page PreRender events.
In this section, we create a Generic Handler that dynamically generates an image from a string of text. For example, if you pass the string Hello World! to the handler, the handler returns an image of the text Hello World!.
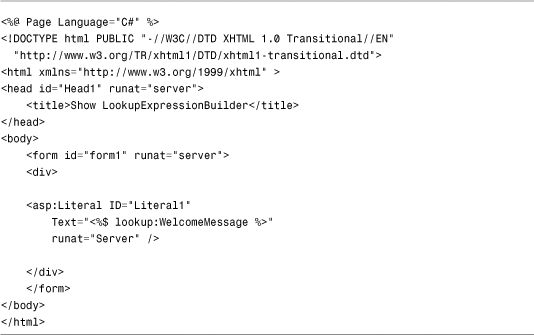
The Generic Handler is contained in Listing 31.14.
Listing 31.14. ImageTextHandler.ashx
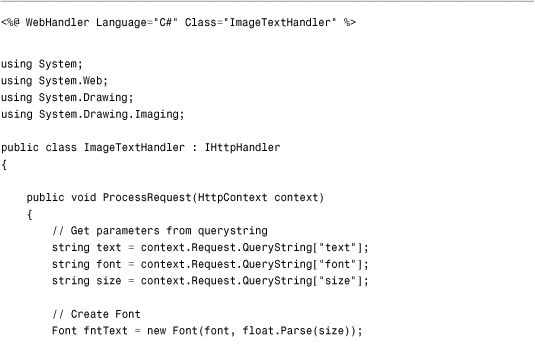

The ImageTextHandler in Listing 31.14 includes one method and one property. The ProcessRequest() method is responsible for outputting any content that the handler renders to the browser.
In Listing 31.14, the image text, font, and size are retrieved from query string fields. You specify the image that you want to return from the handler by making a request that looks like this:
/ImageTextHandler.ashx?text=Hello&font=Arial&size=30
Next, a bitmap is created with the help of the classes from the System.Drawing namespace. The bitmap is actually created twice. The first one measures the size of the bitmap required for generating an image that contains the text. Next, a new bitmap of the correct size is created, and the text is drawn on the bitmap. After the bitmap has been created, it is saved to the HttpResponse object’s OutputStream so that it can be rendered to the browser.
The handler in Listing 31.14 also includes an IsReusable property, which indicates whether the same handler can be reused over multiple requests. You can improve your application’s performance by returning the value True. Because the handler isn’t maintaining any state information, there is nothing wrong with releasing it back into the pool so that it can be used with a future request.
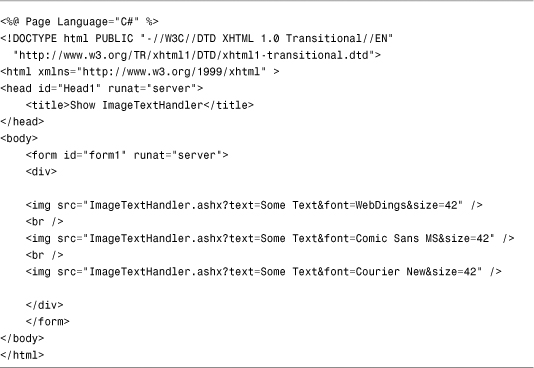
The page in Listing 31.15 illustrates how you can use the ImageTextHandler.ashx file. This page contains three HTML <img> tags that pass different query strings to the handler (see Figure 31.4).
Figure 31.4. Displaying text images with an HTTP Handler.
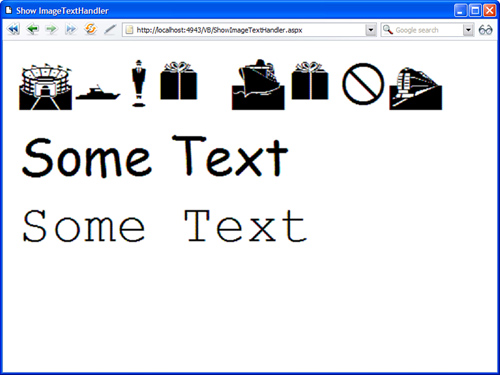
Listing 31.15. ShowImageTextHandler.aspx
Implementing the IHttpHandler Interface
The big disadvantage of a Generic Handler is that you cannot map a Generic Handler to a particular page path. For example, you cannot execute a Generic Handler whenever someone requests a file with the extension .gif. If you need more control over when an HTTP Handler executes, you can create a class that implements the IHttpHandler interface.
For example, the class in Listing 31.16 represents an Image HTTP Handler. This handler retrieves an image from a database table and renders the image to the browser.
Listing 31.16. App_CodeImageHandler.cs


After you create a class that implements the IHttpHandler interface, you need to register the class in the web configuration file. The web configuration file in Listing 31.17 includes an httpHandlers section that associates the .gif, .jpeg, and .jpg extensions with the Image handler.
Listing 31.17. Web.Config

When you register a handler, you specify the following four attributes:
• path—Enables you to specify the path associated with the handler. You can use wildcards in the path expression.
• verb—Enables you to specify the HTTP verbs, such as GET or POST, associated with the handler. You can specify multiple verbs in a comma-separated list. You can represent any verb with the * wildcard.
• type—Enables you to specify the name of the class that implements the handler.
• validate—Enables you to specify whether the handler is loaded during application startup. When true, the handler is loaded at startup. When false, the handler is not loaded until a request associated with the handler is made. This second option can improve your application’s performance when a handler is never used.
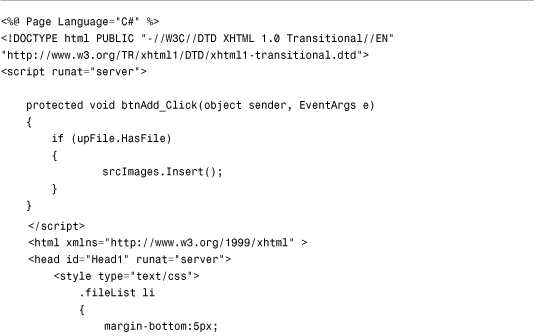
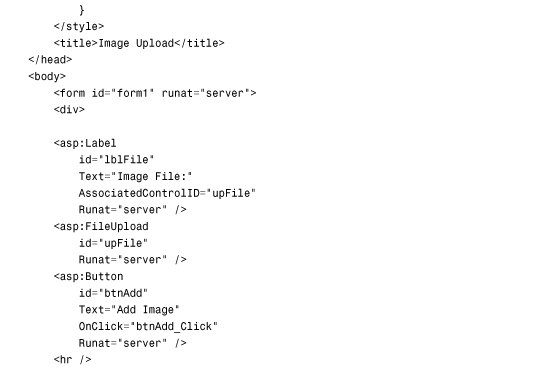
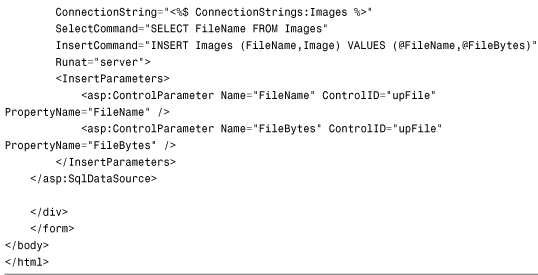
The page in Listing 31.18 uses the ImageHandler to render its images. The page enables you to upload new images to a database named ImagesDB. The page also displays existing images (see Figure 31.5).
Figure 31.5. Displaying images with the ImageHandler.

Listing 31.18. ImageUpload.aspx

Creating an Asynchronous HTTP Handler
When you create an HTTP Handler by creating either a Generic Handler or implementing the IHttpHandler interface, you are creating a synchronous handler. In this section, you learn how to create an asynchronous handler.
The advantage of creating an asynchronous handler is scalability. The ASP.NET Framework maintains a limited pool of threads that are used to service requests. When ASP.NET Framework receives a request for a file, it assigns a thread to handle the request. If ASP.NET Framework runs out of threads, the request is queued until a thread becomes available. If too many threads are queued, the framework rejects the page request with a 503—Server Too Busy response code.
If you execute an HTTP Handler asynchronously, the current thread is released back into the thread pool so that it can be used to service another page request. While the asynchronous handler is executing, ASP.NET Framework can devote its attention to handling other requests. When the asynchronous handler completes its work, the framework reassigns a thread to the original request, and the handler can render content to the browser.
Note
You can configure the ASP.NET thread pool with the httpRuntime element in the web configuration file. You can modify the appRequestQueueLimit, minFreeThreads, and minLocalRequestFreeThreads attributes to control how many requests ASP.NET Framework queues before giving up and sending an error.
You create an asynchronous HTTP handler by implementing the IHttpAsyncHandler interface, which derives from the IHttpHandler interface and adds two additional methods:
• BeginProcessRequest—Called to start the asynchronous task.
• EndProcessRequest—Called when the asynchronous task completes.
For example, the file in Listing 31.19 contains an asynchronous handler that grabs an RSS feed from the ASP.NET website.
Listing 31.19. App_CodeRSSHandler.cs


The handler in Listing 31.19 implements both the BeginProcessRequest() and EndProcessRequest() methods required by the IHttpAsyncHandler interface.
The BeginProcessRequest() method uses the WebRequest class to request the page that contains the RSS headlines from the MSDN website. The WebRequest.BeginGetResponse() method retrieves the remote page asynchronously.
When the BeginGetResponse() method completes, the handler’s EndProcessRequest() method is called. This method retrieves the page and renders the contents of the page to the browser.
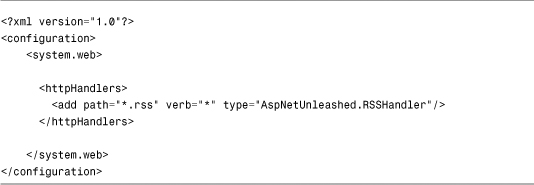
Before you can use the RSSHandler, you need to register it in your web configuration file. The web configuration file in Listing 31.20 includes an <httpHandlers> section that registers the RSSHandler and associates the handler with the .rss extension.
Listing 31.20. Web.Config
After you register the RSSHandler, you can execute the handler by making a request for any file that ends with the extension .rss. If you have a news reader, such as SharpReader, you can enter a path like the following in the reader’s address bar:
http://localhost:2026/YourApp/news.rss
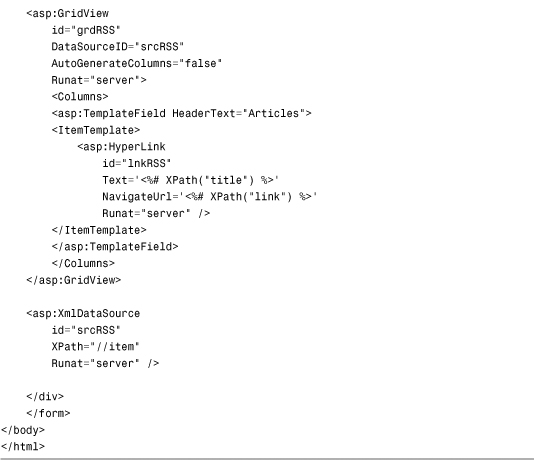
The page in Listing 31.21 contains a GridView and XmlDataSource control. The XmlDataSource control calls the RssHandler to retrieve the headlines displayed in the GridView control (see Figure 31.6).
Figure 31.6. Retrieving an RSS feed asynchronously.

Listing 31.21. ShowRSSHandler.aspx

Working with HTTP Applications and HTTP Modules
Whenever you request an ASP.NET page, ASP.NET Framework assigns an instance of the HttpApplication class to the request. This class performs the following actions in the following order:
- Raises the
BeginRequestevent - Raises the
AuthenticateRequestevent - Raises the
AuthorizeRequestevent - Calls the
ProcessRequest()method of thePageclass - Raises the
EndRequestevent
The entire page execution lifecycle happens during the fourth step. For example, the Page Init, Load, and PreRender events all happen when the Page class ProcessRequest() method is called. The HttpApplication object is responsible for raising application events. These application events happen both before and after a page is executed.
You might want to handle one of the application events for several reasons. For example, you might want to implement a custom authentication scheme. In that case, you would need to handle the AuthenticateRequest event to identify the user. Or you might want to create a custom logging module that tracks the pages that your website users visit. In that case, you might want to handle the BeginRequest event to record the pages being requested.
If you want to handle HttpApplication events, there are two ways to do it. You can create a Global.asax file or you can create one or more custom HTTP Modules.
Creating a Global.asax File
By default, the ASP.NET Framework maintains a pool of HttpApplication objects to service incoming page requests. A separate HttpApplication instance is assigned to each request.
If you prefer, you can create a custom HttpApplication class. That way, an instance of your custom class is assigned to each page request.
You can create custom properties in your derived class. These properties can be accessed from any page, control, or component. You also can handle any application events in your custom HttpApplication class.
You create a custom HttpApplication class by creating a special file named Global.asax in the root of your application. Every application can have one and only one of these files. For example, the Global.asax file in Listing 31.22 can be used to track the number of page requests made for any page.
Listing 31.22. Global.asax
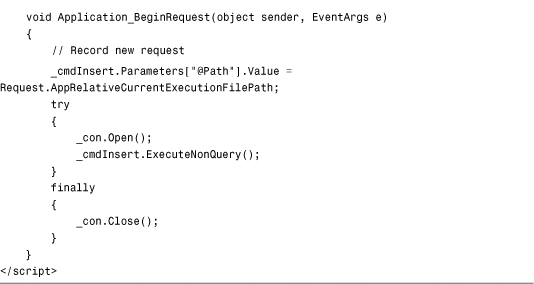
The Global.asax page in Listing 31.22 handles the Application BeginRequest() event. You can handle any application event by following the naming pattern Application_EventName where EventName is the name of the HttpApplication event.
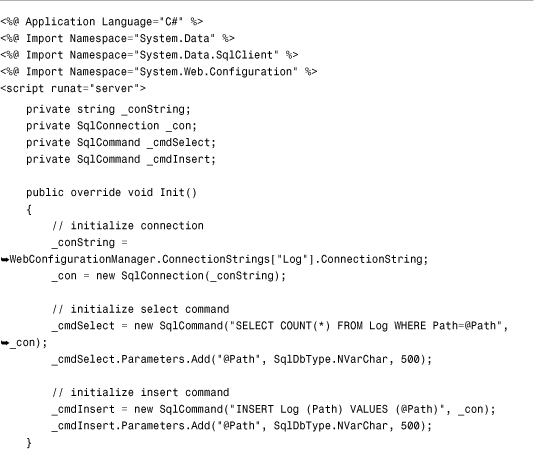
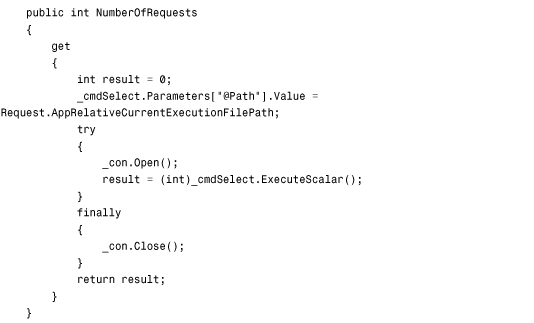
In Listing 31.22, the Application_BeginRequest() handler records the path of the page requested. A SqlCommand object records the page path to a database table named Log. The Global.asax file also extends the base HttpApplication class with a custom property named NumberOfRequests. This property retrieves the number of requests made for the page at the current path.
Finally, the Global.asax includes an Init() method that overrides the base HttpApplication's Init() method. In Listing 31.22, the Init() method initializes the SqlConnection and two SqlCommand objects used in the Global.asax file. The Init() method is called when the class represented by the Global.asax is initialized. It is called only once, when the class is first created.
Warning
The same instance of the HttpApplication object is reused for multiple page requests (although never for multiple page requests at the same time). Any value that you assign to a property in a Global.asax file is maintained over the multiple page requests.
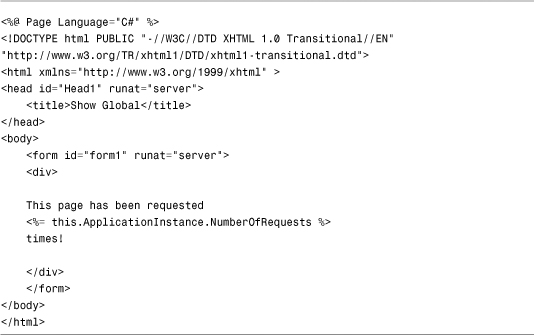
The page in Listing 31.23 displays the value of the custom property exposed by the Global.asax file (see Figure 31.7). The ApplicationInstance property is used to refer to the instance of the HttpApplication class associated with the page. Because the Global.asax file is compiled dynamically in the background, any properties that you declare in the Global.asax file are exposed as strongly typed properties.
Figure 31.7. Displaying the NumberOfRequests property.

Listing 31.23. ShowGlobal.aspx
Creating Custom HTTP Modules
An HTTP Module is a .NET class that executes with each and every page request. You can use an HTTP Module to handle any of the HttpApplication events that you can handle in the Global.asax file.
Behind the scenes, ASP.NET Framework uses HTTP Modules to implement many of the standard features of the framework. For example, ASP.NET Framework uses the FormsAuthenticationModule to implement Forms authentication and the WindowsAuthenticationModule to implement Windows authentication.
Session state is implemented with an HTTP Module named the SessionStateModule. Page output caching is implemented with an HTTP Module named the OutputCacheModule, and the Profile object is implemented with an HTTP Module named the ProfileModule.
When a new instance of an HttpApplication class is created, the HttpApplication loads all the HTTP Modules configured in the web configuration file. Each HTTP Module subscribes to one or more HttpApplication events. For example, when the HttpApplication object raises its AuthenticateRequest event, the FormsAuthenticationModule executes its code to authenticate the current user.
In this section, we create a simple authentication HTTP Module. The HTTP Module doesn’t enable you to request a page unless you include the proper query string with the request. The code for the custom HTTP Module is contained in Listing 31.24.
Listing 31.24. App_CodeQueryStringAuthenticationModule.cs
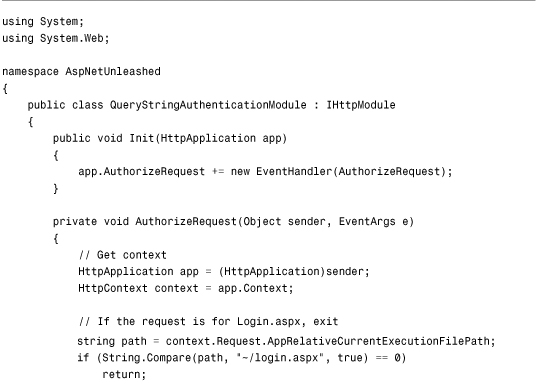
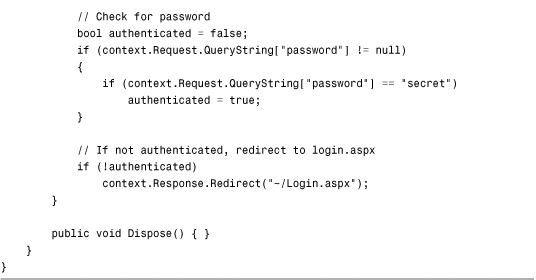
The class in Listing 31.24 implements the IHttpModule interface. This interface includes two methods:
• Init—Enables you to subscribe to HttpApplication events.
• Dispose—Enables you to clean up any resources used by the HTTP Module.
In Listing 31.25, the Init() method adds an event handler for the HttpApplication AuthorizeRequest event. When the HttpApplication raises the AuthorizeRequest event, the HTTP Module’s AuthorizeRequest() method executes.
The AuthorizeRequest() method checks for a password=secret query string. If the query string does not exist, the user is redirected to the Login.aspx page. (The method also checks whether the user is requesting the Login.aspx page to avoid a vicious circle.)
Before you can use the QueryStringAuthenticationModule, you must register the HTTP Module in the web configuration file. The web configuration file in Listing 31.25 includes an <httpModules> section that registers the module.
Listing 31.25. Web.Config

After you register the HTTP Module, if you attempt to request any page without including the password=secret query string, you are redirected to the Login.aspx page. (If the Login.aspx page doesn’t exist, you receive a 404--Not Found error message.)
Summary
In this chapter, you learned how to extend the ASP.NET Framework by extending different parts of the HTTP Runtime. In the first section, you learned how to create a custom BuildProvider. For example, you learned how to create a BuildProvider that dynamically generates a data access component from an XML file.
Next, you explored the topic of ExpressionBuilders. You learned how to use an ExpressionBuilder to automatically replace one expression with another. For example, we created a custom ExpressionBuilder that enables you to look up a value from an XML file.
The topic of HTTP Handlers was also explored. You learned two methods of creating custom HTTP Handlers. You learned how to create a Generic Handler and how to create an HTTP Handler by implementing the IHttpHandler interface. You also saw how you can improve the scalability of your ASP.NET applications by implementing asynchronous HTTP Handlers.
Finally, you learned two methods of handling application-wide events. You learned how to create a custom HttpApplication by creating a Global.asax file. You also learned how to handle application events by implementing a custom HTTP Module.