
Fooling around with email is a time-honored time-waster. However, some of Outlook Express's options can actually be time-savers, including custom signatures, junk mail filters, and so on. This section covers a few of the ways you can bend the program to your will.
As noted at the beginning of this chapter, Outlook Express can handle multiple email accounts. You might have one email address provided by your company, another by your ISP, and a third by Hotmail. To manage settings for your various mail accounts, choose Tools→Accounts, and then click the Mail tab (Figure 12-15).
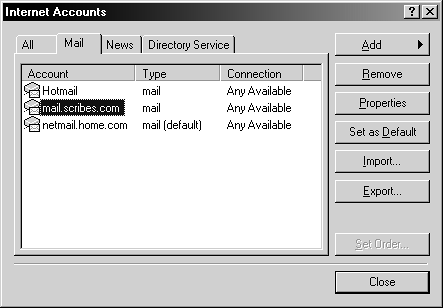
Figure 12-15. To change the default account used when sending email, click the account you want and then click Set as Default. To export the settings for a mail account, making it quick and easy to setup the mail account again on a different computer, select the account, click the Export button, and then use the Export Internet Account dialog box to save the account settings to disk. Use the Import button to import previously exported settings.
The gateway to the account-fiddling screen is the Properties button. It summons a dialog box that offers five screens full of settings, which are described in the following sections.
The General tab, shown in Figure 12-16, is where you modify the name and email address used with the account.

Figure 12-16. On the General tab, you can edit the name that Outlook Express gives this email account. (It can be anything you like.) The Name box stores the name you used to set up the account (usually your real name). The email address you enter on the General tab is the address that recipients will see; if they decide to add you to their address books, this is the email address they'll get.
If you don't want Outlook Express to check this account's mail every time you check your email, clear the "Include this account when receiving mail or synchronizing" checkbox. You can still check the email for this account manually whenever you like, just by using the Send/Recv toolbar button's drop-down menu. In the meantime, however, you save yourself some time by omitting accounts you don't need checked every day.
Use the boxes provided here to verify or change your mail server settings (see page 248).
Use this tab to specify how the account should connect to the Internet (if, indeed, you have more than one method available). Your choices might be your ISP, your corporate network, and so on. If you need to always use a specific method of connecting to the Internet—perhaps because your work email is only available when you're connected to your company's network—select this checkbox and then choose that connection method from the drop-down menu.
To allow the account to connect using any available connection, on the other hand, clear the "Always connect to this account using" checkbox.
Email isn't the most secure way of corresponding. Anyone can pretend to be someone else simply by changing the mail software's Name and Email address settings; and determined hackers can easily intercept and read email messages.
For most people, this theoretical vulnerability really isn't a problem. Deviant individuals usually have better things to do than pretend to be your mother on email or to intercept and read sappy love letters and boring work mail. However, there are times when security is important. Maybe you want to send someone your credit-card information by email (which, by the way, is not a good idea) or sensitive work information. Or perhaps you need to assure to your recipient that you are indeed who you claim to be. In these situations, you should consider using Outlook Express's message encryption and digital signatures features. (The rest of the time, don't bother.)
This advanced tab lets you configure how this email account sends digitally signed or encrypted email. Before you can configure these settings, you need to acquire and install a digital ID (see Section 17.2); then click the Select button in the Signing Certificate section to choose that ID when sending digitally signed messages with this account. Use the Algorithm box to select the encryption algorithm to use, if necessary.
The Advanced tab (not present for a Hotmail account) includes settings you're unlikely to need to change; for example, the Outgoing Mail and Incoming Mail boxes specify what ports your mail server uses.
If you encounter bad connections or slow servers, the Server Timeouts slider tells Outlook Express how long it should wait before giving up when checking or sending mail. If you frequently get error messages reporting that the server "timed out," try increasing this setting to two minutes or more. Another setting that can be useful for ornery mail servers is the "Break apart messages larger," which breaks large messages into smaller chunks, to accommodate mail servers that refuse to send or receive larger messages. (Such servers typically choke at 64 KB or 1 MB, but you might have to experiment to find the optimal setting.)
If your mail server is an IMAP server, you'll find this additional tab in the mail account's Properties dialog box. Use it to change how Outlook Express deals with special IMAP folders. For example:
Root Folder Path specifies the folder on the server that contains all your mail folders. You generally leave it blank, but if you can't find your mail folders, ask your administrator or ISP what the correct setting should be.
Check for new messages in all folders. Remember that if you have an IMAP account, a distant computer on the Internet actually stores your messages, in folders that you've created there. If you receive new mail only in your Inbox folder and don't need Outlook Express to check your other folders, you can clear this checkbox to reduce the amount of time it takes to check your mail.
Store special folders on IMAP server. Outlook Express generally stores the Sent Items and Drafts folders on the IMAP server, too, so that you can look up previously sent messages and message drafts from anywhere you can access your account. If you don't want to store these folders on the server (to save disk space there, for example), clear this checkbox. Or, if you prefer, you can specify different folders to hold these messages by editing the Sent Items Path and Drafts Path boxes.
Outlook Express's interface is well designed; but on the grounds that it-takes-all-kinds, Microsoft offers you the flexibility to make a few modifications. You can customize Outlook Express's toolbar, change which panes of the Outlook Express window show up, or modify the Preview pane.
While Outlook Express's toolbars are well designed for most people, you may find that with a little customization, you can make them work even better for yourself. To customize Outlook Express's toolbar, right-click it and choose Customize from the shortcut menu; as you'll quickly discover, the dialog box that lets you add or remove Outlook Express toolbar buttons is the same one you use to edit toolbars in desktop folder windows. See Section 11.7.1 for details.
To show or hide Outlook Express's various windowpanes, or to change how the Preview pane works, choose View→Layout (Figure 12-17).

Most of the options in the Tools→Options dialog box are self-explanatory, but here are a few that are tricky and/or especially useful:
When starting, go directly to my 'Inbox' folder. Skips the Outlook Express summary view when opening the program.
Notify me if there are any new newsgroups. Whenever you check for new newsgroup messages, you'll be notified if there are any new newsgroups. (There almost always are.)
Send and receive messages at startup. Makes Outlook Express check for new mail as soon as you open the program. If you have a dialup connection, you may well want to turn this option off, so that you can read and write some messages before connecting to the Internet.
Check for new messages every __. Controls whether or not Outlook Express intermittently checks for new messages automatically, and if so, how often. If you're online all the time (you lucky cable modem, DSL, or corporate network member), by all means, let Outlook Express keep your Inbox frequently updated. Otherwise, use the drop-down list box to control how often, if ever, Outlook Express should connect to the Internet unbidden.
Make default. To make Outlook Express the default mail or news program, use the Make Default buttons at the bottom of the General tab. (If they're dimmed, it's because you only have one mail or newsreading program.)
The following list presents some of the noteworthy options you may want to change on the Read, Send, Receipts, and Connection tabs of the Tools→Options dialog box.
Mark message read after displaying for __. This option marks a message as having been read—changing its typeface from bold to not bold—if you leave it highlighted in the message list for five seconds or more, even without opening it.
Get __ headers at a time. Controls how many newsgroup message headers Outlook Express downloads at each connection. If you have a high-speed Internet connection, you may want to increase this setting to, for example, 1000.
Use these options to request that a receipt be emailed to you when your outbound messages are read. Note that this is somewhat of an imposition on your recipients' privacy; most will feel uncomfortable sending back such a receipt if they don't plan to respond to the message promptly. (Furthermore, this feature works only if the recipient's email program offers a similar feature; Outlook Express, Outlook, and Eudora all do.)
You can also control how Outlook Express responds to receipts requested of you on this tab.
Save copy of sent messages in the 'Sent Items' folder. Keeps a copy of each message you send.
Send messages immediately. If this checkbox is on, Outlook Express connects to the Internet and sends each new message the instant you click the Send button. That's fine if you have a high-speed, full-time Internet connection. But if you have a standard modem, you might wish you didn't have to wait while your PC dials and connects each time you finish writing a message.
If you clear this checkbox, clicking the Send button places a new outgoing message into your Outbox. There it will sit until you click the Send/Recv button, whereupon Outlook Express will send all waiting messages.
Automatically put people I reply to in my Address Book. Every time you send a reply to someone, Outlook Express adds that person's name and email address to your Address Book. This feature can fill up your Address Book with superfluous email addresses; you may want to turn off this option.
Include message in reply. When you click the Reply button, Outlook Express generally pastes the original message at the bottom of your reply, to help your correspondent remember what she'd said originally. If you're trying to keep your messages small, you can turn off this option.
Mail Sending Format and News Sending Format. These sections control the default message format you use for email and newsgroup posts, as described in Section 12.4.3. Plain Text is best for News messages; HTML message format is a safe choice for email correspondence. (As noted on Section 12.4.3, you can always switch to the other format on a message-by-message basis.)
Hang up after sending and receiving. Makes Outlook Express disconnect from the Internet after checking messages. This feature ensures that you won't accidentally leave the phone line tied up all day, but also means that you can't continue to browse the Web on the same call.
Ask before switching dial-up connections. This option is for people who have set up several different dial-up connections (see page Section 14.1.3). It ensures that Outlook Express won't disconnect one call, just so it can dial another to check email.
Adding an automatic signature to your mail can save you considerable time. For business messages, you can include your name, title, company, telephone number, and so forth. You can have a different signature for personal mail. In fact, you can have as many signatures as you like, and switch among them as necessary.
To create and manage signatures, select Tools→Options, and then click the Signatures tab. To create the signature, see Figure 12-18.

Figure 12-18. Click the New button in the Signatures section to create a new signature. In the Text box at the bottom of the dialog box, enter the text you want to use as a signature, or choose the File option to use an HTML or text file as your signature. Use the Rename and Remove buttons to manage your signatures. To choose a default signature, select it from the list of signatures and then click Set as Default.
Then, if you'd like the signature stamped at the bottom of every outgoing message automatically, turn on "Add signatures to all outgoing messages"; if you like, clear the "Don't add signatures to replies and forwards" checkbox.
You can even set up a different default signature for each of your mail accounts. To do so, select a signature, click the Advanced button, and then select the appropriate email accounts.
Tip
You can also attach an electronic business card with outgoing messages. To do this, use the Business Cards section of the Compose tab to include your contact information (attached as a industry-standard vCard file) with email. By the way: It's not polite to include a business card with newsgroup posts.
If a lot of mail or newsgroup messages pass through your copy of Outlook Express, you'll occasionally need to pay attention to maintenance chores such as emptying the Deleted Items folder, compacting your messages, or deleting downloaded messages.
To perform these tasks, choose Tools→Option from the Tools; click the Maintenance tab. This tab lets you configure how Outlook Express maintains itself by deleting old email and newsgroup messages, for example.
While it's important to regularly back up all files on your computer (see Chapter 18), it's very important to back up the files that you really care about—such as your documents and email messages.
You can back up your Outlook Express messages and Address Book either by using a backup program such as the one described in Chapter 18 or by manually copying Outlook Express folders onto a Zip disk or CD.
To perform the latter kind of backup, follow these steps
Choose Tools → Options from the Tools menu, click the Maintenance tab, and then click the Store Folder button.
The Store Location dialog box appears, showing you (in the form of a Windows path) where your messages are stored.
Highlight the entire folder path.
Do that by clicking at the very left of the path and dragging the cursor carefully all the way to the right end of the text.
Press Ctrl+C to copy the path to the Clipboard. Click OK, and then open Windows Explorer.
See Section 5.1.1 for more on opening Explorer.
Click in the Address box to select the current address, press Ctrl+V, and then press Enter.
You've just pasted the path of, and then jumped to, the folder containing all of your mail and news data.
To backup your data, drag this folder to your backup location (such as a Zip disk or network drive).
Alternatively, open your backup program and use it to backup this folder.
Tip
You don't have to keep your Outlook Express messages in the folder suggested by the program. You can choose any folder to hold them. In Outlook Express, choose Options→Tools, click the Store Folder button on the Maintenance tab, click the Change button, and then select a different folder. Click each OK button to resurface.