Those of you who have worked with Microsoft SharePoint Portal Server 2003 and Windows SharePoint Services v2 will definitely be familiar with Microsoft FrontPage 2003. FrontPage was Microsoft’s recommended application for all SharePoint customizations. Well, Microsoft has changed the rules again. Say hello to the Microsoft Office SharePoint Designer 2007, a part of the Microsoft Office 2007 release.
With the new release, Microsoft has come up with a new set of tools for web site design:
The choice of which tool is best for you depends on your needs. Ideally:
Use Expressions Web Designer if you are a professional web designer building dynamic standards-based web sites.
Use SharePoint Designer 2007 if you are a solution creator, web designer, or content author using SharePoint Technologies.
Use Visual Studio 2005 if you are professional web application developer.
Office SharePoint Designer 2007 is specifically designed to help you create and customize SharePoint web sites and workflows (for both Microsoft Windows SharePoint Services v3 and Office SharePoint Server 2007). Office SharePoint Designer 2007 allows you to:
Customize SharePoint sites to meet your needs
Build SharePoint applications quickly, without writing any server code
Automate business processes with workflows
Easily manage SharePoint sites
Office SharePoint Designer 2007 has a very intuitive interface, just like Microsoft FrontPage 2003, that enables you to create and refine SharePoint Sites and build workflow-enabled SharePoint applications and reporting tools quickly and easily. Using SharePoint Designer 2007, you can quickly become a solution creator, even if you are not a programmer or application developer.
With existing SharePoint Web Parts in Office SharePoint Server 2007 and ASP.NET controls, it is very easy to build SharePoint applications. You can use custom lists, forms, and data from external sources, and build custom workflows, all without having to write a single line of code. In this chapter, we will look at how to achieve each of these features in detail.
So what happened to FrontPage?
Microsoft has discontinued FrontPage as of late 2006, but it will continue to support the application for the foreseeable future.
There will be 100 percent compatibility between FrontPage and the new web authoring tools.
In this chapter, we will go through each through each of these scenarios: building a custom site, building applications, and automating business processes workflows.
Before we start our deep dive into utilizing Office SharePoint Designer 2007 to customize SharePoint sites, it is important to understand key concepts that affect the page customization.
A site home page’s content and its formatting come from the default master page. Master pages are templates that are associated with pages. When a master page changes, all the pages associated to the master page also change. Hence, it is easy to update multiple pages simultaneously. Master pages make it easy to apply a common look and feel to your SharePoint site.
The default master page in Windows SharePoint Services 3.0 sites is named default.master and is located in the site’s _catalogs/masterpage folder. This page controls the formatting of the home page and all the list item default pages. There are two ways to customize a site: start adding content to the regions of the home page or modify the site’s default master page.
Warning
Site home pages in Office SharePoint Server 2007 may be controlled by master pages other than the default.master page, depending on which master page was attached to the site definition when the site was created.
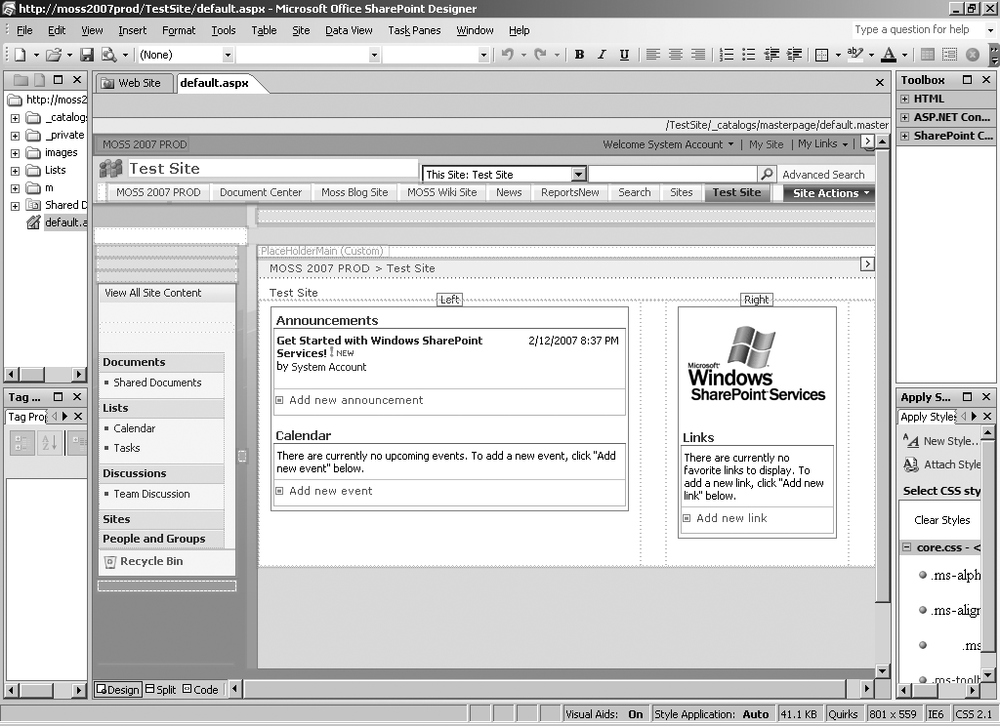
When you open the home page of a SharePoint site, you will see a screen similar to Figure 19-1. Note the placeholders that show up on selected areas. These placeholders define sections of the master page where you can add or edit content.

Placeholders can also be used to reserve space for current functionality or future use. Master pages in Office SharePoint Server 2007 have more default required placeholders than do master pages in Windows SharePoint Services 3.0.
Warning
On the region label, the placeholder name is followed by either (Master) or (Custom). Placeholders marked (Master) contain default content from a master page in the site, and placeholders marked (Custom) contain custom content that has been added to the current page.
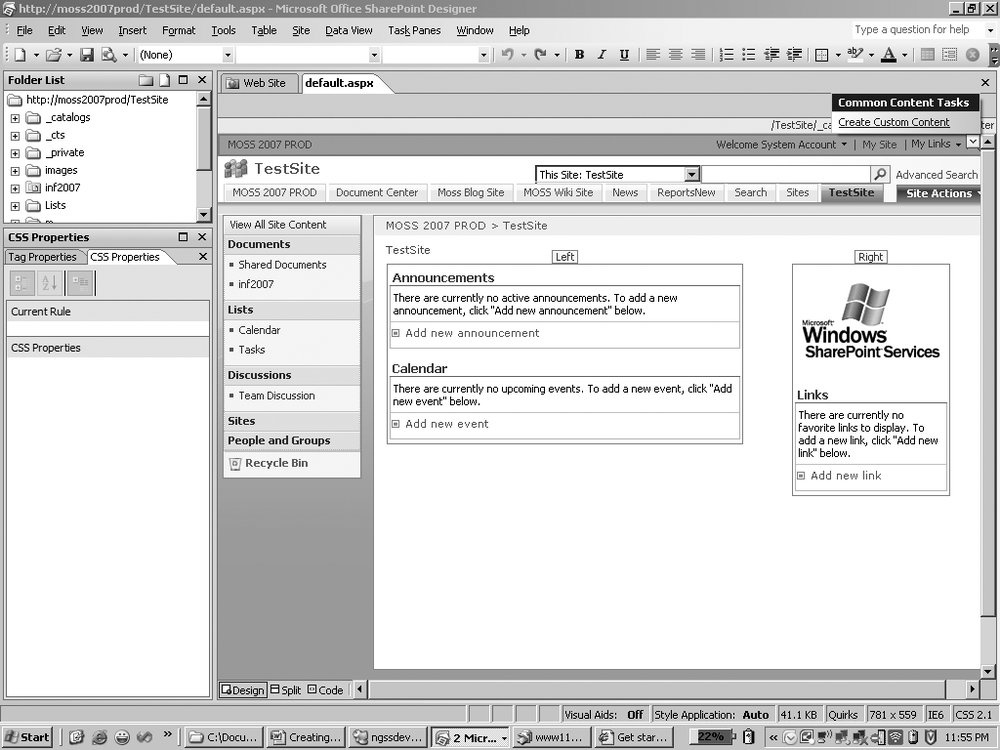
In order to customize a placeholder, you need to first unlock the placeholder by selecting it and clicking on “Create custom content.” You then can add custom content to the placeholder, as shown in Figure 19-2.
You can customize each placeholder independent of any other placeholder. However, you should remove content placeholders with great care. If you remove a content placeholder from your master page, every content page that supplies content for that region shows an error.
Just like the home page, you can customize each of the default pages in a SharePoint site. If there are changes that you cannot make to the placeholders, you can edit the master page that controls the page.

Ideally you will start with creating a site within Office SharePoint Server 2007 and then open it with SharePoint Designer 2007 to customize the site. We will start off with a basic team site on Office SharePoint Server 2007. When you open the site in SharePoint Designer 2007, you will see the screen as shown in Figure 19-3.
One of the most common tasks performed with customizing a site is branding the site to match a corporate site or intranet site. The most common changes include modifying the logo, changing style sheets, switching fonts, and realigning content to get the desired look and feel.
As you can see in Figure 19-4, SharePoint Designer 2007 provides many tools for performing these changes.
SharePoint Designer can be divided into five main zones:
- Folder List
Shows the list of files that are a part of this site.
- Tag Properties
Shows the properties.
- Toolbox
Shows the available components.
- CSS Style Management
Allows you to easily adjust style attributes.
- Main Content
Gives you an editor for viewing and changing a page.
You can add text or images to placeholders by selecting a placeholder and then making changes. For example, you can drag images that reside in your site from the folder list into the placeholder. Figure 19-5 shows how we can select a placeholder and edit it to create custom content.
Click on Create Custom Content. This allows us to edit this section. You can then change any property you want on the placeholder by using the different tools available from within SharePoint Designer 2007.

One of the main uses of SharePoint Designer is to create and configure Data View Web Parts. You can use this part to easily bring in data from any one of the following data sources:
SharePoint Lists
SharePoint Libraries
Database Connections
XML Files
Server-Side Scripts
XML Web Services
Business Data Catalog
Linked sources
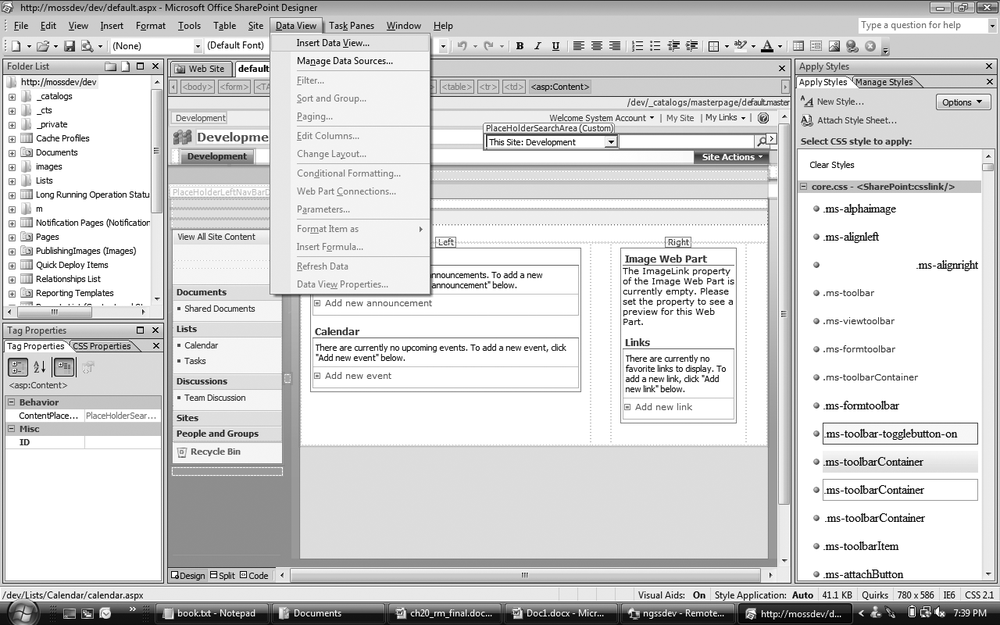
For example, let’s insert a Data View Web Part that connects to a database. Click Insert Data View from the Data View menu, as shown in Figure 19-6.
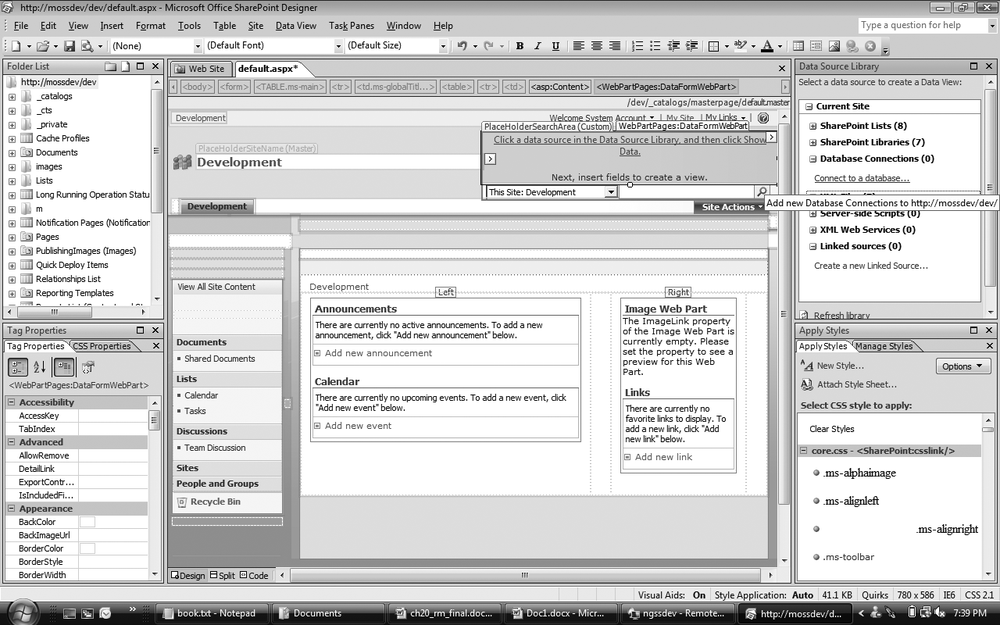
This will give you the option to select a data source from the resulting list. For our example, we will connect to a database. From the list of data sources, click “Connect to database,” as shown in Figure 19-7.
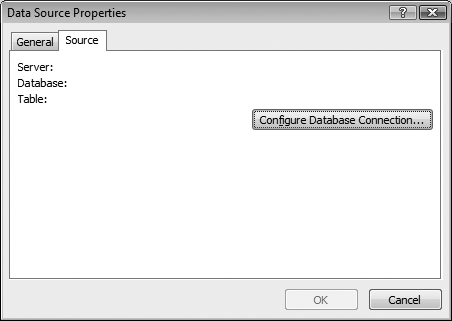
This will pop up a dialog box that prompts for database connection information, as shown Figure 19-8.
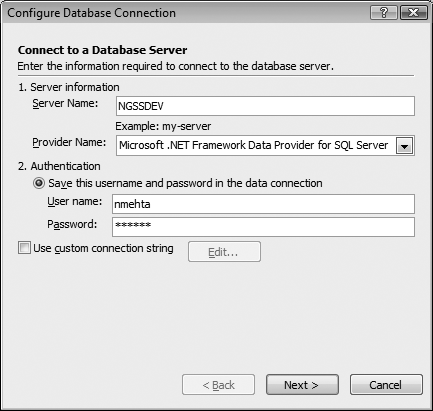
Follow the default steps to configure a connection to a database. For our example, we will connect to the Northwind database on the SQL server, as shown in Figure 19-1 and Figure 19-10.
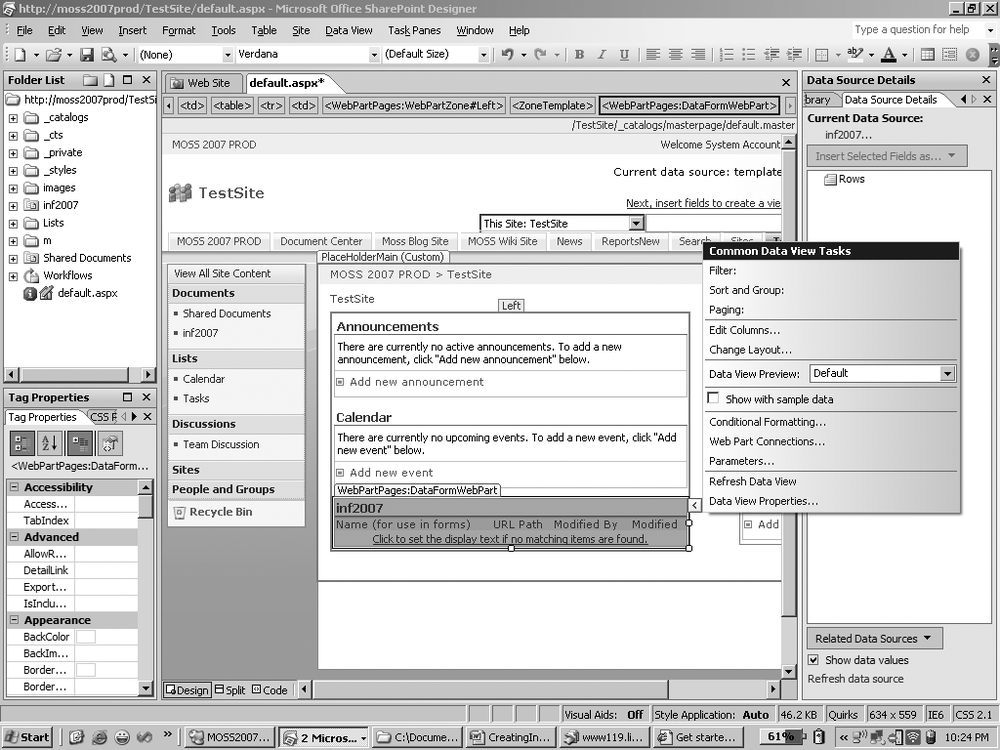
Once the connection has been successfully established, you can insert the Data View Web Part by dragging it over to the desired section. You can then change the view property by selecting Data View Properties from the Actions menu on the Web Part, as shown in Figure 19-11.

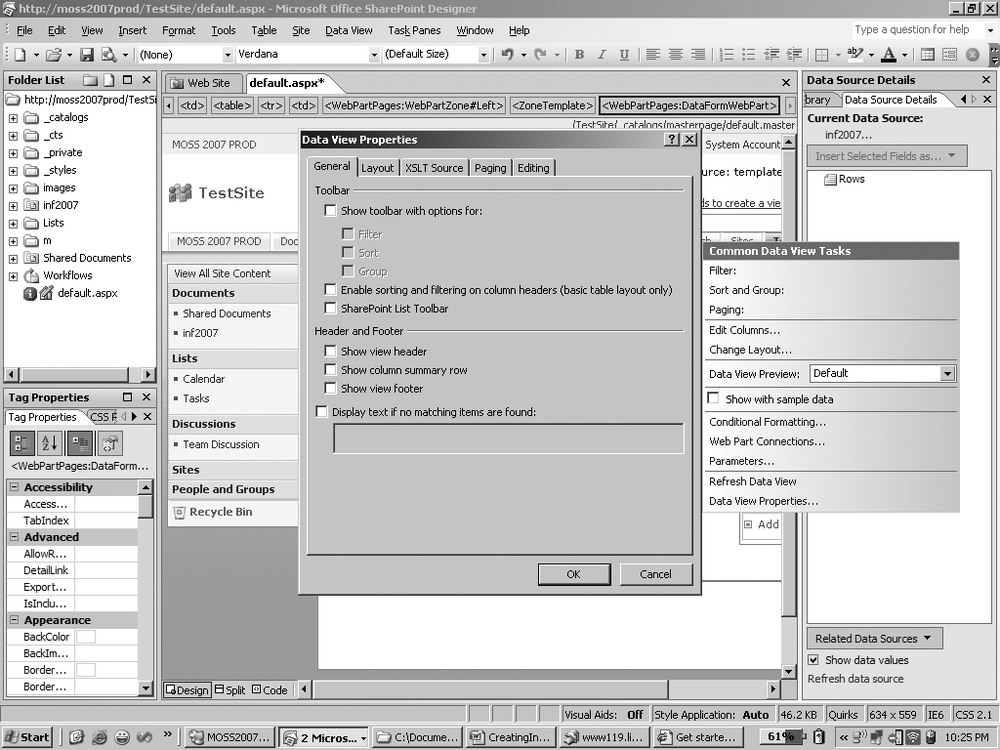
The Data View Properties dialog box (Figure 19-12) allows you to set properties on the Web Part, such as Toolbar options, header and footer styles, different HTML layouts, etc. Many of these properties are not available, or not as easily available, from the configuration screens inside the actual SharePoint site.
After you have made the necessary selections, save your settings. You can see the results by refreshing your site home page, as shown in Figure 19-13.
And that’s it. The choices are vast. You can bring in data from any of your other corporate applications, as long as the application supports one of the data sources as mentioned earlier. You can also combine data from multiple sources to show a single view.
SharePoint Designer 2007 allows you to create custom workflows for SharePoint sites without having to write a single line of code. In order to implement workflows, however, you must have the Windows Workflow Foundation part of .NET 3.0 installed on your computer. If you don’t have Windows Workflow installed, you will be prompted to install it before you create a workflow (Figure 19-14).
Once you have the required Windows Workflow Foundation installed, click File → New → Workflow, as shown in Figure 19-15.
For the sake of simplicity, let’s assume we will be implementing a really simple work-flow of populating metadata field values for a document when it is uploaded to a SharePoint Document Library. Follow the simple steps for which you are prompted. In the first screen that shows up, as shown in Figure 19-16, enter a meaningful name for your workflow, such an “Item Added.” Select startup options for the workflow from one of the following:
Allow this workflow to be manually started from an item.
Automatically start this workflow when a new item is created.
Automatically start this workflow when an item is changed.
In this case, we will select the second option, “Automatically start this workflow when a new item is created.”
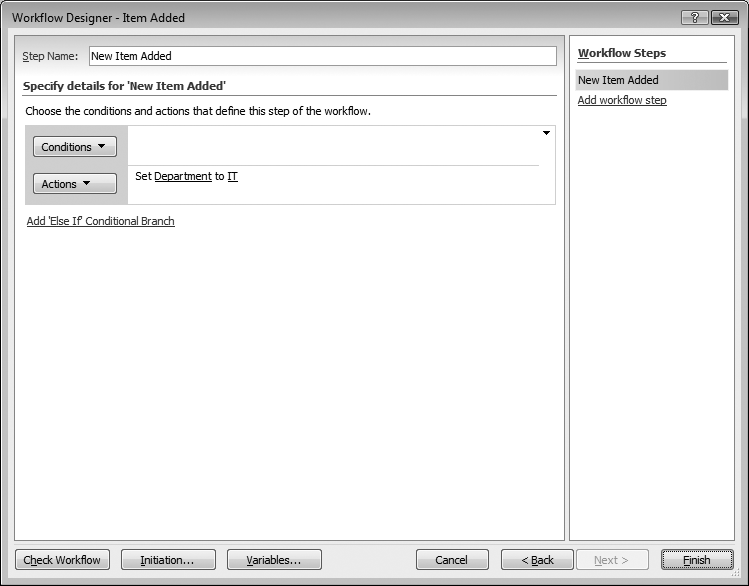
On the next screen, enter a name for the step, such as “New Item Added.” We can choose from any of the following conditions available out of the box to create a workflow. However, for the sake of simplicity, we will not select any criteria; instead, just set the action to populate the Department field value to IT whenever a document is uploaded to the library, as shown in Figure 19-17.

Click Finish to save and deploy the workflow, as in Figure 19-18.
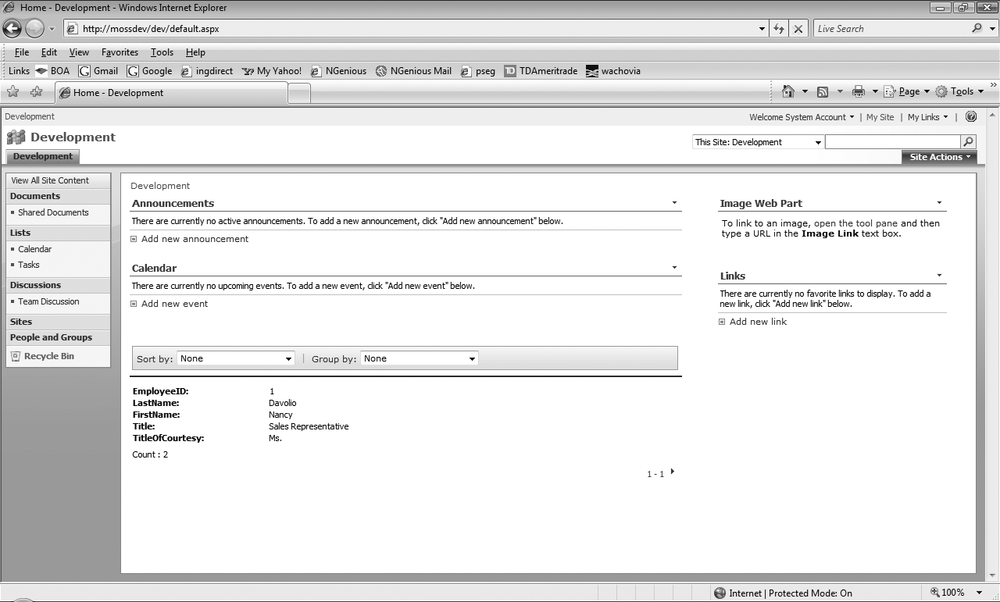
Let’s test the workflow now. Open the SharePoint site in a web browser. Upload a document to the SharePoint Document Library, and see whether it will populate the metadata field for Department. We will fill in the Title value, but the Department field is left empty, as in Figure 19-19.
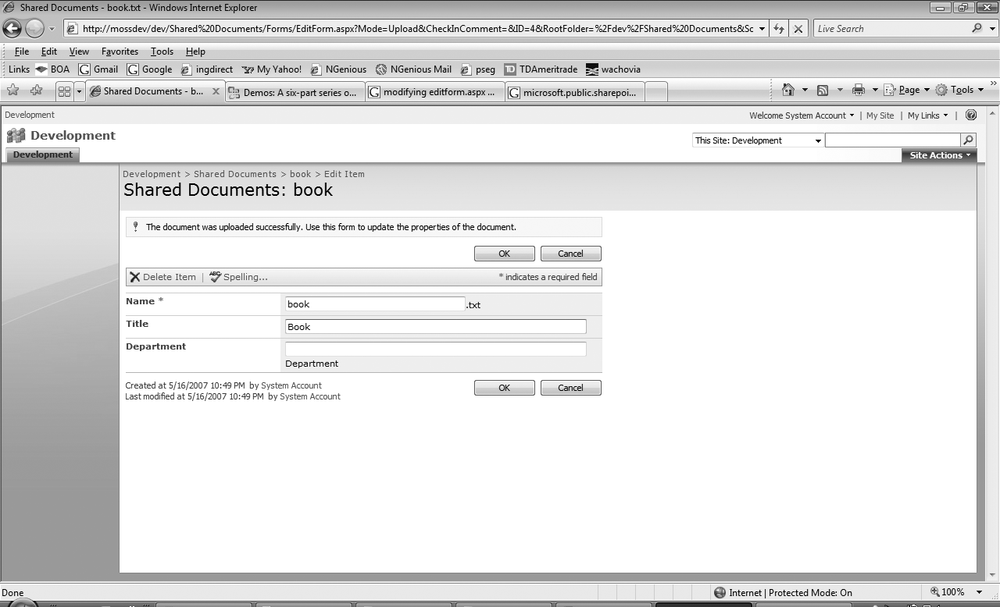
Once the file has been uploaded properly, confirm that the Department field has been updated properly, as shown in Figure 19-20.
This is just an example of how you can create some basic workflows using Share-Point Designer without having to write even a single line of code.

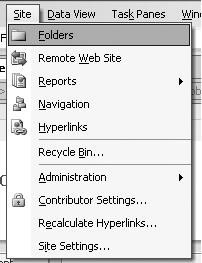
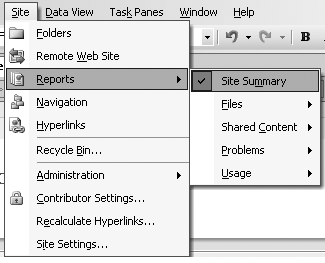
SharePoint Designer 2007 also allows us to manage the SharePoint sites. The Site menu on the toolbar contains features that allow you to manage the SharePoint team site, as shown the Figure 19-21.
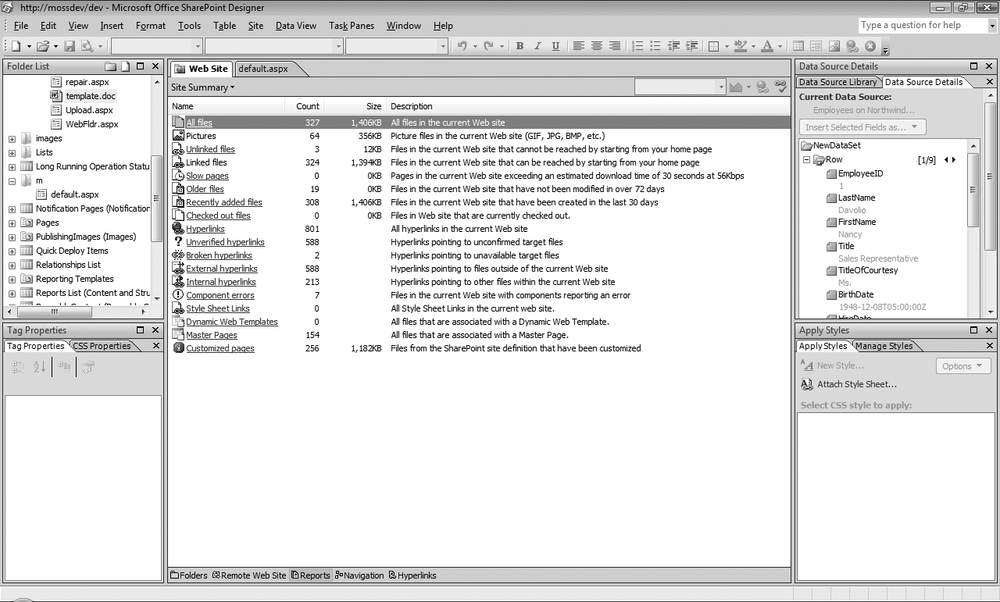
One of the most useful features available in SharePoint Designer 2007 for administering the SharePoint team sites is the ability to see the reports on the environment. Basic reports such as Site Summary, Files, Shared Content, Problems, and Usage are shown in Figure 19-22.
The site summary report gives us information about all the files in our site, as shown in Figure 19-23. This information is useful because it tells us about all the open issues related to our site.

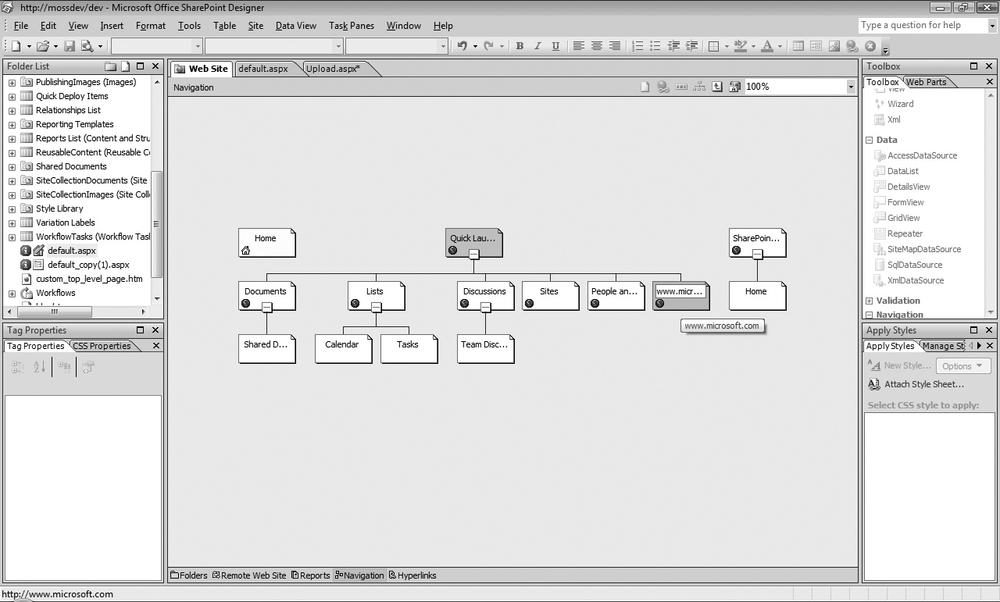
With the navigation view, you can easily change the site’s navigation by adding a new page or a custom link bar, as shown in Figure 19-24. In this figure, we are adding a link to the Microsoft site on the Quick Launch.
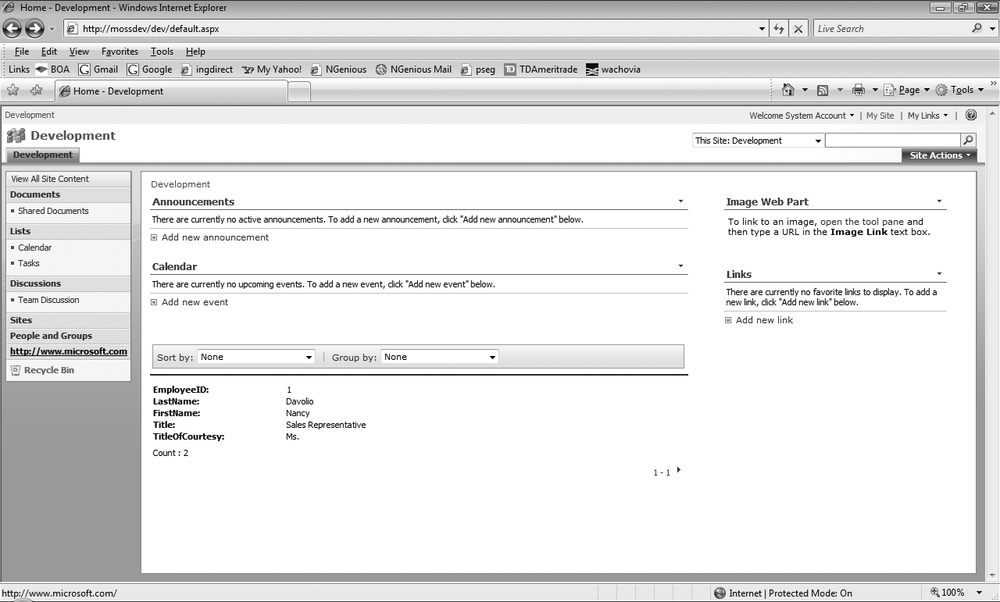
You can see on the home page that the Quick Launch now has an extra link that connects you to the Microsoft home page, as shown in Figure 19-25.
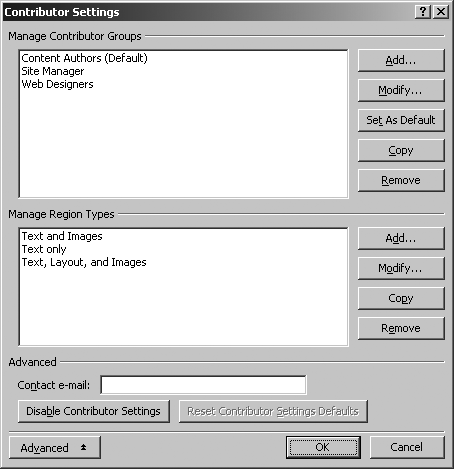
Another important setting that you can access from here is Contributor Settings. This allows setting permissions for each contributor on the SharePoint Team Site. There are three groups and three types of regions available for modification, as shown in Figure 19-26:

When you are modifying properties on the group, it allows you to set the following:

The other features are self-explanatory: