
FIELD STUDIES
WHEN SHOULD YOU CONDUCT FIELD STUDIES?
THINGS TO BE AWARE OF WHEN CONDUCTING FIELD RESEARCH
FIELD STUDY METHODS TO CHOOSE FROM
Introduction
Collecting data in the field (i.e., in your user’s environment) is sometimes referred to as “site visits.” However, “site visit” is a broad term and can include other interactions with customers while not necessarily collecting data (e.g., conducting a sales demo). More accurate names for site visits to collect data are “ethnographic study,” “field research,” or “field studies.”
“Field studies” refers to a broad range of data gathering techniques at the user’s location – including observation, apprenticeship, and interviewing. A field study can be composed of several visits to the user’s environment and can be conducted in any environment in which a user lives or works. For example, researchers observed users in a vineyard to develop a ubiquitous computing system for agricultural environments (Brooke & Burrell 2003). Studies have also been done in people’s homes and offices. Field studies can last for a couple hours to a full day or even weeks, depending on the goals and resources of the study. The advantage of this technique is that you get to observe the users completing the tasks in their environment. You can observe their task flows, inefficiencies, and challenges directly. This information can then be used to help you understand the user requirements for your product.
You will notice that this chapter is designed a little differently from the other method-related chapters. In the previous chapters, we presented one primary way to conduct a specific method and then a few modifications. There is no one best way to conduct a field study – it depends on the goals of your study and your access to users. Consequently, we will provide you with several variations from which to choose. In this chapter, we discuss different types of field studies available to enable you to go into your user’s environment to collect data, how to select the best method to answer your questions, special considerations, how to analyze the data you collect, and how to present the results to stakeholders. Additional sources for information are provided throughout, as well as lessons learned. Finally, a case study by Bentley College (for Staples) is showcased to demonstrate the value of a field study in the real world.
When Should You Conduct Field Studies?
The purpose of a field study is to understand the end user’s natural behavior in the context of his or her everyday environment. You will want to conduct a field study any time you are interested in seeing first-hand how the user works or behaves, the context of the tasks undertaken, and the artifacts used to support those tasks (e.g., checklists, forms to fill out, calendars). It can be more advantageous to observe user behavior than to ask the user to describe how he/she works because of issues with memory, social desirability, acquiescence, and prestige response bias. In addition, users often know more than they say in a single or even several interviews. It is not that they are “holding out” on you, rather that much of what they do has become automatic and, as a result, is difficult to articulate. For example, describe how you balance yourself while riding a bicycle. It’s not easy to describe, is it? Alternatively, users may incorrectly explain a behavior because they don’t understand it well enough.
You can conduct a field study to learn about an area in general (exploratory) or to answer a specific question or problem. You can also conduct a longitudinal study (i.e., a series of visits with the same participant over time) rather than an “out-of-box” or one-time exposure study. Field studies can be used to accomplish a number of goals:
![]() When the product development team needs to be jolted out of their current way of thinking or to challenge/verify assumptions that you or the stakeholders have about users/tasks/environment
When the product development team needs to be jolted out of their current way of thinking or to challenge/verify assumptions that you or the stakeholders have about users/tasks/environment
![]() Identify a mismatch between the way user’s work/think and the tools/procedures they are forced to use
Identify a mismatch between the way user’s work/think and the tools/procedures they are forced to use
![]() Identify training materials needed
Identify training materials needed
![]() Collect artifacts (i.e., objects or items that users use to complete their tasks or that result from their tasks)
Collect artifacts (i.e., objects or items that users use to complete their tasks or that result from their tasks)
![]() Verify the user profile (are people using your product who do not match your initial user profile?)
Verify the user profile (are people using your product who do not match your initial user profile?)
![]() Develop personas through observations of actual users (refer to Chapter 2, Before You Choose an Activity, “Step 2: Personas” section, page 47)
Develop personas through observations of actual users (refer to Chapter 2, Before You Choose an Activity, “Step 2: Personas” section, page 47)
![]() Collect necessary information for another usability activity (e.g., develop a survey, identify tasks for a usability test).
Collect necessary information for another usability activity (e.g., develop a survey, identify tasks for a usability test).
Field studies are excellent for collecting rich, detailed data and for obtaining a holistic view of the process or domain. Field studies are not a good technique if you want to collect quantitative data or data from large samples. The data collected are usually qualitative and it is too expensive and time-consuming to examine large sample sizes. All in all, field studies allow you to collect data to design based on reality, not assumptions. The goal of a field study is to make the implicit aspects and processes of the user environment explicit.
Things To Be Aware of When Conducting Field Research
There are several challenges you may face when proposing a field study. There are also challenges you could face while conducting the study. Below are some issues to be aware of when deciding to conduct a field study.
Gaining Stakeholder Support
It can be difficult to convince people with limited time and budgets to support field studies. Products must be developed on tight budgets and deadlines. It can be easier to convince product teams or management to support a wants and needs session or focus group, because the materials needed are few and the time frame for delivering results is short. It can be much more difficult to get that same support for longer term, off-site studies with actual customers or end users.
The fact is, no short-term, lab-based study can compare to observing users in their own environment. And the reality is that schedules slip. Even if you cannot get the information in time to influence the upcoming release of the product, there will be future releases where your data can be used. You want your information to make an impact as soon as possible, but do not let schedules prevent you from collecting information altogether.
There are also discount ways to collect information. Write a detailed proposal to demonstrate the information you plan to collect and when. Also include estimated cost, and immediate and long-term benefits. You may also want to show documented cases where products went wrong and could have been saved by conducting a field study. Better understanding of your users can also provide a competitive edge.
Despite sharing the war stories listed by Hackos and Redish, your stakeholders may still offer an abundance of arguments against conducting field studies. Below are just a few you may hear:
“We simply don’t have the time or money for such a study.”
“Sales owns the customers. We don’t want to ruin any potential deals. We don’t want to make the customer unhappy by pointing out what our product doesn’t do. This will be too time-consuming for our customers.”
“You’ll make promises we can’t keep. You’ll let out confidential information.”
“We have information already. Why collect more?”
“We’re introducing a different process so don’t waste your time studying the current process.”
“This product/process/service is completely new. There is nothing to observe.”
“Everyone does it differently so there is no point studying a few users.”
“We’re changing just one part of the system/product/environment; we don’t need to study more than that.”
“We are developing this product for our own company, not for sale, so we don’t need a field study.”
In Chapter 1, we offer counter-arguments for each of these statements (refer to Chapter 1, Introduction to User Requirements, “Getting Stakeholder Buy-in for Your Activity” section, page 14). We strongly recommend reviewing these prior to presenting a proposal for a field study.
Finally, you will likely need to educate stakeholders on the empirical nature of usability, how the information you collect on-site with users differs from lab-based data, and how the data you collect in field studies can provide a competitive edge.
Other Things to Keep in Mind
Once you have convinced stakeholders, there are a few other things to keep in mind when designing and conducting field studies.
Types of bias
There are two types of bias to be aware of when conducting field studies. The first is introduced by the investigator and the second by the participant.
If the investigator is a novice to the domain, he or she may have a tendency to conceptually simplify the expert users’ problem-solving strategies while observing them. This is not done intentionally, of course, but the investigator does not have the complex mental model of the expert, so a simplification bias results. For example, if an investigator is studying database administrators and does not understand databases, he/she may think of a database as nothing more than a big spreadsheet and misinterpret (i.e., simplify) what the database administrator is explaining or demonstrating. It is important for you to be aware of this bias and ask users or a subject matter expert to review your notes/observations. They can identify areas where you have over-simplified or incorrectly captured information.
The other type of bias is called a translation bias. Expert users will attempt to translate their knowledge so that the investigator can understand it. The more experts translate, the more there is the potential for them to over-simplify and distort their knowledge/skills/etc. One way to avoid this is to ask the expert user to train you or speak to you as if you had just started the job. If you are missing the background knowledge necessary to understand everything the user is saying, you may either ask probing questions or bring a subject matter expert (SME) with you to “translate.” However, it is to your advantage to learn as much as you can prior to your visit so that you have some mental model to begin understanding what you are observing. You should be enthusiastic about learning the domain and become well-versed yourself, but with a “usability hat on” so that you can identify opportunities for improvement. This is different from coming in with preconceived notions. You should have a good base of knowledge but do not think about solutions yet.
The Hawthorne effect
Participants may behave differently when observed; this is known as the Hawthorne effect. They will likely be on their best behavior (e.g., observing standard operating procedures rather than using their usual shortcuts). It can take some time for users to feel comfortable with you and reveal their “true behavior.” Users can’t keep up a façade for long and you’ll notice differences between participants. Developing a rapport with the user can lessen this effect.
Logistics can be more challenging
Field studies can be very simple when you are conducting pure observation. All you need is a pen and paper. Depending on the location, you may not need anyone’s permission so you are free to come and go as you please.
However, most field studies done for product development are more complex because you are interacting with more people (e.g., recruiter, sales person, site contact, other observers, participants, legal departments, etc.) and because more things can potentially go wrong on-site (e.g., broken equipment, missing forms, late arrival, dead batteries). So, field studies are much more challenging to conduct than most other techniques described in this book. Even though your equipment may fail in the lab, you are in a better position to replace/repair it than when you are traveling to an unfamiliar location. You cannot possibly take duplicates of every piece of equipment. In addition, directions to your site may be poor and driving in unfamiliar areas can be stressful. Being detail-oriented, creating a well thought out plan in advance, and piloting everything can help you avoid many problems but there will always be some surprises along the way.
Field Study Methods to Choose From
Field studies come to us from anthropology. Field studies can last from a few hours to days, weeks, or even months depending on the scope of your study and your resources. Before you can begin preparing, you need to understand the techniques available to you. Methods range from pure observation to becoming a user yourself. Table 13.1 is a chart that provides comparisons between the techniques.


Since there is no standard method, we will consider a range of techniques. The goal of each method is the same: to observe users and collect information about their tasks and the context in which they are done. The cost for each method is also very similar (e.g., your time to collect and analyze the data, recording equipment, potential recruitment fees, and incentives). The differences arise in the way you collect data and some of the information you are able to collect.
The techniques described here are divided into three categories: observation only, interacting with the user, and method supplements. The most important thing to remember when designing a field study is to be flexible. Select the method(s) that will best address the goals of your study, as well as the time and resources available to conduct it. Collect several types of data (e.g., notes, audio, video, still pictures, artifacts, sketches, diaries) to obtain a richer data set. Finally, and regardless of the type of study you conduct, do not focus on solutions before or during data collection. Doing that may bias your observations and needlessly limit the information you collect. You can conduct follow-up visits to investigate hypotheses, but – at least in the initial visit – focus on the data collection and keep an open mind.
Observation Only
Techniques that do not involve interacting with users are ideal when you cannot get permission to interview them or when you do not want the users to know you are observing them. There are also cases when you cannot interact with participants (e.g., a doctor in surgery, a trader on the stock exchange floor). Observation-only techniques have their limits in terms of the information that can be collected but they are typically less resource-intensive. There is no set number of users or sites to observe. You simply continue to observe until you feel you understand the users/tasks/environment and you are no longer gaining new insights with each new user or site.
Pure Observation
Ideally, you would like to begin your field study by simply observing. Classic ethnographic methods require one to enter a situation with an open mind (i.e., no preconceived notions or biases). You must spend significant time building sufficient understanding to know what questions to ask and what issues to research. You begin by observing the user, the tasks, and the environment before you ever formulate your first question or study goal. As we mentioned earlier, do not focus on solutions before or during data collection.
In pure observation studies, users may or may not know they are being studied. If you wanted to observe people’s initial reaction to a self-serve kiosk at an airport, you might sit quietly at a well-positioned table and simply record the number of people who saw the kiosk, looked at it, and then used it. You might also capture information such as facial expressions and overheard comments. If you didn’t need photographs or interviews from the participants, you would not need to inform them of your presence. In other situations, however, you will likely need to inform individuals that you are observing them (e.g., in office settings). Refer to Chapter 3, Ethical and Legal Considerations, page 94, for information about informed consent and appropriate behavior with participants.
Obviously, with this technique you do not interact with the participant. You do not distribute surveys, interview the user, or ask for artifacts from the user. This is simply about immersing yourself in the environment and developing questions along the way. From here, you may go back to your product team and management to recommend additional areas of focus.
The pure observation technique is valuable in situations where you cannot interact with the end users. Perhaps you cannot speak with the end user for privacy or legal reasons (e.g., hospital patients), or it is an environment where you cannot distract the user with questions (e.g., emergency room doctors). The information that you can obtain is obviously limited. You cannot find out why the user did a particular action or how the user completed the task. This is particularly challenging in situations where you are new to the domain and you may not understand much of what you are seeing. In addition, you cannot influence events; you get only what is presented and may miss important events as a result. Consequently, it is essential to have a good sampling plan. The sampling plan should include days/times you anticipate key events (e.g., the day before Thanksgiving, or bad weather at an airport), as well as “normal” days. However, regardless of how good your sampling plan is, you may still miss out on infrequent but important events (e.g., a bad weather closure at the airport, or multiple traumas in the ER). Nevertheless, the information that you can obtain is worthwhile and will bring you closer to understanding the user, tasks, and environment than you were when you began. As Yogi Berra said, “You can see a lot just by watching.”
Deep Hanging-Out
A more structured form of pure observation is referred to as “Deep Hanging-Out.” It involves significant amounts of observation along with involving yourself in the process. In addition, some structure is wrapped around the observation process.
Researchers from Intel developed this method by applying anthropological techniques to field research (Teague & Bell 2001). Their method of Deep Hanging-Out includes structured observation, collection of artifacts, and becoming a user yourself. However, you do not interview participants, distribute surveys, or present design ideas for feedback.
To make this data collection manageable, the system/environment is divided up into ten focus areas, as shown in Table 13.2. The foci are intended to help you think about different aspects of the environment. Because these foci are standardized, you can compare data across multiple sites in a structured manner (to be described in detail later).
Table 13.2
Focal points for Deep Hanging-Out (Teague & Bell 2001)
| Focal point | Some questions to ask |
| Family and kids | Do you see families? How many children are there? What are the age ranges? What is the interaction between the kids? Between the parents and the kids? How are they dressed? Is the environment designed to support families/kids (e.g., special activities, special locations, etc.)? |
| Food and drinks | Are food and drinks available? What is being served/consumed? Where is it served/consumed? When is it served? Are there special locations for it? Are people doing other things while eating? What is the service like? Are only certain people consuming food and drinks? |
| Built environment | How is the space laid out? What does it look like? What is the size, shape, decoration, furnishings? Is there a theme? Are there any time or space cues (e.g., clocks on the walls, windows to show time of day or orientation to the rest of the outside)? |
| Possessions | What are people carrying with them? How often do people access them? How do people carry them? What do they do with them? What are people acquiring? |
| Media consumption | What are people reading, watching, and listening to? Did they bring it with them or buy it there? Where do they consume the media and when? What do they do with it when they are done? |
| Tools and technology | What technology is built in? How does it work? Is it for the customers or the company? Is it visible? |
| Demographics | What are the demographics of the people in the environment? Are they in groups (e.g., families, tours)? How are they dressed? How do they interact with each other? How do they behave? |
| Traffic | What is the flow of traffic through the space? Was it designed that way? What is traveling through the space (e.g., people, cars, golf carts)? Where are the high/low traffic areas? Why are they high/low traffic areas? Where do people linger? |
| Information and communication access | What are the information and communication access points (e.g., pay phones, ATMs, computer terminals, kiosks, maps, signs, guides, directories, information desks)? Do people use them, and how often? How do people use them? Where are they located (e.g., immediately visible, difficult to access)? What do they look like? |
| Overall experience | Don’t forget the forest for the trees. What is the overall environment like? What is the first and last thing you noticed? What is it like to be there? How is it similar or different from similar environments? Are there any standard behaviors, rules, or rituals? [Think high level and obtain a holistic view, rather than concentrating on details.] |
Breadth can be important, even at the expense of depth, when first learning about an area. One use of the list in Table 13.2 is to remind you to focus on a large number of areas and not focus on just one small (easy to collect) area. This list is particularly useful for a novice – to appreciate all the areas to look at and to understand that depth in every area isn’t that important.
Another key use of the list is to help teams who are doing research together to come away with better findings. Many times a group of four to five people go out and conduct observations independently but they all come back with pretty much the same findings. This can be frustrating for everyone involved and may cause stakeholders to question the value of having so many people involved in the study or the value of the study period. Using the list of foci and giving each person a specific focus area helps to ensure that the team examines multiple areas. In addition, it gives individuals some direction and ownership and makes their insight a unique contribution to the team.
Numerous studies at Intel demonstrated that, regardless of the system, users, or environment they studied, these ten foci represented the domain and supported valuable data collection. The technique is intended to be flexible. There is no minimum number of foci to collect data about or recommended amount of time to spend observing each focus area. However, even if a particular focal point does not seem appropriate to your study, you should still try to collect information about it. The lack of information about that particular focal point can be just as enlightening! For example, you may think that the “Family and kids” focal point is not appropriate when you are studying users in their office environment. Who brings their family to work with them? But, you may observe that a user is constantly getting calls from a spouse and pages from the kids. Perhaps they are complaining because your user is never home or is late for the daughter’s recital. Maybe this means that the user is so overwhelmed with work that problems with the family life are spilling over into work, and vice versa. Even if you do not think a particular focal point is applicable to your study, you should remember to go in with an open mind!
Just as with observation only when creating your sampling plan, we recommend collecting data at different times during the day and on different days of the week. For example, you would likely observe different things if you went to the airport at 8 am on Monday, 8 am on Saturday, and 6 pm on Wednesday.
Deep Hanging-Out stresses that you are “on” at all times. Using our earlier travel example, you would begin your observations from the time you travel to the airport. Observe the experience from the very beginning of the process, not just once you are inside the airport. Pay attention to the signs directing you to parking and passenger pick-up. The intention is to obtain a holistic view of the system/environment that goes beyond Contextual Inquiry (discussed on page 580).
While you are observing the users and environment, create maps (see Figure 13.1). Identify where actions occur. If your focus is “Family and kids,” identify locations designed for families or kids (e.g., jungle gym, family bathroom). Where do families tend to linger? In addition to creating maps, collect maps that the establishment provides. Collect every artifact you can get your hands on (e.g., objects or items that users use to complete their tasks or that result from their tasks). If allowed, take photos or videos of the environment. You may need to obtain permission first, so keep this in mind.

Finally, involve yourself in the process by becoming a user. If you are interested in designing a kiosk at an airport, use each kiosk currently at the airport but never mistake yourself for the actual end user. Involving yourself in the process helps you understand what the users are experiencing, but it does not mean that you are the end user.
Here are some other tips to keep in mind when conducting pure observation or Deep Hanging-Out (Teague & Bell 2001):
![]() Maintain a low profile. Do not announce your presence and what you are doing. Stay out of everyone’s way and be quiet.
Maintain a low profile. Do not announce your presence and what you are doing. Stay out of everyone’s way and be quiet.
![]() Act like everyone else – or not. You can either blend in (e.g., clothing, behavior, language) or stand out to see people’s reactions. How would people react if you did not observe their rituals (e.g., dressing inappropriately)? Perhaps certain taboos aren’t actually taboos. You won’t know until you test them.
Act like everyone else – or not. You can either blend in (e.g., clothing, behavior, language) or stand out to see people’s reactions. How would people react if you did not observe their rituals (e.g., dressing inappropriately)? Perhaps certain taboos aren’t actually taboos. You won’t know until you test them.
![]() Find an appropriate note-taking method. You do not want to draw attention to the fact that you are observing people and making notes about their behavior. Find a method that allows you take useable notes but is not obvious. This may be as simple as bringing a pocket-sized notepad, or you may find an isolated corner where you can dictate notes into an audio recorder. Refer to Chapter 7, Interviews (page 307) for a discussion of note-taking methods.
Find an appropriate note-taking method. You do not want to draw attention to the fact that you are observing people and making notes about their behavior. Find a method that allows you take useable notes but is not obvious. This may be as simple as bringing a pocket-sized notepad, or you may find an isolated corner where you can dictate notes into an audio recorder. Refer to Chapter 7, Interviews (page 307) for a discussion of note-taking methods.
![]() Think “big picture.” Don’t think about solutions or focus on just one interesting finding. You are going for a holistic understanding of the environment, users, and tasks.
Think “big picture.” Don’t think about solutions or focus on just one interesting finding. You are going for a holistic understanding of the environment, users, and tasks.
![]() Pay attention to signs. There is a reason why signs are posted. What is the important point that needs to be conveyed, and why?
Pay attention to signs. There is a reason why signs are posted. What is the important point that needs to be conveyed, and why?
Interacting with the User
For actual product development (not just learning about a domain or preparing for another usability activity), it is almost always better to interact with users rather than just observe them. You will not get enough information to design from observation alone. You frequently need to follow-up an observational study with an interaction study. Several techniques are available to you to accomplish this, including:
Contextual Inquiry
Beyer and Holtzblatt (1998) wrote the book on Contextual Inquiry (CI) and Contextual Design. This is a very detailed method and we are unable to cover all of the fine points in this chapter. However, because this is a very popular and useful method, we would like to introduce you to the basics. For more details, please refer to the Suggested Resources box.
There are four main parts to Contextual Inquiry:
![]() Context. You must go to the user’s environment in order to understand the context of his/her actions. Contextual Inquiry assumes that observation alone or out-of-context interviews are insufficient.
Context. You must go to the user’s environment in order to understand the context of his/her actions. Contextual Inquiry assumes that observation alone or out-of-context interviews are insufficient.
![]() Partnership. To better understand the user, tasks, and environment, you should develop a master-apprentice relationship with the participant. Immerse yourself in the participant’s work and do as he/she does. Obviously, this is not possible with many jobs (e.g., surgeon, fighter pilot).
Partnership. To better understand the user, tasks, and environment, you should develop a master-apprentice relationship with the participant. Immerse yourself in the participant’s work and do as he/she does. Obviously, this is not possible with many jobs (e.g., surgeon, fighter pilot).
![]() Interpretation. Observations must be interpreted with the participant in order to be used later. Verify that your assumptions and conclusions are correct.
Interpretation. Observations must be interpreted with the participant in order to be used later. Verify that your assumptions and conclusions are correct.
![]() Focus. Develop an observation guide to keep you focused on the subject of interest/inquiry.
Focus. Develop an observation guide to keep you focused on the subject of interest/inquiry.
Unlike the methods described earlier, the user is very aware of your presence and becomes a partner in the research. Contextual Inquiry is more focused and context dependent than the previous methods. It can also be faster, taking only a few hours or a day. At the end, you walk away with actionable items to begin designing a product, your next usability activity (e.g., tasks for a usability test, questions for a survey), or areas for innovation and future research.
The process begins by developing an observation guide (see Figure 13.2). This is a list of general concerns or issues to guide your observations – but it is not a list of specific questions to ask. You may want to refer to the foci listed in Table 13.2 to build your observation guide. Using a travel agent observation example, some issues to look out for might be sources for travel research, interactions with co-workers, and length of time spent doing research for an individual client. This observation guide would obviously be influenced by the goals of your study and what you want to learn.

Next, you carefully select a few representative users to observe and apprentice with. Beyer and Holtzblatt recommend 15–20 users, but four to six is more common in industry practice. The number of participants used should be based on the question you are trying to answer. The more focused (or narrow) the question and the more consistency across users, tasks, and environments, the fewer participants are necessary. For example, if you are interested in studying only one particular task that a travel agent does rather than his/her job in general, you could observe fewer participants and feel more confident in the reliability of the results.
Context
Work with participants individually. Begin by observing the participant in action. The goal is to collect ongoing and individual data points rather than a summary or abstract description of the way the participant works. It is best to have one note-taker and one interviewer present. You can ask the participant to think-aloud as he/she works (refer to Chapter 6, During Your User Requirements Activity, “Introducing Your Think-aloud Protocol” section, page 218), or you may choose to ask the participant clarifying questions along the way. You may even decide not to interrupt the participant at all but wait until he or she has completed a task and then ask your questions. Your choice should depend on the environment, task, and user.
For example, travel agents would not be able to think-aloud as they book travel plans for clients over the phone. It would also cause confusion and annoy participants if you interrupted them with questions during the call. It is best in that case to wait until the travel agent has concluded the call and then ask your questions. Task clarification questions in the case of a hotel booking might include: “How did you determine the rate?”, “Why did you ask the customer if she had AAA membership?”, and “How were you able to pull up the customer’s personal profile?”
Partnership
Once the participant is comfortable with your presence and you have developed a rapport, you can introduce the master-apprentice relationship. (Refer to Chapter 7, Interviews, “Monitoring the Relationship with the Interviewee” section, page 290 to learn about developing a rapport with participants.) As long as the company approves it and you are not breaking any laws, the participant becomes the master and instructs you (the apprentice) on how to complete a given task. You could not apprentice next to an emergency room physician unless each patient gave you permission; but considering the nature of emergencies, it is not likely that your presence could be easily accommodated. Despite limitations in some environments, the participant can always instruct you on some aspect of his/her activities.
It is easy for certain types of relationships to develop during this time. You should avoid the three relationships listed below because they are not conducive to unbiased data collection.
![]() Expert-novice. Because you are entering the environment as a “specialist,” the user may see you as the expert. It is important for you to remind the participant that he or she is the expert and you are the novice.
Expert-novice. Because you are entering the environment as a “specialist,” the user may see you as the expert. It is important for you to remind the participant that he or she is the expert and you are the novice.
![]() Interviewer–interviewee. Participants may assume that this is an interview and, if you are not asking questions, you already understand everything. Stress to the participant that you are new to the domain and need to be instructed as if you were a new employee starting the job. The user should not wait for questions from you before offering information or instruction.
Interviewer–interviewee. Participants may assume that this is an interview and, if you are not asking questions, you already understand everything. Stress to the participant that you are new to the domain and need to be instructed as if you were a new employee starting the job. The user should not wait for questions from you before offering information or instruction.
![]() Guest–host. You are a partner with the user and should be involved with the user’s work. The user should not be getting you coffee, and you should not be concerned about invading the user’s personal space. Get in there and learn what the user knows.
Guest–host. You are a partner with the user and should be involved with the user’s work. The user should not be getting you coffee, and you should not be concerned about invading the user’s personal space. Get in there and learn what the user knows.
Interpretation
Interpretations of the data you collect will drive future decisions, so it is critical that those interpretations are correct. As you work with participants, share your interpretations with them and verify that you are correct. You do not have to worry that users will agree with an incorrect interpretation just to please you. When you create a solid master-apprentice relationship, the user will be keen for you to understand the process and will correct any misconceptions you have. He or she will often add to your interpretations as well, extending your knowledge and understanding of what you have observed.
Remember what your teacher told you: “The only dumb questions are the ones you don’t ask.” Do not be afraid to ask even simple questions. In addition to increasing your own knowledge, you can make the participants think more about what they would consider “standard practices” or the “that’s just the way we have always done it” mentality. (Refer to Chapter 7, Interviews, “Your Role as the Interviewer” section, page 277, for tips about communicating with users and helping them provide the information you are seeking.)
Focus
During the entire process, you want to keep the inquiry focused on the areas of concern. You began by developing an observation guide for the inquiry (see above). Refer to this guide throughout the process. Since the participant is the master, he or she will guide the conversation to points he/she finds of interest. It is essential for you to learn what the participant finds important, but it is also critical that you get the data necessary to guide your design/next usability activity/innovation. The user may find it more interesting to cover all topics at a high level, but your focus should uncover details in the areas that you believe are most important. “The devil is in the details” – if you do not uncover the details, your interpretation of the data will be inadequate to inform design/the next usability activity/innovation. (Refer to Chapter 7, Interviews, “Your Role as the Interviewer” section, page 277, to learn more about guiding the participant’s conversation.)
Process Analysis
A process analysis is similar to Contextual Inquiry. Unlike Contextual Inquiry, however, you enter with a series of questions (see below) and you do not necessarily apprentice with the user. It is a focused type of field study targeted at understanding the task sequence for a process that may span several days. At the end, you can develop a process map that visually demonstrates the steps in a process. (Figure 13.3 illustrates a very simple process map for a travel agent.) Because process analysis is more focused than Contextual Inquiry, it is also much faster to conduct.

![]() When does the first task in the process happen?
When does the first task in the process happen?
![]() What information does the person have when the task begins?
What information does the person have when the task begins?
![]() What are the major steps in the task?
What are the major steps in the task?
![]() What information comes out of it?
What information comes out of it?
![]() Who is the next person in the chain of the process?
Who is the next person in the chain of the process?
![]() When does the next task happen? [repeat for each task in the process]
When does the next task happen? [repeat for each task in the process]
![]() How do you know when the process is complete?
How do you know when the process is complete?
![]() Does this process connect to other processes?
Does this process connect to other processes?
![]() Is this process ever reopened and, if so, under what circumstances?
Is this process ever reopened and, if so, under what circumstances?
![]() What errors can be made? How serious are they? How often do they occur?
What errors can be made? How serious are they? How often do they occur?
Condensed Ethnographic Interview
Based on the cognitive science model of expert knowledge, the condensed ethnographic interview employs the standardization and focus of a semi-structured interview (refer to Chapter 7, Interviews, page 246) along with the context of observations and artifacts. Users are first interviewed to ask them how they accomplish a task, as well as other information surrounding their work. Users are then observed doing the task(s) in question, focusing on processes and tools. Artifacts are collected and discussed. Rather than a general observation guide, investigators use a standard set of questions to guide the visits but remain flexible throughout. One researcher developed a model of the users’ work and then asked experts for validation/correction (Wood 1996).
This approach is characterized as “top-down” – in contrast to Contextual Inquiry’s “bottom-up” approach – because the interviews form a general framework from which to interpret specific observations. This technique is considerably shorter than some of the other techniques described above but it also limits the data you are able to collect.
Discount User Observation (DUO)
Three usability professionals created a method of collecting, analyzing, and presenting observational data in a shorter time frame than other methods they were familiar with – such as Contextual Inquiry (Laakso, Laakso, & Page 2001).
“Discount User Observation” (DUO) requires two data collectors. The first is a note-taker and is responsible for taking detailed notes during the visit, as well as asking clarifying questions. The questions should not disrupt the user’s activities and should not turn into an interview. It is best to save questions until the end. Also, it is important that all notes be time-stamped. Notes can be taken either by hand or on a laptop. Using Microsoft Excel, you can write a program that automatically time-stamps each data entry. This would be less resource-intensive and error prone. See Figure 13.4 for a sample of time-stamped notes.

The second data collector is a photographer. The key difference between DUO and other methods is the critical aspect of collecting digital photographs of artifacts (e.g., printouts, business cards, notes, day planners) and the environment. Digital cameras typically include automatic time-stamps. Combining the time-stamped notes with the time-stamped photos provides a timeline of the user’s work. Following data analysis, a summary of the results is presented to users for verification and correction (see “Data Analysis and Interpretation,” page 615).
The goal of this discount method is not to save time by focusing in on any specific area of the user’s work or environment, but rather to capture a holistic picture of the user’s work, environment, and tasks. The goal is to understand the complex interdependencies of tasks, interruptions, and temporal overlaps (i.e., two actions occurring at the same time) without having to spend significant amounts of time transcribing, watching videos, or confusing raw data with inferences and interpretations.
Method Supplements
There are three activities that you can conduct in addition to the above methods, or use as standalone techniques: artifact walkthroughs, incident diaries, and observing while absent. They all require participation from the user, so they are not useful when conducting observation-only studies.
Artifact walkthroughs
Artifact walkthroughs are quick and easy but provide indispensable data. Begin by identifying each artifact a user leverages to do a particular task. Artifacts are objects or items that users use to complete their tasks or that result from their tasks. These can include the following:
![]() “Official” documents (e.g., manuals, forms, checklists, standard operating procedures)
“Official” documents (e.g., manuals, forms, checklists, standard operating procedures)
![]() Documents that get printed out as needed and then discarded
Documents that get printed out as needed and then discarded
![]() Communications (e.g., inter-office memos, e-mails, letters)
Communications (e.g., inter-office memos, e-mails, letters)
![]() Outputs of tasks (e.g., confirmation number from travel booking).
Outputs of tasks (e.g., confirmation number from travel booking).
You want to understand what triggers the use of each artifact: when is it used, and for what. Whenever possible, get copies of each artifact. If there are concerns about sensitive or private information (e.g., patient information, credit card numbers), ask for a copy of the original, black out the sensitive data, and then make a second copy. This takes a little extra time but most participants are willing to help wherever possible. You can also sign the company’s confidential disclosure agreement promising that you will keep all data collected confidential (refer to Chapter 3, Ethical and Legal Considerations, “Legal Considerations” section, page 103). The information obtained during an artifact walkthrough will be essential if you want to conduct an artifact analysis (see “Data Analysis and Interpretation,” page 615).
Incident diaries
Another technique that works well in field studies is the incident diary. Incident diaries allow you to collect ongoing data from users rather than one-time performance or opinions. They are given to users to keep track of issues they encounter while using a product.
Participants are provided with a notebook containing worksheets to be completed at home or work on their own (i.e., when you are not around to observe). The worksheets may ask users to describe a problem or issue they encountered, how they solved it (if they did), and how troublesome it was (e.g., Likert scale). The exact content of the worksheet will depend on the goals of the study. The purpose of incident diaries is to understand infrequent tasks that you might not be able to see even if you observed the user all day. In the example shown (see Figure 13.5), planning a vacation often happens over an extended period and during unplanned times. You cannot possibly be there to observe on all of those occasions and you do not want to interrupt their natural behavior. Finally, incident diaries can also be used while you are present to get two different perspectives on the same issue (e.g., during a usability evaluation).

The appeal of incident diaries is that they require little time or resources on your part. However, there are several issues with using incident diaries which call into question their validity and reliability:
![]() They are best used when problems or tasks are relatively infrequent. It is important to remember that frequency does not equate with importance. Some very important tasks happen very rarely but you need to capture and understand them. Frequent tasks can and should be observed directly, especially since users are usually unwilling to complete worksheets every few minutes for frequent tasks.
They are best used when problems or tasks are relatively infrequent. It is important to remember that frequency does not equate with importance. Some very important tasks happen very rarely but you need to capture and understand them. Frequent tasks can and should be observed directly, especially since users are usually unwilling to complete worksheets every few minutes for frequent tasks.
![]() When you are not present, there is a chance that users will not remember (or want) to fill out the diary while they are in the middle of a problem. There is no way of knowing whether the number of entries matches the number of problems actually encountered.
When you are not present, there is a chance that users will not remember (or want) to fill out the diary while they are in the middle of a problem. There is no way of knowing whether the number of entries matches the number of problems actually encountered.
![]() The user may not provide enough detail or context for the entry to be meaningful.
The user may not provide enough detail or context for the entry to be meaningful.
![]() The user may lack the technical knowledge to accurately describe the problem.
The user may lack the technical knowledge to accurately describe the problem.
![]() User perception of the actual cause or root of the problem may not be correct.
User perception of the actual cause or root of the problem may not be correct.
Despite these issues, incident diaries can give you additional insight into the user experience over time that you would not otherwise have. The caution here is not to use incident diaries in isolation. Follow-up with interviews or other usability activities.
Observing while you are not present
You can observe users even when you are not present by setting up a video camera and then leaving. This is an excellent way to understand detailed steps a user takes, especially in small environments where observers cannot fit or critical jobs where you do not want to interrupt/distract the user. In one study, researchers videotaped radiologists at work, viewed the tapes later, and formulated questions (Ramey, Rowberg, & Robinson 1996). They then set up another appointment with the radiologists about three days later to view the tapes together while the radiologists provided a running commentary (called “retrospective think-aloud” or “stimulated recall”). The interviewers inserted questions along the way. They refer to this technique as “stream-of-behavior chronicles.” To analyze the data, they categorized and indexed specific behaviors.
In another example of recording user behavior, investigators videotaped the participant’s setting and captured the participant’s computer screen (Bauersfeld & Halgren 1996). This was recorded as a picture-in-picture image with a video mixer. The user could turn the recording on and off as needed (e.g., turn off the recording to read personal e-mail). The investigators then came back two to three hours later to collect the equipment and analyze the tapes. If you have several cameras, you can record the behavior of several participants simultaneously.
Preparing for a Field Study
Before you begin any user requirements activity there are a number of things that you must be familiar with. Because these elements are common to all user requirements activities, they have been covered in the earlier chapters – but now is a good time to double-check the list. If you are not familiar with one of the items you can refer to the earlier chapter to brush up or familiarize yourself with that element.
Chapter 1: Introduction to User Requirements
![]() Get stakeholder buy-in for your activity (see page 14)
Get stakeholder buy-in for your activity (see page 14)
Chapter 2: Before You Choose an Activity
Chapter 3: Ethical and Legal Considerations
Chapter 5: Preparing for Your User Requirements Activity
![]() Develop an activity proposal (see page 146)
Develop an activity proposal (see page 146)
![]() Recruit participants (see page 156)
Recruit participants (see page 156)
![]() Develop an activity protocol (see page 191)
Develop an activity protocol (see page 191)
![]() Pilot your activity (see page 193)
Pilot your activity (see page 193)
Chapter 6: During Your User Requirements Activity
![]() Record and take notes during your activity (see page 226)
Record and take notes during your activity (see page 226)
Now that you are familiar with some of the techniques available to you, it is time to plan and prepare for your field study. Although some of the details may vary slightly depending on the data collecting technique selected, the preparation, participants, and materials remain constant.
Identify the Type of Study to Conduct
To identify the type of study you would like to conduct, use the decision diagram in Figure 13.6.

Scope your study appropriately. You may not have time to learn everything you would like to, or be able to visit all the sites you are interested in. It is critical to the success of your study to plan carefully. Create a realistic timetable for identifying the sites, recruiting the users, collecting the data, and then analyzing the data. You will have questions later on (usually during the analysis stage). If possible, leave enough time to conduct follow-up interviews. There is nothing more frustrating than running out of time and not being able to analyze all the data you have! And remember, it always takes longer than you think – so include enough extra time in case you run into snags along the way.
Write a proposal (refer to Chapter 5, Preparing for Your User Requirements Activity, “Creating a Proposal” section, page 146) that establishes the objectives of the study, identifies the user and site profile, the timeline, the resources needed (e.g., budget, materials, contacts, customers) and from whom, as well as how the information you collect will benefit the company/product/design. If you cannot provide this information, you have more research to do. It is essential that you get buy-in from all stakeholders on this proposal. You do not want stakeholders changing their focus or disagreeing about the direction of your study halfway through. The proposal will be your stake in the ground.
Players in Your Activity
In addition to participants to observe, there are a few other roles you may need to fill for your study. Each one is described below.
The participants
Once you know the type of study you would like to conduct, you need to identify the user type to investigate (refer to Chapter 2, Before You Choose an Activity, “Learn About Your Users” section, page 41). As with any of the techniques described in this book, the data you collect are only as good as the participants you recruit.
Create a screener to guide your recruitment and make sure everyone is in agreement (refer to Chapter 5, Preparing for Your User Requirements Activity, “Recruitment Methods” section, page 173).
There is no set number of users to recruit. As mentioned earlier, some people recommend 15–20 users, but time and cost restraints mean that four to six (per user type) is more common in industry practice. There are other factors to keep in mind when identifying users and sites for field studies. These include:
Diverse range of users and sites
Get a broad representation of users and sites. This includes industry, company size, new adopters and long-time customers, as well as geographical diversity. Try to get access to multiple users at each site. They may be doing the same task, but each person may do it differently, have different ideas, challenges, workarounds, etc. You also want a mix of experts and novices. Contacts at a given company will likely introduce you to their “best” employees. Explain to the contacts the value in observing both expert and novice users. In the end, though, politics and people’s availability may determine your choice of sites and users to observe. Just make sure the participants and sites meet your profile, otherwise there is no point in collecting the data. Also, try to get stakeholders involved in identifying sites, users, and contacts at those sites. They often have the contacts to help you do this.
When you begin recruiting, start small; do not recruit more users or sites than your schedule will permit. If your first set of visits is successful, you can leverage that success to increase the scope of your study. In addition, you may need to start with local sites for budgeting reasons; but if your study is successful, you could be given the opportunity to expand later.
Setting company expectations up-front
Some companies may insist, as a condition of participating, on seeing the results of your study or receiving a report on their employees. Be clear and set their expectations at the beginning; you are not there to report on the employees – it is unethical and may be a violation of labor laws. In addition, you cannot provide information gained from another company. Most often, companies will ask you to sign a confidential disclosure agreement to ensure that you will keep their data confidential (refer to Chapter 3, Ethical and Legal Considerations, page 94). You may offer to provide a copy of the notes from the sessions conducted at their site, or a very general summary, but first speak with your legal department to get permission.
Do not reveal the names of the people who participated in your study. The actions and comments you observed should not be associated with specific participants.
Some conclusions and design recommendations that you develop as a result of the site visits could be deemed confidential by your company, so you may not be able to share this information with the companies that participated.
Once you explain all this, most site contacts will understand your position. Some may still feel that you are not providing them with enough information to make participation worthwhile. Explain the benefit they will see in a new or improved product. However, if that is not incentive enough, you must move on to another site.
The investigators
Begin by identifying who wants to take part as genuine data collectors, not just as curious onlookers. You may be surprised to discover how many people want to be present during your field visits, particularly those visits in which you intend to interact with customers. In purely observational or Deep Hanging-Out studies (as described above), this is not a big issue. You should welcome some additional help in collecting data. It will speed the process, and an additional set of eyes can bring a fresh perspective to the data analysis. Expect and encourage people to get involved, but be aware of some of the issues surrounding inexperienced investigators.
You may want to establish a rule that anyone present at the site must participate in the data collection and follow a set of ground rules (see “Train the Players,” page 598). This is where you must establish yourself as the expert and insist that everyone respect your expertise. Sometimes you need to be diplomatic and tell a stakeholder that he/she cannot attend a particular visit, without ruining your relationship with that stakeholder.
Once you have a list of people who want to take part in the study, look for those who are detail-oriented, and good listeners. We recommend working in teams of just two, because that is less overwhelming for the participant being observed. Each team should consist of an investigator and a note-taker, and a videographer/ photographer (see below). Since the video camera can usually be set up in the beginning and left alone, either the investigator or note-taker can do this. And because three people can be overwhelming for a user, we recommend that either the note-taker or investigator double-up as photographer. Mixed-gender teams can help in cases where a participant feels more comfortable relating to one gender or another.
The job of the investigator is to develop rapport with the participant, and if applicable, conduct the interview and apprentice with him/her. The investigator is the “leader” in the two-person team. In cases where you lack a great deal of domain knowledge, you may not know enough about what you are observing to ask the user follow-up questions later on. You may wish to create more of a partnership with a developer or product manager. You can begin by asking participants each question, but the domain expert would then follow up with more detailed questions. Just be sure that one of you is capturing the data! Alternatively, you can bring a “translator” along with you. This may be a user from the site or an expert from your company who will provide a running commentary while the participant is working. This is ideal in situations where the participant cannot provide think-aloud data and cannot be interrupted with your questions. In a healthcare field study we conducted, we asked a member of the product team who was a former Registered Nurse to act as a translator for us. She pointed out observations that were interesting to her and which we would not have noticed. She also explained the purpose of different artifacts when users were not available to discuss them. Her help was priceless on-site!
If you have more potential investigators than you have roles, you may choose different investigators for each site. This can lower inter-rater reliability (i.e., the degree to which two or more observers assign the same rating or label to a behavior), but it may also be necessary if individual investigators do not have the time to commit to a series of visits. Having a single person who attends all visits (i.e., yourself) can ensure continuity and an ability to see patterns/trends. Having a new investigator every few visits provides a fresh set of eyes and a different perspective. It also breaks up the workload and allows more people to take part in the study. You are sharing the knowledge, and important stakeholders do not feel excluded.
If time is a serious issue for you, it may be wise to have more than one collection team. This will allow you to collect data from multiple sites at once, but you will need to train several people and develop an explicit protocol for investigators to follow (see “Develop Your Protocol,” page 599). If there is more than one experienced usability professional available, pair each one up with a novice investigator. Having more than one collection team will mean that you will lose that consistent pair of eyes, but it may be worthwhile if you are pressed on time but have several sites available to you.
The note-taker
In addition to an investigator, a note-taker is required. The investigator should be focused on asking questions and apprenticing with the user (if applicable), not taking detailed notes. You will find a detailed discussion of note-taking tips and strategies in Chapter 6 (refer to Chapter 6, During Your User Requirements Activity, “Recording and Note-taking” section, page 226). The note-taker can also serve as a timekeeper if that is information you wish to collect. You may also wish to have the note-taker serve as the videographer/photographer (see below). Lastly, it is also important to have an additional pair of hands on-site to set up equipment, and the note-taker can serve this purpose.
The videographer/photographer
Whenever possible you will want to video record your field study. You will find a detailed discussion of videotaping tips and the benefits of videotape in Chapter 6 (refer to Chapter 6, During Your User Requirements Activity, “Recording and Notetaking” section, page 226). In most cases, this person simply needs to start and stop the tape, insert new tapes as needed, and keep an eye out for any technical issues that arise.
You may also want someone to take photographs. (Again, the note-taker can often take on the roles of videographer and photographer.) Capturing visual images of the user’s environment, artifacts, and tasks is extremely valuable. It helps you remember what you observed, and it helps stakeholders who were not present to internalize the data. Even if you do not plan to include pictures of participants in your reports or presentations, they can help you remember one participant from another. A digital camera is advantageous, because if the user is nervous about what you are capturing, you can show him/her every image and get permission to keep it. If the user is not happy with the image, you can demonstrate that you deleted it.
Account managers
The account manager or sales representative is one person who may insist on following you around until he or she feels secure in what you are doing. Since this is the person who often owns the sales relationship with the customer and must continue to support the customer after you are long gone, you need to respect his/her need for control. Just make sure the account manager understands that this is not a sales demo and that you will be collecting the data. We have experienced this ourselves in more than one study. We have found that account managers are so busy that they will often leave you after an hour or less.
Train the Players
You are entering someone’s personal space; for some users, this is often more stressful for the user than going to a lab. You will also likely need to leverage multiple skill sets such as interviewing, conducting surveys, observing, and managing groups of people. If you or a co-worker has not conducted a field study before, we recommend reviewing Chapter 6, During Your User Requirements Activity, “Moderating Your Activity” section, page 220, for a foundation in moderating. You may also want to sign up for a tutorial at a conference hosted by a relevant professional organization to get hands-on training for one of the particular techniques. Shadowing an experienced usability professional is another option, but it is more difficult to do since the primary investigator will want to reduce the number of observers to an absolute minimum.
Even if the people available to collect data are all trained usability professionals, you want to ensure that everyone is on the same page – so a planning and/or training session is essential. Begin by identifying roles and setting expectations. If you need the other investigator to help you prep (e.g., copy consent forms, QA equipment), make sure he or she understands the importance of that task. You do not want to get on-site only to find that you don’t have the consent forms because of miscommunication or because the other investigator was annoyed at being your “assistant.” Also make sure that everyone is familiar with the protocol that you will be using (refer to Chapter 5, Preparing for Your User Requirements Activity, “Creating a Protocol” section, page 190).
If you will be conducting usability evaluations on-site, make it clear to all investigators that they are not there to “help” the participant. It is human nature to want to help someone who is having difficulty, but all the investigators need to remember that they will not be there to help the user later on. One usability professional keeps a roll of duct tape with him and shows it to his co-investigators prior to the visit. He informs them that he will not hesitate to use it should they offer inappropriate help or comments during the visit. It gets a laugh and helps them to remember the point.
If this will be a large field study (rather than a one-time visit), you may want inexperienced investigators to read this chapter, attend workshops, practice during mock sessions, or watch videos of previously conducted field studies. Develop standardized materials (see “Activity Materials,” page 603) and review them with all investigators. Additionally, everyone should know how to use each piece of equipment. Practice setting up and packing up equipment quickly. Labeling cords for easy identification will make setting up much faster. Finally, identify a standard notetaking method and shorthand for easy decoding.
Develop your Protocol
By now, you have selected the type of field study you will conduct. Now you need to identify your plan of attack or protocol. This is different from your observation guide (a list of concerns or general areas to observe). A protocol can include how you will interact with users (the observation guide is part of that), how much time you plan to spend observing each user/area, and what instructions you will give users (e.g., think-aloud protocol). You should also identify any activities that you want other investigators to participate in. The answers to these and many other questions need to be spelled out in a protocol (refer to Chapter 5, Preparing for Your User Requirements Activity, “Creating a Protocol” section, page 190). Without a protocol, you do not have a script for everyone to follow and each investigator will do his/her own thing. Even if you are doing the study alone, you may end up conducting each visit differently, forgetting some questions, haphazardly adding in others. A protocol allows you to collect the data in the most efficient and reliable manner possible. It also allows you to concentrate on the data collection, not trying to remember what you forgot this time.
Schedule the Visits
After you have selected your investigators, get commitment from each one and include them in scheduling discussions. They must agree to be present at the visits they are scheduled for, and they must be willing to receive training. If they do not have time for either of these, it is best to find someone else.
Below are some things to consider when scheduling your visits. The questions below may seem obvious, but when you are in the middle of creating the schedule, many “obvious” details are forgotten.
![]() Where is the site? How long it will take to get there? If there will be a significant drive and traffic will likely be a problem, obviously you do not want to schedule early morning appointments.
Where is the site? How long it will take to get there? If there will be a significant drive and traffic will likely be a problem, obviously you do not want to schedule early morning appointments.
![]() Have you checked to see if your contact or the user’s manager should be called or scheduled as part of the visit?
Have you checked to see if your contact or the user’s manager should be called or scheduled as part of the visit?
![]() Do you plan to visit more than one site per day? How far apart are they? Will there be traffic? What if you are running behind schedule at the other site? If you must visit more than one location per day, put in plenty of pad time between sites.
Do you plan to visit more than one site per day? How far apart are they? Will there be traffic? What if you are running behind schedule at the other site? If you must visit more than one location per day, put in plenty of pad time between sites.
![]() Include breaks between users or sites in your schedule. This will allow you to review your notes, rest, eat a snack, check your messages, etc. You do not want a growling stomach to interrupt your quiet observations.
Include breaks between users or sites in your schedule. This will allow you to review your notes, rest, eat a snack, check your messages, etc. You do not want a growling stomach to interrupt your quiet observations.
![]() Make sure you are refreshed for each visit. If you are not a morning person, do not schedule early morning appointments; or if your energy tends to run out at the end of the day, schedule only one visit per day. Clearly, you do not want the user to see you yawning during the interview.
Make sure you are refreshed for each visit. If you are not a morning person, do not schedule early morning appointments; or if your energy tends to run out at the end of the day, schedule only one visit per day. Clearly, you do not want the user to see you yawning during the interview.
– Lunchtime may either be good or bad for users. Find out what they prefer as well as what their workload might be during that time (see next point).
– Some users want you there when work is slow so you won’t disturb them. Obviously, you want to be there when things are busy! Make sure that the time the user suggests for your visit will allow you to observe what you are interested in.
– Consider the cyclical nature of work. Some tasks are done only during certain times of the year. Going back to the vineyard study mentioned at the beginning of this chapter, if you are interested in observing the harvest, there is a limited window in which you can observe.
– Some days of the week are worse than others (e.g., Monday and Friday). As a general rule, avoid Monday mornings and Friday afternoons. Also find out if there are standard “telecommuting” days at your user’s site?
– Be prepared to compromise. Your users have lives to live and your study is likely low on their priority list. You may have to change your original plan or schedule, but keep in mind that some data are better than none.
![]() Do not forget the other investigators. Ask them for their availability. Find out whether they are morning or evening people. It isn’t any less offensive for the note-taker to be yawning during an interview.
Do not forget the other investigators. Ask them for their availability. Find out whether they are morning or evening people. It isn’t any less offensive for the note-taker to be yawning during an interview.
![]() Find out how to make copies or print out files. Can you use the user’s facilities or will you have to find a local copy shop?
Find out how to make copies or print out files. Can you use the user’s facilities or will you have to find a local copy shop?
![]() Finally, consider the haphazard schedule of some occupations (e.g., surgeons, emergency medical technicians). They may agree to participate but be pulled away to activities you cannot observe. Be prepared to wait long periods of time. Bring other work with you to do and/or have a list of things to observe that do not require interacting with participants. Also be prepared to take advantage of sudden opportunities.
Finally, consider the haphazard schedule of some occupations (e.g., surgeons, emergency medical technicians). They may agree to participate but be pulled away to activities you cannot observe. Be prepared to wait long periods of time. Bring other work with you to do and/or have a list of things to observe that do not require interacting with participants. Also be prepared to take advantage of sudden opportunities.
Begin your study on a professional foot. When recruiting individuals over the phone, they may be skeptical. You must demonstrate that you are not trying to sell them a timeshare in Florida and you can be trusted. If your company is not well known, point people to your website for legitimacy. Give them your name and call-back information. Obviously, you should be polite even if the person on the other end is not.
If the potential participant or site contact is interested, provide all logistical details up-front (e.g., dates, times, length of stay, etc.). Get names, e-mail addresses, and phone numbers for each person you plan to speak with (not just their supervisor’s or the account manager’s information). You need this information to follow up, ask questions, and resolve issues that may arise. If the supervisor or account manager is absent, you may be unable to find your next appointment or learn that the person you are supposed to be interviewing went home sick (see “Lessons Learned,” page 623). Finally, call the night before to confirm your appointment and answer any lastminute questions the participant or site contact may have.
The final thing to keep in mind when scheduling is burnout. Burnout is a risk for extended studies. Field studies are intense activities where you must be “on” at all times. It is time-consuming to conduct each visit and analyze the data. You can also suffer from information overload. All of the sites or users tend to blur together after a while. And travel can be stressful. Take the “fatigue factor” into consideration when scheduling the visits and determining the timeline for analyzing data. Unfortunately, you may be placed in the situation where you must visit six sites in three days and there is no way around it. Alternating the roles of note-taker and interviewer between yourself and your co-worker can give you a break. At least you will not have to be “on” for every participant (encouraging participants to think-aloud, following up on questions, apprenticing). You will still be exhausted, but since you get a “break” every other participant, the data collected will hopefully not be degraded.
Activity Materials
You may have many materials to take to each site; it depends on the type of study you are conducting and what is permitted on-site. Below is a list of suggested materials for most types of studies, but you should tailor this for your own study and include more detail in your own checklist. Some of these materials may not be familiar to you, but they are all described later. This is the best way to stay organized and keep your study running smoothly from one site to the next. Without your checklist, you will likely forget at least one thing each time out.
Checklist of all materials and equipment needed
![]() Contact information for each participant
Contact information for each participant
![]() Consent forms and confidentiality agreements
Consent forms and confidentiality agreements
![]() Method of note-taking (audio recorder and/or paper and pencil)
Method of note-taking (audio recorder and/or paper and pencil)
![]() Peripherals (e.g., batteries, tapes, extension cords, power strip)
Peripherals (e.g., batteries, tapes, extension cords, power strip)
![]() Method for collecting artifacts (e.g., accordion folder, notebook, hole puncher)
Method for collecting artifacts (e.g., accordion folder, notebook, hole puncher)
![]() Method for carrying all the equipment (e.g., small suitcase, luggage cart)
Method for carrying all the equipment (e.g., small suitcase, luggage cart)
![]() Thank you gift for participant(s)
Thank you gift for participant(s)
![]() Business cards for participants to contact you later with questions or additional information
Business cards for participants to contact you later with questions or additional information
![]() Video recorder or camera and audio recorder (if permission has been obtained to record).
Video recorder or camera and audio recorder (if permission has been obtained to record).
![]() Conduct a check of your equipment prior to every visit. Are the batteries still good? Did you bring all the cords back from your last visit? Is everything behaving as it should? Practice to make sure you know how everything works and needs to be set up. Do not wait until you are in the user’s cubicle to find out the battery to the video recorder is dead or you did not bring the right power cord.
Conduct a check of your equipment prior to every visit. Are the batteries still good? Did you bring all the cords back from your last visit? Is everything behaving as it should? Practice to make sure you know how everything works and needs to be set up. Do not wait until you are in the user’s cubicle to find out the battery to the video recorder is dead or you did not bring the right power cord.
![]() Label all cords and make sure they are correct. Many black cords tend to look alike but are not interchangeable.
Label all cords and make sure they are correct. Many black cords tend to look alike but are not interchangeable.
We recommend providing an incentive for participants (refer to Chapter 5, Preparing for Your User Requirements Activity, “Determining Participant Incentives” section, page 159). We also recommend getting a gift for anyone who helped arrange your access to the site or users (e.g., account/product manager). This individual may have spent significant time finding people in the company to match your user profile, or helping you to arrange your visit. It never hurts to show your appreciation and it can also help if you ever need to access that site again. When selecting the gift, keep in mind that you must carry it along with the rest of your equipment. You don’t want to carry around several shirts in each size or heavy, breakable coffee mugs.
As we mentioned earlier, it is important to develop an observation guide. This is a list of general concerns or issues to guide your observations but it is not a list of specific questions to ask. This will help ensure you address each of the goals of your study. Next, use your observation guide to develop a visit summary template (see Figure 13.7). This is a standardized survey or worksheet given to each investigator to complete at the end of each visit. This helps everyone get their thoughts on paper while they are fresh. It also speeds data analysis and avoids reporting only odd or funny anecdotal data. Although this can be the most thought-provoking information and can bring your users to life for stakeholders, it should not be the only data you report. Stakeholders who are eager for immediate results can read the summary worksheets and know what the key points are from each visit. They will appreciate being kept in the loop and will be less likely to insist on being present at each site if they feel you are promptly providing the information.

The template should be flexible enough so that you can record data you hadn’t anticipated and avoid losing important insights. You may also further develop the template as you conduct more visits. Just make sure that everyone who views the summaries understands that they are viewing summary data from one data point. They should not begin building the product or making changes to their existing product based on their interpretations of that data.
Create any incident diaries, surveys, prototypes, or interview worksheets you may need during your study. You can also create any pre-visit activity materials such as mailing out a survey in advance to help you develop your observation guide. Incident diaries are another valuable tool to send out prior to your visit. The surveys and diaries will be extremely useful if you know you will have limited time with each participant.
Summary
We have provided a lot of information to help you prepare for your field study. Figure 13.8 now summarizes the main points. Use this checklist when preparing for your study.


Conducting a Field Study
The specific procedure for your field study will obviously vary depending on the type of study you conduct. We can offer some high-level tasks to conduct, regardless of the type of study. Just remember to remain flexible.
Get Organized
If the visit has been arranged (i.e., this is not a public location where you can observe users unnoticed), upon arrival meet with your site contact. Familiarize yourself with the environment. Where is the bathroom, kitchen, copier, etc.? Where can you get food (if that hasn’t been planned for you already)? If your site contact won’t be with you throughout the visit, how will you get to your next appointment, and so forth? If there are multiple investigation teams, decide where and when you will meet up again. Arrive at least 15 minutes before your first scheduled appointment to take care of these details. Be prepared for some extra hand-shaking and time at this point. You may need to say “hello” to the contact’s or user’s boss. This is another good reason for being early.
Meet the Participant
Again, if your visit is arranged, go to your first scheduled appointment on time. Introduce yourself and any other investigators or observers with you. If you are reviewing prototypes, it may be necessary to ask each participant to sign a confidential disclosure agreement. All participants should be aware of their rights, so ask them to sign a consent form at the beginning. Don’t forget to make copies of those forms for the user if he/she wants them. Refer to Chapter 3, Ethical and Legal Considerations, page 94, for information on these forms. (This is one reason you need to check on copying capability ahead of time.)
Explain what you will be doing and your timeframe. Also, state clearly that the participant is the expert; not you. Remind the participant that he/she is not being evaluated in any way. While you are going over the forms and explaining these points, the other investigator should be setting up the equipment. If you must invade a co-worker’s space, ask for permission and treat that person with the same respect you are showing your participant. This may sound obvious, but it is easy to overlook common courtesies when you are wrestling with equipment and trying to remember a million different things. This is when your protocol will come in handy.
Next, get a feel for the user’s environment (e.g., take pictures, draw maps, record sticky notes, note lighting, equipment, background sounds, layout, software used). While the note-taker is doing this, the interviewer should begin developing a rapport with the user. Give the participant time to vent any frustrations about your product or his/her job in general. If the user has product-specific questions or enhancement requests, state that you can record these questions and take them back to the product team, but do not attempt to answer them yourself. Participants will be curious about you and the purpose of the study. They may also ask for help. State that you cannot give advice or recommendations and that you are there simply to observe. At the end of the session, you may choose to provide the user with help, both to repay the user and to learn more about why the user needed help in the first place. Throughout, be polite and show enthusiasm. Your enthusiasm will rub off on others and make the participant feel more comfortable.
If you plan to set up recording equipment and leave for a few hours, you should still review the consent form with participants and have a discussion to make sure the participant is comfortable with being recorded. You may think it is not necessary to establish a rapport with the user; but if you want the participant to behave naturally, he or she needs to understand the purpose of your study and have the opportunity to ask questions. Enthusiasm is important, even if you won’t be there for more than 10 minutes.
Begin Data Collection
Now it is time to begin your selected data collection technique. Use an appropriate note-taking method. If you do not want people to know you are collecting data about them, select an inconspicuous method (e.g., a small notepad). If it is not necessary to hide your actions, a laptop and tape recorder may be better.
It is important to know the difference between capturing observations and inferences. Unless you verify your interpretations with the participant, do not record your assumptions as facts. Your interpretations are not raw data points and may be incorrect. Check your interpretations with the participant wherever possible. For example, imagine you are observing an agent interacting with clients and she is always smiling and is very cheery and pleasant. This is good information to record, but do not infer from that observation that she loves her job – she may feel extremely overworked but has learned to hide it with a smile. As another example, imagine you observe the travel agent spending great deal of time on e-mail. Do not infer that she is e-mailing clients – it could be co-workers, friends, family, etc. You must speak with the person to understand what you are observing.
Wrap-up
Once you have completed your selected data collection technique or when your time with the participant is up, wrap-up the session. Make sure you leave time at the end to provide any help that you promised earlier and to answer additional questions the participant may have. While the interviewer thanks the participant, answers questions, and provides the incentive for participation or a thank-you gift, the note-taker should be packing up all materials and equipment. You may wish to leave behind follow-up surveys or incident diaries. This is also a good time to schedule follow-up visits. You will often find during data analysis that you have new questions.
Organize Your Data
After the session, you will find it useful to compare notes, thoughts, and insights with your fellow investigators. Now is the time to get everything on paper or record the discussion on a tape recorder. You can complete the visit summary template individually or together. You may be tired after the session and just want to move on to the next appointment or go home, but you will be so relieved at the end of the study when you have everything well documented. You can provide quick interim reports and it will make data analysis much easier.
Now is also the time to label all data (e.g., tapes, surveys, artifacts) with a participant ID (but not their name, for confidentiality reasons), date, time, and investigation team. You may want to have a large manila envelope to keep each participant’s materials separate. It is a terrible feeling to get back to the office and not know which user provided a set of artifacts or who completed a certain survey.
When you return to the office, scan in artifacts, notes, and photos. In addition to sending out the visit summary report, you can include electronic files or physical copies of the artifacts to stakeholders without worrying about losing the originals. However, this is time-consuming if you have lots of artifacts. (We collected nearly 200 documents from one hospital during our healthcare field study!) Alternatively, you could ask participants for multiple copies of each original artifact – but this can be asking a lot.
Summary
We have given a lot of recommendations about how to conduct a successful field study. For easy referral, they are summarized in Figure 13.9.

Data Analysis and Interpretation
At this point, you have a stack of visit summary worksheets and other notes and artifacts from your visits to wade through. The task of making sense out of all the data can seem daunting. Below we present several different ways of analyzing the data. There is no one right way – you have to select the method that best supports your data and the goals of your study. The goal of any of these data analysis techniques is to compile your data and extract key findings. You do this by organizing and categorizing your data across participants. The analysis methods within this section provide you with different approaches for accomplishing this.
Before you begin your analysis, there are few key points to keep in mind:
![]() It is all good data. Some points may not seem to make sense, or it may be difficult to bring it all together, but the more time you spend with the data, the more insight you will gain from it. In other words, your first impression won’t be your last.
It is all good data. Some points may not seem to make sense, or it may be difficult to bring it all together, but the more time you spend with the data, the more insight you will gain from it. In other words, your first impression won’t be your last.
![]() Be flexible. If you planned to analyze your data with a qualitative data analysis tool but it is not working for you, consider an affinity diagram or another mechanism.
Be flexible. If you planned to analyze your data with a qualitative data analysis tool but it is not working for you, consider an affinity diagram or another mechanism.
![]() Do not present raw data. It can be quite challenging to take the detailed data from each visit and turn them into actionable recommendations for the product team. However, neither designers nor product developers want the plethora of raw data you collected. You need to compile the information, determine what is really important, and highlight it for your audience.
Do not present raw data. It can be quite challenging to take the detailed data from each visit and turn them into actionable recommendations for the product team. However, neither designers nor product developers want the plethora of raw data you collected. You need to compile the information, determine what is really important, and highlight it for your audience.
![]() Prioritize. You will likely end up with a lot of data and may not have the time or resources to analyze it all at first. Analyze the data, first based on the goals of your study, and then you can go back and search for other insights/ nuggets/ideas.
Prioritize. You will likely end up with a lot of data and may not have the time or resources to analyze it all at first. Analyze the data, first based on the goals of your study, and then you can go back and search for other insights/ nuggets/ideas.
![]() Frequency does not necessarily mean importance. Just because a user does a task frequently, that does not necessarily mean it is critical to the user. Keep the context and goals of the user’s actions in mind during analysis.
Frequency does not necessarily mean importance. Just because a user does a task frequently, that does not necessarily mean it is critical to the user. Keep the context and goals of the user’s actions in mind during analysis.
Debrief
Begin with an initial debriefing session. Once all visits have been conducted, bring all the data collectors together in a large conference room with a whiteboard or laptop and computer projector (that way you can easily save the discussion points and distribute them to the group afterward). Designate a scribe to capture the important points of the discussion. Once you have selected the analysis method (see below), work as a group to analyze the data.
The results and recommendations you obtain in the end are the same regardless of how you analyze the data. However, the method you select to structure/organize data can be easier or more difficult, depending on how you collected it. Regardless of the data collection technique used, you can use any of the analysis techniques below. You do not have to limit yourself to the analysis technique associated with your collection technique. In other words, if you conducted a Contextual Inquiry, you could use the questions from Deep Hanging Out to analyze your data. Pick the analysis method that best fits your data or the goals of your study.
Affinity Diagram
An affinity diagram is probably the most frequently used method for analyzing qualitative data. Similar findings or concepts are grouped together to identify themes or trends in the data. Most of the methods for data analysis listed below use affinity diagrams as part of their technique. A full discussion of affinity diagrams is presented in Appendix F (page 714). The details of this analysis method are located in an appendix as this analysis method is used by other methods such as interviews and focus groups.
Analyzing Deep Hanging-Out Data
It is best to begin by going around the room and asking each person to provide a one-sentence summary for each focus area (refer back to Table 13.2 on page 576). Ask the following questions when analyzing the data:
![]() What were the biggest/most important findings?
What were the biggest/most important findings?
![]() What sticks out or really grabs you?
What sticks out or really grabs you?
![]() Are there themes/patterns/coherence?
Are there themes/patterns/coherence?
![]() What’s THE story? What is the key takeaway?
What’s THE story? What is the key takeaway?
![]() What surprised you and what didn’t?
What surprised you and what didn’t?
![]() What is the disruptive or challenging information?
What is the disruptive or challenging information?
![]() If you could go back again, what else would you do or what would you do differently?
If you could go back again, what else would you do or what would you do differently?
![]() What do you wish you paid more attention to?
What do you wish you paid more attention to?
![]() If more than one person studied a focus area or observed a single user, what are the similarities and differences found?
If more than one person studied a focus area or observed a single user, what are the similarities and differences found?
Upon answering these questions, you can begin organizing the data.
Analyzing Contextual Inquiry/Design Data
You may have conducted a Contextual Inquiry to prepare for another usability activity (e.g., identify questions for a survey), to better understand the domain, or as an innovation exercise. If that is the case, you can use any of the data analysis techniques in this chapter. If, however, you conducted a Contextual Inquiry in order to inform your design decisions, you are ready to move into Contextual Design.
Contextual Design is complex and beyond the scope of this book, as we do not delve into design. If you are interested in the data analysis that is specific to Contextual Design, we strongly recommend referring to Beyer and Holtzblatt (1998). The other types of data analysis discussed in this section can be applied to the data collected from Contextual Inquiry.
Analyzing Data from Discount User Observations
Because of the unique nature of DUO’s data collection, the creators offer a unique way to analyze the data and present it to stakeholders.
Initial organization
Immediately after the visit has concluded, it is critical for the two data collectors to record the events (actions) observed on a timeline with the help of the notes and photographs. Waiting even three or four days can result in significant loss of data. Group the events observed by task. For each event, identify a task that it is associated with. Some events may be “orphans” in that you are unable to identify tasks for them. Those events may be associated with tasks that were started before you arrived or segments of larger goals that extended beyond your visit. A three to four hour observation can take four to five hours to document.
Communication
The creators of DUO recommend creating your timeline in Microsoft® PowerPoint®. On the PowerPoint master slide (i.e., the editable slide template PowerPoint uses to provide the same look for all the slides in your presentation), use the drawing tools to create a timeline along the left side of the slide. Leave ample space to insert a description of the actions, overall task or goal, and corresponding photographs. Create one set of slides per user observed.
Next, take the first task the user began during your visit and identify the associated events. Highlight each event and provide descriptive text and photos in the main content area (see Figure 13.10). Continue until all tasks are completed. Use a separate slide to discuss the orphaned events.

Figure 13.10 Sample slide presenting the timeline and description of specific events observed with a travel agent
A Gantt chart can also be used to present the timeline data DUO captures.
User verification
Once you have created a first draft of your timeline with associated tasks and photos, you should either visit the participants again and review the slides with them, or send the slides out to the participants to review on their own (e-mail works well, but you may need to physically mail them if the file size is too large). The participants should verify that the identified events are connected to the correct tasks. They will readily point out mistakes and make annotations.
Uses for documentation
There are numerous uses for the PowerPoint slides following your field study. The creators recommend using them not only to communicate the results to the users and product development, but also to leverage them during design. They use the resulting scenarios during prototype design and review. They also use the tasks they observed to provide real-world tasks during usability and system testing. Finally, they have found that the documentation helps create end user educational materials, task-based search, and a user guide organized by task.
Qualitative Analysis Tools
Several software tools are available for purchase to help you analyze qualitative data. Even so, when we surveyed several usability experts, we found that none of them had ever used such a tool. If you are interested in exploring qualitative analysis software tools, refer to Appendix G (page 722) for a description of each tool and the pros and cons of using such tools.
Communicate the Findings
Preparing to Communicate Your Findings
The specific data that you communicate to product teams can vary depending upon the activity you conducted, but some elements of how you communicate the results are the same regardless of the method. Because these strategies are common to all user requirements activities, they are discussed in detail in Chapter 14, Concluding Your Activity, page 636. We recommend that you read that chapter prior to relaying your results to your stakeholders. Topics discussed include:
Because the data collected during field studies is so rich, there are a wide variety of ways in which to present the data. Leveraging several of the techniques below will help bring stakeholders closer to the data and get them excited about your study. There is no right or wrong answer; it all depends on the goals of your study, how your data stacks up, and the method you feel best represents your data. In the end, a good report illuminates all the relevant data, provides a coherent story, and tells the stakeholders what to do next. Below, we offer some additional presentation techniques that work especially well for field study data. For a discussion of standard presentation techniques for any requirements method, refer to Chapter 14, Concluding Your Activity, page 636.
Two frequently used methods for presenting or organizing your data are the artifact notebook and storyboards.
![]() Artifact notebook. Rather than storing away the artifacts you collected in some file cabinet where people will not see them, create an artifact notebook. Insert each artifact collected, along with information about how the artifact is used, the purpose, and the implications for design. Keep this notebook in an easily accessible location. You can create several of these and include them as another educational material for the product development team.
Artifact notebook. Rather than storing away the artifacts you collected in some file cabinet where people will not see them, create an artifact notebook. Insert each artifact collected, along with information about how the artifact is used, the purpose, and the implications for design. Keep this notebook in an easily accessible location. You can create several of these and include them as another educational material for the product development team.
![]() Storyboards. You can illustrate a particular task or a “day-in-life” of the user through storyboards (using representative images to illustrate a task/scenario/story). Merge data across your users to develop a generic, representative description. The visual aspect will draw stakeholders in and demonstrate your point much faster.
Storyboards. You can illustrate a particular task or a “day-in-life” of the user through storyboards (using representative images to illustrate a task/scenario/story). Merge data across your users to develop a generic, representative description. The visual aspect will draw stakeholders in and demonstrate your point much faster.
Hackos & Redish (1998) provided a table summarizing some additional methods for organizing or presenting data from a field study. A reduced version is reproduced here as Table 13.3.
Table 13.3
Methods for presenting/organizing data. (Hackos & Redish 1998)
| Analysis method | Brief description |
| Lists of users | Examine the types and range of users identified during your study, including estimates of their percentages in the total user population and a brief description of each. |
| Lists of environments | Examine the types and range of environments identified during your study, including a brief description of each. |
| Task hierarchies | Tasks are arranged in a hierarchy to show their interrelationships, especially for tasks that are not performed in a particular sequence. |
| User/task matrix | Matrix to illustrate the relationship between each user type identified and the tasks they perform. |
| Procedural analysis | Step-by-step description examining a task including the objects, actions, and decisions. |
| Task flowcharts | Drawings of the specifics of a task including objects, actions, and decisions. |
| Insight sheets | List of issues identified during the field study and insights about them that may affect design decisions. |
| Artifact analysis | Functional descriptions of the artifacts collected, their use, and implications/ideas for design. |
Lessons Learned
In the course of conducting field studies over the years, we have learned some painful lessons. These include working with customers, account managers, and product managers.
Surprise Guests
Several years ago, Kathy and another co-worker went on-site to several customers in the Atlanta area. It took about two to three months to arrange the visits. The product team was invited to participate in the field study from the very beginning, but declined. We later learned that they were conducting their own “site visits” with customers along the east coast during the same time as our field study in Atlanta.
We were fortunate that our company’s account manager for the Atlanta customers was open to our study, but it was clear that she was a bit nervous about our presence. She was relieved to hear that only two people would be conducting the visits (less people to manage and fret over). Upon arriving at our first site, the account manager came up to us and fumed, “I thought you said there were only two of you!”
We were stunned and didn’t understand what she was talking about. She replied that four other members of “our team” had already arrived and were waiting. When we walked around the corner, four product managers greeted us. Needless to say, we were astonished. They decided that, since they were so close, they might as well fly down and join us. Because we had sent the product team copies of all documents (including our agenda) they knew exactly where to go and who to contact. Unfortunately, they felt no need to inform us of their change in plans.
Since we did not expect the additional guests, we had not conducted any training sessions or even discussed the appropriate protocol. Our intended activity was a focus group with about eight database administrators. We knew we could not delve into each question deeply but we wanted to get an overall impression. We could then use the upcoming individual interviews to delve into the important issues that arose from the focus group. Unfortunately, the product managers were not on the same wavelength. They drilled down into each question in such painful detail that a couple of users actually walked out of the session. We then decided to split up for the individual interviews. We suggested that the product managers interview one user while we interviewed another. It allowed the product managers to be involved but they were not able to influence the data we were collecting during our interviews. The data the product managers collected were not incorporated into our data analysis because the questions they asked were quite different, being feature-oriented.
Considering our close relationship to the team before this activity, it was all the more shocking that they did not understand the inappropriateness of their behavior. The lesson learned here is that you should be prepared for anything! Have a back-up plan. In this case, we split up so that the team could interview some participants while we interviewed others. We got the data we needed without alienating the product team, although our credibility with the account manager was a bit scuffed at the end.
Missing Users
At another location in Atlanta, we had difficulty finding our participants. The supervisor who had arranged for his employees to speak with us had an emergency at home and had to leave early. Unfortunately, no one knew which of his employees he wanted us to speak with. We walked around the floor, asking people whether they had been asked to participate in our study. We found only one participant. We now know to insist on getting the names and contact information for all participants, even if there is one point of contact that will take you to each participant.
Pulling It All Together
In this chapter, we have discussed the best uses for field studies and things to keep in mind when proposing them. We have presented a plethora of techniques for collecting, analyzing, and presenting the data. Considering the complexity of field studies, tips and recommendations have been provided throughout. Finally, painful lessons learned illuminate common mistakes we are all capable of making.
Understanding the Staples Delivery Experience
Beth Loring, Bentley College, and Kelly GordonVaughn, American Institutes for Research
Staples is an $11.6 billion retailer of office supplies, business services, furniture, and technology. Staples provides its products and services to a wide variety of customers in North America and Europe, from home-based businesses to Fortune 500 companies. American Institutes for Research (AIR) is a not-for-profit human sciences research firm whose Concord, MA, office is considered one of the country’s leading usability engineering groups.
Staples partnered with the usability engineering group at AIR to conduct both internal and external user needs research targeted at improving the Staples customer experience. The overarching goals of this “life of an order” project included understanding the process of placing an office supply delivery order from a business customer’s perspective; identifying opportunities to improve the ease-of-use of Staples’ catalog, website, and customer service; and stimulating ideas for future research.
AIR worked closely with Staples to develop a research plan that addressed the goals of the study. As the plan evolved, the study segmented into two phases, internal and external. In the internal phase, AIR conducted research (including field studies and shadowing) with Staples’ employees who interact directly with business customers. The purpose of this phase was to identify opportunities to improve the ordering and delivery process from “behind the scenes,” and to obtain an internal point of view on ways to improve existing levels of customer satisfaction. The second (external) research phase involved conducting 23 field studies with small to medium-sized Staples business customers in their workplaces. The purpose of the second phase was to obtain feedback about the Staples customer experience and to identify “points of pain” in the current ordering and delivery process. The second phase was of primary importance to Staples.
As described in the following sections, the research provided Staples with a thorough understanding of the life of an order. Specifically, it provided valuable qualitative information and a rich set of video and photographic evidence that proved particularly compelling to stakeholders within the Staples organization. The final result was a set of detailed recommendations for enhancing the Staples customer experience.
Our Approach
As is common with many research projects, the schedule was tight – the AIR team had slightly over four months to complete the study. The first two months were spent planning the study, preparing the materials, and conducting the internal research. The third month was spent conducting the external research, and the fourth month was spent analyzing the data and preparing the final report. Due to the responsiveness and commitment of the project manager on the Staples side, there were no unwanted gaps in the schedule. Also, AIR employed a core team of four usability specialists (including the project manager), as well as occasional help from other staff members, in order to accomplish the work in four months.
Internal Research
Planning for the internal research phase included determining the appropriate individuals to interview, scheduling participants, and developing interview scripts for the field studies and shadowing activities. AIR and Staples managers collaborated to accomplish these tasks. We determined that the most valuable Staples participants would be those who interact most frequently with business customers, and that the timeframe for the internal phase would have to be limited in order to maintain primary focus on the external research. Ultimately, the internal research participants included several Staples delivery drivers (one Staples fleet driver and one contract delivery service), and six customer service representatives at the Staples customer service center in Halifax, Nova Scotia.
To prepare for the internal research, AIR created two separate interview scripts, one for the delivery drivers and one for the customer service representatives. The scripts contained structured data collection forms that incorporated areas for interviewer notes. AIR also created checklists of materials to bring into the field, such as interviewees’ contact information, clipboards, video camera, digital videotapes, digital camera, and extra batteries.
Shadowing the Delivery Drivers
AIR shadowed a Staples fleet delivery driver for one day. We selected a driver whose schedule included different types of small to medium-sized businesses, as well as several residences and a hospital.
Two AIR team members rode with the driver as he made scheduled deliveries in the Greater Boston area. During the course of the day, we interviewed the driver about his job and his impressions of how the Staples customer experience could be improved. Due to the long duration of the shadowing, both team members participated in the interviewing, note-taking, and handling of the video camera and digital camera. We took turns noting any usability issues the driver encountered with the delivery forms and equipment, as well as any ergonomic issues regarding the handling of the boxes.
Several days later, the same AIR team shadowed a contract delivery company in New Hampshire for one day as its team of two men delivered Staples office supplies to small to medium-sized businesses and residences. We followed the same procedure with the contract delivery company as was used with the fleet driver.
Conducting Field Studies with Customer Service Representatives
At the customer service center in Halifax, the same two AIR team members spent one day interviewing six phone representatives. This time, we conducted separate interviews simultaneously in order to maximize the number of customer service representatives included. We observed, videotaped, and photographed the representatives as they worked, and listened to their conversations with customers via headsets.
During the course of the day, we were able to observe representatives taking orders, handling calls about existing orders, and taking information from customers who wanted to establish Staples accounts (see Figure 13.11). Using our interview scripts, we noted any usability issues the representatives experienced, such as difficulties using the software interfaces, as well as any suggestions they made for ways to improve customer service.

External Research
To plan the external phase of the study, the AIR/Staples team began by determining the appropriate number and types of business customers to target for the field studies. We decided that the sample should include participants from two of Staples’ major markets, Boston and Los Angeles. Further, we developed a detailed profile for the type of customer that would provide the most appropriate feedback in relation to the project goals.
After carefully weighing many factors, we targeted our recruiting toward individuals who placed office supply orders at small to medium-sized businesses. Potential participants were further segmented according to factors such as their Staples ordering history, ordering volume, and primary ordering channel (e.g., website vs. catalog-and-phone). AIR created a detailed participant matrix, ensuring that the appropriate number of participants was represented in each cell.
Using lists provided by the Staples marketing group, AIR recruited 24 participants (12 from each city) who met the predetermined criteria. Even with such a targeted list of potential participants, the recruiting required hundreds of phone calls over the course of two weeks. Many customers were interested in participating, but they were reluctant or unable to have their workday interrupted. In addition to ordering office supplies, these customers were typically responsible for office administration, reception, answering phones, and other key office activities. As such, it was difficult for them to make even a short time commitment during work hours (9 am to 5 pm), even though they were interested in the $100 cash incentive offered. In spite of these obstacles, AIR was successful in recruiting 24 participants who matched the research criteria.
AIR prepared a script for the field studies that included an introduction, a semi-structured interview, an observation section (used to record observations as the customer placed a delivery order via their preferred channel), and a debriefing section (see Figure 13.12). As with the internal research, the script also incorporated areas for interviewer notes. As we had completed the internal research phase by this time, the findings from that phase informed the script development for the external phase. For example, we incorporated issues identified by the delivery drivers or customer service representatives, such as how customers communicate with Staples regarding a problem with a shipment, into the interview questions for the business customers.

The AIR team pilot-tested the field study script with their own office manager, who matched the customer profile. We then refined the script based on the results of the pilot test, for example, reorganizing some of the interview questions.
Conducting Field Studies with Business Customers
A three-person research team, including two AIR team members and one Staples observer, conducted each field study. Staples felt that it was important to have an observer attend each field study in order to hear customers’ comments first-hand. During the visit, one AIR team member conducted the interview while the other handled the cameras, although the roles were alternated from visit to visit. The Staples observer listened and took notes, asking occasional probing questions on particular points of interest. Prior to the visits, we set ground rules with the Staples observer for interacting with customers to ensure that the interviews would stay on track and remain unbiased.
We began the field studies by explaining the purpose of the research and obtaining written consent from the customers. Next, we interviewed customers about their office supply ordering process and associated activities (e.g., gathering orders, selecting items, storing items, and returns and exchanges). We conducted most of the interviews at the customers’ desks. However, some customers preferred to be interviewed in a conference room or other quiet area so as not to disrupt office activities.
After the interview, we asked customers to place an office supply order as they normally would (see Figure 13.13). All customers had been asked to reserve their office supply order until the field study. However, we found that several had already placed their normal order and therefore they placed a smaller order while being observed.
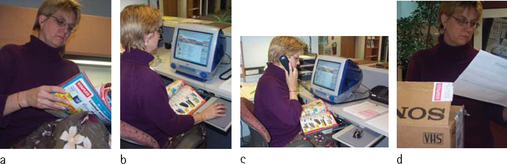
Figure 13.13 Office manager (a) checking for an item in her catalog; (b) using the catalog in conjunction with the website to order supplies; (c) calling Staples to check on the availability of an item for next-day delivery; (d) checking delivered goods against the Staples invoice
After customers had placed their order, we asked them for a tour of their workplace, specifically indicating where office supplies were delivered, unpacked, sorted, and stored. We asked them to show us where they stored office supply catalogs, how they filed their receipts, and how they paid their invoices. We collected interesting artifacts during this portion of the field study, such as examples of re-ordering checklists and notes from coworkers indicating what supplies were needed.
Following the tour, we asked the customers for any final comments or suggestions for simplifying ordering processes, and then compensated them for their valuable time.
Analysis
To analyze the data from both the internal and external research, the AIR team first compiled a comprehensive list of findings. Each team member typed up his or her notes, which included customers’ answers to the interview questions. The Boston team then read the notes from the Los Angeles field studies, and vice versa. Next, AIR built a database and entered observed usability issues and reported incidents (both positive and negative) that affected customers’ experiences with Staples. The database allowed us to sort the issues and incidents according to the area of Staples service that was impacted, allowing the various groups within Staples to focus on the findings that mattered most to them. Thus, the database had categories for catalog-related findings, website-related findings, and delivery-related findings, among others.
Because the field studies generated such a large number of digital images, the AIR team found it difficult to locate specific photos. To solve this problem, we created an HTML-based photo archive that made browsing the photos much easier.
Over the course of several weeks, the AIR/Staples team worked closely to prioritize the list of over 50 findings and brainstorm creative ways to address each issue. We organized the findings to correspond with stages of the ordering process, from planning the order through to billing. Each finding was assigned an urgency rating (high, medium, or low), an impact assessment (such as “Will increase customer retention”) and an “owner,” which was the person within Staples who would be responsible for addressing the issue.
Findings
AIR presented the findings from the study in a multimedia format using Macromedia® Director®. Director was selected, rather than a presentation tool such as Microsoft PowerPoint, for its ability to handle large numbers of video clips. Director also allowed us to add custom controls for navigating back and forth through the presentation and for playing the video clips. Each finding was presented on a slide along with a customer quote and one or more video clips to stimulate discussion from the audience. The multimedia presentation proved highly effective and AIR was asked to repeat the presentation several times to various audiences within Staples.
Overall, the research showed a high level of satisfaction with Staples’ customer service. Because of this, the first finding in the presentation was “Customers had mostly positive things to say about Staples’ delivery.” Examples of other findings generated by the study were:
![]() Many customers shopped using more than one channel. For instance, Web users often referred to their catalogs for item numbers in order to expedite the process of placing an order online.
Many customers shopped using more than one channel. For instance, Web users often referred to their catalogs for item numbers in order to expedite the process of placing an order online.
![]() Customers personalized their catalogs by flagging frequently ordered items with sticky notes, by circling items, or by folding page corners. This required them to transfer their flags when a new catalog arrived.
Customers personalized their catalogs by flagging frequently ordered items with sticky notes, by circling items, or by folding page corners. This required them to transfer their flags when a new catalog arrived.
These findings, as well as numerous similar findings, gave Staples a clear understanding of the life of an order. Additionally, it provided opportunities to enhance the Staples customer experience, and generated many ideas for future research.
Lessons Learned
Looking back on this project, we have identified the following lessons regarding field studies:
![]() Close collaboration and a true team approach with an invested client yields the best results.
Close collaboration and a true team approach with an invested client yields the best results.
![]() Whenever possible, schedule field studies in adjacent ZIP codes during the same day to minimize travel time between sites.
Whenever possible, schedule field studies in adjacent ZIP codes during the same day to minimize travel time between sites.
![]() When scheduling the field studies, ask participants to be prepared to carry out the activities you are interested in observing. In this case, we asked customers to place actual orders, which made the observation portion of the field studies more authentic.
When scheduling the field studies, ask participants to be prepared to carry out the activities you are interested in observing. In this case, we asked customers to place actual orders, which made the observation portion of the field studies more authentic.
![]() Flexibility is important. In this case, if participants naturally began with a tour of their office, we asked questions from the section of the script that required movement within the work environment. Similarly, if more than one individual placed office supply orders, we interviewed both of them.
Flexibility is important. In this case, if participants naturally began with a tour of their office, we asked questions from the section of the script that required movement within the work environment. Similarly, if more than one individual placed office supply orders, we interviewed both of them.
![]() When necessary, briefly suspend the interview to allow the customer to continue working.
When necessary, briefly suspend the interview to allow the customer to continue working.
![]() Be aware that some participants will express concern about being videotaped. In this case we offered a few options: (1) audiotaping and taking digital photographs; (2) audiotaping only; or (3) hand-written notes only. Most participants who declined to be videotaped allowed us to videotape their computer screen if they placed an order via the website.
Be aware that some participants will express concern about being videotaped. In this case we offered a few options: (1) audiotaping and taking digital photographs; (2) audiotaping only; or (3) hand-written notes only. Most participants who declined to be videotaped allowed us to videotape their computer screen if they placed an order via the website.
![]() Finally, it is important to be as unobtrusive as possible during field studies. This particular study involved three-person teams, which AIR typically considers a maximum.
Finally, it is important to be as unobtrusive as possible during field studies. This particular study involved three-person teams, which AIR typically considers a maximum.
This case study proved that field studies are a unique and effective means of gathering customer data. This method provides an inside look at customers’ environments, behaviors, and use patterns that is impossible to achieve with other user research methods.
Acknowledgments. The authors wish to acknowledge the major contribution of Colin Hynes, Director of Usability at Staples, for sponsoring this research and providing input into this case study