
22. Managing Your Desktop with Exposé and Spaces
Taking Control of Your Desktop
Modern Macs now routinely ship with 2GB of RAM installed, and most of the latest iMac models come with 4GB to play with (and support up to 8GB). In other words, most Macs now have plenty of room in RAM to open as many applications as you need for working or playing.
The downside to having lots of applications on the go is that your desktop can get cluttered and crowded in a hurry, which can make finding the specific application or document you need a real needle-in-a-digital-haystack exercise. If you find that you’re wasting lots of precious time trying to sort through that mess you call a desktop, it’s time for some spring cleaning. I’m talking here about a couple of Mac OS X tools that can knock some sense into an out-of-control desktop:
• Exposé—This Mac OS X feature is a window management program that temporarily shrinks all your running windows and then arranges them on your screen so that nothing overlaps. This lets you see at a glance what’s in each open window, and then you can select the one you want with a quick click of the mouse.
• Spaces—This Mac OS X feature lets you set up not just a single desktop, but a whole herd of them—up to 16 in all! These are called spaces and they act as virtual desktops. The idea is that you configure each space with a single application that has multiple windows, or with multiple applications that are related in some way.
This chapter introduces you to Exposé and Spaces. However, to fully appreciate the power and usefulness of these tools (or, on the other hand, to understand whether you need to use them at all), you should know the standard Mac OS X techniques for managing your desktop applications, so that’s where we’ll begin.
Managing Your Running Applications
If you have a single application on the go, and you have only a single window open in that application, there’s really nothing to manage as far as your desktop is concerned, because you have just a single window open. These days, that’s a pretty rare scenario, as most of us not only have multiple applications up and running, but also multiple windows open in many of those applications. To handle all those desktop windows, you need to know a few useful Mac OS X techniques, particularly how to switch between running applications and their windows, and how to temporarily hide an application that you won’t be using for a while.
Switching Between Running Applications and Windows
If you’ve got two or more applications on the go (including Finder, which is always running), you need some way to switch from one application to another. The two most obvious methods are either to click inside an application’s window, if you can see it, or to click the application’s Dock icon. (Remember that Mac OS X displays a blue dot below the Dock icon of each running application.)
Those techniques work well, but they’re not often the handiest. For example, if your hands are near the keyboard, you might prefer to keep them there to make the switch. In that case, your Mac offers you three keyboard techniques for switching applications:
• Press ![]() -Tab—This technique switches between the current application and the application you used most recently.
-Tab—This technique switches between the current application and the application you used most recently.
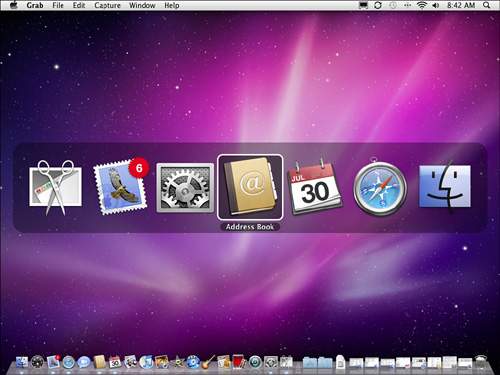
• Hold down ![]() and tap the Tab key—The first time you tap Tab, you see a menu that shows an icon for each running application, as shown in Figure 22.1. With each subsequent press of the Tab key, Mac OS X highlights the next icon in the menu. When the application you want is highlighted, release
and tap the Tab key—The first time you tap Tab, you see a menu that shows an icon for each running application, as shown in Figure 22.1. With each subsequent press of the Tab key, Mac OS X highlights the next icon in the menu. When the application you want is highlighted, release ![]() to switch to that application. Note, too, that if you prefer to cycle through the icons from right to left, hold down both Shift and
to switch to that application. Note, too, that if you prefer to cycle through the icons from right to left, hold down both Shift and ![]() and then tap Tab.
and then tap Tab.
Figure 22.1 Hold down ![]() and tap the Tab key to cycle through the icons of your running applications.
and tap the Tab key to cycle through the icons of your running applications.
• Hold down Control and tap the F4 key—This technique cycles through all the open windows in your running applications. For example, if you have two Safari windows open, you see both windows as you tap F4. When the application window you want is onscreen, release Control to switch to that window. If you want to cycle through the windows in the reverse order, hold down both Shift and Control and then tap F4. (Note that for all this to work, your Mac’s keyboard must be configured to use F1 through F12 as standard function keys; see Chapter 30, “Working with Mice, Keyboards, and Other Input Devices,” for more info.)
![]() See “Configuring a Keyboard,” p. 593.
See “Configuring a Keyboard,” p. 593.
Tip
![]()
When you have the menu of running application icons displayed, you can also switch to an application by clicking its icon.
On the other hand, if you’re currently using the mouse, you might prefer a mouse-based technique for switching applications. That’s no problem as long as you have a mouse with a scroll wheel in the middle:
• Tap the scroll wheel—Use this technique to switch between the current application and the application you used most recently.
Tip
![]()
If you have two or more windows open in a single application, hold down ![]() and repeatedly press the backquote key (`) to cycle through the open windows. (Hold down Shift, as well, to cycle the windows in reverse.)
and repeatedly press the backquote key (`) to cycle through the open windows. (Hold down Shift, as well, to cycle the windows in reverse.)
• Press down the scroll wheel and tilt it to one side—When you press and hold down the scroll wheel, you see the same menu of running application icons as you saw earlier in Figure 22.1. Tilt the scroll wheel to the right to cycle through the icons left to right; tilt the scroll wheel to the left to cycle through the icons right to left. When the application you want is highlighted, release the scroll wheel to switch to that application.
Note
![]()
Unfortunately, these techniques don’t work with the scroll ball on Apple’s Mighty Mouse.
Hiding a Running Application
If you’ve got a bunch of applications on the fly, your desktop can end up awfully messy. To reduce the clutter, you can remove an application from the desktop. If you won’t need that application for a while, it’s best just to quit the program to conserve your Mac’s resources. Otherwise, a quick click of the application’s Minimize button clears the application from the desktop and displays it as an icon on the right side of the Dock.
Actually, I should say that it clears the application’s current window from the desktop. If the application has other windows open, they remain in place, and you won’t be much better off. Ideally, you need a quick way to hide all the open windows in an application. Fortunately, your Mac gives you three ways to do this:
• Switch to the application and then press ![]() -H.
-H.
• Right-click (or Control-click) the application’s Dock icon and then click Hide.
• Hold down ![]() (or both Shift and
(or both Shift and ![]() ), tap the Tab key until the application you want to hide is highlighted in the icon menu, and then press H.
), tap the Tab key until the application you want to hide is highlighted in the icon menu, and then press H.
Managing Open Windows with Exposé
The standard Mac OS X techniques for navigating running applications and open windows are handy, but they become less useful the more applications and windows you have on the desktop. You might very well find it useful to have multiple applications and multiple documents within each application open at the same time, but you might end up with dozens of windows open simultaneously with those windows layered one on another. Getting to the specific window you want can be difficult. That’s where Exposé comes in. It’s designed to help you quickly manage all the open windows on your desktop.
Using Exposé
Exposé is a window management program that offers a number of useful functions for managing your open windows. Exposé has four main features:
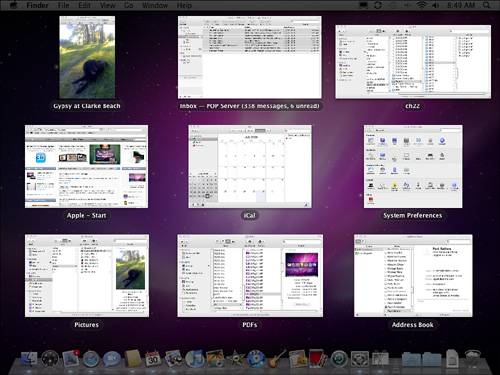
• See all your open windows at the same time—Press the F9 key on most Macs and Exposé temporarily reduces the size of the open windows and tiles them so that they can all be displayed on the desktop at the same time (see Figure 22.2). You can click a window to move into that window; the other windows return to their previous sizes and locations. You can also move into a window in which the cursor is located by pressing F9 again; if you don’t point to a different window, pressing F9 will return you to your previous location.
Figure 22.2 Using Exposé, you can show all open windows on your desktop at the same time.
Note
![]()
If you use multiple monitors and activate Exposé, the windows on all monitors shrink and remain on the monitor they were on when you activated Exposé.
• See all the windows in the current application at the same time—Press the F10 key on most Macs and Exposé shows thumbnails of all the windows in the current application. Just as you can with the F9 key, you can point to a window to see its title, click it to move into it, and so on.
Tip
![]()
If you hold down the Shift key while you activate Exposé, you see its effects in slow motion. Why is this useful? I have no idea.
• Hide all open windows and show the desktop—Pressing F11 on most Macs and Exposé hides all the open windows by moving them off to the sides of the desktop, which means you see your desktop in all its beauty. This is useful if you have a bad case of desktop clutter and want to work on the desktop without closing or moving the current windows. You can return all windows to their previous locations by pressing F11 again. You can also open a desktop icon by double-clicking it; when you do, the other windows return to their previous locations. Another option is to click one of the window borders visible along the edges of your screen to return windows to their previous states.
• Cycle through the Open windows in each application—Activate Exposé by pressing F9 or F10, then cycle through the set of open windows in each application by pressing the Tab or Shift-Tab keys (to move in the opposite direction). Each time you do, the next application becomes active and you see all its open windows. Windows open in other applications remain at their current sizes and are unselectable. When the window in which you want to work is exposed, click in it to deactivate Exposé and start using the application with which the window is associated.
Note
![]()
The Exposé keyboard techniques that I talk about in this section work on most keyboards but, unfortunately, not on all of them. For example, many Mac notebook keyboards don’t support the standard Exposé keystrokes, and neither does the Apple Keyboard. If Exposé doesn’t kick in when you press F9 (or when you press F10 or F11 to run Exposé’s other features), you still have other options. First, there is another Exposé key you can use in place of F9: the F3 key. For F10 and F11 (or even F9, for that matter), you must also hold down the Fn key to run the Exposé features. Alternatively, consider configuring your Mac keyboard to use F1 through F12 as standard function keys, as I describe in Chapter 30. Finally, you can configure Exposé to use different keys altogether, as described in the next section.
Configuring Exposé
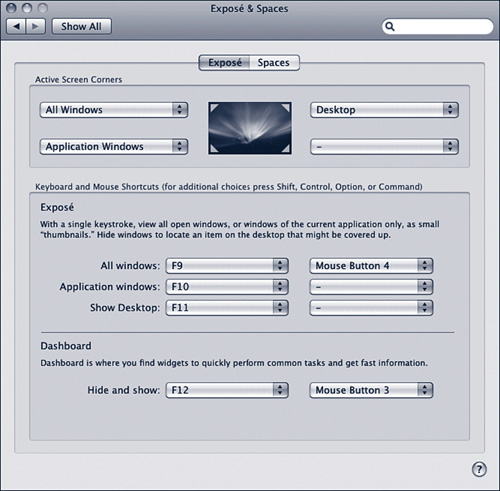
You can customize the following aspects of Exposé using the Exposé tab of the Exposé & Spaces pane of the System Preferences application (see Figure 22.3):
• Active Screen Corners—Use the pop-up menu located at each corner of the preview monitor to set an action that happens when you move the cursor to that corner. The actions you can set are All Windows (the default F9 key), Application Windows (the default F10 key), Desktop (the default F11 key), Dashboard, Spaces, Start Screen Saver, Disable Screen Saver, and No Action (-). To set an action for a corner, select the action on the related pop-up menu. When you point to that corner of the screen, that action occurs.
• Keyboard—Use the Keyboard pop-up menus to set the keys to activate each Exposé action. In addition to the keys on the menus, you can see other combinations by scrolling down the pop-up menu. If you hold down a modifier key (such as the ![]() key), you can add that modifier to the shortcut.
key), you can add that modifier to the shortcut.
• Mouse—If you use an input device with more than one button, such as a two-button mouse, the Mouse pop-up menus appear. Use the Mouse pop-up menus to set Exposé actions for specific buttons on the device you use, such as the right button on a two-button mouse.
• Dashboard—Use the pop-up menus to select which keyboard and mouse (if you have a mouse with multiple buttons) controls will activate the Dashboard.
Figure 22.3 The Exposé & Spaces pane of the System Preferences application enables you to customize various aspects of Exposé.
Creating, Using, and Managing Spaces
Being able to use Exposé to manage open windows and applications is nice, but if you use many applications and windows at the same time, you may still find it hard to pick out the window you want using the Exposé thumbnails. The Spaces feature enables you to create environments that contain specific applications so that you can easily switch between them. For example, you can create an Internet space that has all your Internet applications open and a Project space that contains applications and documents related to a project you’re working on. When you want to move from the project to the Internet, you move into the Internet space and all your Internet applications are immediately available, and your project applications are hidden. Getting back to your project space is just as easy.
Enabling and Building Spaces
To get started with Spaces, you need to enable the feature and build your spaces. After you create spaces, you assign applications to those spaces; only applications that are bound to a space are available to you when you access that space. To enable Spaces and create spaces, perform the following steps:
1. Open the System Preferences application, click Exposé & Spaces, and then click the Spaces tab.
2. Activate the Enable Spaces check box, as shown in Figure 22.4. If you want to see the Spaces menu appear in the Mac OS X menu bar, activate the Show Spaces in Menu Bar check box, as well. You can use the Spaces menu to quickly switch from one space to another, so it’s a good idea to activate the menu.
Figure 22.4 Use the Spaces tab to create and configure spaces on your Mac.
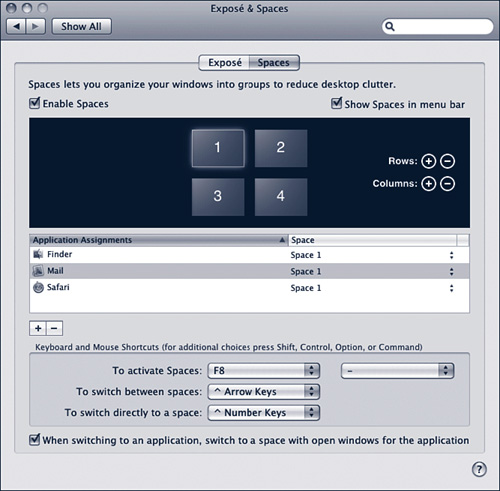
3. At the top of the pane, you see the preview window that shows a thumbnail of each space you have configured; initially there are four spaces arranged in a 2×2 grid. As you create spaces, you add them by row or by column. Below the preview window is the Application Assignments section; here, you see the applications that are part of the selected space. At the bottom of the pane are the controls you use to set keyboard shortcuts for specific actions.
4. Add applications that you want to be part of the spaces you are creating. There are several ways to do this:
• Drag an application’s icon from the desktop and drop it on the space in which you want it contained; when the icon is over a space, the space’s thumbnail is highlighted to show you that you can drop it on the space.
• Drag an application’s icon from the desktop and drop it on the application list. Then, choose the space in which you want the application to be used on the pop-up menu in the Space column (more on that in a bit).
• Click Add Application and use the resulting sheet to move to and select the application you want to add. Then use the pop-up menu in the Space column to choose the space in which you want that application to appear.
5. Add spaces by clicking the Add button in the Row section to add a new row of spaces or the Add button in the Column section to add a new column of spaces.
6. Add spaces until you’ve added all that you want to have available.
7. To remove spaces, you must remove an entire row or column by clicking the Remove button in the Row or Column section.
8. Use the pop-up menu in the Space column to assign an application to a space (see Figure 22.5). The choices on the menu are each space you’ve created and Every Space, which makes the application available in all spaces. When you select an application, the spaces to which it is assigned are highlighted in the preview window.
Figure 22.5 Assign applications to spaces to make them available when you choose a space.

9. To remove an application from the list, select it and click Remove.
10. Use the To Activate Spaces keyboard pop-up menu to set the keyboard shortcut to activate Spaces.
11. If you have a multibutton mouse, use the To Activate Spaces mouse pop-up menu to set the mouse control to activate Spaces.
12. Use the To Switch Between Spaces pop-up menu to choose the keyboard shortcut to move among the spaces you have created.
Tip
![]()
Hold a modifier key down to see more shortcut choices on these menus.
13. Use the To Switch Directly to a Space pop-up menu to choose the keyboard shortcut you can use to jump directly into a space.
Using and Managing Spaces
After you’ve created spaces, you can use them to more efficiently manage your desktop. Here are some space pointers:
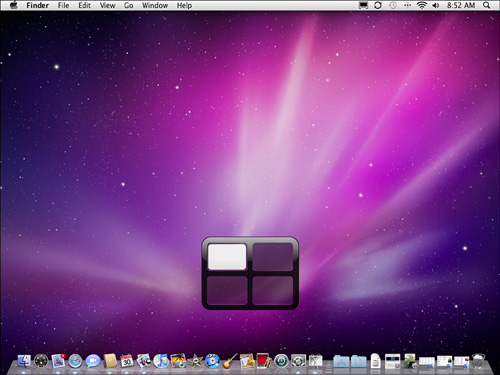
• Press the keyboard shortcut you set for switching between spaces (the default is Control-Arrow key). The Spaces manager appears on the screen (see Figure 22.6). The manager has a box representing each of the spaces you’ve created. To jump to a space, keeping pressing the shortcut keys until the space you want to use is highlighted. When you release the keys, you jump into that space and return to the last application you were using in that space.
Figure 22.6 When you activate Spaces, you see the Spaces manager that indicates how many spaces are available to you.
• Press the keyboard shortcut for jumping directly to a space (the default is Control-number key) to move directly into a space. When you do, the Space manager will appear briefly, you move into the space you selected, and applications in that space are available to you.
• When you are in a space, you can open applications that aren’t part of that space, just as you can when you aren’t using Spaces. That application is available in the current space, but not in any others. If you open an application that is already assigned to a different space, you jump to the space in which it is assigned.
• The Finder is available in all spaces.
• If an application isn’t running when you move into the space to which it is assigned, you need to launch the application to be able to use it.
• Spaces retain window configurations. If you use multiple monitors and have windows on each display in a space, they will resume their former positions as soon as you move back into that space.
• You can use the Dock to move into open or closed applications. If you open an application in a space, you move into that space. If the application is not part of a space, it opens as usual, but is available only when you are using the space you were using when you opened it. In other words, it is temporarily bound to the space you were using when you launched it.
• If you assign an application to all spaces, its windows will always appear in the same positions in all spaces.
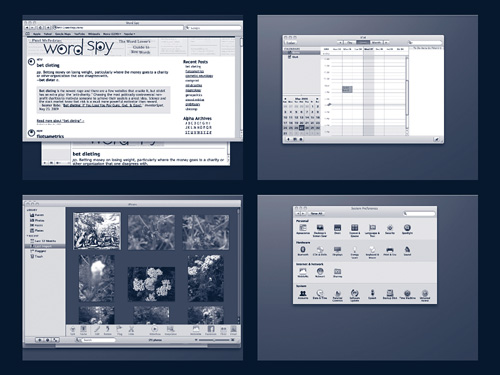
• If you press the Spaces keyboard shortcut (the default is F8 or Fn+F8), you see large thumbnails of all your spaces (see Figure 22.7). In each space, you see smaller thumbnails of all the applications running in that space. If you use multiple displays, you see a thumbnail for each display. Click a space to move into it.
Figure 22.7 Pressing the Spaces keyboard shortcut shows you all your spaces.
• To turn Spaces off, open the Spaces tab of the Exposé & Spaces pane of the System Preferences application and uncheck the Enable Spaces check box. All open applications will return to the desktop. You can start using your spaces again by checking the Enable Spaces check box.