
13.8. Embedding JavaScript Files
Another option for localizing your JavaScript files is to embed the files directly into the assembly. This approach is a bit different, but it also shows you how to achieve results similar to those just presented.
For this example, create an ASP.NET Web Application Project by selecting File ![]() New
New ![]() Project rather than File
Project rather than File ![]() New
New ![]() Web Site. Instead of creating multiple scripts for each of the languages that you are going to want to work with, you store the language differences in resource files.
Web Site. Instead of creating multiple scripts for each of the languages that you are going to want to work with, you store the language differences in resource files.
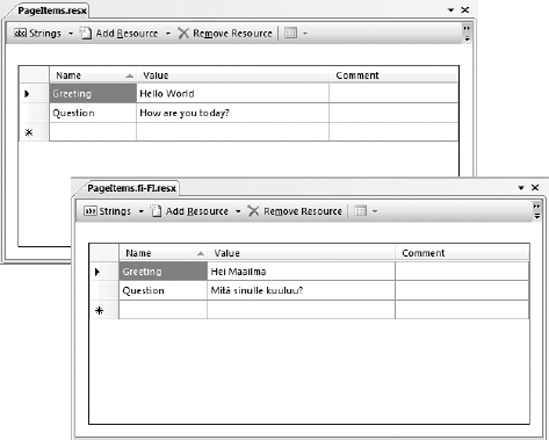
First, create a resource file called PageItems.resx. As before, this file contains two items only: Greeting and Question. Enter the same values you entered before. The other file to create is another resource file called PageItems.fi-FI.resx with the same keys as the other file. Figure 13-17 shows how both of these files should appear in the resource editor in Visual Studio 2008.
Once you have the resource files created in your project, the next step is to create a JavaScript file called ScriptLocalization.js that will use either of the resource files that you created. This resource file is presented here in Listing 13-18.
Example 13-18. A JavaScript file that will work from resource files
function populateItems() {
    $get('Label1').innerText = PageItems.Greeting;
    $get('Label2').innerText = PageItems.Question;
} |
Figure 13-17. Figure 13-17
Again, the idea is that the page contains two <span> elements that will be populated with values from this script file. Remember that unlike the static script file approach shown earlier, in this case, there is only a single script file and it is using one of the appropriate resource files to finish how it is completed.
ASP.NET will find the appropriate items from the resource files through the namespace, PageItems, which is defined later in this example. Using this namespace, the Greeting and Question keys from the resource files can be accessed as is done in this example.
The last change you need to make to the ScriptLocalization.js file is to make the file an embedded resource. Meaning that it will be embedded into the application's DLL when the application is compiled. To accomplish this task, highlight the JavaScript file in the Visual Studio Solution Explorer and change the Build Action property (found in the Properties dialog) from Content to Embedded Resource, as shown here in Figure 13-18.
Figure 13-18. Figure 13-18

Next, expand the Properties folder in the Solution Explorer and find the AssemblyInfo.cs file. Open this file and add some references to the items that you just created. At the bottom of the file, add the two lines that are presented in Listing 13-19.
Example 13-19. Adding references to the AssemblyInfo.cs file
[assembly: WebResource("WebApplication1.ScriptLocalization.js",
   "application/x-javascript")]
[assembly: ScriptResource("WebApplication1.ScriptLocalization.js",
"WebApplication1.PageItems", "PageItems")] |
The first thing to add is a WebResource value. You also need to reference the System.Web.UI namespace for this to work. The first parameter of this is the fully qualified script. In this case, it is the name of your solution (in my case, WebApplication1), followed by the script file itself.
WebApplication1.ScriptLocalization.js
My qualification looks like this because my ScriptLocalization.js file is located in the root folder of my Web solution. If I kept my scripts in a folder called Scripts, then I would have to include the folder in the qualification as well.
WebApplication1.Scripts.ScriptLocalization.js
The second parameter used in the WebResource declaration is the MIME type of the file. In this case, it is application/x-javascript.
The next assembly declaration is the ScriptResource line. In this part, again you fully qualify the script you are working with and follow that with the link to the resource files that you are associating to this script file. Since the script files that you are working with start with the word PageItems, this is what you use in the specification.
WebApplication1.PageItems
In this association to the resource files, you do not include the culture part of the names nor the .resx file extension. The last parameter of this line is the single word PageItems. This is the keyword that you are using in the JavaScript file to associate as the namespace in working with the keys from the file. For example, in the script file there is use of the PageItems.Greeting object. The PageItems part of this statement comes from this declaration.
The last part of this example puts it all together in the Web page that you are working with. Listing 13-20 shows an example of this page.
Example 13-20. Putting everything together in the WebForm1.aspx page
<%@ Page Language="C#" AutoEventWireup="true" CodeBehind="WebForm1.aspx.cs"
    Inherits="WebApplication1.WebForm1" Culture="auto" UICulture="auto" %>

<html xmlns="http://www.w3.org/1999/xhtml">
<head id="Head1" runat="server">
<title>Script Localization</title>
<script type="text/javascript">
function pageLoad() {
populateItems();
}
</script>
</head>
<body>
<form id="form1" runat="server">
<div>
<asp:ScriptManager ID="ScriptManager1" runat="server"
 EnableScriptLocalization="true">
   <Scripts>
      <asp:ScriptReference Assembly="WebApplication1"
       Name="WebApplication1.ScriptLocalization.js" />
   </Scripts>
</asp:ScriptManager>
<span id="Label1"></span><br />
<span id="Label2"></span>
</div>
</form>
</body>
</html> |
There are a few things to notice here. First, you will need to set the Culture and UICulture to a value of auto in either the file (as is done here), or in the web.config file within the <globalization> element.
The pageLoad() function calls the ScriptLocalization.js file's populateItems() function. This script is found through the script reference done with the ScriptReference control within the ScriptManager control.
<asp:ScriptManager ID="ScriptManager1" runat="server"
EnableScriptLocalization="true">
<Scripts>
<asp:ScriptReference Assembly="WebApplication1"
Name="WebApplication1.ScriptLocalization.js" />
</Scripts>
</asp:ScriptManager>It is important that the ScriptManager has the EnableScriptLocalization property set to true for this all to work. The ScriptReference control points to the embedded resource through the Assembly property and this is set to the name of the Solution followed by a Name property value of the file that is used. Again, this is the fully qualified reference to the file.
Compiling this solution, you will find that everything is embedded and you will find the alternate resource files (such as the fi-FI resource file that you created) is also embedded into the solution (as illustrated in this view of the Solution Explorer from Figure 13-19). Click on the Show All Files button if you do not see the bin folder in your solution.
Figure 13-19. Figure 13-19

Running this page, produces the simple results presented in Figure 13-20.
Figure 13-20. Figure 13-20
