
10.2. Examples of Animation Actions
Now that you have a general understanding of the framework and the tools at your disposal, this section looks at some of the actions that you can use and provides some samples of using these actions.
10.2.1. Using the <FadeOut> Action in a Sequence
To show an example of using the <FadeOut> element along with a sequence of animations, Listing 10-2 expands upon the earlier example by adding another animation to the list of sequenced animations.
Example 10-2. Fading out text using FadeOut animation
<script runat="server">
<%@ Page Language="C#" %>
<%@ Register Assembly="AjaxControlToolkit" Namespace="AjaxControlToolkit"
TagPrefix="cc1" %>
protected void Button1_Click(object sender, EventArgs e)
{
Label1.Text = "Hello " + TextBox1.Text;
}
</script>
<html xmlns="http://www.w3.org/1999/xhtml">
<head runat="server">
<title>Growing Label</title>
</head>
<body>
<form id="form1" runat="server">
<div>
<asp:ScriptManager ID="ScriptManager1" runat="server" />
<asp:TextBox ID="TextBox1" runat="server"></asp:TextBox>
<asp:Button ID="Button1" runat="server" Text="Submit your name"
OnClick="Button1_Click" />
<br /><br />
<asp:Label ID="Label1" runat="server"></asp:Label>
<cc1:AnimationExtender ID="Label1_AnimationExtender" runat="server"
Enabled="True"
TargetControlID="Label1">
<Animations>
<OnLoad>
<Sequence>
   <Scale ScaleFactor="4" Unit="px" ScaleFont="true" FontUnit="pt"
    Duration="2.5" Fps="50" ></Scale>
   <FadeOut Duration="5" Fps="25" />
</Sequence>
</OnLoad>
</Animations>
</cc1:AnimationExtender>
</div>
</form>
</body>
</html> |
Now in this case, the sequence definition includes two animations. The first animation is the scaling of the text, and the second animation is the fading out of the text. Running this example gives you similar views to those presented in Figure 10-5.
Within the <OnLoad> element, a <Sequence> element is used to define the transition of two animations. The first is the same scaling animation, while the second is the <FadeOut> animation.
<Sequence>
<Scale ScaleFactor="4" Unit="px" ScaleFont="true" FontUnit="pt"
Duration="2.5" Fps="50" ></Scale>
<FadeOut Duration="5" Fps="25" />
</Sequence>Figure 10-5. Figure 10-5

The <FadeOut> element includes two attributes (or properties). These include the Duration and the Fps attributes. The Duration attribute defines the number of seconds over which the fading out transition should occur. The Fps attribute defines the number of frames per second in which to draw the animation. The default is 25, so there really isn't a need to define it here, as it is the same value.
Some other interesting attributes are the MinimumOpacity and MaximumOpacity properties. A value of 1 for each of these items shows the element in its full strength. This means that a value of ".5" displays the element at half strength. Try running the example from Listing 10-2 using a <FadeOut> element as illustrated here:
<FadeOut Duration="5" Fps="25" MinimumOpacity=".2" />
Now with this in place, the opacity will not decrease to nothing, but instead, it will decrease to 20 percent of its full value.
10.2.2. Using <FadeIn> and <FadeOut> Together
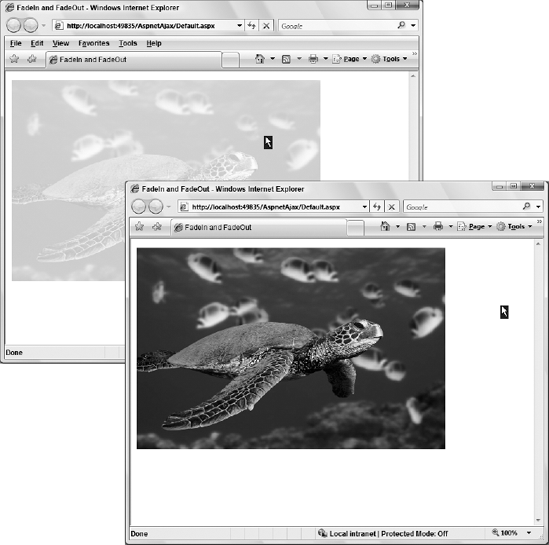
The <FadeIn> and <FadeOut> actions behave similarly, but in the end, they perform the opposite action. To provide an example of the two items working together, Listing 10-3 shows an <OnMouseOver> trigger along with an <OnMouseOut> trigger. This page allows end users to hover their mouse over an image and have the image fade to 20%; performing a mouseout causes the image to come back to its original state. The code for this example is presented here:
Example 10-3. Using move the <OnMouseOver> and <OnMouseOut> triggers
<%@ Page Language="C#" %>

<%@ Register assembly="AjaxControlToolkit" namespace="AjaxControlToolkit"
tagprefix="cc1" %>

<html xmlns="http://www.w3.org/1999/xhtml">
<head runat="server">
    <title>FadeIn and FadeOut</title>
</head>
<body>
    <form id="form1" runat="server">
    <div>

        <asp:ScriptManager ID="ScriptManager1" runat="server">
        </asp:ScriptManager>

        <asp:Image ID="Image1" runat="server" Height="341px"
         ImageUrl="~/Sea Green Turtle.jpg"
            Width="523px" />

        <cc1:AnimationExtender ID="Image1_AnimationExtender" runat="server"
            Enabled="True" TargetControlID="Image1">
            <Animations>
            <OnMouseOver>
                <Sequence>
                    <FadeOut Duration="1" Fps="50" MinimumOpacity=".2" />
                </Sequence>
            </OnMouseOver>
            <OnMouseOut>
                <Sequence>
                    <FadeIn Duration="1" Fps="50" />
                </Sequence>
            </OnMouseOut>
            </Animations>
        </cc1:AnimationExtender>

    </div>
    </form>
</body>
</html> |
The interesting thing with this example is that there are animations in place for more than one trigger. This means that you can perform a series of complex animations based up multiple triggers. In this case, there are two triggers in place for two distinct actions. Also, the two triggers use separately defined animations. Figure 10-6 shows an example of both states of this page.
Figure 10-6. Figure 10-6
10.2.3. Moving and Working with a Panel
When working with the animation framework, you can easily work with everything from pop-ups to tooltips and other items held in Panel controls and <div> elements. This next example moves and presents a set of items contained within a <div> element when you click on the LinkButton server control on the page. Listing 10-4 shows an example of this.
Example 10-4. Moving and working with a <div> using animation
<%@ Page Language="C#" %>

<%@ Register assembly="AjaxControlToolkit" namespace="AjaxControlToolkit"
tagprefix="cc1" %>

<html xmlns="http://www.w3.org/1999/xhtml">
<head runat="server">
    <title>Moving divs</title>
</head>
<body>
    <form id="form1" runat="server">
    <div>
        <asp:ScriptManager ID="ScriptManager1" runat="server">
        </asp:ScriptManager>
        <asp:LinkButton ID="LinkButton1" runat="server"
         OnClientClick="return false;">Vote!</asp:LinkButton><br />
        <asp:Image ID="Image1" runat="server" Height="341px"
         ImageUrl="~/Green Sea Turtle.jpg"
            Width="523px" />
        <cc1:AnimationExtender ID="LB1_AnimationExtender" runat="server"
            Enabled="True" TargetControlID="LinkButton1">
            <Animations>
            <OnClick>
                <Sequence>
                    <ScriptAction
                     script="$get('LinkButton1').style.visibility='hidden';">
                    </ScriptAction>
                    <StyleAction AnimationTarget="imageTooltip" Attribute="display"
                     Value="block"/>
                    <Parallel AnimationTarget="imageTooltip" Duration="1" Fps="25">
                        <Move Horizontal="150" Vertical="−50" />
                        <Resize Height="30" Width="350" />
                    </Parallel>
                    <FadeIn AnimationTarget="imageTooltip" Duration=".5"/>
                </Sequence>
            </OnClick>
            </Animations>
        </cc1:AnimationExtender>

        <div id="imageTooltip" style="display: none;
                                      background-color: White; border-style: solid;
                                      border-width: medium;  border-color: Black">
            <center>Vote for this image!
            <asp:Button ID="Button1" runat="server" Text="I like it!" />
            <asp:Button ID="Button2" runat="server"
             Text="I don't like it!" /></center>
        </div>
    </div>
    </form>
</body>
</html> |
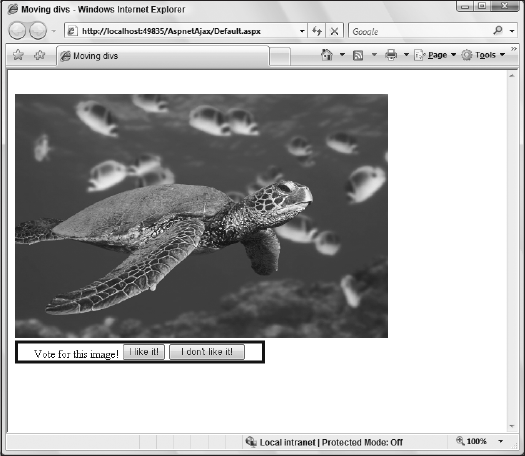
In this example, when the end user clicks the Vote button above the image, a <div> element below the image goes through a transition to show a set of voting buttons. The <div> element is presented at the bottom of the page and one important thing for this is that the style needs to be set so that the display of this element is set to none. As part of the <Sequence> structure, the display is reset back on using the <StyleAction> element.
<StyleAction AnimationTarget="imageTooltip" Attribute="display" Value="block"/>
When running this page, you get something similar to the results presented in Figure 10-7, when the Vote button is clicked.
Figure 10-7. Figure 10-7
One interesting point about the <Sequence> section of the document is that it also includes a <Parallel> element within it with its own set of animations.