
14.2. Understanding Sessions
Sessions within an ASP.NET application enable users to easily maintain application state. Sessions will remain with the user as he works through repeated calls to an application for a defined period.
Sessions are easily created, and it is just as easy to retrieve information from them. Use the following code to create a session for the user or calling application that can be accessed later in the application or to assign a value to an already established session.
Session["EmployeeID"] = Value1;
This will assign what was being held in the variable Value1 to the EmployeeID Session object. To retrieve this information from the session and then use it in your code, do the following:
Value2 = Session["EmployeeID"];
In ASP.NET, session timeout is similar to what it was in classic ASP — a session would timeout on the user after 20 minutes. If the user opened a page within a Web application (thereby creating a session) and then walked away for a cup of coffee, when the user came back to the page 40 minutes later, the session would not be there for them. You could get around this by going into the server and changing the time allotted to the session timeout property, but this was cumbersome and required that you stop the server and then start it again for the changes to take effect. In addition, because sessions are resource intensive, you would not want to store too many sessions for too long.
With ASP.NET it is now possible to change the session timeout property quite easily. On the application level, it is now stored in the web.config file. The machine.config file stores the default timeout setting for the entire server. By changing the setting in the web.config file, you can effectively change the timeout property of sessions within the application. The great thing about changing this property within this XML application file is that the server does not have to be stopped and started for the changes to take effect. After the web.config file is saved with its changes, the changes take effect immediately.
The part of the web.config file that deals with session state management is the <sessionState> node as presented in Listing 14-1.
Example 14-1. Reviewing the <sessionState> element in the web.config file
<sessionState mode="InProc" stateConnectionString="tcpip=127.0.0.1:42424" sqlConnectionString="data source=127.0.0.1;user id=sa;password=" cookieless="false" timeout="20" /> |
The <sessionState> node of the web.config file is where session state is managed. The property that you are concerned with now is the timeout property.
The timeout property is set to 20 (the default setting). This setting represents minutes of time. Therefore, if you want the users' sessions to last for one hour, you set the timeout property to 60.
14.2.1. Running Sessions In-Process
Presently, the default setting for sessions in ASP.NET stores the sessions in the in-process mode. Running sessions in-process means that the sessions are stored in the same process as the ASP.NET worker process. Therefore, if IIS is shut down and then brought back up again, all sessions are destroyed and unavailable to users. On mission-critical Web applications, this can be a nightmare.
In order to run the sessions in-process, set the mode property in the <sessionState> node to InProc. Running sessions in-process provides the application with the best possible performance.
The following table describes all the session modes available.
14.2.2. Running Sessions Out of Process
It is possible to run sessions out of process. Running a session out of process allows IIS to be stopped and then restarted, while maintaining the user's sessions.
Along with the .NET Framework is a Windows service called ASPState. This service enables you to run sessions out of process, but it has to be started in order to use it to manage sessions.
To start the ASPState service, open the Command Prompt (Start ![]() Programs
Programs ![]() Accessories
Accessories ![]() Command Prompt). On the Command Prompt line type the following command:
Command Prompt). On the Command Prompt line type the following command:
CD WINDOWSMicrosoft.NETFrameworkv2.0.50727
Next, press Enter. This changes the directory of the command prompt. After typing that line in the command prompt, type:
net start aspnet_state
This turns on the session out-of-process capabilities, as shown in Figure 14-1.
The path shown is for Windows XP Professional. If you are on a different operating system, the path could be different. Also, look at the path within Windows Explorer and view the version of the .NET Framework that you are running. Since you are working with the .NET Framework 3.0 or 3.5, then you will find this file in the 2.0 version of the framework, as shown in the previous example.
Figure 14-1. Figure 14-1

It is also possible to turn on the ASP.NET State Service through the Services console. In Windows XP, open the console by selecting Start ![]() Control Panel
Control Panel ![]() Performance and Maintenance
Performance and Maintenance ![]() Administrative Tools
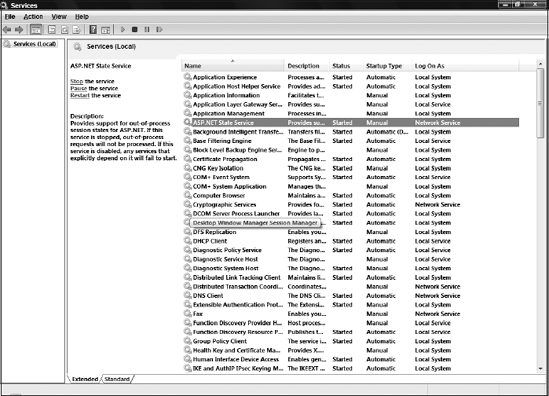
Administrative Tools ![]() Services. You are then presented with a list of services available on the server. In Windows XP, you can start or stop the ASP.NET State Service by clicking the appropriate link. In Windows Vista you will find the Services option in the Administrator Tools section. The Services application is presented in Figure 14-2.
Services. You are then presented with a list of services available on the server. In Windows XP, you can start or stop the ASP.NET State Service by clicking the appropriate link. In Windows Vista you will find the Services option in the Administrator Tools section. The Services application is presented in Figure 14-2.
Figure 14-2. Figure 14-2
Once the out-of-process mode is enabled, you can change the settings in the <sessionState> node of the web.config file so that all the users sessions are run in this manner. You do this by setting the mode to StateServer, as illustrated in Listing 14-2.
Example 14-2. Setting the Session object to use the StateServer option
<sessionState mode="StateServer" stateConnectionString="tcpip=127.0.0.1:42424" sqlConnectionString="data source=127.0.0.1;user id=sa;password=" cookieless="false" timeout="20" /> |
Now the user can turn IIS off and then on again and her sessions will remain intact, although doing this is a little more resource-intensive than running the sessions in-process.
If the mode is set to StateServer, the server looks to the stateConnectionString property to assign the sessions to a specified server and port. In this case, which is the default setting, it is set to the local server. You can easily change this so that the sessions are stored on a completely separate server.
Running sessions out of process is a great advantage with ASP.NET. This is a great tool when running Web applications in a Web farm where you are unsure which server the user will navigate to. This gives you the ability to move users from one server to another and yet maintain their state.
14.2.3. Maintaining Sessions on SQL Server
Another option to run sessions out of process is to employ SQL Server to store the user sessions. Storing sessions in SQL Server also enables users to move from one server to another and maintain their state. It is the same as the StateServer mode but instead stores the sessions in SQL Server.
If you installed the .NET Framework, you also installed a mini-version of SQL Server on your computer. This SQL Server–lite version enables you to store your sessions to use for state management. It is recommended, however, that you use a full-blown version of SQL Server, such as SQL Server 2008. This is a more dependable solution.
The first thing to do in order to use SQL Server as a repository of your sessions is to create the database within SQL that ASP.NET can use. Included in the version folder of ASP.NET (found at C:WINDOWSMicrosoft.NETFrameworkv2.0.50727) are two scripts that work with SQL Server session management. The first is the install script, InstallSqlState.sql. This script instructs SQL Server which database tables and procedures to create. You can look at the script instructions, which are quite readable, by opening the script in Notepad.
If you ever wish to remove these tables and stored procedures from SQL Server, use the uninstall script, UninstallSqlState.sql.
If you wish to use SQL Server to manage your sessions, run the install script. To do this, open up the command prompt again and navigate to the version folder of ASP.NET that you are running. On the command line, type:
OSQL -S localhost -U sa -P <InstallSqlState.sql
The OSQL utility enables you to enter Transact-SQL statements, system procedures, and script files. This utility uses ODBC to communicate with the server. Running this command creates the tables and procedures needed to run the SQL Server session management option. The notation -S in the command line is specifying the location of the server that is to be used. In this case, you are using localhost, meaning your local server.
The notation -U refers to the SQL server's assigned username to gain access. In this case, it is just the typical sa.
The notation -P is for the SQL server's password, if required. In this case, it is not required. Therefore, you leave it blank.
Following the SQL server's setting specifications, you then specify the script that you wish to install, InstallSqlState.sql. This installs what is necessary to run SQL Server session management.
After you have created the tables and procedures necessary, change the <sessionState> node of the web.config file, as shown in Listing 14-3.
Example 14-3. Using SQL Server as a state server
<sessionState mode="SQLServer" stateConnectionString="tcpip=127.0.0.1:42424" sqlConnectionString="data source=127.0.0.1;user id=sa;password=" cookieless="false" timeout="20" /> |
To use SQL Server to manage sessions, the mode of the <sessionState> node needs to be set to SQLServer. After the mode is set to SQLServer, ASP.NET then looks to the sqlConnectionString property to find the SQL server to connect to when storing state. The value of this property should be set so that the data source is the server where the SQL and any needed login information are located.
14.2.4. Deciding on the State of Sessions
The mode you choose for running sessions within your Web application makes a considerable difference in the performance, functionality, and reliability of your Web application.
Which mode should you choose? The following list summarizes the best conditions for each option:
InProc: The session is run in the same process as the ASP.NET worker process. Therefore, this option should be used when maintaining sessions is not mission critical to the application. This option has the best performance possible out of all the choices.
StateServer: This Windows Service option runs the sessions out of process and is, therefore, best when used on multiple servers or when sessions need to be maintained if IIS is stopped and then restarted. This option provides better performance than the other out-of-process option, SQLServer.
SQLServer: This out-of-process option is the most reliable choice because the sessions are stored directly in SQL Server. Even though this is the most reliable choice, this option ranks worst in performance.
14.2.5. Cookieless Session State
All the options mentioned so far also allow you to set the sessions so that they employ a cookieless option. This is for visitors to your site who choose to have cookies disabled in their browsers. You enable the cookieless-session-state environment by setting the cookieless property in the <sessionState> node of the web.config file to true, as shown here in Listing 14-4.
Example 14-4. Providing a cookieless session state
<sessionState mode="StateServer" stateConnectionString="tcpip=127.0.0.1:42424" sqlConnectionString="data source=127.0.0.1;user id=sa;password=" cookieless="true" timeout="20" /> |
ASP.NET embeds the user's session directly into the URL. When a user calls an ASP.NET page with a URL, the URL is rendered to contain the user's session ID in the middle of the URL itself.
For an example of this, use the same session counter method that you used earlier in this chapter and change the web.config file so that the cookieless property is set to True. Figure 14-3 shows an example of running the same Web application with this setting in place.
Figure 14-3. Figure 14-3

The URL in the browser's address box now contains the session ID right in the middle:
http://localhost/AspnetAjax/(S(c3ibca55z1a1meajdrrctb45))/Default.aspx
Because you set the web.config file to perform cookieless sessions, it gave the user a session ID of (z5wjrf452csfky55cnyl5y3e). ASP.NET uses this to identify the user on any subsequent Web requests. The drawback is that the user could change the contents of his session, thus destroying the session.