
It’s said that “appearances can be deceiving,” yet so many things in people’s lives seem centered on appearances. Even a casual viewing of television commercials or magazine ads reveals a great concern about hairstyles, clothing, makeup, and oral hygiene. Translating that to the World Wide Web, some of the things people look for in a web site are how it displays and how it functions. The discipline of Web Usability exists to test web sites and determine how to make them better and easier to use by their target audience.
You want everything about your business to be professional and attractive to customers. This includes your external web presence, intranet, extranet, and any other HTML-based interface to your company. MOSS 2007 contains various tools that affect the general layout, style, and color of your site collection and its content in order to achieve this goal. In general, the elements you will be modifying to establish the "look and feel” of your site collection are site templates, page layouts, and themes:
- Site templates
These let you provide a consistent and professional appearance for your site collection including the Portal Site. This includes the general layout and structure of sites and eliminates the need to create sites and subsites from scratch.
- Page layouts
This element governs what type of site content is displayed and the location and function of fields on the page.
- Themes
Themes are a collection of colors, fonts, and other decorative elements on your site that can enhance its appearance and reflect your corporate identity, purpose, and goals.
There are a number of other templates available in addition to site templates:
Form templates
Libraries templates
List templates
Role-based templates for My Sites
Tip
These templates are better addressed in Chapter 13, Chapter 14, and Chapter 21.
MOSS 2007 comes with four default site templates: Collaboration, Meetings, Enterprise, and Publishing.
You can also create one or many customized site templates yourself. Begin by customizing a site. You can select a theme, choose from a variety of Web Part pages, workspaces, and Web Parts, and then save your customized site as a template. After you’ve constructed numerous site templates, they are available to apply to any sites you make.
Tip
See Chapter 5 for information on how to create a site or site collection.
As just mentioned, when you create a SharePoint site, you can choose from four default templates, each of which will impose a particular structure and function:
Collaboration
Meetings
Enterprise
Publishing
Within each template, you can select from several types. For example, in the Collaboration site template, you can select from one of six different types. Let’s take a more complete look at the choices you have when you are on the New SharePoint Site page.
The general purpose of the Collaboration template is to provide a platform for teams or groups, in either the same or different departments, to collaborate on tasks, documents, and other efforts (Figure 7-1).
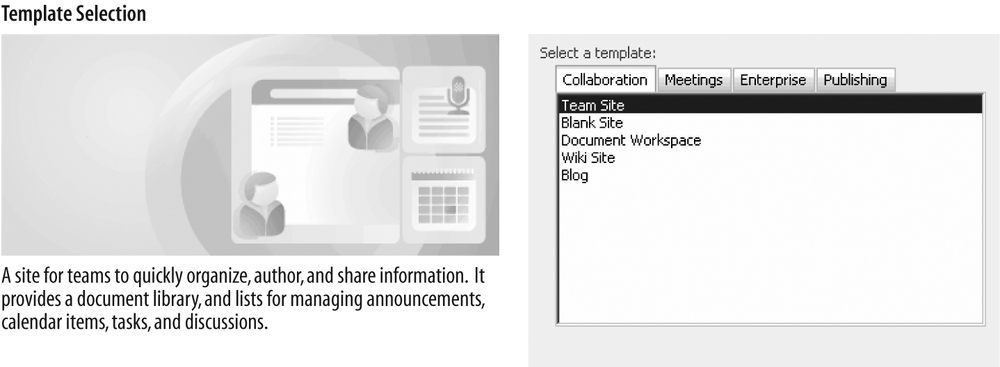
Depending on your exact needs, you can select one of six functional choices for your collaboration site:
- Team Site
This site can be used for any purpose that requires a group to collaborate on any work task or project. Default Web Parts included with this site are a document library, an announcements list, a calendar, a contacts list, and a links list.
- Blank Site
This is a general-purpose site with no default formatting. With a Blank site, you choose whatever Web Parts you want and customize the site for whatever purpose you desire. You also have the option to use Microsoft Office SharePoint Designer 2007 or any other SharePoint-compatible web design program to insert design elements and functional features into the site.
- Document Workspace
You can use this site option when your primary task is to initiate a collaborative team documentation project. This would be ideal for a company’s technical writing group or a similar team that needs to have several people create and modify common documentation. Lists and libraries included are a document library, an announcements list, a tasks list, a members list, and a links list.
- Wiki Site
Use this site when you want to create an information repository that can be quickly and easily edited by team members. Properties of the Wiki site include pages where users can record information, link data through keywords, and have a recorded history, allowing you to restore deleted content. Content elements included are Wiki pages, a links list, and a Wiki page library.
- Blog
Select this option if you want an online journal that allows you to quickly add and edit information and allows readers to comment on your content. Elements in a blog site include a posts list for storing blog posts, a blogs list for links to other blogs, a categories list, a comments list, a links list for links to related resources, and a photo library.
Meetings site templates are available to help teams manage various types of meetings (Figure 7-2).
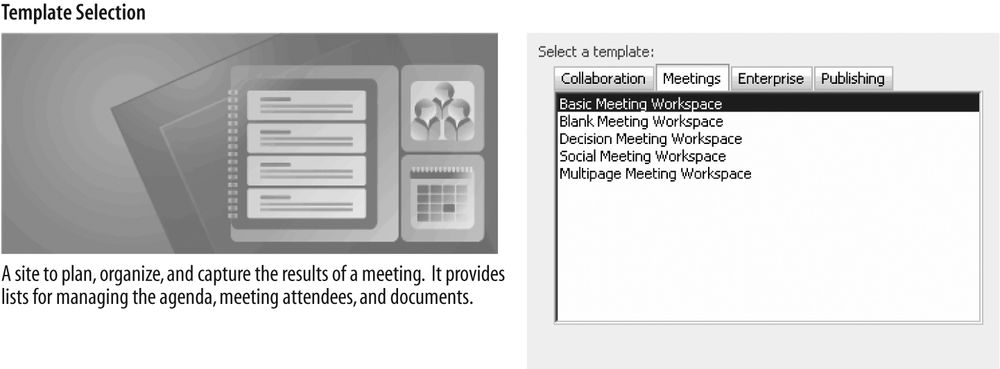
Meetings can be recurring (such as weekly staff meetings) for a particular project that will include a limited series of meetings, or single event meetings, such as introducing a company’s new health insurance provider. Depending on the nature and scope of your meetings, you can choose from any of the following templates:
- Basic Meeting Workspace
This is a general-purpose meeting template and is typically used for most meeting types. Elements that come with this template by default are an objectives list, an attendees list, an agenda, and a document library.
- Blank Meeting Workspace
This is a completely unformatted meeting site that you can customize to meet your needs.
- Decision Meeting Workspace
Use this site template when the purpose of your meetings is to review documents, lists, and other information sources related to making a particular decision. This site is ideal for a team meeting to make decisions, such as how to design a new data center or what sales objectives to pursue in the coming year. Default elements included in this template are an objectives list, an attendees list, an agenda, a document library, a tasks list, and a decisions list.
- Social Meeting Workspace
This site template is used when you want to plan and organize a social event, such as a company picnic, holiday party, or potluck. Elements included in this site are an attendees list, directions, an image log, a “Things to Bring” list, and a photo library.
- Multipage Meeting Workspace
This template is similar to the Decision Meeting Workspace template, except that it’s designed to accommodate very complex and involved data and decision processes. The site comes with two web pages by default, but you can add up to 10 individual pages per meeting. This site includes an objectives list, an attendees list, and an agenda.
The Enterprise site template is commonly used for a top-level or high-level site in your organization’s site collection. It is designed to accommodate the needs of a national or multinational company in the areas of document management, information management, and records management (Figure 7-3).

- Document Center
Use this site when you need a central interface to manage your enterprise-level documentation. This site template includes a Document Library, Relevant Documents Web Part, Upcoming Tasks Web Part, and Tree View navigation. Several document management features are enabled on this site, including major and minor versioning, required check out, and support for multiple content types.
- Records Center
The Records Center template is one of the major templates used in SharePoint 2007’s Business Intelligence (BI) solution. It is the central interface for managing all enterprise-level data and data sources for an organization. Elements included in this template are a Records Vault, information management policy enforcement, a Holds list, a Record Routing list, and an Unclassified Records library.
Tip
Learn more about Business Intelligence in Chapter 15.
Tip
Learn more about My Sites in Chapter 21.
Tip
Find out how a Site Directory is used for creating and managing sites in Chapter 5.
- Report Center
The Report Center site template is the core of SharePoint’s Business Intelligence. It provides the central collection point for all manner of business-related data sources. The Report Center comes with multiple data interface tools in order to present the widest possible mix of information. Web elements included in this site are dashboards, key performance indicators (KPIs), special document libraries, and connections to external data sources. You can further customize the Report Center with additional site templates and Web Parts, depending on your requirements.
- Search Center
This site provides a search engine and includes search results pages and advanced search features.
- Search Center with Tabs
This site is similar to the Search Center template except that it has two tabs: one for general searches and the other for searching for people and information. You have the option of customizing the tabs for other search scopes and results.
The Publishing site template is used to design, create, and publish different types of Web Portal sites for the enterprise. These sites can then be deployed as departmental or corporate intranet sites or as the organization’s Internet web presence (Figure 7-4).

Elements included in the template’s sites are a page editing toolbar, content editor, and check out.
- Publishing Site
This is another general-purpose site template, but one designed to let you quickly publish WebPages on the SharePoint site. Default Web Parts included are document and image libraries for storing web publishing assets.
- Publishing Site with Workflow
Use this site template when you need a web interface for content that must go through an approval workflow before it is published.
- News Site
This site is used to display a variety of news-related content to your audience. This template includes a sample news page, easy-to-use layouts, an archive for storing older news items, and two news delivery Web Parts: RSS Viewer and This Week in Pictures.
- Collaboration Portal
Use this site template if you need a general portal site for a department, division, or other group within your organization. This site includes features from several other Publish site templates, such as a home page, a News site, a Site Directory, and a Search Center with Tabs.
- Publishing Portal
This template is similar to the Publishing Site but with a larger scope. Use this site when you want to create a portal site for web content and serve it to the Internet or a large intranet audience. Features include a home page, a sample press releases subsite, a Search Center, a login page, and publishing with workflow.
- My Site Host
This template is used for creating a site that will host My Site sites. (You’ll learn more about My Sites in Chapter 21.)
In addition to the default site templates available in SharePoint 2007, you can create customized site templates. Any user with Owners or Design permissions can enter the Site Template Gallery and modify any site template. Typically, site templates are modified in order to then create sites with the organization’s unique branding and look and feel. Once the corporate site template is created, users can create sites in the site collection that all conform to the same styling and format used throughout the company.
One of the most common ways to create a unique site template is to modify your default site so that it reflects the functionality and image you want to project, and then save the site as a site template.
Once you’ve created a site that fulfills all of your functional and design goals, you can save it as a template and then select the template when you create additional sites.
On the customized site, click Site Actions and choose Site Settings from the menu.
On the Site Settings page, in the Look and Feel section, click “Save site as template” (Figure 7-5).
On the “Save Site as Template” page, in the File Name section, type the name of the template file in the Name field.
Type the name of the template in the Title field.
Type a brief description of the template’s purpose in the Description field.
In the Include Content section, click the Include Content checkbox if you want all of the Web Parts and other elements in this site to be included in subsequent sites created with this template (Figure 7-6).
Click OK to save the template.

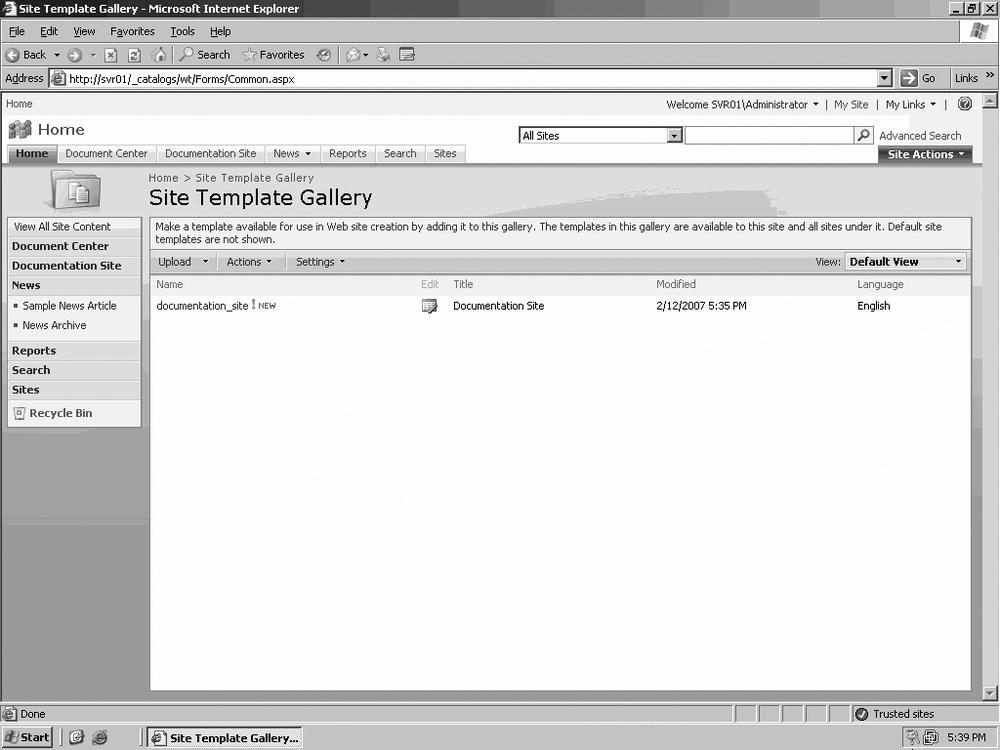
As you can see in Figure 7-7, you can either go to the Site Template Gallery by clicking the link or click OK to return to the site administration page. When you go to the Site Template Gallery, you can see your new template in the main pane (Figure 7-8).

In addition to creating a site and saving it as a template, site templates can be imported from external sources. You can import a site template created on another SharePoint site or one created by a web site designer using Microsoft Office SharePoint Designer 2007 or another SharePoint-compatible tool.
Adding a site template to your Site Template Gallery is as easy as uploading a document to a folder on your hard drive:
On your site, click Site Actions and choose Site Settings from the menu.
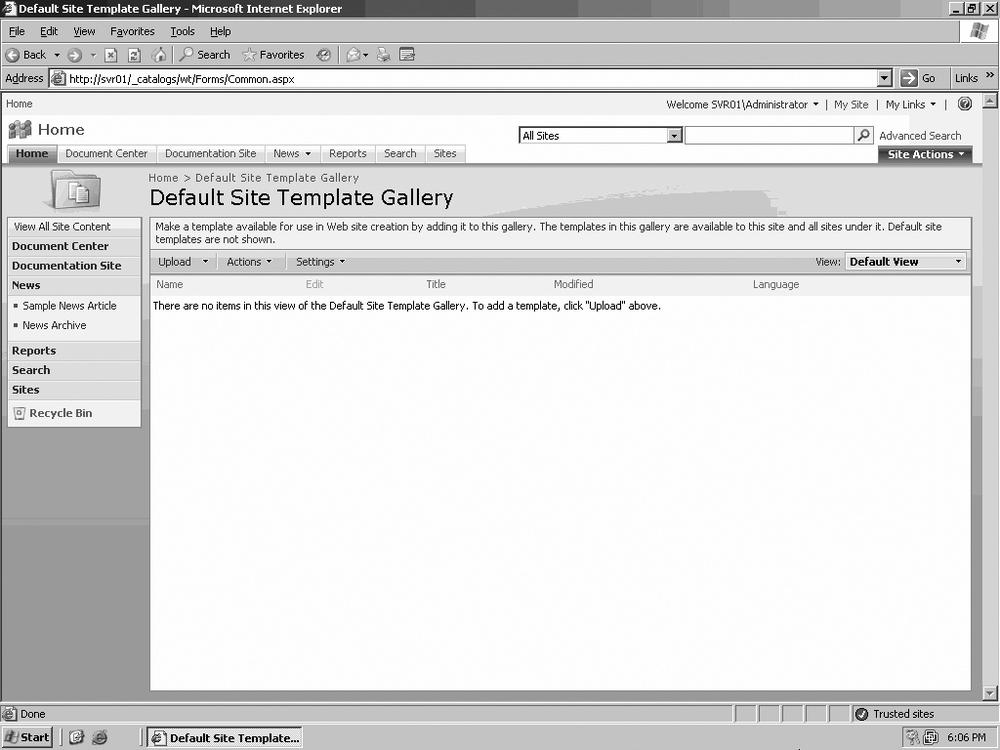
On the Site Settings page in the Galleries area, click “Site templates.”
On the Site Templates Gallery page, click Upload.
Click the Browse button and navigate to the location of the desired template.
Click OK to add the template to the Template Gallery.

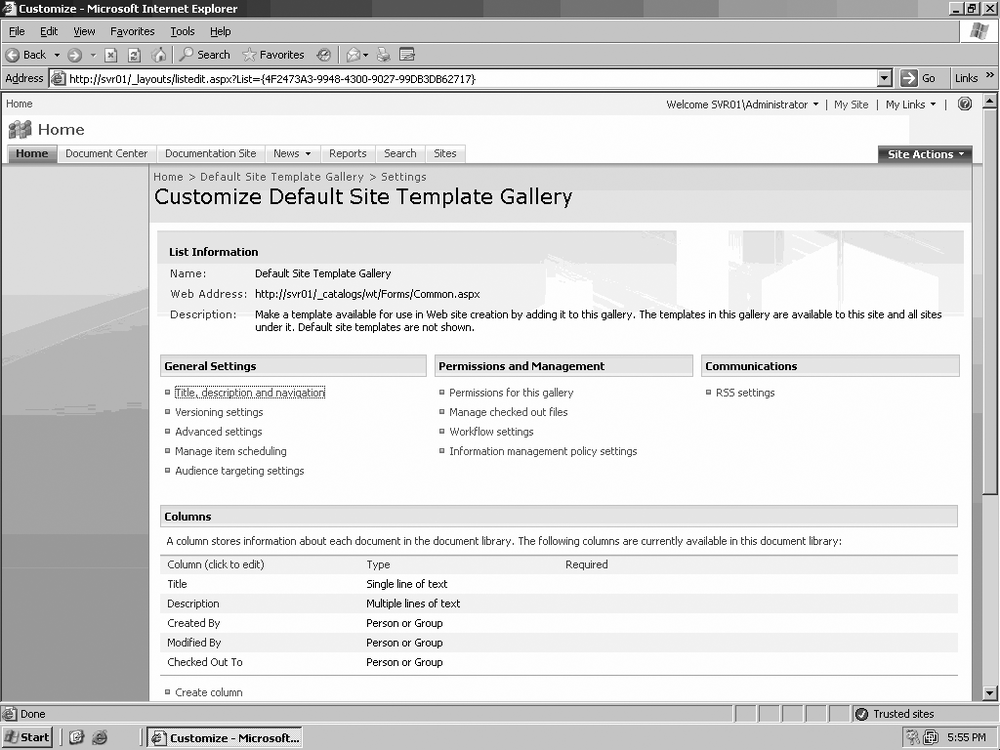
Periodically, you may find it necessary to change the layout or access permissions for your Site Template Gallery. To do this, you must be on the top-level site of your site collection:
Click Site Actions, select Site Settings from the menu, and then select Modify All Site Settings (Figure 7-9).
On the Site Settings page in the Galleries section, click “Site templates.”
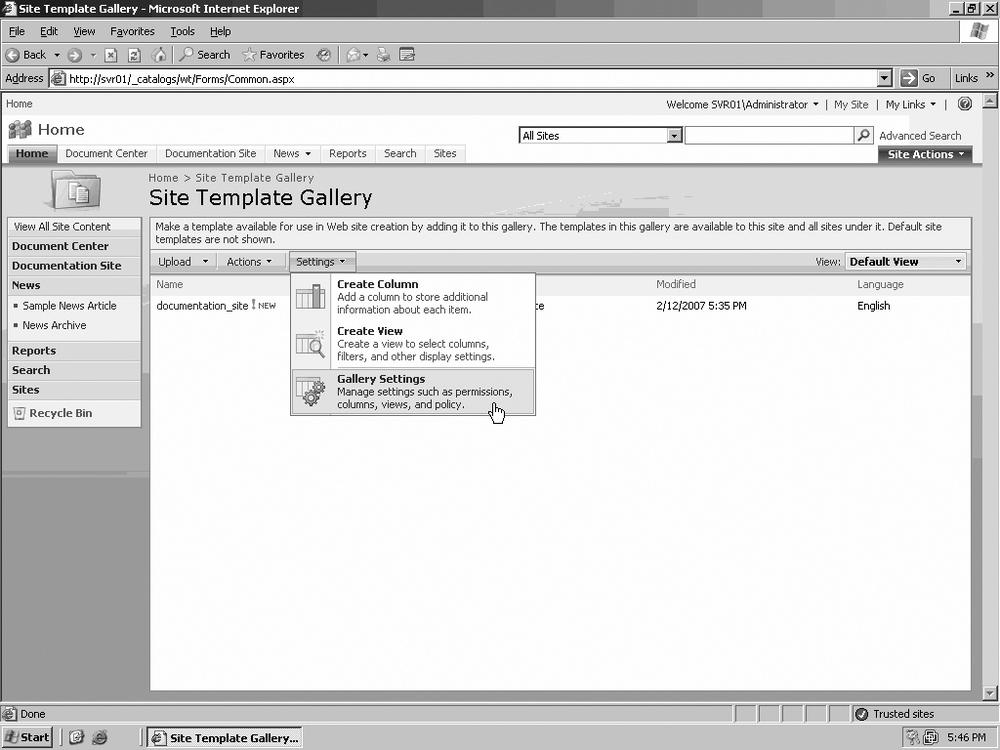
Click Settings, and then click Gallery Settings (Figure 7-10).
On the Customize Site Template Gallery page, locate the name of the property you want to modify under the available sections and click that property’s link.
Make whatever modifications you require and click Save (Figure 7-11).
Tip
You are returned to the Customize page. Notice that the Site Template Gallery title reflects the changes that were just made (Figure 7-12).
Not all site templates are forever. For example, your organization may completely redesign its logo and entire look and feel. Your corporate Internet and intranet sites will need to reflect these changes, and any site templates that are oriented to the old look and feel will need to be deleted to prevent accidental (and embarrassing) use. You must be on the top-level site of your site collection to do this:
Click Site Actions, select Site Settings from the menu, and then select Modify All Site Settings.
On the Site Settings page in the Galleries section, click “Site templates.”
Locate the name of the template you want to delete from the list, and click Edit (Figure 7-13).
On the Edit Item page, click Delete Item (Figure 7-14).
When the confirmation dialog box appears, click OK (Figure 7-15).

You are returned to the Site Template Gallery and can see that the site template has been deleted (Figure 7-16).
You can configure options related to how site templates will act on your site collection. For example, you can either allow a user creating a new site to use any template in the Site Template Gallery or limit the templates that can be used.
Click Site Actions, select Site Settings from the menu, and then select Modify All Site Settings.
On the Site Settings page, in the Look and Feel section, click “Page layouts and site templates.” In the Subsite Templates section, you have several options:
Select “Subsites can use any site template.”
Select “Subsites can only use the following templates,” choose which templates can be utilized, and then click Add.
Select “Reset all subsites” to inherit these preferred subsite template settings.
Click OK to save your changes.
A page layout is the overall structure of a Web Part web page. Web page layouts are controlled by the content type of the web page. For example, when you create a Web Part page, you can select the specific layout of the fields that will be used to contain Web Parts.

For pages with a designated content type, fields can hold only certain types of content. Each content type has columns that are related to the fields on the page. The columns are controlled by column templates that determine what each field can hold. Examples are a single line of text, a hyperlink, or a calculated value.
When you view or edit a particular page, the page content is displayed in field controls. This is like “Design this page view” in SharePoint 2003, and allows you to see the underlying layout of the page fields as well as the content type.
Page layouts are stored in a Document Library called the Master Page Gallery. The Master Page Gallery is created when you first install MOSS 2007. Each Master Page Gallery contains the master page, which is the default layout for each site. Master pages can be customized to suit your specific needs.
When you create a site, the master page is created by default. To create a new master page, you can modify and save the current master page under a new name. You can also simply edit the master page and save it with its original name.
Warning
To edit a master page, you must use a SharePoint-compatible web design program such as Microsoft Office SharePoint Designer.
On your site, click Site Actions and select Site Settings from the menu.
On the Site Settings page in the Galleries area, click “Master pages.”
On the Master Pages page, click the master page you want to modify.
Open the master page in your web design program by clicking Edit.
Use the features provided by your web design program to modify the master page.
Save the master page either with its original name or with a new name if you want to create a new master page.

Setting your Preferred Page Layouts is very similar to setting your Preferred Site Settings:
Click Site Actions, select Site Settings from the menu, and then select Modify All Site Settings.
On the Site Settings page, in the Look and Feel section, click “Page layouts and site templates.” In the Page Layouts section, you have several options:
Select “Pages in this site can use any layout.”
Select “Pages in this site can only use the following layouts,” choose which layouts you want to use, and then click Add.
Select “Variations” if you have source variations configured, and then select the source variation you want to apply to your page layouts.
Select “Reset all subsites” to inherit these preferred page layout settings.
Click OK to save your changes.

In addition to site templates and page layouts, you can modify the appearance of your site and site collection using themes. A theme is a collection of colors, fonts, and other design elements that lets you control the look and feel of your SharePoint site. You can select from among a series of default themes and apply them to your site. The application of any theme will have no impact on any portion of a site template or page layout.
Tip
You can also create a custom theme for your site with a SharePoint-compatible design program such as Microsoft Office SharePoint Designer.

Not everyone appreciates the default theme that’s applied when you first create a SharePoint site. Fortunately, changing to another theme is quite easy:
On your site, click Site Actions and select Site Settings from the menu.
In the Look and Feel column, click “Site theme.”
On the Site Theme page, select the desired theme (Figure 7-17).
Click Apply to apply the theme to your site.
As you can see, the new style is now applied to the site (Figure 7-18).
Yet another visual aspect that affects the presentation of your site collection is images. The most important image that appears on your site is your organization’s logo. Also, each department and team within your company may have their own unique logos or other images associated with them.
Although you can edit images in SharePoint, you cannot use SharePoint to create original graphics. Instead, you will need to use a commercially available product to create images for your site collection. Chances are you either have an art department in your organization that handles this area or have hired one to create your company logos, color schemes, and other design elements. Once those images are created, you can upload them into an image library in SharePoint and then place them wherever you want in your site collection.
Tip
Chapter 8 shows how to add image Web Parts to pages, and Chapter 13 covers picture libraries in detail.

SharePoint site pages contain a default logo image in the upper lefthand corner of the page. You will most likely want to replace that image with your company’s logo. You will need the URL that points to where your logo image is stored. Although you don’t have to store the logo in a SharePoint picture library, it makes more sense to keep all your site assets organized within SharePoint.
Prerequisites for this action are that the image must already have been created and uploaded into a SharePoint picture library. You will also need to know the URL of the image:
On your site, click Site Actions and select Site Settings from the menu.
On the Site Settings page in the Look and Feel column, click on “Title, description, and icon.”
In the “Logo URL and Description” section, replace the default URL in the URL field with the URL to your logo image (Figure 7-19). The easiest way to do this is to copy it from the picture library and paste it in the URL field.
Type a description of the image in the Description field. The description is the alternate text for your image in the event that the image cannot be viewed.
Under the URL field, click “Click here” to test (Figure 7-20).
Close the window displaying the image.
Click OK to apply your changes.
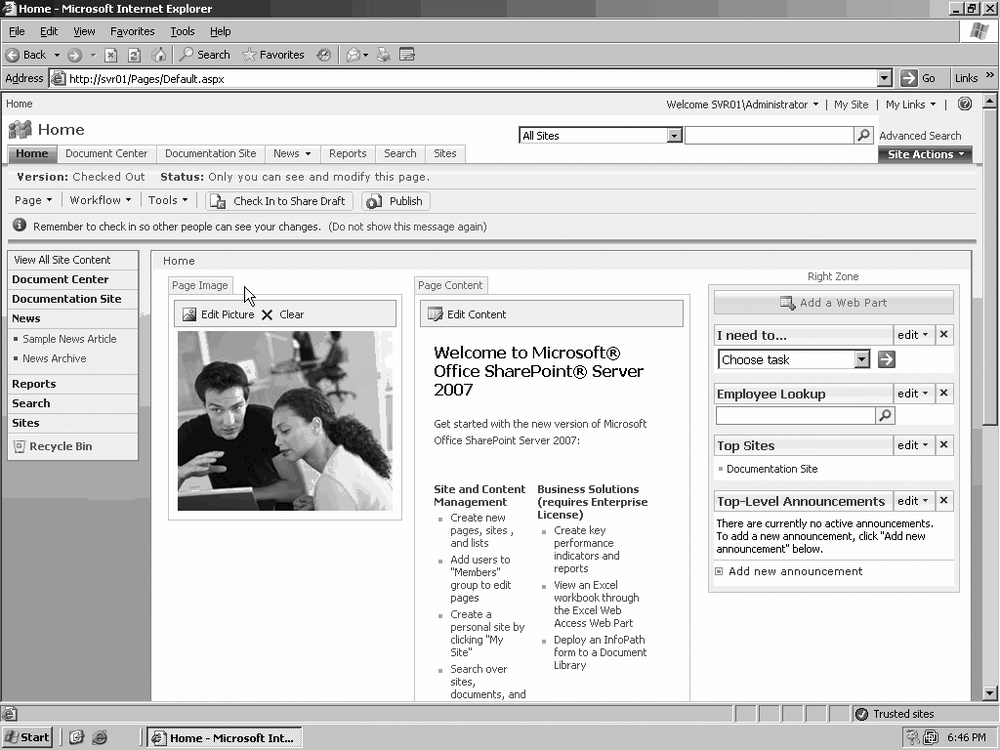
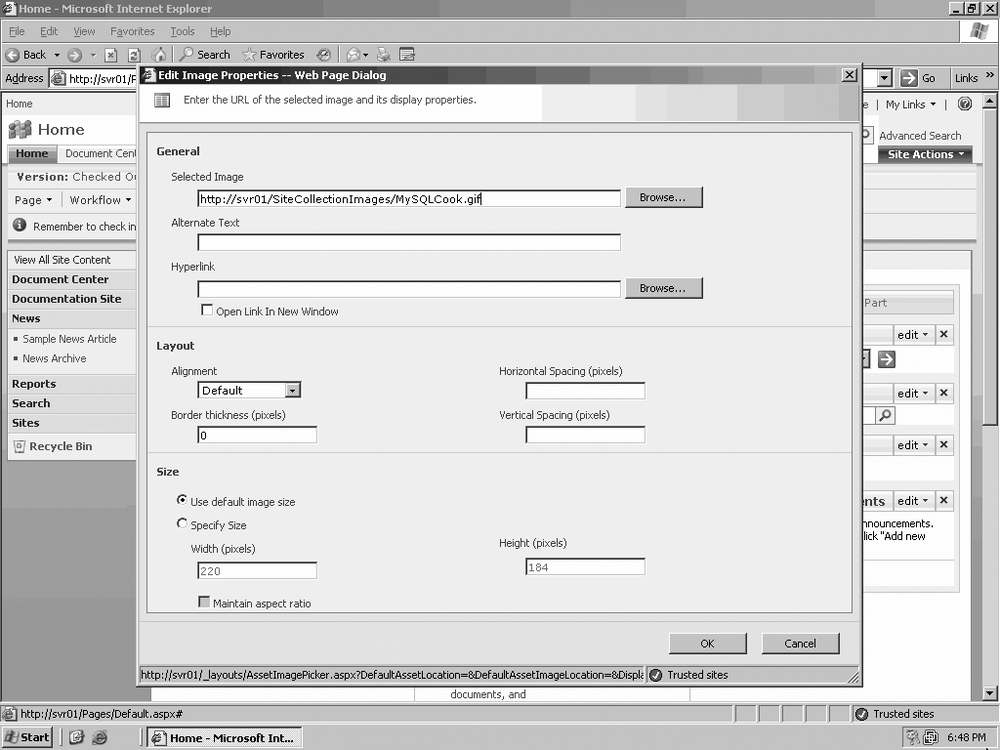
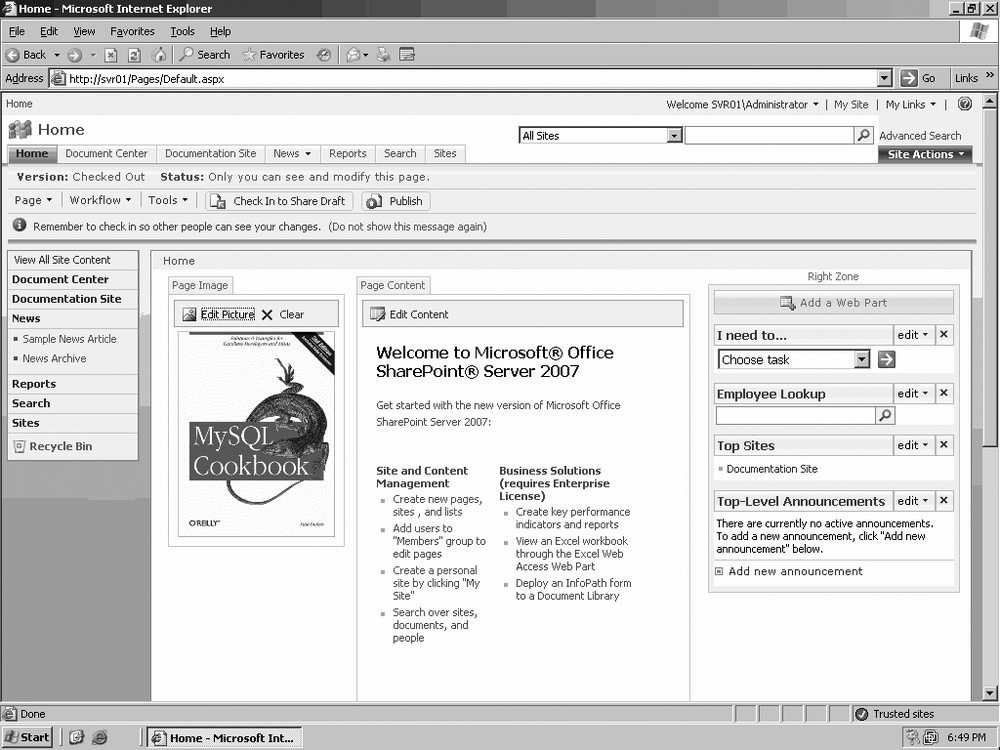
By default, an image is placed in the body of the top-level site’s main page. This is basically a temporary placeholder that is meant to be replaced or deleted once you’ve installed SharePoint and modified the top-level site. To make the process easier, first put the image you want to use in a SharePoint image library and copy the URL to the image:
Click Site Actions and select Edit Page from the menu.
Locate the Site Image Web Part and click Edit Picture (Figure 7-21).
Select Modify Shared Web Part from the menu.
Replace the URL in the URL field with the URL to the image you want to use (Figure 7-22).
Click Test Link to verify that the URL to your image is valid. A separate window will open to notify you of the link’s validity. You can close this window after you are done with it.
Type a short description of the image in the Alternate Text field.
Click OK to save your changes (Figure 7-23).
Click “Check In to Share Draft.” At this point, you can either click Edit Page to continue your modifications or click Publish to apply your changes to the most recent version.


As you can see, you have a great deal of flexibility in how you can customize the appearance and usability of your MOSS 2007 site collection. You can either use the default templates that ship with SharePoint or develop your own. Page layouts let you determine where and how site content is organized on a web page, and numerous built-in themes are available to modify your site’s color scheme, fonts, and other visual elements. You can also brand your site with your company’s logo and other visual indicators that are uniquely associated with your business. Using the tools presented in this chapter, you should have no difficulty in creating a site or site collection that looks and behaves exactly as you desire.