
Chapter 6. Designing Websites with Themes
An ASP.NET Theme enables you to apply a consistent style to the pages in your website. You can use a Theme to control the appearance of both the HTML elements and ASP.NET controls that appear in a page.
Themes are different than Master Pages. A Master Page enables you to share content across multiple pages in a website. A Theme, on the other hand, enables you to control the appearance of the content.
In this chapter, you learn how to create and apply ASP.NET Themes. First, you learn how to create Skins, which enable you to modify the properties of an ASP.NET control that have an effect on its appearance. You learn how to create both Default and Named Skins.
Next, you learn how to format both HTML elements and ASP.NET controls by adding Cascading Style Sheets (CSS) to a Theme, which enable you to control the appearance and layout of pages in a website in a standards-compliant manner.
You also learn how you can create Global Themes, which can be used by multiple applications located on the same server. You learn how to use Global Themes with both file systems and HTTP-based websites.
Finally, you learn how to load Themes and Skins dynamically at runtime. You build a page that each user of a website can customize by skinning.
Creating Themes
You create a Theme by adding a new folder to a special folder in your application named App_Themes. Each folder that you add to the App_Themes folder represents a different Theme.
If the App_Themes folder doesn’t exist in your application, you can create it. It must be located in the root of your application.
Visual Web Developer Note
When using Visual Web Developer, you can create a new Theme folder by right-clicking the name of your project in the Solution Explorer window and selecting Add Folder, Theme Folder.
A Theme folder can contain a variety of different types of files, including images and text files. You also can organize the contents of a Theme folder by adding multiple subfolders to a Theme folder.
Following are the most important types of files in a Theme folder:
• Skin Files
• Cascading Style Sheet Files
In the following sections, you learn how to add both Skin files and CSS files to a Theme.
Warning
Be careful about how you name your Theme (the folder name). The contents of a Theme folder are automatically compiled in the background into a new class. Don’t name a Theme with a class name that conflicts with an existing class name in your project.
Adding Skins to Themes
A Theme can contain one or more Skin files. A Skin enables you to modify any of the properties of an ASP.NET control that have an effect on its appearance.
For example, imagine that you decide that you want every TextBox control in your web application to appear with a yellow background color and a dotted border. If you add the file in Listing 6.1 to the Simple Theme (the App_ThemesSimple folder), you can modify the appearance of all TextBox controls in all pages that use the Simple Theme.
Listing 6.1. SimpleTextBox.skin

The Skin file in Listing 6.1 is named TextBox.skin. You can name a Skin file anything you want. I recommend following a naming convention in which you name the Skin file after the name of the control that the Skin modifies.
A Theme folder can contain a single Skin file that contains Skins for hundreds of controls. Alternatively, a Theme can contain hundreds of Skin files, each of which contains a single Skin. It doesn’t matter how you organize your Skins into files because everything in a Theme folder eventually gets compiled into one Theme class.
The Skin file in Listing 6.1 contains a declaration of a TextBox control. The TextBox control includes a BackColor property set to the value Yellow and a BorderStyle property set to the value Dotted.
The TextBox control includes a Runat="Server" attribute, but it does not include an ID attribute. You must always include a Runat attribute, but you can never include the ID attribute when declaring a control in a Skin.
Note
You can’t create a Skin that applies to the properties of a User Control. However, you can skin the controls contained inside a User Control.
The Skin is applied to every page to which the Simple Theme is applied. For example, the page in Listing 6.2 uses the Simple Theme.
Listing 6.2. ShowSkin.aspx
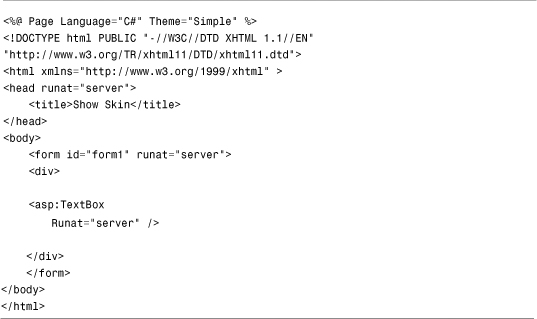
The page in Listing 6.2 includes a Theme attribute in its <%@ Page %> directive. This attribute causes the Simple Theme to be applied to the page.
When you open the page in Listing 6.2, the Label control appears with a yellow background color and dotted border. This is the background color and border specified by the Theme (see Figure 6.1).
Figure 6.1. Using a TextBox Skin.

Only certain control properties are “themeable.” In other words, you can create a Skin file that modifies only certain properties of a control. In general, you can use a Skin to modify properties that have an effect on a control’s appearance but not its behavior. For example, you can modify the BackColor property of a TextBox control but not its AutoPostBack property.
Note
By default, all control properties are themeable (can be modified in a Skin file). However, certain control properties are decorated with the Themeable(False) attribute, which disables theming.
Creating Named Skins
In the previous section, we created something called a Default Skin. A Default Skin is applied to every instance of a control of a certain type. For example, a Default Skin is applied to every instance of a TextBox control.
You also have the option of creating a Named Skin. When you create a Named Skin, you can decide when you want to apply the Skin. For example, you might want required fields in a form to appear with a red border. In that case, you can create a Named Skin and apply the Skin to only particular TextBox controls.
The Skin in Listing 6.3 contains both a Default Skin and a Named Skin for a TextBox control.
Listing 6.3. Simple2TextBox.skin

The first TextBox in Listing 6.3 is an example of a Named Skin and includes a SkinID property. The SkinID property represents the name of the Named Skin. You use the value of this property when applying the Skin in a page.
The file in Listing 6.3 also includes a Default Skin for a TextBox control. The Default Skin does not include a SkinID property. If a TextBox control in a page is not associated with a Named Skin, the Default Skin is applied to the TextBox.
A Theme can contain only one Default Skin for each type of control. However, a Theme can contain as many Named Skins as you want. Each Named Skin must have a unique name.
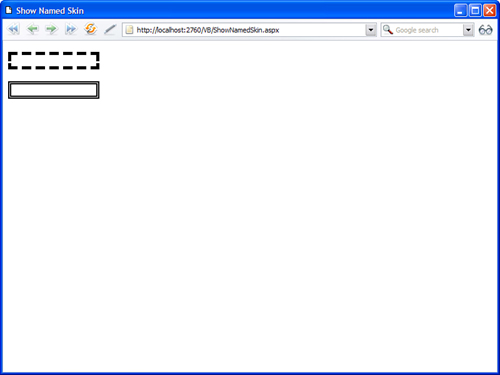
The page in Listing 6.4 contains two TextBox controls. The first TextBox control includes a SkinID attribute. This attribute causes the Named Skin to be applied to the control. The second TextBox, on the other hand, does not include a SkinID property. The Default Skin is applied to the second TextBox control.
Listing 6.4. ShowNamedSkin.aspx

When you open the page in Listing 6.4, the first TextBox appears with a dashed border, and the second TextBox appears with a double border (see Figure 6.2).
Figure 6.2. Using Named Skins.
Themes Versus StyleSheetThemes
When you apply a Theme to a page, the Skins in the Theme override any existing properties of the controls in the page. In other words, properties in a Skin override properties in a page.
For example, imagine that you create the Skin in Listing 6.5.
Listing 6.5. Simple3Label.skin

The Skin in Listing 6.5 sets the background color of all Label controls to the color Orange.
Now, image that you apply the Skin in Listing 6.5 to the ASP.NET page in Listing 6.6.
Listing 6.6. ShowSkinTheme.aspx

The page in Listing 6.6 includes a Label that has a BackColor property that is set to the value Red. However, when you open the page, the BackColor declared in the Skin overrides the BackColor declared in the page, and the Label displays with an orange background.
The default behavior of Themes makes it easy to modify the design of an existing website. You can override any existing control properties that have an effect on the appearance of the control.
However, there are situations in which you might want to override Skin properties. For example, you might want to display every Label in your website with an orange background color except for one Label. In that case, it would be nice if there were a way to override the Skin property.
You can override Skin properties by applying a Theme to a page with the StyleSheetTheme attribute instead of the Theme attribute. For example, the page in Listing 6.7 uses the StyleSheetTheme attribute to apply the Simple3 Theme to the page.
Listing 6.7. ShowSkinStyleSheetTheme.aspx

The <%@Page %> directive in Listing 6.7 includes a StyleSheetTheme attribute. When you open the page in Listing 6.7 in a web browser, the Label displays with a red background color instead of the orange background color specified by the Theme.
Disabling Themes
Every ASP.NET control includes an EnableTheming property. You can use the EnableTheming property to prevent a Skin from being applied to a particular control in a page.
For example, the page in Listing 6.8 contains two Calendar controls. The second Calendar control has its EnableTheming property set to the value False (see Figure 6.3).
Figure 6.3. Disabling a Theme.

Listing 6.8. ShowEnableTheming.aspx

The page in Listing 6.8 includes a Theme attribute that applies the Simple Theme to the page. The Simple Theme includes the Skin in Listing 6.9.
Listing 6.9. Simple4Calendar.skin

When you open the page in Listing 6.9 in a web browser, the Skin is applied to the first Calendar control but not the second Calendar control.
Registering Themes in the Web Configuration File
Rather than add the Theme or StyleSheetTheme attribute to each and every page to which you want to apply a Theme, you can register a Theme for all pages in your application in the web configuration file.
The Web.Config file in Listing 6.10 applies the Site Theme to every page in an application.
Listing 6.10. Web.Config

Rather than use the theme attribute, you can use the styleSheetTheme attribute to apply a Theme to the pages in an application. If you use the styleSheetTheme attribute, you can override particular Skin properties in a page.
The web configuration file in Listing 6.11 includes the styleSheetTheme attribute.
Listing 6.11. Web.Config

After you enable a Theme for an application, you can disable the Theme for a particular page by using the EnableTheming attribute with the <%@ Page %> directive. For example, the page in Listing 6.12 disables any Themes configured in the web configuration file.
Listing 6.12. DisablePageTheme.aspx

Adding Cascading Style Sheets to Themes
As an alternative to Skins, you can use a CSS file to control the appearance of both the HTML elements and ASP.NET controls contained in a page. If you add a CSS file to a Theme folder, the CSS is automatically applied to every page to which the Theme is applied.
For example, the CSS in Listing 6.13 contains style rules applied to several different HTML elements in a page.
Listing 6.13. App_ThemesStyleThemeSimpleStyle.css

If you add the SimpleStyle.css file to a Theme named StyleTheme (a folder named StyleTheme in the App_Themes folder), the Cascading Style Sheet is applied automatically to the page in Listing 6.14.
Listing 6.14. ShowSimpleCSS.aspx


The CSS is used to style several HTML elements in Listing 6.14 (see Figure 6.4). For example, the Style Sheet sets the background color of the page to the value Gray. It also centers the <div> tag containing the page content.
Figure 6.4. Styling with Cascading Style Sheets.

Because an ASP.NET control renders HTML, the Style Sheet also styles the HTML rendered by the ASP.NET Label, TextBox, and Button controls. An ASP.NET Label control renders an HTML <label> tag and the Style Sheet formats all <label> tags in bold. Both a TextBox control and a Button control render HTML <input> tags. The Style Sheet modifies the border and background color of the <input> tag.
The Button control includes a CssClass attribute. By providing a control with a CssClass attribute, you can target a particular control (or set of controls) in a CSS. In this case, the background color of the <input> tag rendered by the Button control is set to the value #eeeeee (light gray).
I recommend that you do all your web page design by using the method discussed in this section. You should place all your page design in an external CSS located in a Theme folder. In particular, you should not modify the appearance of a control by modifying its properties. Furthermore, you should avoid using Skin files.
The advantage of using Cascading Style Sheets is that they result in leaner and faster loading pages. The more content that you can place in an external Style Sheet, the less content must be loaded each time you make a page request. The contents of an external Style Sheet can be loaded and cached by a browser and applied to all pages in a web application.
If, on the other hand, you modify the appearance of a control by modifying its properties, additional content must be rendered to the browser each time you make a page request. For example, if you modify a Label control’s BackColor property, an additional Style attribute is rendered when the Label control is rendered.
Using Skins is no different than setting control properties. Skins also result in bloated pages. For example, if you create a Skin for a Label control, the properties of the Label Skin must be merged with each Label control on each page before the Label is rendered.
Note
In this book, I try to avoid formatting controls by using control properties. Instead, I perform all the formatting in a Style Sheet embedded in the page (using the <style> tag). I would prefer to place all the control formatting in an external Style Sheet, but that would require creating a separate file for each code sample, which would make this book much longer than it already threatens to be.
Adding Multiple Cascading Style Sheets to a Theme
You can add as many CSS files to a Theme folder as you need. When you add multiple Cascading Style Sheets to a Theme, all the Cascading Style Sheets are applied to a page when the Theme is applied to a page.
The order in which an external Style Sheet is linked to a page can be important. For example, style sheet rules in one Style Sheet can override style sheet rules in another Style Sheet.
When you add multiple Style Sheets to a Theme, the style sheets are linked to a page in alphabetical order (in the order of the Style Sheet filename). For example, if the Theme contains three Style Sheet files named ThemeA.css, ThemeB.css, and ThemeC.css, the following three links are added to a page:
![]()
If you want to control the order in which Style Sheets are applied to a page, you need to follow a naming convention.
Changing Page Layouts with Cascading Style Sheets
Because you can use a Cascading Style Sheet to change the layout of a page, you can use a Theme to control page layout.
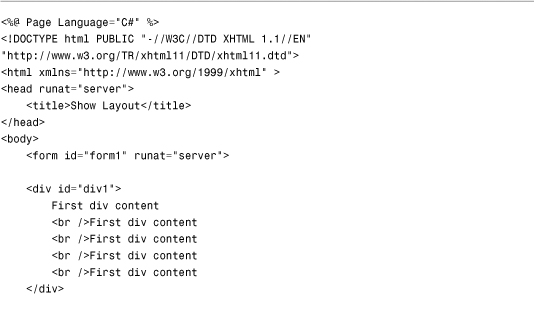
For example, the page in Listing 6.15 contains three <div> tags. By default, if you open the page, the contents of the <div> tags are stacked one on top of another (see Figure 6.5).
Figure 6.5. Page without Cascading Style Sheet.

Listing 6.15. ShowLayout.aspx

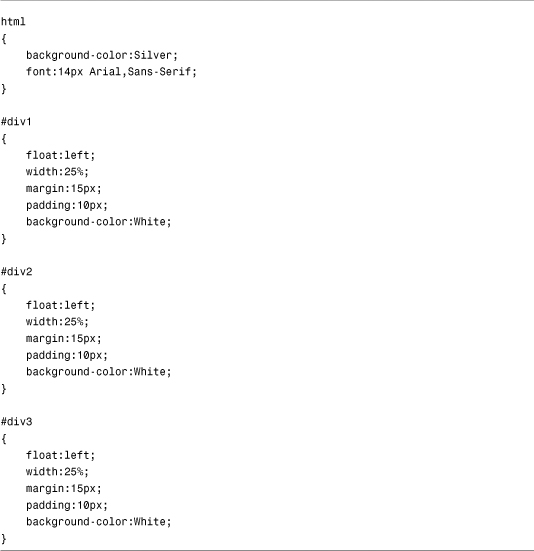
If you add the Cascading Style Sheet in Listing 6.16, you can modify the layout of the <div> tags (see Figure 6.6). The Style Sheet in Listing 6.16 displays the <div> tags in three columns. (The Stylesheet floats each of the <div> tags.) You can appy this stylesheet to your page using the following line of code in the <head> tag:
<link href="float.css" type="text/css" rel="stylesheet" />
Figure 6.6. Using a floating layout.
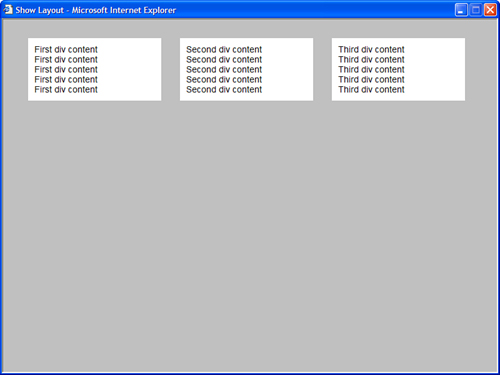
Listing 6.16. Float.css
Alternatively, you can position the <div> tags absolutely by using the left and top style properties. The Style Sheet in Listing 6.17 reverses the order in which the three <div> tags are displayed (see Figure 6.7).
Figure 6.7. Using an absolute layout.

Note
The Cascading Style Sheets in this section work equally well with Internet Explorer, Firefox, and Opera.
Listing 6.17. Absolute.css

The point of this section is to demonstrate that Cascading Style Sheets are powerful. You can create elaborate website designs simply by creating the right Style Sheet. If you want to see some samples of some amazing website designs performed with Cascading Style Sheets, visit the CSS Zen Garden located at http://www.CSSZenGarden.com.
Creating Global Themes
You can share the same Theme among multiple web applications running on the same web server. A Global Theme can contain both Skin files and CSS files. Creating a Global Theme is useful when you want to create one companywide website design and apply it to all your company’s applications.
You create a Global Theme by adding the Theme to the Themes folder located at the following path:
WINDOWSMicrosoft.NETFramework[version]ASP.NETClientFilesThemes
After you add a Theme folder to this path, you can immediately start using the Theme in any file system-based website.
If you want to use the Theme in an HTTP-based website, you need to perform an additional step. You must add the Theme folder to the following path:
Inetpubwwwrootaspnet_clientsystem_web[version]Themes
You can copy the Theme to this folder manually or you can use the aspnet_regiis tool to copy the Theme folder. Execute the aspnet_regiis tool from the command line like this:
aspnet_regiis -c
The aspnet_regiis tool is located in the WindowsMicrosoft.NETFramework[version] folder. You can open a command prompt and navigate to this folder to execute the tool. Alternatively, if you have installed the Microsoft .NET Framework SDK, you can execute the tool by opening the SDK Command Prompt from the Microsoft .NET Framework SDK program group.
Applying Themes Dynamically
You might want to enable each user of your website to customize the appearance of your website by selecting different Themes. Some website users might prefer a green Theme, and other website users might prefer a pink Theme.
You can dynamically apply a Theme to a page by handling the Page PreInit event. This event is the first event raised when you request a page. You cannot apply a Theme dynamically in a later event such as the Page Load or PreRender events.
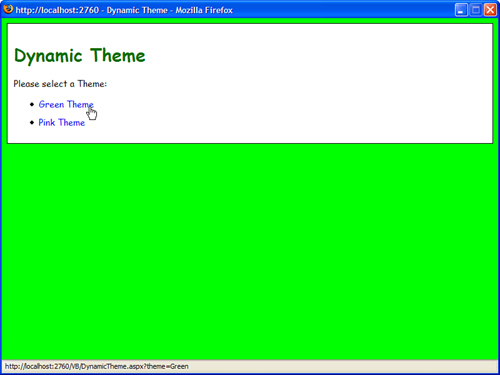
For example, the page in Listing 6.18 applies either the Green Theme or the Pink Theme to the page depending on which link you click in the page body (see Figure 6.8).
Figure 6.8. Selecting a Theme programmatically.
Listing 6.18. DynamicTheme.aspx

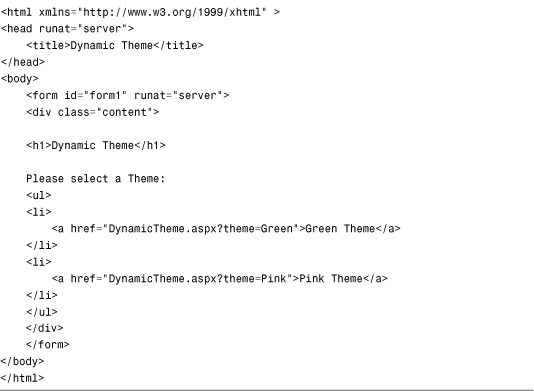
A particular Theme is applied to the page with the help of the Theme property. You can assign the name of any Theme (Theme folder) to this property in the Page PreInit event, and the Theme will be applied to the page.
The selected Theme is stored in the Profile object. When you store information in the Profile object, the information is preserved across multiple visits to the website. So, if a user selects a favorite Theme once, the Theme is applied every time the user returns to the website in the future.
The Profile is defined in the web configuration file in Listing 6.19.
Listing 6.19. Web.Config

Because the control tree has not been created when the PreInit event is raised, you can’t refer to any controls in a page. Hyperlinks are used in Listing 6.18 to select a Theme. You could not use a DropDownList control because the DropDownList control would not have been created.
Note
If you need to load a Theme dynamically for multiple pages in an application, you can override the OnPreInit() method of the base Page class. This technique is discussed in the “Loading Master Pages Dynamically for Multiple Content Pages” section of Chapter 5, “Designing Websites with Master Pages.”
Applying Skins Dynamically
You can apply skins dynamically to particular controls in a page. In the Page PreInit event, you can modify a control’s SkinID property programmatically.
For example, the page in Listing 6.20 enables a user to select a favorite skin for a GridView control. The GridView control displays a list of movies (see Figure 6.9).
Figure 6.9. Applying a Skin programmatically.

Listing 6.20. ShowDynamicSkin.aspx

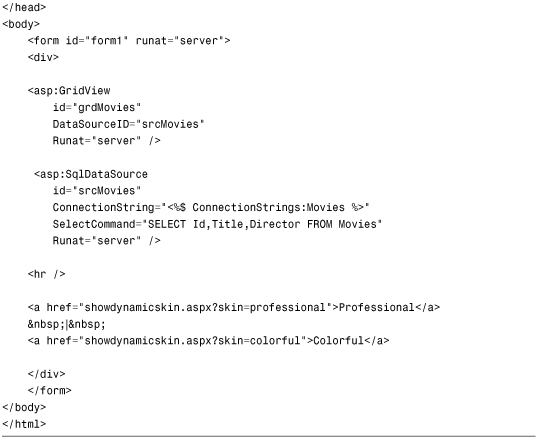
A hyperlink is used to select a particular Skin. The Skin is applied to the GridView in the PreInit event when a particular value is assigned to the GridView control’s SkinID property.
Of course, I don’t recommend doing this. It makes more sense to use a CSS and modify a control’s CssClass property. This alternative approach is demonstrated by the page in Listing 6.21.
Listing 6.21. ShowDynamicCSS.aspx


Note that in this code sample, unlike the previous one, you can use a DropDownList and Button control to change the appearance of the GridView control when modifying the CssClass property. Because you can modify the CssClass property during any event before the page is rendered, you can handle the Button Click event to modify the value of the CssClass property (see Figure 6.10).
Figure 6.10. Modifying a CssClass programmatically.

Summary
In this chapter, you learned how to create a consistent look for your website by taking advantage of ASP.NET Themes. In the first section, you learned how to modify the appearance of controls in a page with Skins. You learned how to create both Default and Named Skins. You also learned how to apply a Theme by using the Theme attribute and StyleSheetTheme attribute.
Next, you learned how to add Cascading Style Sheets to Themes. I recommended that you take advantage of Cascading Style Sheets and avoid Skins whenever possible.
We also discussed how you can create Global Themes. You learned how to create a Theme that you can apply to every application executing on a web server.
Finally, you learned how to dynamically apply Themes. You learned how to use the PreInit event to dynamically apply either an entire Theme or a particular Skin at runtime.