
Creating the Bank ASP.NET Web Service
This example demonstrates how to create two ASP.NET Visual Basic .NET Web Services that implement the Visual Basic .NET managed objects business logic created in Chapter 14.
Note
If you have not implemented Chapter 14's example, you may want to download Chapter 14's code from the publisher's Web site at this time. For more information regarding the BankVB.vb .NET example or for an overview of .NET, refer to Chapter 14.
The figures in this chapter depict a development environment that builds on Chapter 14's example. For simplicity, we added the two new Visual Studio .NET projects created in this chapter to the BTSDotNet solution created in Chapter 14.
We are going to walk through each of the following steps. After we complete the steps, we will modify the Transaction.skv BizTalk Orchestration schedule to implement the Web Services created.
1. |
Set up the development environment. |
2. |
Create the BankWS ASP.NET Web Service project and add the BankWS and UpdateBankWS Web Services (.asmx files). |
3. |
Add the business logic to the Web Service .asxm files defining the Web Service methods. |
4. |
Add transaction attributes and the required assemblies to the .NET Web method code. |
5. |
Test an ASP.NET Web Service from a browser. |
6. |
Modify the BankVBWebClient ASP.NET project to test the Web Services from the BankVBClient.aspx ASP.NET Web form. |
Setting Up the Development Environment
The development environment for this example requires an MSMQ private queue named ReceiveRequest and two SQL Server databases named BankofAmerica and Fidelity. The MSMQ private queue can be created by selecting the Start, Administrative Tools, Computer Management menu option. In the management console that appears, navigate to the Services and Applications, Message Queuing, Private Queues folder in the tree view. Right-click on Private Queues and select New. In the dialog that appears, enter the queue name as ReceiveRequest. Be aware that MSMQ queue names are case sensitive and that the queue must be transactional. Figure 15.2 shows the MSMQ receiverequest Properties dialog.

Note
The source code and required setup files to create the MSMQ and databases can be found on the publisher's Web site in the directory for this chapter.
The two database tables can be created by downloading the CreateDBs.sql script located on the publisher's Web site in the Setup directory for this chapter or manually by using the SQL Server Enterprise Manager. The two database names are Fidelity and BankofAmerica. Each contains a single database table named Accounts with two fields, AccountNo and Amount, both integers. Each table should have a single record with the account number of 1 and an amount greater than 0. The SQL script automatically creates the databases and inserts a single record in each Account table.
Creating a New Web Service Project
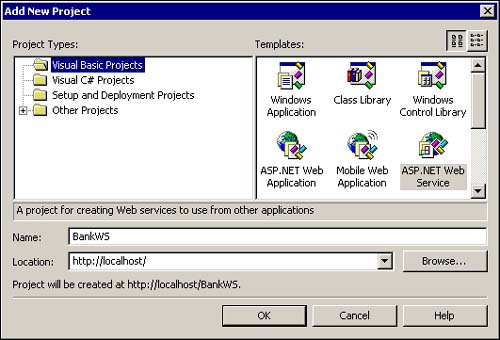
To add a new Visual Studio .NET Web Service project to the BTSDotNet solution, open the BTSDotNet solution and then right-click on it in the Solution Explorer. In the pop-up menu that appears, select Add, New Project from the menu. In the dialog that appears, select the Visual Basic ASP.NET Web Service project option and name it BankWS as displayed in Figure 15.3. You can also choose to create a new solution and add the Web Service project to it; however, the examples in this chapter assume that the solution is the BTSDotNet solution from Chapter 14.
In the new BankWS Web service project that appears, select the Service1.asmx file and rename it BankWS.asmx. Then select the BankWS Web service project in the Solution Explorer and right-click. In the pop-up menu that appears, select Add, A Web Service. In the dialog that appears, name the service UpdateBankWS and save the project.
Adding the Business Logic and Defining the Web Service Methods
The BankWS and UpdateBankWS Web services are going to implement the same business logic as the Bank.vb Visual Basic .NET managed object created in Chapter 14. The BankVB.vb file contains two Visual Basic .NET classes, QueryBankVB and UpdateBankVB. In the Web Services implementation of these classes, we are going to separate the classes into two distinct Web Service files. The QueryBankVB class code will become the BankWS.asmx Web Service, and the UpdateBankVB code will become UpdateBankWS.asmx.
As you begin to migrate the business logic into the Web Services files, you will notice a few subtle but important differences. First, the BankVB object was implemented as a .NET managed object and then later exposed via a COM wrapper to a BizTalk Orchestration schedule. To ensure that the object was registered properly with COM, we added a few attributes that will no longer be required in the Web Services implementation. Also notice that the UpdateBankVB class uses COM+ transactions. The Web Services version of this code supports transactions as well; however, the Web Services transaction model handles them in a slightly different manner. We will cover the transactional aspects of Web Services in the next section, “Adding Transaction Attributes and an Assembly to the Web Methods.”
In the previous step, we created the two .asmx Web service files; in this step, we copy the business logic from the BankVB.vb file into each.
To begin, follow these steps:
1. |
Open the BankWS.asmx file and select the Click here to switch to code hyperlink. |
2. |
Rename the default class named Service1 to QueryBankWS and then open the Bank.vb file in the BankVB Visual Basic .NET project. |
3. |
Navigate to the QueryBankVB class and copy the DisplayBalances, DisplayMsg, and GetBalance methods to the Windows Clipboard. Then, switch back to the BankWS.asmx file and paste the code in the Clipboard to the QueryBankWS class in between the public class declaration statements. |
4. |
Although the methods are now members of the class, they are not yet publicly available as WebMethods in the Web Service. To expose the three methods as Web methods, place the attribute <WebMethod()> in front of each as displayed in Listing 15.1. We are not going to expose this class to a BizTalk Orchestration schedule using COM wrappers, so there is no need to add the <ComClass("D995F48F-C075-426b-8D49-6B4E17CFF3F5")> attribute as we did in the BankVB managed object. |
Finally, we need to make one small modification to the business logic. Web Services are nonvisual objects and, therefore, do not have the capability to pop up message boxes. In the BankVB example in Chapter 14, we used the DisplayMsg method to display a message box containing the current account balance as the XML document moved through the schedule actions. The DisplayBalances method in the BankVB implementation calls the DisplayMsg method. To eliminate the message box call, comment out that line in the DisplayBalances method that calls the DisplayMsg method. You can leave the DisplayMsg method intact or delete it. In either case, it will not be exposed as a public method in our Web Service. In the section “Calling Web Service Methods from a BizTalk Orchestration Schedule,” we will modify the BizTalk Orchestration schedule to accommodate the need to display the balance information without using this method in the Web Service. Listing 15.1 displays the code for the QueryBankWS class.
Note
You will also need to add a reference to the ADODB COM library as done in Chapter 14 to reference the ADO data access objects.
Listing 15.1. The QueryBankWS.asmx File
Imports System.Web.Services
<WebService(Namespace:="http://tempuri.org/")> _
Public Class QueryBankWS
Inherits System.Web.Services.WebService
' WEB SERVICE EXAMPLE
' The HelloWorld() example service returns the string Hello World.
' To build, uncomment the following lines then save and build the project.
' To test this web service, ensure that the .asmx file is the start page
' and press F5.
'
'<WebMethod()> Public Function HelloWorld() As String
' HelloWorld = "Hello World"
' End Function
<WebMethod()> Public Function DisplayBalances(ByVal Bank1Account As Integer, ByVal
|
Next, we need to add the business logic to the UpdateBankWS.asmx Web Service. To begin, select and open the UpdateBankWS.asmx file in Visual Studio .NET and select the Click here to switch to code view hyperlink. Then, open the BankVB.vb file and navigate to the UpdateBankVB public class and copy the Debit and Credit functions to the Windows Clipboard. Next, switch back to the UpdateBankWS.asmx file and copy the code in the Clipboard in between the public class declarations inside the file. The BankVB.vb implementation of this business logic implements the Serviced Component .NET interface allowing the UpdateBankVB class to participate in COM+ transactions. The Web Services model handles COM+ transactions a little differently, so for now delete the following attributes if you copied them:
<AutoComplete>
<Transaction(TransactionOption.Requires>
ComClass("73297D71-DA59-43b6-9511-9743B379BF02")>
Again, to expose the methods as Web methods, place the <WebMethod()> attribute in front of each of the methods. You also need to import two System namespaces, System. WebServices for the Web Services functionality, and System.Enterprise Services to allow the methods to participate in COM+ transactions. Listing 15.2 shows the code for UpdateBankWS.asmx Web Service.
Listing 15.2. The UpdateBankWS.asmx File
Imports System.Web.Services
Imports System.EnterpriseServices
<WebService(Namespace:="http://tempuri.org/")> _
Public Class UpdateBankWS
Inherits System.Web.Services.WebService
' WEB SERVICE EXAMPLE
' The HelloWorld() example service returns the string Hello World.
' To build, uncomment the following lines then save and build the project.
' To test this web service, ensure that the .asmx file is the start page
' and press F5.
'
'<WebMethod()> Public Function HelloWorld() As String
' HelloWorld = "Hello World"
' End Function
<WebMethod(TransactionOption:=TransactionOption.RequiresNew)> Public Function Credit
|
Notice the addition of transaction properties on the WebMethod attributes. We will discuss these at length a little later in the chapter in the section “Adding Transaction Attributes and an Assembly to the Web Methods.”
Now, save the files you've created and build the BankWS Web Service project. To save the files, select the BankWS Web Service project in the Visual Studio .NET Solution Explorer and then select File, Save from the menu. Next, select Build, Build BankWS from the menu. If build is successful, you see the message as displayed in Figure 15.4.
Figure 15.4. Building the BankWS Visual Studio .NET Web Service.

When you create a new Web Service project, it automatically creates a virtual directory at the destination you specified in the project's properties. When you build a Web Service, Visual Studio .NET automatically deploys it to that virtual directory. Deploying a Web Service involves copying the .asmx file and assemblies used by the Web Service that are not a part of the Microsoft .NET Framework to its virtual directory.
For example, the BankWS Web Service in this example lives in a virtual directory named BankWS off the root of the localhost (susiea) of the local machine. To verify this, you can open the Internet Services Manager management console by selecting the Start menu's, Programs, Administrative Tools option. Then, select the Internet Services Manager menu option. The BankWS virtual directory is displayed in the management console in Figure 15.5.
Figure 15.5. The Internet Services Manager Management Console.

In the next step, we will add the transaction attributes to the Web services.
Adding Transaction Attributes and an Assembly to the Web Methods
Transaction support in ASP.NET Web Services leverages the transaction support found in the common language runtime and is based on the COM+ Services model. You declare a Web Service's transactional behavior by setting the TransactionOption property in the WebMethod attribute. If an exception is thrown during a Web Service method, the transaction is automatically aborted; otherwise, the transaction is automatically committed. Due to the stateless nature of HTTP, Web Service methods can participate only as the root object in a transaction. Web Service methods, however, can invoke objects that participate in the same transaction if the object is marked to run within a COM+ transaction.
In our example, we call two Web methods from the context of a BizTalk Orchestration transaction, Debit and Credit, both of which are set with a TransactionOption property of RequiresNew. Because a Web Service can act only as the root object in a transaction, it will be instantiated in its own transactional context. So, for example, if the Debit action succeeds and the Credit action fails, the BizTalk Orchestration schedule will have to manually compensate for the failure by executing business logic to reverse the debit. This will require a slight modification to the BizTalk Orchestration schedule, BankTransactionWS.skv, and will be covered in the section “Calling Web Service Methods from a BizTalk Orchestration Schedule.”
In our example, the only class that requires transaction support is the UpdateBankWS.asmx Web service's UpdateBankWS class. To add this support, add the following assembly and namespace references prior to the class declarations in the UpdateBankWS.asmx file as displayed in the following code:
Imports System.Web.Services
Imports System.EnterpriseServices

Public Class UpdateBankWS
    Inherits System.Web.Services.WebService
Next, add the TransactionOption property to the WebMethod attributes in both the Credit and Debit public Web methods as displayed here:
<WebMethod(TransactionOption:=TransactionOption.RequiresNew)> Public Function Credit(ByValAccountNo As Integer, ByVal AmountToCredit As Integer, ByVal myBank As String) As Boolean Dim myConn As New ADODB.Connection() Dim myCommand As New ADODB.Command() <WebMethod(TransactionOption:=TransactionOption.RequiresNew)> Public Function Debit
Note
If the assembly is not referenced correctly, the transaction property will be highlighted as an error in the Visual Studio .NET development environment.
The Web Services code in this example is now complete and should be saved. In the next step, we build and then test the Web Services using the Web Services description page.
Testing an ASP.NET Web Service from a Browser
There are several ways to test a .NET Web Service. The easiest way is to reference its URL in a Web browser. The server, in response to this request, displays the Web Service's HTML description page. This page lists each method in the Web Service and provides a means for you to test the methods and see their XML responses.
Before you can test a Web Service, you must first build it. To build the BankWS Web Service project, select the BankWS project in the Visual Studio .NET Solution Explorer. Next, select Build, Build BankWS from the menu.
To test the two Web Services in this example, BankWS.asmx and UpdateBankWS.asmx, select each of them in the Visual Studio .NET Solution Explorer and right-click. In the pop-up menu that appears, select the View in Browser menu option. Because Visual Studio .NET contains a version of Internet Explorer, you will see the description page displayed within the Visual Studio .NET development environment. You can also choose to view the page outside the development environment by requesting the page's URL http://localhost/BankWS/BankWS.asmx or by entering the exact method you want to test using an HTTP-GET request. For example, you could enter this to test the BankWS service's GetBalance method:
http://localhost/BankWS/BankWS.asmx/GetBalance?AccountNo=1&myBank=BankofAmerica
Note
By default, ASP.NET Web Services support multiple protocols, including HTTP-GET, HTTP-POST, and HTTP-SOAP. To learn more about ASP.NET Web services please refer to the .NET Framework documentation.
Figure 15.6 shows the QueryBankWS Web Service test page.
Figure 15.6. The QueryBankWS Web Service default test page.

To invoke the GetBalance Web Service method, type an AccountNo equal to 1 and a myBank value equal to BankofAmerica and run the method. You should see the current balance of Account 1 from the BankofAmerica SQL Server database displayed as an XML response message.
Now that you've seen how easy it is to test a Web Service using a browser and the Web Services HTML description page, let's see how to do so programmatically.
Testing the Web Services from a Web Client
A compelling strength of the .NET Web Services model is its capability to mask the complexities of the Web Services architecture from the developer. In the previous section, you saw how easy it is to test a Web Service using HTTP and a standard Web browser. In the development environment, it's just as simple.
In Chapter 14, we created a simple ASP.NET Web form to test the BankVB.vb managed object. The Visual Studio .NET project is named BankVBWebClient, and the Web form is named BankVBClient.aspx. In this section, we modify the form by adding two buttons that will call the Web Services version of the business logic just created. Figure 15.7 shows the modified version of the Web form.
Figure 15.7. BankVBClient.aspx Web form.

Note
In ASP.NET, you have the capability to separate the business logic from the presentation layer using a concept called code behind. The business logic and associated code for the BankVBClient example is located in a code behind file named BankVBClient.aspx.vb. Both the ASPX file and the code behind file are downloadable from the publisher's Web site.
The Get Balance buttons display the current value of the specific bank account in the upper left-hand corner of the page. The transfer buttons transfer the amount specified to the banks selected. You can create the test Web form from scratch or download the BankVBClient.aspx Web form and code behind files from the publisher's Web site. To create the example project, select the BTSDotNet solution in the Visual Studio .NET Solution Explorer and right-click. In the pop-up menu that appears, select Add, New Project. In the dialog that appears, select the ASP.NET Web Application option and name the Web application BankVBWebClient off the localhost root as displayed in Figure 15.8.
Figure 15.8. The Add Project dialog to add the BankVBWebClient project.

Next, you can either add a new ASP Web form manually or add the sample Web form located on the publisher's Web site. To keep things simple, we are going to assume that you have downloaded the sample code from the publisher's Web site and will be adding the completed code to the project.
To add the Web form to the new project follow these steps:
1. |
Select the BankVBWebClient project in the Solution Explorer and right-click. In the pop-up menu that appears, select the Add Existing Item menu option. |
2. |
In the dialog that appears, navigate to the BankVBWebClient.aspx file and select Open. |
3. |
To reference a Web Service, you need to add a Web reference to the Visual Studio .NET project for the Web Service you want to instantiate. The Web reference creates a proxy class that defines methods that represent the actual methods exposed by the Web Service. At design time, the proxy class enables a developer to use statement completion in the Code Editor giving them the capability to code the instantiation of Web Service methods as if they were methods on a local object. The actual implementation of the methods in the proxy class consists of code to package and send SOAP requests and responses.
You create a proxy by adding a Web reference to the Web References folder in the Solution Explorer. You can also create a proxy manually using a the command-line utility WSDL.exe.
To create the Web reference in the BankVBClient Visual Studio .NET project, open the project in Visual Studio .NET and select the References folder in the Solution Explorer. In the dialog that appears, type your local computer name or localhost as the address in the address bar along with the complete path of the .asmx file, as shown in Figure 15.9, and press the Add Reference button.
Figure 15.9. Adding a Web reference to the BankVBClient ASP.NET project.

A list of the Web Service's Web methods appears on the left-hand side of the dialog, and the available contracts appear in the right-hand side. In this example, there are two Web Services, BankWS.asmx and UpdateBankWS.asmx, that must be referenced. Figure 15.10 displays the UpdateBankWS.asmx Web Service Add Web Reference dialog.
Figure 15.10. UpdateBankWS.asmx Add Web Reference dialog.

Select the Add Reference button at the bottom of the dialog. The proxy code for the Web Services will be automatically generated and appended to the project for you. You need to repeat the same steps to add a Web reference to the BankWS service as well. The proxy code files are located in the Web References folder under the machine name you entered in the Add Web Reference dialog. In this example, we used localhost to reference both Web Services. Because we added two Web Services from the same location, the second service has a namespace of localhost1. The actual code for the proxy objects is located beneath the Reference.map files for each of the Web Services (see Figure 15.11).
Figure 15.11. The Web Service proxy objects.

Listing 15.3 displays the code for the BankWS proxy object.
Listing 15.3. The Reference.vb Proxy File
------------------------------------------------------------------------------
' <autogenerated>
' This code was generated by a tool.
' Runtime Version: 1.0.3324.0
'
' Changes to this file may cause incorrect behavior and will be lost if
' the code is regenerated.
' </autogenerated>
'------------------------------------------------------------------------------
Option Strict Off
Option Explicit On
Imports System
Imports System.ComponentModel
Imports System.Diagnostics
Imports System.Web.Services
Imports System.Web.Services.Protocols
Imports System.Xml.Serialization
'
'This source code was auto-generated by Microsoft.VSDesigner, Version 1.0.3324.0.
'
Namespace localhost
'<remarks/>
<System.Diagnostics.DebuggerStepThroughAttribute(), _
System.ComponentModel.DesignerCategoryAttribute("code"), _
System.Web.Services.WebServiceBindingAttribute(Name:="QueryBankWSSoap", [Namespace]
|
Note
Depending on which Web Service you choose in your first Web reference, the code may be generated slightly differently.
Although much of the generated proxy code is out of the scope of this chapter, there are a few things you will need to be aware of to reference the proxy object methods with which this chapter is concerned. First, the namespace that's created by Visual Studio .NET is by default set to the name of the Web Services host server, in this case localhost and localhost1. Second, each proxy class contains a public method for each of the Web Service's public methods. To reference the proxy object in the BankVBClient application, you need to modify the code behind file for the BankVBClient.aspx file. The code behind file is named BankVBClient.aspx.vb. To accomplish this, open the BankVBClient.aspx.vb file by double-clicking on it in the Solution Explorer.
Caution
You must turn on the Show All Files option in the Solution Explorer to view this file in the tree view list. You can do this by selecting the Show All Files button located on top of the Solution Explorer.
Next, you need to create an instance of the proxy class and then access the methods of that class as you would the methods of any other class.
Note
The code has already been added for you in the sample code located on the publisher's Web site; however, the imports statement will need to be modified to reflect the name of your local server.
The BankVBClient Web form contains four buttons: two that implement the business logic in the BankVB.vb managed objects created in Chapter 14 and two that implement the Web Services just created. The code in Listing 15.4 was added to the BalanceWS and TransferWS buttons to call the Web Services methods.
Listing 15.4. The BankWS.vb Proxy File Button Event Code
Private Sub btnBalance_Click(ByVal sender As System.Object, ByVal e As System.EventArgs) |
The only difference between the btnTransfer and btnGetbalance buttons is the type of bank object they instantiate. For example, the btnTransferWS_click method creates an instance of the proxy object rather than an instance of the BankVb managed object created in Chapter 14.
To run the test Web form, select the BankVBWebClient project in the Solution Explorer and select Build, Build BankVBWebClient from the menu. When the project completes its build, select the BankVBWebClient.aspx file in the Solution Explorer and right-click. In the pop-up menu that appears, select the View in Browser menu option. Note the balance of account 1 in each bank, Bank of America and Fidelity, by selecting the Get Balance WS button. Then perform transfers by selecting the Transfer WS button. Both the Get Balance and Get Balance WS buttons should produce the same results.
To help you debug the Web Services code, the next section describes how to set up an ASP.NET project for debugging.
Debugging Tips and Tricks
To debug an ASP.NET Web Service, you must enable ASP.NET debugging in the Visual Basic application. To enable debugging, complete the following steps:
1. |
In Solution Explorer, select the Web Service ASP.NET project. |
2. |
From the View menu, choose Property Pages. |
3. |
In the project property pages dialog box, in the Configuration list box, choose Debug. |
4. |
In the Configuration Properties folder, choose the Debugging category. |
5. |
Under the Debuggers heading, select ASP.NET debugging. |
Note
An ASP.NET project, by default, has debugging turned on.
The easiest way is to configure your Web Service project as the startup project of your solution by right-clicking on the project in the Solution Explorer. In the pop-up menu that appears, select Set as StartUp Project. Then select the .asmx file in the Solution Explorer, right-click, and set the file as the start page using the Set As Start Page. Next, set a break point in your Web Service file and then select Debug, Start from the menu or press F5.
You can also debug your Web Service by attaching to the ASP worker process. To debug your Web Service in this manner, browse an instance of it by selecting the .asmx file in the Solution Explorer and right-clicking. In the pop-up menu that appears, select the View in Browser menu option. The client application in this case is the Web Services description page. To debug the Web Service, set a break point in the Web Service code file and then select the Tools, Debug Processes menu option. In the dialog that appears, click the Show System Processes check box; then select the ASP.NET worker process named aspnet_wp.exe as displayed in Figure 15.12. To attach to the process, click the Attach button.
Figure 15.12. Attaching to the ASP.NET worker process.

Then switch back to your Web Services description page and continue running the client. Your Web Service will now break on the breakpoint you set earlier.
Note
To learn more about debugging, refer to the appropriate ASP.NET Microsoft documentation.
Now that we have discussed how to create a .NET Web Service and test, it only seems natural to try and call the Web Services created from a BizTalk Orchestration schedule.