
We now have a Cylinder in the world, as well as the Material we want to apply to the Cylinder when it is shot. The final piece of the interaction is the game logic that evaluates that the Cylinder has been hit, and then changes the Material on the Cylinder to our new red Material. In order to create this behavior and add it to our Cylinder, we have to create a Blueprint. There are multiple ways of creating a Blueprint, but to save a couple of steps, we can create the Blueprint and directly attach it to the Cylinder we created in a single click. To do so, make sure you have the CylinderTarget object selected in the World Outliner panel, and click on the blue Blueprint/Add Script button at the top of the Details panel. You will then see a Select Path window.
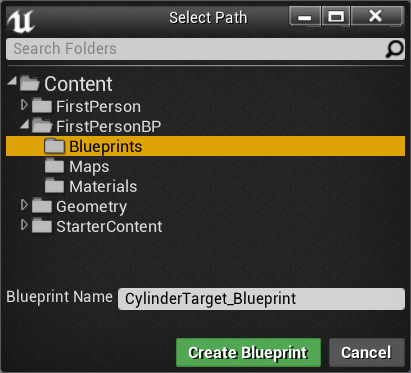
For this project, we are storing all our Blueprints in the Blueprints folder, which is inside the FirstPersonBP folder. Since this is the Blueprint for our CylinderTarget Actor, leaving the name of the Blueprint as the default CylinderTarget_Blueprint is appropriate:
The Blueprint Editor opens and CylinderTarget_Blueprint should now appear in Content Browser, inside the Blueprints folder. Now, let's look at the Viewport view of our Cylinder. From here, we can manipulate some of the default properties of our Actor or add more Components, each of which can contain their own logic to make the Actor more complex. We will explore Components more in Chapter 6, Enhancing Player Abilities; for now, we want to create a simple Blueprint that is attached to the Actor directly. To do so, click on the tab labeled Event Graph.