
Warm ears, cool music By WurlitzerGirl
This project will show you how to make a quick (10-minute), cuddly audio accessory out of a pair of cheap headphones and two small stuffed animals. Not much in the way of skills is necessary. Your friends and acquaintances will coo with delight!
1. Procure the supplies
What you will need:
![]() One pair cheap headphones (mine were of the five dollar Amtrak variety, I believe), preferably small-ish with removable foam ear discs, although this is not a necessity.
One pair cheap headphones (mine were of the five dollar Amtrak variety, I believe), preferably small-ish with removable foam ear discs, although this is not a necessity.
![]() Two stuffed animals. You want these to be medium-small and (preferably) cheap. I don’t want you cutting into any Steiff bears, now. You’ll save yourself loads of time if the animal has a seam up its back. You can find them in places like drugstores and five-and-dimes.
Two stuffed animals. You want these to be medium-small and (preferably) cheap. I don’t want you cutting into any Steiff bears, now. You’ll save yourself loads of time if the animal has a seam up its back. You can find them in places like drugstores and five-and-dimes.
![]() Seam ripper
Seam ripper
![]() Needle and thread
Needle and thread
![]() Fabric glue (Optional. I didn’t use any, but it’s up to you.)
Fabric glue (Optional. I didn’t use any, but it’s up to you.)
![]() Quality music
Quality music

Figure A: Adorable headphones
2. Un-suture the poor bastards
Use the seam ripper to tear through that handy back-seam, pulling out cut threads as you go. If you didn’t get an animal with a back-seam, well, shame on you. In this case, I would suggest you make a very neat, straight cut along where the back-seam would be if it had one (down the middle of the toy’s back). You don’t necessarily need to undo the whole seam, just enough to fit the earpiece of the headphone in. Remember to take care and make it neat, because you’re going to have to sew it all back up again in a moment. If your stuffed animal seems ill-at-ease, reassure it with a comforting pat on the head and tell it, in soothing tones, that everything will be all right. Repeat for second animal.
3. Insert the earpiece
First of all, check to see a) how thick each animal’s “fur” is, and b) what kind of earpiece you are dealing with. For example, my earphones had a kind of hard, thin, plastic cup around the speaker itself. Not something I would want jabbing into my head. The tan-colored bear had thin-ish fur, so when I inserted the earpiece I left the foam disk on. The koala, however, had very thick fur, so to avoid muffling the sound I took the foam disk off. Due to the thickness of the fur I, thankfully, could not feel the speaker inside. But anyway, insert the speaker, noisy-side up (meaning facing the back of the animal). This is where some glue could come in handy, but again, I didn’t need any.
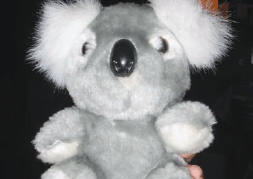
Figure B: Representative stuffed Koala
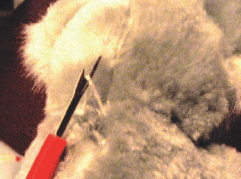
Figure C: Oh, the humanity! Un-suturing.

Figure D: Inserting earpieces

Figure E: Closing the wound
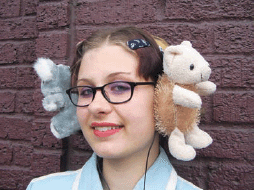
Figure F: The finished headphones!
4. Stitch it back up
Use your needle and thread to sew up the backseam (I used a simple whipstitch), adjusting the earphone as necessary as you go. Leave the wire hanging out of the bottom of the seam and the connector for the earphones (the headband part) out of the top. Again, glue? Do it neatly, and don’t try to make the scar too big. That won’t feel very pretty on tender ears. Repeat for both earphones.
5. Plug in your freshly minted plush headphones and jam
May I suggest some nice theater organ music? http://tinyurl.com/5pchw6. And have fun! I would welcome any feedback, and if you do decide to do this project, I would love to know how it turns out!
User Notes
Paulathing made Wild Things headphones!
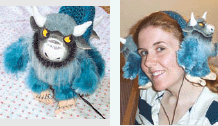
Wild Things!
Kat Brightwell, aka WurlitzerGirl, lives in Seattle. When not busy crafting, practicing the theater organ, volunteering at the Seattle Architectural Foundation, shopping for vintage clothing, playing in the marching band, hanging out in old movie palaces, and urbexing, she moonlights as a high school student.