

LED Throwies are an inexpensive way to add color to any ferromagnetic surface! By Q-Branch
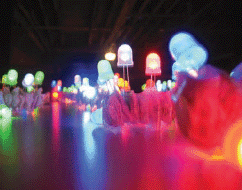
Figure A: That’s a lot of Throwies!
Developed by the Graffiti Research Lab (graffitiresearchlab.com) a division of the Eyebeam R&D OpenLab (research.eyebeam.org), LED Throwies are an inexpensive way to add color to any ferromagnetic surface in your neighborhood. A Throwie consists of a lithium battery, a 10mm diffused LED and a rare-earth magnet taped together. Throw it up high and in quantity to impress your friends and city officials.
Check out this link to see the LED Throwies in action in NYC thanks to resistor and fi5e! graffitiresearchlab.com/?page_id=6
1. Materials list
LED Throwies consist of only a few inexpensive parts (see Figure B) and can be made for ~$1.00 per Throwie:
10mm diffused LED
![]() Vendor: HB Electronic Components (www.hebeiltd.com.cn/?p=leds.9.10mm)
Vendor: HB Electronic Components (www.hebeiltd.com.cn/?p=leds.9.10mm)
![]() Average cost: $0.20 avg per LED
Average cost: $0.20 avg per LED
![]() Notes: Cost reductions for larger quantities. Comes in red, blue, amber, white in both diffused and clear. Diffused works better than water clear for the Throwie application.
Notes: Cost reductions for larger quantities. Comes in red, blue, amber, white in both diffused and clear. Diffused works better than water clear for the Throwie application.
Note: HB has even created a Throwie Pack (www.hebeiltd.com.cn/?p=throwies) page with deals on 10mm LEDs and lithium batteries!
CR2032 3V lithium batteries
![]() Vendor: CheapBatteries.com (www.cheapbatteries.com/coin.htm)
Vendor: CheapBatteries.com (www.cheapbatteries.com/coin.htm)
![]() Cost: $0.25 per battery
Cost: $0.25 per battery
![]() Notes: Cost reductions for larger quantities. With the 2032 Lithium battery, depending on the weather and the LED color, your Throwie should last around 1 -2 weeks.
Notes: Cost reductions for larger quantities. With the 2032 Lithium battery, depending on the weather and the LED color, your Throwie should last around 1 -2 weeks.
1-inch wide strapping tape
![]() Vendor: Your local hardware store
Vendor: Your local hardware store
![]() Cost: $2.00 for one roll
Cost: $2.00 for one roll
![]() Notes: One roll will make many Throwies
Notes: One roll will make many Throwies
1/2” diameter x 1/8” thick NdFeB disc magnet,
Ni-Cu-Ni plated
![]() Vendor: Amazing Magnets (www.amazingmagnets.com/index.asp?PageAction=VIEWPROD&ProdID=63)
Vendor: Amazing Magnets (www.amazingmagnets.com/index.asp?PageAction=VIEWPROD&ProdID=63)
![]() Cost: $13.00 per 25 magnets
Cost: $13.00 per 25 magnets
![]() Notes: Cost reductions for larger quantities
Notes: Cost reductions for larger quantities
Conductive epoxy (Figure C)
![]() Vendor: Newark In One (www.newark.com/product-details/text/catalog/47973.html)
Vendor: Newark In One (www.newark.com/product-details/text/catalog/47973.html)
![]() Cost: $50.00
Cost: $50.00
![]() Notes: The epoxy is optional. To use the epoxy, mix in equal parts A and B. Mix well. Then apply to leads and preload them into the battery contact surfaces. Allow a few hours to dry and 24 hours to cure.
Notes: The epoxy is optional. To use the epoxy, mix in equal parts A and B. Mix well. Then apply to leads and preload them into the battery contact surfaces. Allow a few hours to dry and 24 hours to cure.
2. Test the LED
Test your LED to determine color, brightness, and functionality. Pinch the LED legs, or leads, to the battery terminals (see Figure D). The longer LED lead, called the anode, should be touching the positive terminal (+) of the battery and the shorter LED lead, called the cathode, should be touching the negative terminal (-) of the battery. Figure E shows the cathode and anode.
Note: The positive terminal on the battery has a larger contact surface than the negative terminal, as shown in Figure F. The positive terminal extends around the sides of the battery. Don’t let the cathode lead of the LED accidentally touch the positive terminal of the battery. This will create a short and cause the LED to function improperly.
For more information on LEDs, see www.kpsec.freeuk.com/components/led.htm.
For more information on batteries, see en.wikipedia.org/wiki/Batteries.
3. Tape the LED to the battery
Cut off a piece of 1" wide strapping tape approximately 7" long. Tape the LED leads to the battery by wrapping the tape two to three times around both sides of the battery. Keep the tape very tight as you wrap as shown in Figure G.
If taped correctly, the LED will not flicker.
4. Tape the magnet to the battery
Now, place the magnet on the positive terminal of the battery, as shown in Figure H, and continue to tightly wrap the tape. The magnet should be held firmly to the battery (see Figure I).
Note: If the magnet gets stuck to a ferromagnetic surface, don’t pull on the LED Throwie. Apply a lateral force to the magnet and slide it off the surface while lifting it with a fingernail or tool.
Warning: Keep the magnet away from conventional hard drives, credit cards, and other data storage devices.
5. Toss your Throwie
The LED Throwie is ready to be tossed onto a ferromagnetic surface. Practice tossing your Throwies. Work on your accuracy and your own personal technique. Every Throwie won’t stick every time, but if you toss them gently, they will stick eventually (Figure K shows the best way to hold them for the toss). Get them up high and in large quantities for greatest enjoyment.
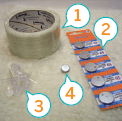
Figure B: 1. 2"-wide strapping. We tore it into two 1" strips. 2. CR2032 lithium batteries 3. 10mm LEDs, diffused, multiple colors 4. Strong little rareearth magnet
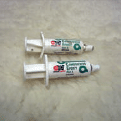
Figure C: Conductive epoxy is optional. It will improve brightness and robustness but it is time and labor intensive.
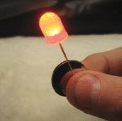
Figure D: Anode lead touching the positive terminal
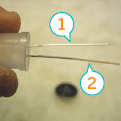
Figure E: 1. Cathode or K lead 2. Anode lead
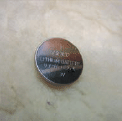
Figure F: Notice how the positive terminal extends around the edge of the battery
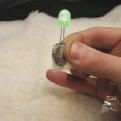
Figure G: Keep up the tension!
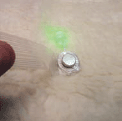
Figure H: The magnet is taped to the positive terminal of the battery
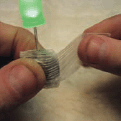
Figure I: Tightly!
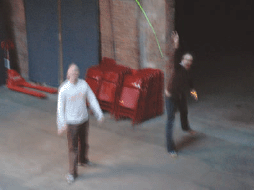
Figure J: Look at J-pizzle’s follow-through on this green Throwie!
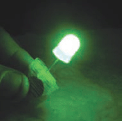
Figure K: Toss the Throwie by the battery/magnet bundle
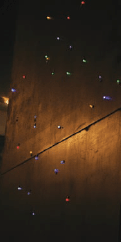
Figure L: Wall of Throwies
Figure M: Fi5e
6. Plan a campaign
Now, find a building or structure that will attract the magnets, form a crew, wait until night, and get some Throwies up. If you do it around a crowd of people, they will probably try to get into the act. It can quickly descend into chaotic fun. Give a handful of Throwies to a stranger and let them get up too. Remember, Throwies are only a temporary alteration of your local environment. Depending on the color, Throwies can last up to two weeks.
7. Other applications and upgrades
Other applications: Other than tossing it, you can also use your LED Throwie to write in the air with light while taking a long exposure picture, as shown in Figure M. You can put them on your bike as an additional reflector. You can put them on surveillance cameras to make them more visible at night. You can use them to play a version of bocci ball on a magnetic surface in the dark.
Upgrades: You can make a better LED Throwie by using heatshrink tubing on each lead to make sure they don’t short to each other or the battery. This upgrade will allow you to bend the LED so it faces in the direction you choose. You can also dip the Throwie in epoxy, silicon, or potting compound to make an all-weather LED Throwie. A resistor in series would allow you to increase the Throwie shelf-life. Bigger batteries = longer life. Stronger magnets = increased stick probability. You could add a solar panel, photocell, etc….Have fun.
Note: See the Flickr instructional set at www.flickr.com/photos/everythingdigital/sets/72057594069888500 for a Throwie on/off switch mod by A. Joyce, aka EverythingDigital.
User Notes
In the Comments, Instructables member Vndr asks about the life of the Throwies, guessing that, since 2032 batteries are 240mAh and LEDs need 20mA, they’d only last for about 12 hours.
Dan, Instructables co-founder, replies: It depends on the LEDs voltage/current curve. For a typical green/blue/white with 3.5V nominal, driving at 3.0V is probably only 1-5mA so you get a few days or week of life. For a red/orange/yellow LED with 2.0V nominal, you are basically shorting out the battery and your current is limited by the 2032 cell—haven’t tested them but I would not be surprised if they maxed out at under 100mA, so you still get a couple hours at least with the lower voltage LEDs.