A similar Product Recommendation Engine that we will use for this uses the PredictionIO template documented at http://predictionio.incubator.apache.org/templates/similarproduct/quickstart. Once the engine template is deployed, we will have a RESTFUL endpoint that can take a predictive query and start recommending the items. We are using the Similar Product Scala template located here (https://github.com/apache/incubator-predictionio-template-similar-product).
The engine uses the Collaborative Filtering discussed in the Introduction To Spark MLlib section and MLlib for the ALS (Alternate Least Square) algorithm. You can find the entire project on the GitHub repository (https://github.com/msrivastav13/pio-engine-heroku). This git repository has been forked from the Salesforce evangelist team and the project is modified to ease the Heroku deployment.
The following section highlights how you can deploy the engine code to Heroku. We will use the Scala Buildpack.
- Log on to your Heroku developer instance and make sure that you have fewer than four apps on it to avoid exceeding installation limits. (Note that the developer Heroku instance does not allow you to have more than five apps.)
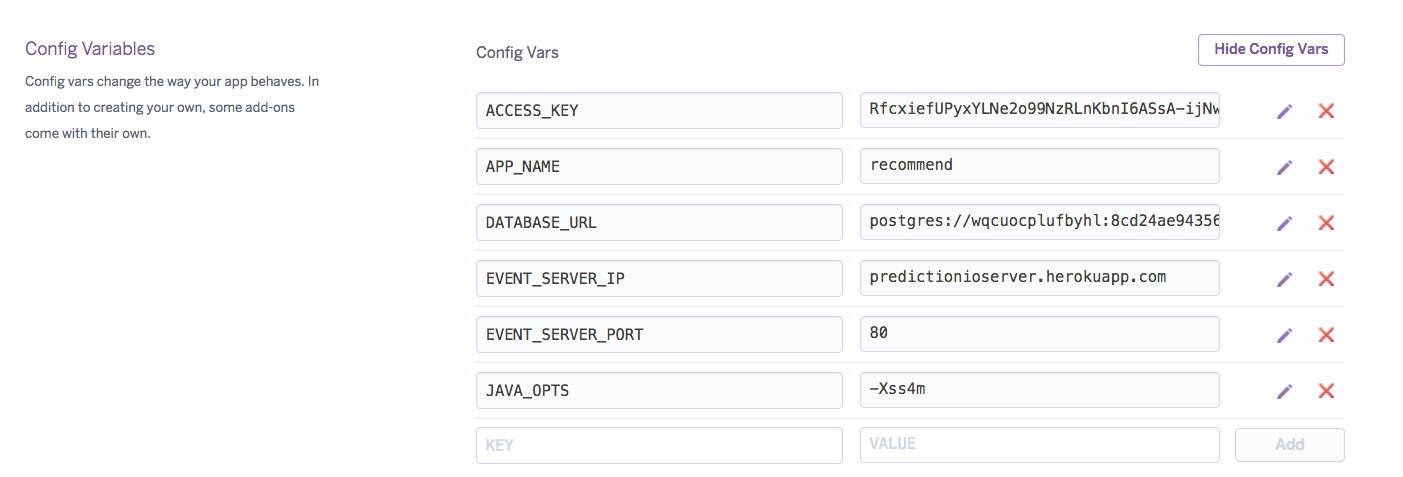
- Use the Deploy to Heroku button on the repository to deploy the engine template. You will need the Event Server ACCESS_KEY from the previous step and also an Event Server app name and port. Take a look at the following screenshot which shows the configuration variables. The event port is 80. Clone the recommendation engine application in your local machine by using the git URL found in the application settings and cd it into the repository as shown:
- Clone the recommendation engine application in your local machine by using the git URL found in the application settings and cd it into the repository as shown:

The CLI command will look like the following screenshot:

- Remove the add-ons, if found, using the following command. Heroku addons will give all the other add-ons, and the remove command will remove the add-ons. Note that here <addons> simply represents any other add-on added:
heroku addons
heroku addons:remove <addons>
- Attach the Event's server Postgres with the engine application using the following command on Heroku CLI:
$ heroku config:set DATABASE_URL=<EVENT SERVER POSTGRES URL>
Here, we can get <EVENT SERVER POSTGRES URL> from the Event Server Heroku app using heroku config on Event Server.
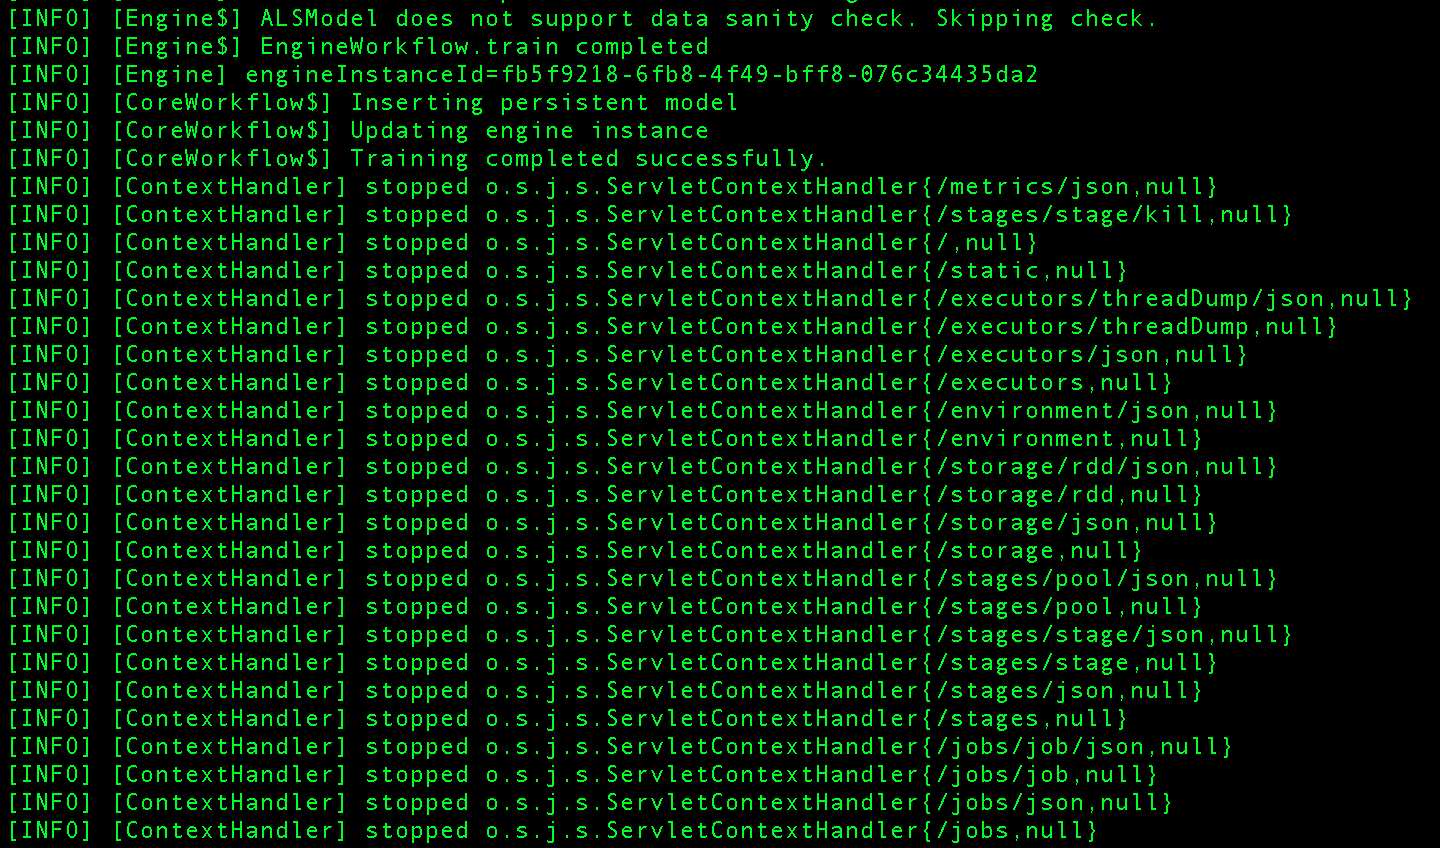
- Let's train the app using pio train:
heroku run -a <YOUR HEROKU APP NAME> train
Note that <YOUR HEROKU APP NAME> is the name of the app for the engine.
If the training is successful, you will see the following output:
- Restart the dynos using the following command:
heroku restart
- Once the engine is trained, the application can be viewed on the browser:

- A simple rest endpoint is available for us to start asking the engine for the prediction. Note that only items for which a View event is generated will yield the similar items.
A simple CURL command to invoke the API will look as follows:
$ curl -H "Content-Type: application/json" -d '{ "items": ["i3"], "num": 4 }' -k http://<heroku app hostname>/queries.json
The response will be of a JSON format, as shown here:
      {
        "itemScores":
        [
          {
            "item":"i44","score":0.2805472425881496
          },
          {
            "item":"i41","score":0.14458527026450552
          }
        ]
      }