
Deploying the Application to the Client
One of the great features of Silverlight is that you can go from a “clean PC” (a machine without Silverlight installed or the application downloaded) to being up and running with the application in a matter of minutes. This makes Silverlight a very effective means of deploying applications to client machines. By default, the HTML page that hosts the Silverlight plug-in notifies the user if they don't have Silverlight installed, and points them to a link where they can download the Silverlight runtime and install it. After the Silverlight runtime is installed, the HTML page will be automatically refreshed and the download of the application will begin, running it after the download is complete.
As you can see, deploying a Silverlight application to the client is a two-step process. The process involves the following:
- Downloading and installing the Silverlight runtime if it's not already installed
- Downloading the application if it's not already downloaded or is not up to date
Let's take a closer look at how this process works, how to customize it to create a more streamlined user experience, and other methods you could use to deploy the Silverlight runtime and your application to the users.
The Default Silverlight Installation Process
Let's start by taking a look at what happens when the user attempts to run your Silverlight application but doesn't have Silverlight installed. Let's assume that no version of Silverlight is currently installed on the user's machine, and that they have navigated to the URL for your application. The user will be presented with a blank page, containing the image shown in Figure 17-2.
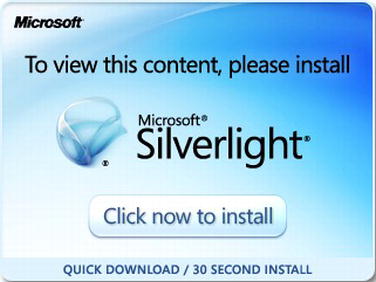
Figure 17-2. The default image displayed in the browser when Silverlight is not installed
If you view the source of the HTML page that's used in your application to host the Silverlight plug-in (detailed in Chapter 1), you will find the following lines of HTML in its body:
<object data="data:application/x-silverlight-2," type="application/x-silverlight-2"

        width="100%" height="100%">

    <param name="source" value="ClientBin/AdventureWorks.xap"/>

    <param name="onError" value="onSilverlightError" />

    <param name="background" value="white" />

    <param name="minRuntimeVersion" value="5.0.61118.0" />

    <param name="autoUpgrade" value="true" />

    <a href="http://go.microsoft.com/fwlink/?LinkID=149156&v=5.0.61118.0"

                                                    style="text-decoration:none">

        <img src="http://go.microsoft.com/fwlink/?LinkId=161376"

            alt="Get Microsoft Silverlight" style="border-style:none"/>

    </a>

</object>
If the browser does not know what the object is supposed to be because the Silverlight plug-in hasn't been installed, it will ignore the object tag and simply display the content between the opening and closing object tags instead. The default HTML between the tags (in bold) simply displays the image you see in Figure 17-2, and when it is clicked, it will download the Silverlight plug-in from the Microsoft web site.
![]() Note We'll look at improving this default Silverlight installation experience to make it somewhat friendlier and more enticing by swapping out this default “install Silverlight” HTML with your own content later in this chapter.
Note We'll look at improving this default Silverlight installation experience to make it somewhat friendlier and more enticing by swapping out this default “install Silverlight” HTML with your own content later in this chapter.
You will also note the following line in the head section of the HTML file:
<script type="text/javascript" src="Silverlight.js"></script>
This script file contains a number of helper functions, including one that automatically reloads the page when it recognizes that the Silverlight plug-in is installed, and various additional functions that enable you to create a Silverlight object in a web page via JavaScript.
After the Silverlight runtime has been installed, the page will be automatically refreshed, and the application will begin to download from the server (and be displayed after the download is complete).
![]() Note If an earlier version of Silverlight has been installed on the user's machine but your application is targeting a more recent version, the new version will be downloaded and installed automatically. However, the user will have to restart their browser. The Silverlight plug-in is backward compatible, meaning that any Silverlight application written in a previous version of Silverlight will run without issues in a more recent version of the plug-in. Additional Silverlight versioning information can be found at
Note If an earlier version of Silverlight has been installed on the user's machine but your application is targeting a more recent version, the new version will be downloaded and installed automatically. However, the user will have to restart their browser. The Silverlight plug-in is backward compatible, meaning that any Silverlight application written in a previous version of Silverlight will run without issues in a more recent version of the plug-in. Additional Silverlight versioning information can be found at http://msdn.microsoft.com/en-us/library/cc265156.aspx.
Customizing the Silverlight Installation Experience
You saw in the previous section how easy it was to get set up and running with Silverlight on a clean PC. However, despite the ease with which you can deploy your applications using Silverlight, the default experience isn't particularly ideal. Let's take a look at why you should customize the Silverlight installation experience, and how you can do so.
Why You Should Customize the Silverlight Installation Experience
When a user navigates to your application, the last thing they want is something blocking their way, like the installation of a plug-in. Depending on their level of commitment to running your application, it opens up a barrier for the user, providing a decision point that may lead to them deciding to abandon the attempt and turn away. You really want to avoid this possibility at all costs.
![]() Note This is not such an issue with standard business applications that are running in corporate environments. The IT department will have bought into Silverlight as the technology running one or more of their applications, they will likely automatically deploy the Silverlight runtime to users' PCs, and the use of the application will have been mandated by the company management. However, there are many other scenarios in which this issue should be considered. If you are providing your application as software as a service (SAAS) or a packaged product, this will be an issue. Alternatively, if you have users working from home, it's important that you provide a low-friction install experience for getting them up and running with your application.
Note This is not such an issue with standard business applications that are running in corporate environments. The IT department will have bought into Silverlight as the technology running one or more of their applications, they will likely automatically deploy the Silverlight runtime to users' PCs, and the use of the application will have been mandated by the company management. However, there are many other scenarios in which this issue should be considered. If you are providing your application as software as a service (SAAS) or a packaged product, this will be an issue. Alternatively, if you have users working from home, it's important that you provide a low-friction install experience for getting them up and running with your application.
Unfortunately, the default “Silverlight requires installation” experience does nothing to help the issue of getting user buy-in. The simple image and link, shown previously in Figure 17-2, fails at the following points:
- It tells the user nothing about
- Your application or your business
- Why your application needs Silverlight
- Why they should install Silverlight
- What value installing Silverlight provides
- Instructions for timid users to walk them through how to complete the installation
- It does not
- Provide any preview that demonstrates what the user will get on the other side of the installation process
- Attempt to engage and entice the user by explaining why it's worth going through the process of installing Silverlight to run your application
- Maintain consistency with the rest of your web site or the Silverlight application, and by not providing any visual consistency, its appearance will be jarring to the user, thus leading to a suboptimal user experience
- Make any attempt to ease any fears that the user might have
- It does not provide any background information on Silverlight, such as
- A link to the Microsoft Silverlight site
- What it will (or will not) do to the user's computer
- What Silverlight is
- Whether Silverlight can be easily uninstalled
- How many major web sites use Silverlight, and how the user will now gain access to these sites as well
- Why the plug-in can be trusted, apart from the Microsoft logo. For all the user knows, this could be an advertisement designed to trick them into installing something malicious, or that they don't need or want.
- Why the user might not be able to install Silverlight on their machine. For example, they might be running an unsupported operating system or browser. In addition, that the user will need administrative rights on their machine to be allowed to complete the installation.
You should personalize the installation experience, tailoring it to your business and the application, and entice the user to work through the minor impediment of not having Silverlight in order to run your application. Ideally, if you had a designer work on the design of your application, you should also have them design the Silverlight installation and application deployment process too, to maintain consistency in all three phases: Silverlight installation, application deployment, and application execution.
It's important to think like a user, and try to identify with them and their psychology when they first use your application. There are many classes of users, including those who will
- Click on and install anything that gets them where they want to go
- Be fearful of using computers and what they install on them
- Have short attention spans and give up quickly if they come to any sort of barrier
Take these behaviors into account and design your Silverlight installation experience accordingly.
![]() Note As the popularity of Silverlight grows, these initial installation issues will become less of a problem. However, you will still need to support users with a freshly installed operating system who will not yet have Silverlight installed. Also, with the number of Silverlight versions that have been released, it's always likely that the user will be running an older version of Silverlight than what you are targeting. As discussed in the introduction of this book, you can get a rough idea of the reach of a particular version of Silverlight at a site such as
Note As the popularity of Silverlight grows, these initial installation issues will become less of a problem. However, you will still need to support users with a freshly installed operating system who will not yet have Silverlight installed. Also, with the number of Silverlight versions that have been released, it's always likely that the user will be running an older version of Silverlight than what you are targeting. As discussed in the introduction of this book, you can get a rough idea of the reach of a particular version of Silverlight at a site such as www.riastats.com. At the time of this writing, this site is reporting that a little over 75 percent of Internet-connected devices already have a version of Silverlight installed.
Seeing What the User Sees Without Silverlight Installed
The first step in customizing the Silverlight installation experience is to see what the user sees in the browser if they don't have Silverlight installed. You could always uninstall Silverlight from your machine using the operating system's uninstall application tool, such as Windows Vista/7's Programs and Features tool, but there is a simpler way: you can simply disable the Silverlight plug-in in your browser of choice. For example, in Internet Explorer go to Tools ![]() Manage Add-ons, select the Microsoft Silverlight plug-in, and then click the Disable button. Now when you navigate to the URL hosting your application, it won't be able to load the Silverlight plug-in, and thus, will enable you to test what will happen when users don't have Silverlight installed.
Manage Add-ons, select the Microsoft Silverlight plug-in, and then click the Disable button. Now when you navigate to the URL hosting your application, it won't be able to load the Silverlight plug-in, and thus, will enable you to test what will happen when users don't have Silverlight installed.
If you then open the Manage Add-ons dialog again and re-enable the Silverlight plug-in and close the dialog again, you will notice that within a second or two the page will be automatically refreshed and your application will be loaded. This is thanks to the Silverlight.js file that is referenced in the HTML/ASPX page hosting your application and distributed with your application. When it detects that the Silverlight plug-in isn't installed, it will continually monitor the browser for it until it is found, which will be when the user has successfully installed the Silverlight plug-in. At this point, it will automatically refresh the page in order to load your application. Therefore, all you really need to focus on is designing an effective landing page.
Implementing a Custom Landing Page
To implement a custom landing page, in the page that is hosting your Silverlight application, replace the following lines of HTML between the opening and closing object tags with your own custom HTML:
<a href="http://go.microsoft.com/fwlink/?LinkID=149156&v=5.0.60818.0"

                                                    style="text-decoration:none">

        <img src="http://go.microsoft.com/fwlink/?LinkId=161376"

            alt="Get Microsoft Silverlight" style="border-style:none"/>

</a>
Ideally, you would replace this HTML with some that will help address each of the issues listed in the previous section detailing why you should customize the Silverlight installation experience, but still retain the link to download the Silverlight runtime from the default HTML. Try to retain as much consistency as possible with the rest of your web site structure and style, make sure the user knows what is happening and what they need to do, and brand it with your company and/or application.
Note that if you want to provide the users with step-by-step instructions on installing Silverlight, each browser requires slightly different steps to be taken, and each displays different dialogs. Ideally, you would recognize the browser type on the server, and provide the corresponding instructions accordingly. For this purpose, you might want to host the Silverlight object in the .aspx page instead of the .html page, which would let you determine the browser type and version on the server (using the following article as a guide: http://msdn.microsoft.com/en-us/library/3yekbd5b.aspx), and output your instructions to the page, between the opening and closing object tags, accordingly.
![]() Note It can be a good exercise to disable the Silverlight plug-in using the method described earlier and investigate how other Silverlight applications have customized their landing page to handle users that need to install Silverlight. You will note how much of a difference it can make to the Silverlight installation experience just by properly customizing this page. Good examples of custom Silverlight install experiences that are well executed include the
Note It can be a good exercise to disable the Silverlight plug-in using the method described earlier and investigate how other Silverlight applications have customized their landing page to handle users that need to install Silverlight. You will note how much of a difference it can make to the Silverlight installation experience just by properly customizing this page. Good examples of custom Silverlight install experiences that are well executed include the www.silverlight.net web site and the Netflix Watch Instantly web site (www.netflix.com/BrowseGenres/Watch_Instantly/gev).
Further Customization Guidance
A great source of information regarding creating custom Silverlight installation experiences, and a must-read when creating your own, is the Silverlight Installation Experience Guidance whitepaper, which you can find a link to at www.microsoft.com/download/en/details.aspx?id=15072. This is an extremely detailed document that can be used to guide you in creating a functional and effective custom Silverlight installation experience, and also has a template (in the accompanying download) that you can use.
Pushing the Silverlight Runtime to Users in the Enterprise
One of the issues in deploying the Silverlight runtime, particularly in enterprise environments, is that the user will need to be a local administrator on their machine in order to install the Silverlight plug-in, as is the case with any plug-in. If the user doesn't already have the Silverlight runtime installed on their machine and does not have local administration rights, they won't be able to install the Silverlight plug-in.
![]() Note It's worth clarifying that the user does need to be a local administrator on their machine in order to install the Silverlight runtime/plug-in. However, they don't need to be a local administrator on their machine in order to install a Silverlight application to run outside the browser.
Note It's worth clarifying that the user does need to be a local administrator on their machine in order to install the Silverlight runtime/plug-in. However, they don't need to be a local administrator on their machine in order to install a Silverlight application to run outside the browser.
The Silverlight runtime can be pushed out to users using the Microsoft Systems Management Server automated installation, or by setting up a group policy. Despite being for Silverlight 2.0, the Silverlight Enterprise Deployment whitepaper available from www.microsoft.com/silverlight/whitepapers/ is a very thorough and detailed guide for methods of deploying Silverlight in enterprise environments.
Building a Client Desktop Installer
In Chapter 16, we discuss how to install your Silverlight application to run outside the browser, in much the same way as a standard (native) desktop application. In some scenarios, you might find that web deployment of your application is not always suitable or even possible. In this case, you will need to have a more traditional setup program that can be run on the client and install the Silverlight application as an out-of-browser application. You can do this using the silent install feature of the Silverlight launcher (sllauncher.exe).
![]() Note Unfortunately, the Silverlight runtime has not been packaged into a merge module, so it can't be included as a part of your setup program and will need to be installed separately. This method therefore assumes the client already has the Silverlight runtime installed. You can download the Silverlight runtime installer from the
Note Unfortunately, the Silverlight runtime has not been packaged into a merge module, so it can't be included as a part of your setup program and will need to be installed separately. This method therefore assumes the client already has the Silverlight runtime installed. You can download the Silverlight runtime installer from the www.silverlight.net web site.
The sllauncher.exe application accepts various command-line parameters, which can be used to install/uninstall/run a Silverlight application.
If you type the following line on the command line:
"%ProgramFiles%Microsoft Silverlightsllauncher.exe"
it will display the message box shown in Figure 17-3.

Figure 17-3. The SLLauncher command-line parameters dialog
![]() Note These examples will work only under Windows, and you will need to change
Note These examples will work only under Windows, and you will need to change %ProgramFiles% to %ProgramFiles(x86)% when running under the 64-bit edition of Windows in this and the following examples.
This tells you what command-line parameters you can take advantage of to enable you to install the application on the machine. Of particular interest are the following options:
/install: the path to the XAP file (required)/origin: the URI specifying the site-of-origin for the application (that is, where it was downloaded from). Even though the application was not downloaded from the Web, this is a required parameter and must be assigned a URI./shortcut: what shortcuts should be created—start menu, desktop, both, or none (optional)/overwrite: when used will overwrite any existing version already installed (optional)
The following is an example of installing an application using these options:
"%ProgramFiles%Microsoft Silverlightsllauncher.exe" /install:"AdventureWorks.xap"

/origin:"http://localhost/AdventureWorks.xap" /shortcut:desktop+startmenu /overwrite
You can take advantage of this silent install feature in your own setup programs by adding the .xap file from your Silverlight project to your setup project, and creating a custom action to extract your .xap file to a temporary location and running sllauncher.exe with the appropriate command-line parameters to install it. A full explanation of this procedure is beyond the scope of this book; however, Anoop Madhusudanan has a prebuilt NSIS script that you can use to create a setup package, which can also install the Silverlight runtime, at http://amazedsaint.blogspot.com/2010/05/how-to-create-offline-installer-no.html. Alternatively, a somewhat simpler option would be to deploy a batch file along with the application, which when executed will install the application using the method described here.
Forcing an Update of the Cached XAP File for New Versions
A common issue experienced when deploying a new version of a Silverlight application is that the new version is not always downloaded by the clients, with their browser simply loading its cached version of the application instead. Different browsers behave in different ways, complicating the issue. The generally accepted best solution is to append a query string to the URL pointing to the .xap file, and change this query string whenever a new version of the application is deployed. So in the definition of the Silverlight object in the HTML/ASPX page, we need to change the bolded line in the following HTML:
<object data="data:application/x-silverlight-2," type="application/x-silverlight-2"

        width="100%" height="100%">

    <param name="source" value="ClientBin/AdventureWorks.xap"/>

    <param name="onError" value="onSilverlightError" />

    <param name="background" value="white" />

    <param name="minRuntimeVersion" value="5.0.60818.0" />

    <param name="autoUpgrade" value="true" />

    <a href="http://go.microsoft.com/fwlink/?LinkID=149156&v=5.0.60818.0"

                                                    style="text-decoration:none">

        <img src="http://go.microsoft.com/fwlink/?LinkId=161376"

            alt="Get Microsoft Silverlight" style="border-style:none"/>

    </a>

</object>
to something like:
<param name="source" value="ClientBin/AdventureWorks.xap?XAPDate=111125041735"/>
The portion in bold is a query string that we append to the .xap file's URL, containing a value generated from the date that the .xap file was last modified. When this value changes, the browser will not match it to an entry in its cache, so it will go back to the server and get the latest version of the .xap file. To generate this query string automatically, you'll need to use the ASPX page instead of the HTML page to host the Silverlight object. Doing so will allow you to write some server-side code into the page, which will run each time the page is requested from the server, and append a dynamically generated query string to the .xap file's URL. Replace the source param line to the code in bold in the following example:
<object data="data:application/x-silverlight-2," type="application/x-silverlight-2"

        width="100%" height="100%">

    <%

    string source = @"ClientBin/AdventureWorks.xap";


    string xapFullPath = HttpContext.Current.Server.MapPath(@"") + @"" + source;

    DateTime xapDate = System.IO.File.GetLastWriteTime(xapFullPath);

    source += "?XAPDate=" + xapDate.ToString("yyMMddHHmmss");


    string paramLine = "<param name="source" value="" + source + ""/>";

    Response.Write(paramLine);

    %>

    <param name="onError" value="onSilverlightError" />

    <param name="background" value="white" />

    <param name="minRuntimeVersion" value="5.0.60818.0" />

    <param name="autoUpgrade" value="true" />

    <a href="http://go.microsoft.com/fwlink/?LinkID=149156&v=5.0.60818.0"

                                                    style="text-decoration:none">

        <img src="http://go.microsoft.com/fwlink/?LinkId=161376"

            alt="Get Microsoft Silverlight" style="border-style:none"/>

    </a>

</object>
Now, the URL to the .xap file will change each time the application is updated, which will result in the clients redownloading the application from the server again, and resolving your caching issues.