
 Workshop: Practicing with Views and Navigation
In this section, you'll create a new view and add a link to it in the menu (part 1). You will then create another view that you pass data to as a query string parameter (part 2). Finally, you will map a custom URI, demonstrating how you can make the URI “friendlier” in the address bar (part 3).
Part 1: Creating a New View
In this first exercise, let's create a new view and add a link to it.
- Open the AdventureWorks solution you created in Chapter 1.
- Add a new item to the Views folder in your project called
ProductListView.xaml, using the Silverlight Page item template.
- Visual Studio will open this view in the designer. You will note that it has no content as yet. We'll modify this view to actually display a list of products in Chapter 6, but in the meantime, you might want to put a control on it just so you know it's successfully loaded when you navigate to it later in this workshop. You might also like to change the default value of the root element's Title property from “ProductListView Page” to “Product List”.
- Let's now add a link to this view to the navigation menu at the top of the screen. Open
MainPage.xaml, and search for a StackPanel control namedLinksStackPanel:<StackPanel x:Name="LinksStackPanel"
Style="{StaticResource LinksStackPanelStyle}">
<HyperlinkButton x:Name="Link1" Style="{StaticResource LinkStyle}"
NavigateUri="/Home" TargetName="ContentFrame"
Content="{Binding Path=Strings.HomePageTitle,
Source={StaticResource ApplicationResources}}"/>
<Rectangle x:Name="Divider1" Style="{StaticResource DividerStyle}"/>
<HyperlinkButton x:Name="Link2" Style="{StaticResource LinkStyle}"
NavigateUri="/About" TargetName="ContentFrame"
Content="{Binding Path=Strings.AboutPageTitle,
Source={StaticResource ApplicationResources}}"/>
</StackPanel> - Note that there are two HyperlinkButton controls and a Rectangle control used as a divider. These are the controls that make up the existing menu at the top of the screen. Copy the XAML for the existing Rectangle and the second Hyperlink Button, and paste it immediately after the second HyperlinkButton control.
- Name the new Rectangle control
Divider2, and name the new HyperlinkButtonProductsLink. The squiggly blue underline both these controls have in the XAML editor, indicating they have errors, should go away. Set the HyperlinkButton'sNavigateUriproperty to/ProductListView(the name of the new view, but without the.xamlextension), and set itsContentproperty toProducts. Note Silverlight's Business Application template uses resources to define the text displayed by the HyperlinkButton controls, hence the bindings used by their
 Contentproperties. This is a great strategy when your application is to be multilingual. However, for the purpose of this workshop, we'll keep things simple and simply hard-code their text. - You should now have the following XAML for the StackPanel:
<StackPanel x:Name="LinksStackPanel"

            Style="{StaticResource LinksStackPanelStyle}">


    <HyperlinkButton x:Name="Link1" Style="{StaticResource LinkStyle}"

                     NavigateUri="/Home" TargetName="ContentFrame"

                     Content="{Binding Path=Strings.HomePageTitle,

                               Source={StaticResource ApplicationResources}}"/>


    <Rectangle x:Name="Divider1" Style="{StaticResource DividerStyle}"/>


    <HyperlinkButton x:Name="Link2" Style="{StaticResource LinkStyle}"

                     NavigateUri="/About" TargetName="ContentFrame"

                     Content="{Binding Path=Strings.AboutPageTitle,

                               Source={StaticResource ApplicationResources}}"/>


    <Rectangle x:Name="Divider2" Style="{StaticResource DividerStyle}"/>


    <HyperlinkButton x:Name="ProductsLink" Style="{StaticResource LinkStyle}"

                     NavigateUri="/ProductListView" TargetName="ContentFrame"

                     Content="Products"/>

</StackPanel> - Run your application now. You should see your new menu item appear in the menu, as shown in Figure 3-5, and clicking it should display your new view.
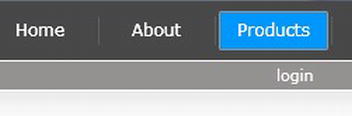
Figure 3-5. The new Products button we've added to the menu
Part 2: Passing Data Between Views
Let's add a view that we'll pass some data to using a query string parameter, and I'll demonstrate accessing the value from that view.
- Add a new item to the Views folder in your project named
ProductDetailsView.xaml, using the Silverlight Page item template (as demonstrated in part 1). - Add a TextBlock control to this view (as content of the
LayoutRootGrid), namedDisplayValueTextBlock:<Grid x:Name="LayoutRoot">
<TextBlock Name="DisplayValueTextBlock" Width="100" Height="25" />
</Grid> - We want to pass some data to this view from the
ProductListViewview and display that in theDisplayValueTextBlockTextBlock control. Go back to theProductListViewview, and add the following content in bold to the LayoutRoot Grid control in that view:<Grid x:Name="LayoutRoot">
<StackPanel Height="25" Orientation="Horizontal" Width="155">
<TextBox Name="ValueField" Width="100" />
<Button Width="50" Content="Go" Margin="5,0,0,0" />
</StackPanel>
</Grid> - Double-click the button. This will add an event handler in your code-behind and switch to the code editor.
- In this event handler, we'll navigate to the
ProductDetailsViewview in code and pass it the text entered into theValueFieldtext box in its query string, as a parameter namedValue. We'll use theNavigationServiceproperty, inherited from thePageclass, for this purpose. Add this code to the event handler:Uri uri = new Uri("/ProductDetailsView?Value=" + ValueField.Text, UriKind.Relative);
NavigationService.Navigate(uri); - Let's now access this value in the
ProductDetailsViewview. Add the following property, simplifying safe access to theValuequery string parameter, to its code-behind:private string ParamValue
{
get
{
string paramValue = "";
const string paramName = "Value";
if (NavigationContext.QueryString.ContainsKey(paramName))
paramValue = NavigationContext.QueryString[paramName];
return paramValue;
}
} - Now, we can get the query string parameter value from this property and display it in the TextBlock we previously added to the view. Add this line to the override of the view's
OnNavigatedTomethod. You'll find this method is already defined in the view's code-behind.DisplayValueTextBlock.Text = ParamValue; - You can now run your application. Go the
ProductListViewview, via the menu, and enter some text in the text box. When you click the button, theProductDetailsViewview is navigated to and displays the value that you entered in the text box in the previous page.
Part 3: Mapping a URI
Instead of navigating to this (somewhat ungainly) URI:
/ProductDetailsView?Value=SomeValue
Let's create a custom URI mapping, so we can navigate to the following URI instead:
/ProductDetails/SomeValue
So far, we've been making use of one of the default mappings, which has allowed us to exclude the Views/ and the .xaml portions of a view's name when navigating to it. Let's take things to the next level and create our own mapping.
- Find the Frame control in
MainPage.xaml, and then find itsUriMapperproperty:<navigation:Frame.UriMapper>
<uriMapper:UriMapper>
<uriMapper:UriMapping Uri="" MappedUri="/Views/Home.xaml"/>
<uriMapper:UriMapping Uri="/{pageName}" MappedUri="/Views/{pageName}.xaml"/>
</uriMapper:UriMapper>
</navigation:Frame.UriMapper> - Add a new entry to the mappings. We want this to take precedence over the mapping we were using, so it should be the second mapping in the list. In order to achieve our desired result, we want to take the mapping we've been currently using:
<uriMapper:UriMapping Uri="/{pageName}" MappedUri="/Views/{pageName}.xaml"/>and extend it to omit the
Viewpart of the view's name and to define a token to automatically assign the “second part” of the URI as the value of theValuequery string parameter, like so:<uriMapper:UriMapping Uri="/{pageName}/{value}"
MappedUri="/Views/{pageName}.xaml?Value={value}"/> - Open the code-behind for the
ProductListView.xamlview. In the Button control's event handler, change the line defining the URI to make use of our new mapping:Uri uri = new Uri("/ProductDetailsView/ " + ValueField.Text, UriKind.Relative); - Now, run your application. When you click the button that navigates to the
ProductDetailsViewview, the navigation should still work correctly and the value entered into theProductListViewview should still appear. As a further exercise, take a look at the URI in the browser's address bar, and modify theValuepart of the URI. You will find that theProductDetailsViewview displays the value you entered in the address bar.