Warp and Liquify
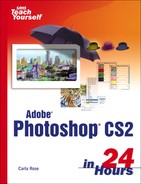
Not all transformations have to be useful. The folks at Adobe have added something that's more of a wonderful toy than a tool. It's called Liquify, and it does exactly that to an image. You can swirl the image, make it bulge or shrink, and generally have fun with it. This tool is found on the Filter menu. Pick a photo, or just draw a squiggle on a blank canvas and play with it yourself. Here's my attempt (see Figure 4.20) at liquifying the fashion doll. Of course, you can also use it “seriously” to turn a frown into a smile or to widen a photo subject's squinting eyes. Use light pressure, and don't overdo it.
Figure 4.20. Salvador Dali would have loved this.

Another semi-useful but very fun feature that's new to Photoshop CS2 is Warp. Select any portion of an image, or any layer, and choose Edit→Transform→Warp. Then go to town! You can drag the “handles” around the warp area's edges to make them bulge or flow, and you can drag the intersections of the interior grid to do the same for the inner portions of the selection or layer (see Figure 4.21).
Figure 4.21. More methodical than Liquify, Warp still enables you to push pixels around to your heart's content. Here, we can turn the level New Orleans skyline into a scene from hilly San Francisco.
