
14. Viewing and Editing Photos and Video with the Photos App

In this chapter, you explore all the photo- and video-viewing and editing functionality that your iPhone has to offer. Topics include the following:
![]() Configuring Photos settings
Configuring Photos settings
![]() Viewing, editing, and working with photos on your iPhone
Viewing, editing, and working with photos on your iPhone
![]() Viewing, editing, and working with video on your iPhone
Viewing, editing, and working with video on your iPhone
![]() Using iCloud with your photos
Using iCloud with your photos
Chapter 13, “Taking Photos and Video with Your iPhone,” explains how to take photos and video using the iPhone’s Camera app. The photos and video you take with your iPhone’s cameras are stored in your photo library, which you can access using the Photos app.
Configuring Photos Settings
The following table describes options in the Settings app that you can access by tapping Settings, and then tapping Photos. You can likely work with the Photos app without changing any of these, but it’s good to know what and where these settings are in case you want to make changes.
Settings App Explained
To get detailed information on using the Settings app, see “Working with the Settings App” in Chapter 2, “Using Your iPhone’s Core Features.”
Photos Settings
Section |
Setting |
Description |
|---|---|---|
Siri & Search |
Siri & Search Suggestions |
When this switch is enabled (green), information in the Photos app can be searched, used when you perform Look Ups on terms, and by Siri. If you set this switch to off (white), Photos information is not used for searches or Siri Suggestions. |
N/A |
iCloud Photo Library |
When enabled, your photos and videos are stored in your iCloud account on the cloud so that they are backed up and you can access them from multiple devices. See Chapter 3, “Setting Up and Using an Apple ID, iCloud, and Other Online Accounts,” for information about using iCloud with your photos and video. |
N/A |
Optimize iPhone Storage |
If you select this option, only versions of your photos that are optimized for the iPhone are stored on your phone; this saves space so that you can keep more photos and videos on your iPhone. Full resolution photos are uploaded to the cloud. |
N/A |
Download and Keep Originals |
This option downloads full resolution versions of your photos and videos on your iPhone. They consume a lot more space than optimized versions. |
N/A |
Upload to My Photo Stream |
When enabled, all your photos are automatically uploaded to your iCloud Photo Stream when you are connected to the Internet with Wi-Fi. New photos are also downloaded from the cloud to your iPhone and other devices with this setting enabled. |
N/A |
Upload Burst Photos |
This setting determines if all of the photos in a burst are uploaded to the cloud or only photos you tag as favorites are uploaded. Because burst photos can take up a lot of space, it’s usually better to leave this disabled. If you leave this disabled, when you select favorite photos in a burst series, only those photos are uploaded. |
N/A |
iCloud Photo Sharing |
When enabled, you can share your photos with others and subscribe to other people’s Photo Streams to share their photos. |
Cellular Data |
Cellular Data |
When enabled (green), photos are copied to and from your iCloud Photo Library when you are using a cellular Internet connection. If you have a limited data plan, you might want to set this to off (white) so photos are copied only when you are using a Wi-Fi network. |
Cellular Data |
Unlimited Updates |
When enabled, updates to your photos are made constantly, which uses much more data. With this disabled, updates are made periodically, which lowers the data use. |
PHOTOS TAB |
Summarize Photos |
When this switch is on (green), you see thumbnails for only some of the photos in a collection and the timeframe of each group is larger. If you set this to off (white), you see a thumbnail of every photo in your collections, which takes up much more screen space and you have to scroll more to move among your collections. This setting affects how you see Collections view and Years view only. |
MEMORIES |
Show Holiday Events |
With this switch enabled (green), the Photos app attempts to collect photos taken on the holidays in your country into memories. When disabled (white), the Photos app ignores holidays when it creates memories for you. |
TRANSFER TO MAC OR PC |
N/A |
If you select Automatic, when you sync photos to a Mac or Windows PC, the compatibility of the format is changed to improve compatibility with the computer you are transferring files to. |
TRANSFER TO MAC OR PC |
N/A |
If you choose Keep Originals, the files are transferred without checking compatibility. |
iCloud Settings
The iCloud-related settings on the Photos settings screen are the same as the Photos settings under the iCloud settings area (see Chapter 3 for details).
Viewing, Editing, and Working with Photos on Your iPhone
When you work with your photos in the Photos app, you first find and view the photos that you are interested in. You can then view those photos in a number of ways including individually or in memories. Should you want to make changes to photos, a couple of taps get you into the app’s amazing editing tools so you can make bad photos better, good photos great, and, well, you get the idea.
Finding Photos to Work With by Browsing
The first step in viewing, editing, or doing other tasks with photos is finding the photos you want to work with. When you open the Photos app, you see four ways to access your photos: Photos, Memories, Shared, and Albums. You can browse these sources to find photos in which you are interested.

The Photos source automatically organizes photos based on the time and location associated with them (this information is automatically embedded in the photos you take with the iPhone’s camera, assuming you haven’t disabled Location Services for it). The top level is Years, which shows your photos grouped by the year in which they were taken. You can then “drill down” into a year where you find collections, under which photos are organized by location and date ranges, which are determined according to the time, date, and location information on your photos. When you tap one of these collections, you drill down and see moments, which show you the detail of a collection. At the moment level, you see and can work with the individual photos in the collection.

The Memories source builds collections of photos for you automatically. These collections can be based on a number of factors, such as time, location, holiday, and even people. You can view the photos in a memory individually, and the app builds slideshows automatically to make viewing your photos more interesting.

Shared shows photos you are sharing with other people and photos other people are sharing with you. For each group of photos being shared, you see the name of the group and who is sharing it (you, for photos you are sharing, or the name of the person sharing with you). When you tap a shared group, you see the photos it contains and can work with them. (Working with photo sharing is covered in detail in “Using iCloud with Your Photos” later in this chapter.)

Albums allow you to organize your photos in a number of ways. Following are some of the albums or types of albums you might see:
• All Photos or Camera Roll—When you see the All Photos album, you have the iCloud Photo Library enabled so that you can use this album to see all the photos in your library. When this is not enabled, you see Camera Roll instead. When you use the iCloud Photo Library, all the photos that you’ve stored on the iPhone or other devices that are using the same iCloud account are stored here. If you don’t use the iCloud Photo Library, the Camera Roll album contains photos and videos you’ve taken with the iPhone’s camera or saved from other apps, such as attachments to email in Mail.
• Favorites—This folder contains images you have tagged as a favorite by tapping their heart icons.
• Favorite Memories—This folder contains memories you’ve tagged as favorites. This album makes it easy to get back to memories you want to view or use.
• People—This folder contains images based on the people in them (people are identified by the iPhone’s facial recognition software).
• Places—This groups photos by the location at which they were captured.
• Videos—Videos you record are collected in this folder.
• Live Photos—This folder contains your Live Photos (which capture snippets of video along with the still photo).
• Selfies—Photos you take with the front-facing camera are stored here.
• Panoramas, Slo-mo, Time-lapse, Bursts, and Screenshots—These folders contain photos and videos of the types for which they are named.
• Recently Deleted—This folder is a temporary location for photos you have deleted recently. When you delete a photo, it is moved into this folder, where it remains for a period of time (how long depends on how many photos you have deleted and when you deleted them). You can recover photos from this folder if you change your mind. After the holding time passes, photos are permanently deleted and can’t be recovered.
• My Albums—In this section, you see albums you create to manually organize photos. You can create albums for any reason and store photos within them.
Your Albums May Vary
Some apps, such as Instagram, might add their own albums to the Albums tab.
Although each of these sources looks a bit different, the steps to browse them to find the photos you want to work with are similar for most of these sources. The Memories source is a bit different and is covered separately. This example shows using the Photos source to browse for photos:
1. On the Home screen, tap Photos.
2. Tap Photos. On the Years screen, you see photos collected by the year in which they were taken. Under the year, you see a summary of the various locations where the photos were taken.
Start at the Beginning
If the title at the top of the screen isn’t “Years,” tap the back icon located in the upper-left corner of the screen until it is.
3. Swipe up and down the screen to browse all the years.
4. Tap the thumbnails in the year that contains photos you want to work with. You move to the Collections screen that groups the selected year’s photos based on locations and time periods.

Memories
If you want to jump directly to memories for the photos, tap a group’s heading, such as the locations for a group of photos. You move into the memory view of those photos (covered later in this chapter).
5. Swipe up and down the screen to browse all the collections in the year you selected.
6. Tap the collection that contains photos you want to see. Doing so opens the Moments screen, which further breaks out the photos in the collection by location and date.

7. Swipe up and down the screen to browse all the moments in the collection you selected.
8. Tap a photo to view it.

9. You’re ready to view the photos in detail as described in the task “Viewing Photos Individually” later in this chapter.

Go Back
You can move back to the screens from where you came by tapping the back icon, which is always located in the upper-left corner of the screen; this icon is named with the screen it takes you back to, it says Back, or it’s just a left-facing arrow. To choose a different source, you might have to tap the back icon a time or two as the Photos, Memories, Shared, and Albums icons at the bottom of the screen are only visible on some screens.
Finding Photos to Work With by Searching
Browsing photos can be a fun way to find photos, but at times you might want to get to specific photos more efficiently. The Search tool enables you to quickly find photos based on their time, date, location, and even content.
1. Continuing in the Photos app, tap the magnifying glass, which is available at the top of many of the app’s screens. The Search bar opens.

2. Swipe up and down the current searches on the screen; these are created for you automatically based on your recent activity. For example, Nearby finds photos that were taken near your current location.
3. To use a current search, tap it and skip to step 5; if you don’t want to use a current search, move to step 4.

4. Type your search term. This can be any information associated with your photos. As you type, collections of photos that match your search criteria are listed under the Search bar. The more specific you make your search term, the smaller the set of photos that will be found.
5. Swipe up and down the screen to browse all the results.
6. Tap the results you want to explore.

7. Tap a photo to view it.

8. View the photos in the group (covered in the next section).
9. Tap the back icon to return to the group of photos you were viewing.

10. Tap Back to move back to the Search screen.

11. Tap a different result to explore its photos.
12. To change the search, tap in the Search bar and change the current search term (you can delete the current term by tapping x).
13. Tap Cancel to exit the search.

Viewing Photos Individually
The Photos app enables you to view your photos individually. Here’s how:
1. Using the skills you learned in the previous tasks, open the group of photos that you want to view.
Orientation Doesn’t Matter
Zooming, unzooming, and browsing photos works in the same way whether you hold your iPhone horizontally or vertically.
2. Swipe up and down to browse all the photos in the group.
3. Tap the photo you want to view. The photo display screen appears.

4. If it is a Live Photo, tap and hold on the screen to see the photo’s motion.

My, Isn’t That Special
If there is something unique about a photo, you see an icon indicating what it is on the photo when you view it. In this figure, you see the LIVE icon indicating it is a Live Photo. You might also see Burst for Burst photos, HDR for a photo captured with HDR, and so on. Keep an eye out for these icons as you explore your photos.
5. To see the photo without the app’s toolbars, tap the screen. The toolbars are hidden.

6. Rotate the phone horizontally if you are viewing a horizontal photo.
7. Unpinch or double-tap on the photo to zoom in.
8. When you are zoomed in, drag around the image to view different parts of the zoomed image.
9. Pinch or double-tap on the photo to zoom out.
No Zooming Please
You can’t have any zoom when you swipe to move to the next or previous photo so make sure you are zoomed out all the way before performing step 10. If not, you move the photo around instead.
10. Swipe to the left to view the next photo in the group.


11. Swipe to the right to view the previous photo in the group.
12. When you’re done viewing photos in the group, tap the screen to show the toolbars again.

13. Swipe to the left or right on the thumbnails at the bottom of the screen to view all the photos in the current group. As you swipe, the photo you are viewing changes to be the one in the larger thumbnail at the center of the screen.
14. Tap a photo to view it.
15. Swipe up on the photo to get detailed information about it.

16. Tap Show Nearby Photos to see photos that were captured near the location associated with the photos you are viewing.
17. Tap the photo on the map to move to the map view (using the map view is covered in the “Working with Memories” section later in this chapter).
18. Swipe up the screen to see more details.

19. Tap a related memory to view it (details are provided later in this chapter).
20. Tap Show Photos from this Day to display the photos taken on the same day.
21. When you are done viewing the details, tap the back icon.

Using 3D Touch with Photos
You can use 3D Touch (iPhone 6s and later models) to preview and open photos as follows:
1. Browse a collection of photos in the Photos app.
2. Tap and hold on a photo in which you are interested. A Peek of that photo appears.

3. To open the photo, press down slightly harder until it pops open and use the steps in the previous task to view it. (If you pop the photo open, skip the rest of these steps.)
4. To see actions you can perform on the photo preview, swipe up the image.

5. Tap the action you want to perform, such as Favorite, to tag the photo as a favorite.

Working with Memories
The Memories feature automatically creates collections of photos for you to view in a number of ways. You can view them in a slideshow, individually, by selecting places, by selecting people, and so on. This feature provides lots of options and at times can be a very interesting way to view photos, because you might be surprised by some of the photos included in a particular memory.
There are a number of ways to access memories, including: tapping the Memories icon on the Dock at the bottom of the screen; tapping a heading for a group of photos when viewing years, collections, or moments; or tapping a Related item on a photo’s Details page.
When you access a memory (no matter how you arrived), you see different options depending on the content of that memory. These can include:
• Slideshow—The photos collected in a memory play in a slideshow that plays using a theme, which has effects and a soundtrack. You can change the theme and length of the slideshow, and you can also edit it.
• Photos—All memories enable you to view the photos they contain just like photos stored in other places.
• People—If the photos in a memory include people, the app identifies those people by facial recognition and enables you to view other photos containing those people or groups of people.
• Groups & People—If the photos in a memory include people that are in consistent groupings, you can use these groups to view photos containing those groupings.
• Places—You can use the Places tool to view the photos in a memory on a map. You can tap locations on the map where photos were taken to view those photos.
• Related—This section of a memory presents other memories that are somehow related to the one you are viewing. This relationship can be based on location, people, and so on.
The Photos app creates memories for you dynamically, meaning they change over time as the photos in your library change. You can save memories that you want to keep as they are. Otherwise, the memories you see change as you take more photos or edit photos you have. This keeps memories a fresh and interesting way to view your photos.
Following are examples of different ways to access memories:

• Memories icon—When you tap the Memories icon on the Dock, you see the Memories screen that contains the current memories the app has created and those you have saved. Tap a memory to open it.

On the memory’s screen, you see different tools for viewing its photos, as described in the previous list, depending on the content of the memory. For example, if there aren’t any people in the photos that the app recognizes via face recognition, there won’t be a People section.


• The heading of group of photos—As you learned earlier, the Photos app collects photos based on the time and location at which they were taken. As you browse these groups, you can tap on a group’s heading to view the photos it contains in a memory.
You can work with memories in a similar way no matter how you open them or what kind of photos they contain. Following are examples showing how to use several of the sections you see in memories.
Watching and Changing a Memory’s Slideshow
All memories have slideshows that you can watch using the following steps:
1. Open a memory using an option described previously. Slideshows appear at the top of a memory’s screen.
2. Tap the Play icon. The slideshow begins to play. If some of the photos in the slideshow aren’t currently stored on your iPhone, there might be a pause while they are downloaded (you see the Downloading status on the opening screen while this is done).

3. To view the slideshow in landscape orientation, rotate the iPhone. As the slideshow plays, you see effects applied to the photos; videos included in the memory also play.
4. Tap the screen to reveal the slideshow controls.

5. To pause the slideshow, tap the Pause icon. (When paused, this becomes the Play icon that you can tap to resume the slideshow.)
6. Swipe to the right or left on the theme bar to change the slideshow’s theme. As you change the theme you might see changes on the screen, such as a different font for the title, and hear different music while the slideshow plays.
7. Swipe to the right or left on the duration bar to change the slideshow’s length. As you make changes, you see the slideshow’s current length just above the theme bar.
8. Swipe to the left or right on the thumbnails at the bottom of the screen to move back or forward, respectively.

9. To restart the slideshow with the new settings, tap the Play icon.
10. Tap Edit to make manual changes to the slideshow and save the memory (see the Go Further sidebar “Make Your Own Memories” for more information).
11. Tap the Share icon and use the resulting menu to share the memory via AirDrop or an app; you can also save it to your iCloud Drive or Dropbox.
12. Tap the back icon to return to the memory.

>>>Go Further: MAKE YOUR OWN MEMORIES
You can edit a memory’s slideshow to change how it plays. Tap Edit; you might see a prompt indicating that the memory is saved to your memories, tap OK if you see this. Tap Title to change the slideshow’s name and title style. Tap Title Image to change the image shown in the video’s opening thumbnail. Tap Music to change its soundtrack; you can choose None to remove the soundtrack, Soundtracks to use one of the default soundtracks, or My Music to use music in your iTunes Music Library. Tap Duration to set the slideshow’s playing time. Tap Photos & Videos to manually select the photos that are included; tap the Trash Can icon to remove a photo from the video (this doesn’t delete the photo from your library, only from the slideshow) or tap Add (+) to include more of the memory’s photos in the slideshow (tap the back icon when you are finished selecting photos). Tap Done to save your slideshow. When you play the slideshow, the options you selected are used. Choose Custom on the Theme bar to view the video you created.
Viewing a Memory’s Photos
You can view the photos contained in a memory using the following steps:
1. Open a memory using an option described previously.
2. Swipe up the screen until you see the Photos section. Here you see the photos in the memory.

Show All, Tell All
If the memory has lots of photos, you might see only a summary view of them on the Photos section. Tap Show More to see all the photos. Tap Summary to return to the summary view.
3. Swipe up and down the photos section to see all the photos the memory contains.
4. Tap a photo to view it.

5. Use the techniques you learned in “Viewing Photos Individually” earlier in the chapter to work with the photos in the memory.
6. Tap the back icon to return to the memory.

Viewing a Memory’s Photos by Place
You can choose the photos in a memory to view based on the location using the Places section.
1. Open a memory using an option described previously.
2. Swipe up the screen until you see the Places section.
3. Tap a place. The map expands to fill the screen and you see more locations associated with photos in the memory.

Nearby Photos
Tap Show Nearby Photos to show other photos that were taken near the locations that you are viewing on the map, but that are not currently included in the memory. Tap Hide Nearby Photos to hide those photos again.
4. Unpinch your fingers on the screen to zoom in to reveal more detailed locations.

5. Swipe around the screen to move around the map.
6. Tap a location with photos to see the photos associated with it.

7. Swipe up and down the screen to browse the photos taken at the location.
8. Tap a photo to view it.

9. Use the techniques covered in “Viewing Photos Individually” earlier in the chapter to work with the photos you view.
10. Tap the back icon to return to the place.

11. Tap Back to return to the map.

12. Tap other locations to view their photos.
13. Tap the back icon to return to the memory.

>>>Go Further: MAKING THE MOST OF YOUR MEMORIES
Here are a few more ways to make the most of your memories:
• To view memories based on people or groups of people, tap the person or group in the Groups & People or People section; you see a memory focused on the person or group you selected. Tap Add Name, enter and then tap the name of the person (if she is a contact), and tap Done. The person will be identified by name. When viewing photos containing a person, you can add more photos of a person by tapping REVIEW. You see more photos that might contain that person. Select the photos containing the person and tap Done. Any photos you confirm are added to that person’s memory. (By the way, the Photos app can often identify pets in your photos and create memories focused on them.)
• Tap a memory in the Related section to see a memory that is related to the current one, such as one with photos containing the same people or in the same locations.
• Tap Add to Favorite Memories to add a memory you are viewing to the Favorite Memories album. Tap Remove from Favorite Memories to remove the memory from the Favorite Memories album.
• Tap Add to Memories to add a memory to the Memory screen. For example, when you are viewing a related memory and want to be able to get back to it quickly, tap Add to Memories. That memory appears on the Memories screen.
• Tap Delete Memory and then confirm you want to delete a memory by tapping Delete Memory again; the memory is deleted. When you delete a memory, only the memory is deleted; the photos that were in that memory remain in your photo library. (However, if you delete a photo from within a memory, that photo is deleted from your photo library, too.)
>>>Go Further: ROLL YOUR OWN SLIDESHOWS
The Memories feature creates slideshows that include effects and soundtracks for you automatically. However, you can create your own slideshows manually. View photos in a collection that you want to view as a slideshow; tap Select and then tap the photos you want to view in a slideshow. Tap the Share icon. Tap Slideshow. The slideshow plays. Tap the screen to show the slideshow controls. Tap Options to configure the slideshow, such as to choose music for it. When you’re done configuring the slideshow, tap Done. Tap Done again when you are finished watching a slideshow.
Working with Burst Mode Photos
When you use the Burst mode to take photos, the Camera app rapidly takes a series of photos. (Typically, you use Burst mode to capture motion, where the action is happening too quickly to be able to frame and take individual photos.) You can review the photos taken in Burst mode and save any you want to keep as favorites; your favorites become separate photos just like those you take one at a time.
Here’s how to identify which photos in a burst you want to keep:
1. View a Burst mode photo. Burst mode photos are indicated by the word Burst and the number of photos in the burst. (You can see all of the burst photos on your phone by opening the Bursts album.)
2. Tap Select. The burst is expanded. At the bottom of the screen, you see small thumbnails for the photos in the burst. At the top part of the screen, you see larger thumbnails of the photos; the photo in the center of the previews is marked with a downward-facing arrow. Photos marked with a dot are “suggested photos,” meaning the best ones in the series according to the Photos app.

3. Swipe all the way to the right to move to the first photo in the series; swiping on the thumbnails at the bottom of the screen flips through them faster.

4. Tap a photo that you want to save. It is marked with a check mark.
5. Swipe to the left to move through the series.
6. Tap each photo you want to save.
7. Continue reviewing and selecting photos until you’ve gone through the entire series.
8. Tap Done.

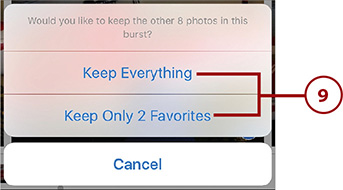
9. Tap Keep Only X Favorites, where X is the number of photos you selected, or tap Keep Everything to keep all the photos in the burst. Each photo you keep becomes a separate, individual photo; you can work with these just like photos you take individually.
Burst Mode Photos and Uploads to the Cloud
If the Upload Burst Photos switch on the Photos Settings screen is set to off, burst photos are not uploaded to the cloud until you go through the steps to select and save photos from a burst. The photos you selected to keep are then uploaded to the cloud just like individual photos you take.
Editing Photos
Even though the iPhone has great photo-taking capabilities, not all the photos you take are perfect from the start. Fortunately, you can use the Photos app to improve your photos. The following tools are available to you:
• Enhance—This tool attempts to automatically adjust the colors and other properties of photos to make them better.
• Straighten, Rotate, and Crop—You can rotate your photos to change their orientation and crop out the parts of photos you don’t want to keep.
• Filters—You can apply different filters to your photos for artistic or other purposes.
• Red-eye—This one helps you remove that certain demon-possessed look from the eyes of people in your photos.
• Smart Adjustments—You can adjust the light, color, and even the black-and-white properties of your photos.
• Markups—You can add markups, such as redlines, drawings, and magnification to photos.
Enhancing Photos
To improve the quality of a photo, use the Enhance tool.
1. View the image you want to enhance.
2. Tap Edit.

3. Tap the Enhance icon. The image is enhanced and the Enhance icon turns orange.

4. If you don’t like the enhancements, tap the Enhance icon again to remove the enhancements.
5. Tap Done to save the enhanced image.

Straightening, Rotating, and Cropping Photos
To change the alignment, position, and part of the image shown, perform the following steps:
1. View the image you want to change.
2. Tap Edit.
3. Tap the Rotate/Crop icon.

4. To rotate the image in 90-degree increments, tap the Rotate tool. Each time you tap this icon, the image rotates 90 degrees in the counterclockwise direction.
5. Rotate the image within its frame by dragging the triangle to the left or right. This is often useful to straighten photos that aren’t aligned quite right, but can be used for artistic effects too.
6. When the image is straightened, lift your finger from the screen. The dial shows how much you’ve rotated the image.
7. Crop the image proportionally by tapping the Constrain icon; to crop the image without staying to a specific proportion, skip to step 9.

8. Tap the proportion with which you want to crop the image. You use this to configure the image for how you intend to display it. For example, if you want to display it on a 16:9 TV, you might want to constrain the cropping to that proportion so the image matches the display device.

9. Drag the corners of the crop box until the part of the image you want to keep is shown in the box. If you performed step 8, the app keeps the crop box in the proportion you selected.
10. Drag on the image to move it around inside the crop box.

11. When the image is cropped and positioned as you want it to be, tap Done. The edited image is saved.

More on Straightening and Cropping Photos
To undo changes you’ve made, tap RESET and the photo returns to the state it was in before you started editing it. To exit the Edit mode without saving your changes, tap Cancel.
Applying Filters to Photos
To apply filters to photos, do the following:
1. View the image to which you want to apply filters.
2. Tap Edit.
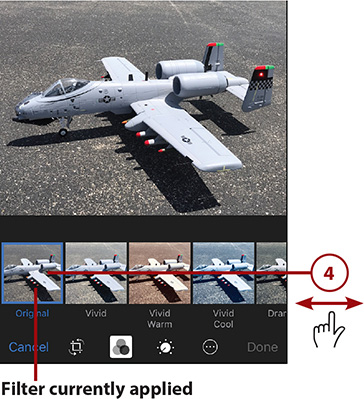
3. Tap the Filters icon. The palette of filters appears. If you haven’t applied a filter, you see the current filter as Original.

4. Swipe to the left or right on the palette to browse all of the filters.
Undoing What You’ve Done
To restore a photo to its unedited state, tap Revert, which appears when you edit a photo that you previously edited and saved. At the prompt, tap Revert to Original, and the photo is restored to its “like new” condition.
The original version of photos is saved in your library so you can use the Revert function to go back to the photo as it was originally taken or added to the library, even if you’ve edited it several times.
However, you can’t have the edited version and the original version displaying in your library at the same time. If you want to be able to have both an edited and original version (or multiple edited versions of the same photo), make a copy of the original before you edit it. To do this, view the photo, tap the Share icon, and tap Duplicate. You can do this as many times as you want. Each copy behaves like a new photo. If you edit one copy, the original remains available in your library for viewing or different editing.
5. Tap the filter you want to apply. The filter is applied to the image and you see a preview of the image as it will be with the filter; the filter currently applied is highlighted with a blue box. Keep trying filters until the image is what you want it to be.
6. Tap Done. The photo with the filter applied is saved.

Removing Red-Eye from Photos
When you edit a photo with people in it, the Red-eye tool becomes available (if no faces are recognized, this tool is hidden). To remove red-eye, perform the following steps:
1. View an image with people that have red-eye.
2. Tap Edit.

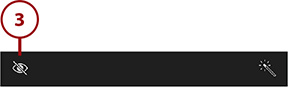
3. Tap the Red-eye icon.
4. Zoom in on the eyes from which you want to remove red-eye; as you zoom in, drag the photo to keep the eyes you want to fix on the screen.

5. Tap each eye containing red-eye. The red in the eyes you tap is removed.
6. Repeat steps 4 and 5 until you’ve removed all the red-eye.
7. Tap Done to save your changes.

Making Smart Adjustments to Photos
You can edit your photos using the Photos app’s Smart Adjustment tools. Using these tools, you can change various characteristics related to light, color, and black-and-white aspects of your photos.
1. View the image you want to change.
2. Tap Edit.

3. Tap the Smart Adjust icon.

4. Tap the characteristic you want to change, such as Color.

Get Straight to the Point
To jump directly to a specific aspect of the area you are adjusting, tap the downward-facing arrow along the right side of the screen. On the resulting menu, tap the characteristic you want to adjust. For example, if you open this menu for Color, you tap Saturation, Contrast, or Cast to adjust those factors.
5. Swipe to the left or right to change the level of the parameter you are adjusting. As you make changes, you see the results of the change on the image.

6. When you’re done adjusting the first attribute you selected, tap the List icon.

7. Tap one of the options under the attribute you are already working with to adjust it; or tap the downward-facing arrow under one of the other attributes, and then tap the characteristic you want to change.

8. Swipe to the left or right to change the level of the parameter you are adjusting. As you make changes, you see the results of the change on the image.
9. Repeat steps 6 through 8 until you’ve made all the adjustments you want to make.
10. Tap Done to save the adjusted image.

Marking Up Photos
You can add markups to photos, including:
• Draw—You draw directly on top of photos, such as to indicate areas of interest or highlight something.
• Magnify—This tool magnifies a section of an image in a circle that looks kind of like an image you see through a magnifying glass.
• Add text—You can use the text tool to add words to an image.
With the drawing and text tools, you can choose the format of the markup, such as its color.
The following steps show the magnification and text markup tools; the drawing and other tools work similarly.
1. View the image you want to mark up.
2. Tap Edit.

3. Tap the Options icon (…).

4. Tap Markup.

But Wait, There Might Be More
The Markup tool is the default photo editor that comes with the Photos app. Over time, other photo-editing tools will become available (check the App Store). When installed, you see them on the Photo Editing menu. Tap a tool to use it. Tap More to configure the photo-editing tools you have installed—for example, set a tool’s switch to off (white) to hide it. You can also change the order in which the tools are listed on the menu.
5. Tap Add (+).
Drawing Tools
Tap the pen or pencil icons to draw on the photo. You can change the size and color of the lines and drag them on the screen similar to how these steps show using the text tool.
6. Tap Magnifier. The magnification circle appears.

7. Drag the circle over the area of the image you want to magnify.

8. To change the size of the area being magnified, drag the blue dot away from the center of the circle to increase the area or toward the center to decrease the size of the area.
9. To change the amount of magnification being applied, drag the green dot clockwise around the circle to increase the magnification or counterclockwise to decrease it.

10. Tap Add (+).
11. Tap Text. A text box appears.

De-magnify
To remove a magnification markup, tap it and then tap Delete on the menu that appears.
12. Tap the text box.
13. Tap Edit.

14. Type the text you want to add.
15. Tap Done.

16. If it isn’t selected already, tap the text.
17. Tap the font icon.

18. Use the font menu, size slider, and justification icons to format the text.
19. Tap outside the menu to close it.

20. If it isn’t selected already, tap the text.
21. Tap the color icon (it starts as black so it is hard to see against the black background).

22. Tap the color you want to apply to the text.

23. Drag the text to where you want it to be on the photo.

24. Tap Done.
25. Tap Done to save your markups on the photo.
Editing Markups
To edit existing markups on a photo, edit the photo and open the markups tool using steps 1 through 4.
Working with Photos
Once you have photos on your iPhone, there are a lot of things you can do with them, including the following:
• Emailing one or more photos to one or more people (see the next task).
• Sending a photo via a text message (see Chapter 9, “Sending, Receiving, and Managing Texts and iMessages”).
• Sharing photos via AirDrop (see Chapter 15, “Working with Other Useful iPhone Apps and Features”).
• Sharing photos with others via iCloud (covered later in this chapter).
• Posting your photos on your Facebook wall or timeline.
• Assigning photos to contacts (see Chapter 6, “Managing Contacts”).
• Using photos as wallpaper (see Chapter 5, “Customizing How Your iPhone Looks and Sounds”).
• Sharing photos via tweets.
• Printing photos from your printer or (see Chapter 2, “Using Your iPhone’s Core Features”).
• Deleting photos (covered later in this chapter).
• Organizing photos in albums (also covered later in this chapter).
Copy ’Em
If you select one or more photos and tap the Copy icon, the images you selected are copied to the iPhone’s clipboard. You can then move into another app and paste them in.
You’ll easily be able to accomplish any actions on your own that are not covered in detail here once you’ve performed a couple of those that are demonstrated in the following tasks.
Individual Versus Groups
Some actions are only available when you are working with an individual photo. For example, you might be able to send only a single photo via some apps, whereas you can email multiple photos at the same time. Any commands that aren’t applicable to the photos that are selected won’t appear on the screen.
Sharing Photos via Email
You can email photos via iPhone’s Mail application starting from the Photos app.
1. View the source containing one or more images that you want to share.
2. Tap Select.

3. Select the photos you want to send by tapping them. When you tap a photo, it is marked with a check mark to show you that it is selected.
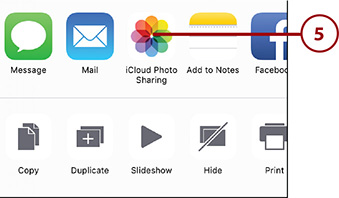
4. Tap the Share icon.

Too Many?
If the photos you have selected are too much for email, the Mail icon won’t appear. You need to select fewer photos to attach to the email message.
5. Tap Mail. A new email message is created, and the photos are added as attachments.

6. Use the email tools to address the email, add a subject, type the body, and send it. (See Chapter 8, ”Sending, Receiving, and Managing Email,” for detailed information about using your iPhone’s email tools.)

7. Tap the size of the images you want to send. Choosing a smaller size makes the files smaller and reduces the quality of the photos. You should generally try to keep the size of emails to 5MB or smaller to ensure the message makes it to the recipient. (Some email servers block larger messages.) After you send the email, you move back to the photos you were browsing.

Images from Email
As mentioned in Chapter 8, when you save images attached to email that you receive, they are stored in the All Photos or Camera Roll photo album just like photos you take with your iPhone.
Organizing Photos in a New Album
You can create photo albums and store photos in them to keep your photos organized.
To create a new album, perform these steps:
1. Move to the Albums screen by tapping Albums on the toolbar.
2. Tap Add (+).

3. Type the name of the new album.
4. Tap Save. You’re prompted to select photos to add to the new album.

5. Move to the source of the photos you want to add to the new album.
6. Swipe up and down to browse the source and tap the photos you want to add to the album. They are marked with a check mark to show that they are selected. The number of photos selected is shown at the top of the screen.
7. Tap Done. The photos are added to the new album and you move back to the Albums screen. The new album is shown on the list, and you can work with it just like the other albums you see.


Playing Favorites
To mark any photo or video as a favorite, tap its heart icon. It fills in with blue to show you that the item you are viewing is a favorite. Favorites are automatically collected in the Favorites album, so this is an easy way to collect photos and videos you want to be able to easily find again without having to create a new album or even put them in an album. You can unmark a photo or video as a favorite by tapping its heart icon again.
Adding Photos to an Existing Album
To add photos to an existing album, follow these steps:
1. Move to the source containing the photos you want to add to an album.
2. Tap Select.

3. Tap the photos you want to add to the album.
4. Tap the Share icon.

5. Swipe to the left until you see Add to Album.
6. Tap Add to Album.

7. Swipe up and down the list to find the album to which you want to add the photos.
8. Tap the album; the selected photos are added to the album. (If an album is grayed out and you can’t tap it, that album was not created on the iPhone, so you can’t change its contents.)

>>>Go Further: More Album Fun
You can create a new album from photos you’ve already selected. Perform steps 1 through 6 and then tap New Album. Name the new album and save it. It’s created with the photos you selected already in it.
You can change the order in which albums are listed on the Albums screen. Move to the Albums screen and tap Edit. Drag albums up or down the screen to reposition them. To delete an album that you created in the Photos app, tap its unlock icon (red circle with a –) and then tap Delete Album. (This only deletes the album itself; the photos in your library remain there.) When you’re done making changes to your albums, tap Done.
To remove a photo from an album, view the photo from within the album, tap the Trash Can, and then tap Remove from Album. Photos you remove from an album remain in your photo library; they are only removed from the album.
Deleting Photos
You can delete photos and videos that you don’t want to keep on your iPhone. If you use the iCloud Photo Library, deleting the photos from your phone also deletes them from your photo library and from all the other devices using your library. So, make sure you really don’t want photos any more before you delete them.
1. Open the source containing photos you want to delete.
2. Tap Select.

3. Tap the photos you want to delete. Each item you select is marked with a check mark.
4. Tap the Trash Can.

5. Tap Delete X Photos, where X is the number of photos you selected. The photos you selected are deleted.

Deleting Individual Photos
You can delete individual photos that you are viewing by tapping the Trash Can, and then tapping Delete Photo.
Recovering Deleted Photos
As you learned earlier, photos you delete are moved to the Recently Deleted folder. You can recover photos you’ve deleted by opening this folder. You see the photos you’ve deleted; each is marked with the time remaining until it is permanently deleted. To restore photos in this folder, tap Select, tap the photos you want to recover, and tap Recover. Tap Recover X Photos, where X is the number of photos you selected (if you select only one, this is labeled as Recover Photo). The photos you selected are returned to the location from which you deleted them.
Deleted Means Deleted
Be aware that when you delete a photo from your iPhone, it is also deleted from your iCloud Library and all the devices sharing that library—not just from your iPhone. (After it has been deleted from the Recently Deleted folder of course.)
Viewing, Editing, and Working with Video on Your iPhone
As explained in Chapter 13, you can capture video clips with your iPhone. Once captured, you can view clips on your iPhone, edit them, and share them.
Finding and Watching Videos
Watching videos you’ve captured with your iPhone is simple.
1. Move to the Albums screen.
2. Tap the Videos album. Video clips display their running time at the bottom of their thumbnails. (Videos can also be stored in other albums, in collections, in memories, etc. This Videos album just collects videos no matter where else they are stored.)

3. Swipe up and down the screen to browse your videos.
4. Tap the video you want to watch.

5. Rotate the phone to change its orientation if necessary.
6. Tap Play. The video plays. After a few moments, the toolbars disappear automatically.

7. Tap the video. The toolbars reappear.

Deleting Video
To remove a video clip from your iPhone, select it, tap the Trash Can, and then tap Delete Video at the prompt.
8. Pause the video by tapping Pause.
9. Jump to a specific point in a video by swiping to the left or right on the thumbnails at the bottom of the screen. When you swipe to the left, you move ahead in the video; when you swipe to the right, you move back in the video.

Watching Slow-Motion and Time-Lapse Video
Watching slow-motion video is just like watching regular speed video except after a few frames, the video slows down until a few frames before the end at which point it speeds up again. Watching time-lapse is similar except the video plays faster instead of slower than real time.
Editing Video
You can trim a video clip to remove unwanted parts. Here’s how you do it:
1. View the video you want to edit.
2. Tap Edit. If the video isn’t stored on your phone, it is downloaded. When that process is complete, you can edit it.

3. Drag the left trim marker to where you want the edited clip to start; the trim marker is the left-facing arrow at the left end of the timeline. If you hold your finger in one place for a few seconds, the thumbnails expand so your placement of the crop marker can be more precise. As soon as you move the trim marker, the part of the clip that is inside the selection is highlighted in the yellow box.
4. Drag the right trim marker to where you want the edited clip to end.
5. Tap Done.

6. Tap Save as New Clip to save the trimmed clip as a new clip or Cancel to leave the clip as it was. When you save it as a new clip, the frames outside the crop markers are removed from the clip and it is added to your library as a new clip.

There’s an App for That
For more powerful video editing on your iPhone, download the iMovie app. This app provides a much more powerful video editor. You can use themes to design a video, add music, include titles and photos, and much more.
>>>Go Further: SHARING VIDEO
There are lots of ways to share your videos. Select the video you want to share. Tap the Share icon. Tap how you want to share the video. There are a number of options including Messages, Mail, iCloud, iCloud Photo Sharing, YouTube, and Facebook. Follow the onscreen prompts to complete the sharing process. The options available to you might depend on the size of the video; for example, you might not be able to email a large video.
Using iCloud with Your Photos
With iCloud, your devices can automatically upload photos to your iCloud account on the Internet. Other devices can automatically download photos from iCloud, so you have your photos available on all your devices at the same time. Using iCloud with your photos has two sides: a sender and receiver. Your iPhone can be both. Photo applications (such as the Photos app on a Mac) can also access your photos and download them to your computer automatically.
In addition to backing up your photos and having all your photos available to you on all your devices, you can also share your photos and videos with others and view photos and videos being shared with you.
Sharing Your Photos
You can share your photos with others by creating a shared album. This is a great way to share photos, because others can subscribe to your shared albums to view and work with the photos you share. When you share photos, you can add them to an album that’s already being shared or create a new shared album.
To create a new, empty, shared album, do the following:
1. Open the Shared source. You see the Shared screen that lists the shared albums in which you are currently participating (as either the person sharing them or subscribed to them).
2. Tap Add (+).

3. Type the title of the new album.
4. Tap Next.

5. Enter or select the email address of the first person with whom you want to share the photos.
6. Add other recipients until you’ve added everyone you want to access the photos.
7. Tap Create. The shared album is created and is ready for you to add photos. The recipients you included in the new album receive notifications that invite them to join the album.


Adding Photos to a Shared Album
To add photos to an album you are sharing, perform the following steps:
1. Move to the source containing photos you want to add to a shared album.
2. Tap Select.

3. Tap the photos you want to share.

4. Tap the Share icon.

5. Tap iCloud Photo Sharing.
6. Enter your commentary about the photos you are sharing. (Note, this commentary is associated only with the first photo.)
7. Tap Shared Album.

8. Swipe up and down to browse the list of shared albums available.
9. Tap the album to which you want to add the photos.
New Shared Album with Photos
You can create a new shared album with the selected photos by tapping New Shared Album.
10. Tap iCloud.

11. Tap Post. The photos you selected are added to the shared album. People who are subscribed to the album receive a notification that photos have been added and can view the new photos along with your commentary.

iCloud Account Required
The people with whom you share photos must have an iCloud account.
>>>Go Further: MORE ON iCLOUD PHOTO SHARING
Following are a few more pointers to help you use iCloud photo sharing:
• You can add comments to photos you are sharing. Open the shared album and tap the photo to which you want to add comments. Tap Add a comment. Type your comment and tap Send. People with whom you are sharing the photo receive a notification and can read your comments.
• To add more photos to a shared album, open the album and tap Add (+). Use the resulting screen to select the photos you want to add, include commentary, and post the photos.
• To invite people to join a shared album, open the shared album. Tap the People tab at the bottom of the screen and then tap Invite People. Enter the email addresses of the people you want to invite and tap Add.
• You can configure various aspects of a shared album by opening it and tapping the People tab at the bottom of the screen. You can see the status of people you have invited, determine if the people with whom you are sharing the album can post to it, make the album a public website, determine if notifications are sent, or delete the shared album.
Working with Photo Albums Shared with You
You can work with albums people share with you as follows:
1. Tap the notification you received, or tap the Shared source when you see a badge indicating you have activity.

2. Tap Accept for the shared album you want to join. The shared album becomes available on your Shared tab.
3. Tap Shared.

4. Tap the new shared album.

5. Tap a photo in the album.

6. Tap Like to indicate you like the photo.
7. Tap Add a comment. (If you previously liked the photo, you see the number of likes for it instead; tap that number to add a comment.)

8. Type your comment.
9. Tap Send. Your comments are added to the album.

10. Tap the back icon.

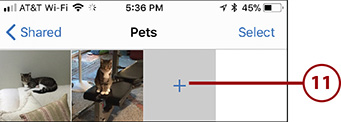
11. If you were allowed to add photos to the shared album by the person who shared it, tap Add (+) and post your own photos to the album you are sharing. This works just like posting to your own albums.
>>>Go Further: MORE ON PHOTOS SHARED WITH YOU
When you share other people’s photos, keep the following points in mind:
• You can do most of the tasks with shared photos that you can with your own, such as emailing them, using them as wallpaper, and so on.
• To unsubscribe from an album, move to its People screen and tap Unsubscribe and confirm that is what you want to do. The shared album is removed from your iPhone.
• To see the activity associated with albums being shared with you, and those you are sharing, open the Activity Album on the iCloud Photo Sharing screen. You see new postings to the albums, when someone comments, and so on.