
WCF RIA Services
Although you can consume WCF Services in Silverlight, you will probably find that creating and maintaining your services becomes somewhat of a chore. The drawbacks of creating and consuming WCF Services include the following:
- A lot of repetitive boilerplate code is required to implement CRUD-style operations.
- Services become more complex when you add support for filtering/sorting/grouping/paging.
- You will constantly need to update your service references in your client whenever the contract on the server changes.
- You will need to write and maintain logic, such as validation and business rules, on both the server and the client. This duplicated code requires additional effort to write, test, and maintain, and the code can easily get out of sync between the tiers.
To try to combat these problems and simplify access to data in Silverlight applications, Microsoft introduced WCF RIA Services, commonly referred to just as RIA Services, primarily designed for use when developing end-to-end Silverlight applications, but with support for additional presentation technologies such as JavaScript now being added. Let's take a deep dive into how you can expose data from the server via WCF RIA Services.
What Is WCF RIA Services?
RIA Services is a layer on top of WCF that provides a prescriptive pattern and framework that you can use when building data-driven Silverlight applications that consume data from a server. Another way of saying that is that RIA Services is a framework that helps you expose data from a server, consume it in your Silverlight application, and share business/validation logic between the two.
RIA Services can be described as follows:
- Partly a data-centric design pattern for structuring your application.
- Partly a framework that provides advanced data management, authentication/authorization management, and querying features.
- Partly a code generator that generates code in one project based on the code written in another project so that common code to be used in multiple tiers can be written in one place.
RIA Services piggybacks on top of WCF Services, which provides the communication mechanism between the middle tier and the presentation tier, as illustrated in Figure 4-1.

Figure 4-1. Communications mechanism between middle tier and presentation tier
The focus of the RIA Services pattern is very much directed toward the middle tier. It's not tied to a specific data access technology, although it integrates particularly well with both the Entity Framework and LINQ to SQL, the latter requiring the WCF RIA Services Toolkit to be installed, as discussed in the “WCF RIA Services Toolkit” section, later in this chapter. It isn't designed to be tied to a specific presentation technology, although the focus is currently primarily on Silverlight, with limited support for other presentation technologies such as JavaScript, WPF, and Windows Forms.
RIA Services is an end-to-end technology; therefore, you need to have control over both the server and the client tiers of the application in order to use it effectively. If you need to access existing services without routing the requests through the server, or if you need to use services being developed by a separate team, RIA Services might not be suitable for your project.
The framework portion of RIA Services provides a host of functionality, right out of the box, that vastly simplifies building an application. Features include the following:
- A data source control that can be used in XAML to communicate with a service.
- Tracking of changes made to data on the client, and processing these changes on the server.
- The ability to write a LINQ query on the client, and have that query executed on the server.
- An out-of-the-box working authentication service.
An Overview of How to Use WCF RIA Services
Following is a brief overview of the process of working with RIA Services. Let's get familiar with the process, before drilling down into the details.
- Link your Silverlight and Web projects: RIA Services requires you to follow a pattern in structuring your application. First, your server (Web) project and your client (Silverlight) project must be linked so that the RIA Services build task/code generator can generate code in the client project to enable it to interact with the server. This means that your client and server projects must exist in the same solution.
 Note There is support to have your entities and metadata classes in a separate project from your server project, using the WCF RIA Services Class Library project template discussed in the “Encapsulating Logic in a Separate WCF RIA Services Class Library” section later in this chapter.
 - Create your domain services: The next step is to create one or more domain services. Think of a domain service as much like a standard WCF service, but following a given pattern and providing some base functionality. As a general rule, you have one domain service for each set of data that you want to expose from the server-for example, products, customers, and so on.
Note In fact, each of your domain services is actually a WCF service. RIA Services generates code in the client project to automatically communicate with the domain service, meaning that you don't have to worry about adding service references to your domain services. However, because domain services are standard WCF Services, you can add them as service references to your projects if you wish (including Windows Forms, WPF, and ASP.NET projects).
- Create domain operations on your domain services: On your domain service you create domain operations, which will typically expose data to the client and accept changes following the create, read, update, and delete (CRUD) pattern. For example, a domain service exposing product data will usually provide domain operations such as GetProducts, InsertProduct, UpdateProduct, and DeleteProduct.
- Decorate your entities with validation logic and other attributes: The entities being exposed by a domain service can be decorated with attributes (such as data validation rules), either directly or by applying the attributes to associated classes (known as metadata classes).
- Specify code to be shared between the server and the client: You can share code between the server and the client projects by simply placing the code to be shared in one or more files with the
.shared.csextension. - Consume the domain services in the client project: The RIA Services build task automatically generates code in the client project that enables it to interact with the domain services on the server. It creates a domain context for each domain service, and proxy classes for each of the entities exposed by the domain service. You can then use the domain contexts to request data from the server, work with it, and submit any changes back to the server.
We will cover consuming data in your Silverlight project in Chapter 5.
How the WCF RIA Services Code Generator Works
RIA Services requires the server and the client projects to be within the same solution and linked together. One contains services that expose data (acting as a server), and the other communicates with the services and consumes the data (acting as a client).
When a domain service is created in the server project, the RIA Services build task in Visual Studio generates corresponding code in the client project (that is, a code generation process) that simplifies the process of interacting and communicating with the service. It also generates corresponding proxy data object classes, which are generally referred to as entities, in the client project for any entities that are exposed by the service; applies attributes, such as those that denote validation logic on the entities and their properties; and copies code marked as shared code from the server project into the client.
![]() Note This code generation is generally referred to as projection, because code is projected from the server project onto the client project.
Note This code generation is generally referred to as projection, because code is projected from the server project onto the client project.
Let's investigate what is happening under the covers when you link the two projects via RIA Services. For this, we'll use the solution that we created back in Chapter 1 (also used in Chapter 3). This solution was created using the Silverlight Business Application project template, and is already configured to use RIA Services, with the two projects in the solution already linked with a RIA Services link.
Start by toggling the Show All Files option (the second button from the left in the Solution Explorer window's toolbar) to “on” for the Silverlight project. There is a Generated_Code folder, as shown in Figure 4-2, into which code is generated by the RIA Services build task when the Silverlight project is compiled. This code enables you to access all the operations, data, and logic from the Silverlight project that has been exposed on the server via RIA Services.

Figure 4-2. The Silverlight project structure, showing the hidden Generated_Code folder
![]() Note You can have a look at the code that has been generated for the client, but don't change anything because any changes you make will be overwritten when the Silverlight project is next compiled (which regenerates the code in this folder). The generated classes are partial classes, which enables you to extend them on the client with client-only logic, should you find the need. We will take a closer look at this generated code in the “Inspecting the Generated Code in the Silverlight Project” section of Chapter 5.
Note You can have a look at the code that has been generated for the client, but don't change anything because any changes you make will be overwritten when the Silverlight project is next compiled (which regenerates the code in this folder). The generated classes are partial classes, which enables you to extend them on the client with client-only logic, should you find the need. We will take a closer look at this generated code in the “Inspecting the Generated Code in the Silverlight Project” section of Chapter 5.
The code generator is intelligent enough to ascertain the nature of operations on the services. The logic it uses is discussed in the “Domain Operations” section, later in this chapter.
You can govern how entity classes are generated in the client project (what properties are included or excluded) by decorating the entity's properties with attributes, also known as data annotations. How you do this is discussed in the “Decorating Entities” section, later in this chapter.
Code that should be shared between the server and the client (copied from the server project into the client project by the RIA Services build task) must be placed into files that have the .shared.cs extension, so that the build task knows to copy these files from the server project to the client project. Sharing code is discussed in the “Sharing Code and Logic Across Tiers” section, later in this chapter.
Creating the RIA Services Link
The AdventureWorks project we created in Chapter 1 using the Silverlight Business Application project template is set up to use RIA Services by default, and already provides some basic functionality using RIA Services. Therefore, we will continue working from that base and the minor modifications we made in Chapter 1 and Chapter 3. Figure 4-3 displays the structure of the Web project in this solution.
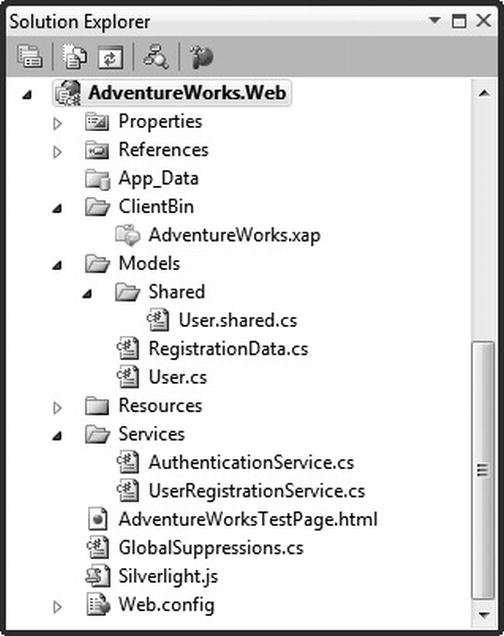
Figure 4-3. The structure of the Web Application project
Note from Figure 4-3 that there is a Services folder and a Models folder in the project. The
Services folder already contains two domain services (AuthenticationService and
UserRegistrationService) for providing authentication and user registration operations to the client (these will be discussed further in Chapter 8). The Models folder contains two data classes (User and RegistrationData) that are passed between the server and the client. You will also find a Shared folder under the Models folder, which has a file called User.shared.cs that contains code to be shared between the server and the client projects.
As demonstrated in Chapter 1, the Silverlight and Web projects are linked together. The purpose of this link is to copy the compiled XAP file generated by your Silverlight application to a location under the Web project when the project/solution is compiled. However, RIA Services requires another link to be created between the projects. The purpose of this link is to configure what project contains the domain services that the Silverlight application will be consuming data from. This will enable the RIA Services build task to generate the required code to communicate with those services in your Silverlight project accordingly.
Whereas the project link to copy the Silverlight application's XAP file into the Web project was configured in the Web project's project properties, the RIA Services link is configured in the project properties of the Silverlight project, as shown in Figure 4-4.

Figure 4-4. The project properties for the Silverlight project, with the WCF RIA Services link configuration at the bottom
This link will already be set up by using the Business Application project template; however, if you have an existing Silverlight project or Web application that you want to use RIA Services with, you can manually link the projects together using this property.
Now you are ready to start creating some domain services. The example you'll work through in this chapter demonstrates some of the key concepts of the RIA Services pattern. Your aim will be to expose data and operations from the server, and make them accessible from the client. In doing so, you will also be sharing some validation logic and code between the server and the client, which will be executed on both the server and the client. First, however, you need to set up a data source/layer from which you will expose data to the client.
Domain Services
After you have created a RIA Services link between your Silverlight and Web projects and configured a data source on the server, your next task is to expose some data and operations from the server, which you will consume in your Silverlight client in subsequent chapters of this book. You will achieve this through the use of a domain service. A domain service typically consists of basic CRUD operations, and any other custom operations you wish to be callable from the client.
The Add New Domain Service Class Wizard
The easiest way to create a domain service is using the Domain Service item template and Add New Domain Service Class wizard. This wizard is shown in Figure 4-5. This wizard is specifically geared toward creating a domain service that exposes entities from either an Entity Framework model or a LINQ to SQL model, the latter requiring you to have the WCF RIA Services Toolkit installed (discussed in the “WCF RIA Services Toolkit” section, later in this chapter).
![]() Note After creating an entity model that you want to expose data from, and before attempting to create a domain service, make sure that you compile your solution. If you don't, you will find that the Add New Domain Service Class wizard won't display your entity model in the Available DataContexts/ObjectContexts drop-down list.
Note After creating an entity model that you want to expose data from, and before attempting to create a domain service, make sure that you compile your solution. If you don't, you will find that the Add New Domain Service Class wizard won't display your entity model in the Available DataContexts/ObjectContexts drop-down list.

Figure 4-5. The Add New Domain Service Class wizard dialog
Let's now take a look at each element of this dialog and what it does.
Available DataContexts/ObjectContexts
The “Available DataContexts/ObjectContexts” drop-down list enables you to select an Entity Framework model or LINQ to SQL model whose entities will populate the entity list. If your model doesn't appear in the list, close the wizard, compile your project, and try again. The project must be compiled after the model is created and before this wizard is run in order for the entities to appear in the list.
If you want to expose presentation model (POCO) types instead of Entity Framework or LINQ to SQL entities, you will need to select the <empty domain service class> option from the Available Data-Contexts/ObjectContexts drop-down list, and implement the domain operations to expose these types yourself.
The Entity List
The entity list enables you to select the entities that you want to expose via this domain service. A domain operation will be created in the domain service for each selected entity, and this operation will return a collection of the corresponding entity to the client. If you want to also be able to modify an entity from the client, select the “Enable editing” option next to it. For each entity marked as editable, the wizard will create insert, update, and delete domain operations for that entity on the domain service.
![]() Note As a general rule, each domain service will only expose a single set of data, such as product data or customer data, rather than all the data you want to expose to the client application from your database.
Note As a general rule, each domain service will only expose a single set of data, such as product data or customer data, rather than all the data you want to expose to the client application from your database.
Enabling Client Access
Make sure that the “Enable client access” check box is checked before moving on from this dialog. This will decorate the domain service class with the EnableClientAccess attribute, which will indicate to the RIA Services code generator that it should generate code in the Silverlight project to enable it to consume this domain service.
Exposing an OData Endpoint
The “Expose OData endpoint” check box enables your domain service to expose data using the Open Data (OData) protocol. OData is a set of extensions for the ATOM protocol to standardize the creation of HTTP-based data services, somewhat similar to REST data services-returning the data as an ATOM feed and providing CRUD operations on the data. While this is a new protocol, it has Microsoft backing, and Microsoft is integrating support for OData into a number of its products, such as SharePoint and PowerPivot. Selecting this check box will enable your domain service to be consumed by products supporting this OData protocol.
Generating Associated Classes for Metadata
The “Generate associated classes for metadata” check box creates a metadata class for each entity selected in the entity list. Metadata classes will be covered in the “Decorating Entities” section later in this chapter, but in summary, they enable you to decorate the properties on your entities with attributes, such as data validation attributes, without the need to modify the entities themselves. Entities are generated code, created by the Entity Framework modeler, and modifying generated code is not a good idea. Doing so would prevent you from regenerating the code again at a later stage-if you did regenerate the code after manually altering it, then you would lose the changes you had made.
Metadata classes provide the solution to this problem. Each entity can have a corresponding metadata class, with each property on the entity having a corresponding field in the metadata class. You can then decorate the fields in the metadata class with attributes that RIA Services will map to the entity and use at design time when generating the corresponding entity on the client, and at runtime when persisting entities passed from the client to the database to revalidate the data.
The Add New Domain Service Class wizard can generate these metadata classes for you for the entities you have selected from the list. These will go into a .metadata.cs file-for example, the ProductService domain service will have a corresponding ProductService.metadata.cs file created, containing metadata classes for all the entities that the ProductService domain service exposes.
It's not essential that you generate metadata classes for the entities that you expose from your domain service. However, if you choose not to create them when creating the domain service, and then decide you wish to use them at a later time, you will need to either create them manually or create another temporary domain service for the entities, from which you can get the generated metadata classes and then delete the domain service.
Creating a Domain Service Using Snippets
Another way of easily creating a domain service is to use Visual Studio's snippets feature. Colin Blair has created some snippets to help you create a domain service without using the Add New Domain Service Class wizard, and made them available as part of the RIA Services Contrib project that he maintains and which is detailed in the “The WCF RIA Services Contrib Project” section, later in this chapter. You can find more information about these snippets on his blog at www.riaservicesblog.net/Blog/2011/06/default.aspx.
 Workshop: Creating an Entity Model
Let's work through the process of exposing a Product entity from the entity model.
- Compile your Web project after creating your entity model (from the workshop titled “Creating an Entity Model").
- Add a domain service to the
Servicesfolder in your Web (server) project, using the Domain Service item template, which you'll find under the Web category. We will be using this service to serve up product data, so call itProductService.cs. This will initiate the Add New Domain Service Class wizard shown in Figure 4-5. - Select your
AdventureWorksentity model from the Available DataContexts/ObjectContexts drop-down list. This will display each entity in your entity model in the list. - Select the
Productentity and its corresponding Enable editing check box. - Ensure that the Enable client access check box is selected.
- Ensure that the Generate associated classes for metadata check box is selected.
- Click the OK button.
This will then create the domain service, and a ProductService.metadata.cs file containing the metadata class for the Product entity in your Web project. Your Silverlight application will now actually be able to get/query a collection of products, and insert/update/delete products via the domain service that has been created for you by the wizard.
Domain Operations
Domain operations are methods on a domain service that can be invoked from a client. These operations will typically be CRUD operations, but you can also have invoke operations and custom operations. The Add New Domain Service Class wizard creates the domain operations on the domain service required to enable CRUD functionality on entities for you, but it's well worth understanding how these domain operations work.
In order for the RIA Services code generator to ascertain what type of operation a given method is, so that it can correctly generate the corresponding code in the client project, it uses a convention-based approach (by default). The conventions prescribe how the operation methods should be named and what pattern their signature should follow.
Alternatively, you can decorate the operation's method with an attribute that identifies what type of operation it is. The naming/signature conventions and alternative attribute decorations for each operation will be included in this section's discussion.
![]() Note Some people prefer to decorate their operations, even when they follow the naming/signature convention, in order to explicitly define what type of operation is being represented.
Note Some people prefer to decorate their operations, even when they follow the naming/signature convention, in order to explicitly define what type of operation is being represented.
Let's now take a look at each of the various types of domain operations that you might have in a domain service.
Query Operations
A query operation enables you to expose data to a client. This data may be either a collection of entities/objects or a single entity/object. Let's first look at the naming/signature convention used for query operations, and then we'll look at each of these cases separately.
Naming/Signature Convention
A query operation has no convention for its naming, and can accept any or no parameters. For it to be implicitly identified by the RIA Services code generator as a query operation, however, it must return an IQueryable<T>, IEnumerable<T>, or an entity. Otherwise, decorate the method with the Query attribute.
![]() Note You can configure the query operation to cache the results in order to save calls back to the server from the client or calls to the database, depending on how you configure the caching. Data caching is ideal when you have data that rarely or never changes. To utilize output caching, decorate the query operation with the
Note You can configure the query operation to cache the results in order to save calls back to the server from the client or calls to the database, depending on how you configure the caching. Data caching is ideal when you have data that rarely or never changes. To utilize output caching, decorate the query operation with the OutputCache attribute, and configure the caching behavior by specifying values for its constructor parameters. These parameters include where the data should be cached (most commonly either on the server and/or the client), and how long the data should be cached (in seconds). Note that client-side caching requires the browser to honor the cache header of the response, which they don't always do. More information on the OutputCache attribute can be found on Matthew Charles' blog at http://blogs.msdn.com/b/digital_ruminations/archive/2011/01/05/ria-services-output-caching.aspx.
Returning a Collection of Entities
In the ProductService class we created in the previous workshop, you will find a query operation that returns a collection of Product entities to the client, as follows:
public IQueryable<Product> GetProducts()

{

    return this.ObjectContext.Products;

}
The GetProducts operation returns an expression, via an IQueryable<T> interface type, that when executed by a LINQ provider will return a collection of the Product entity. Throughout this book, the LINQ provider we are using is LINQ to Entities for querying an Entity Framework model, although any LINQ provider can be used. Although you could return an actual collection from the query operation, such as a List<T>, returning an IQueryable<T> expression provides numerous benefits, and enables one of the most powerful features that RIA Services provides.
By returning an expression that hasn't been executed against the LINQ provider as yet, you enable RIA Services to add additional query criteria to the expression, which it can then execute, and can subsequently return the results to the client. As you will see in Chapter 5, the client can specify filtering, sorting, and paging criteria as a LINQ query when calling a query operation on the server. Let's say that the client wants all the products whose name starts with “A” and provides the LINQ query to do so when calling the GetProducts domain operation. This LINQ query will then be serialized and sent to the server when the request is made, and this query will be appended to the existing LINQ to Entities query before it is executed and the results are returned to the client. This provides a neat, easy, and elegant way of passing criteria from the client to the server, and having them included in the query to the database.
Query operations can accept parameters as part of their signature, which you can use as an alternative means to pass filters and other criteria to the query operation. For example, the following query operation accepts a string that it will use to filter the results and which must be provided when calling the operation from the client:
public IQueryable<Product> GetProducts(string nameFilter)

{

    return this.ObjectContext.Products.Where(p =>

                                             p.Name.StartsWith(nameFilter));

}
Returning a Single Entity
In addition to returning a collection of entities, you will often want to add a domain operation that returns a single entity matching the key you pass through to it as a parameter. This will support the drill down-type scenario that will be covered in Chapter 7. To demonstrate this, we'll add a new domain operation to the ProductService domain service called GetProduct, which will return the Product entity with the matching ProductID passed through to it as a parameter:
public Product GetProduct(int productID)

{

    return ObjectContext.Products

        .Where(p => p.ProductID == productID)

        .FirstOrDefault();

}
![]() Note
Note GetProduct, which returns a single Product entity, is very similar in name to the default GetProducts domain operation, which returns a collection of Product entities. It's best not to have such similarly named operations on your domain service because it will cause confusion and lead to mistakes being made on both the server and the client. Therefore, it's best to rename the GetProducts domain operation to something such as GetProductCollection or GetProductList.
Insert/Update/Delete Operations
When a client application submits a changeset to the server, RIA Services will call the appropriate insert/update/delete operation for each entity in the changeset, based on the action specified for that entity in the changeset. These operations cannot be called explicitly from the client.
Naming/Signature Convention
The insert/update/delete operations must accept a single entity as their parameter, upon which it will perform the corresponding operation, with no additional parameters, and not return a value. When naming the methods, note the following:
- Insert operation method names must start with
Insert,Create, orAdd. Otherwise, you will need to apply theInsertattribute to the method. For example:public void InsertProduct(Product product) - Update operation method names must start with
Update,Change, orModify. Otherwise, you will need to apply theUpdateattribute to the method. For example:public void UpdateProduct(Product currentProduct) - Delete operation method names must start with
DeleteorRemove. Otherwise, you will need to apply theDeleteattribute to the method. For example:
public void DeleteProduct(Product product)
Understanding the Domain Service Life Cycle for Insert/Update/Delete Operations
Let's take a quick look at how a domain service works and the various phases in its life cycle when changes are submitted to the server. The core interaction that a client has with a domain service is to retrieve a collection of entities or a single entity from the domain service, and return any of these entities that have been modified (or additional entities that have been inserted into the collection) back to the server as a changeset.
When a client submits a changeset to a domain service, the domain service's Submit method is called, initiating the start of the domain service's life cycle. The domain service will work through the following phases in order:
- The authorize changeset phase essentially verifies that the user passing through the changeset is actually authorized to execute the operations in that changeset. It checks that each operation to be called from that changeset is permitted according to the security-related rules defined on each of these operations in the domain service, by decorating the operations with security rule attributes. Configuring security rules on domain operations is covered in Chapter 8.
- The validate changeset phase performs server-side validation of the entities being passed through in the changeset according to the validation rules applied to each object and its properties, by decorating them with validation rule attributes, within the changeset. Although the objects and their properties are validated on the client side, the domain service validates them again according to the validation rules to verify that someone didn't circumvent the validation rules on the client, as is proper practice. Configuring validation rules on objects and their properties is covered later in this chapter.
- Once the changeset has been fully authorized and validated, the execute changeset phase can begin. This phase enumerates through each entry in the changeset and calls the specified domain operation-that is, the insert, update, delete, or custom operation on the domain service-passing in the given entity to perform that operation upon.
- The final phase in the domain service's life cycle is the persist changeset phase. When you are using a data access layer that maintains its own changesets, such as the Entity Framework or LINQ to SQL, the final task is to persist that changeset to the database. For example, when using an Entity Framework model as your data access layer, this phase would be used to call the
SubmitChangesmethod on the data context and complete the transaction. If changes are immediately committed to the database in the domain operations, then this phase will usually be ignored.
Each of these phases is automatically performed by the domain service; however, there is a corresponding method on the domain service that you can override and hook into if you need to provide some custom behavior in addition to what is provided by the base domain service class. These methods are
AuthorizeChangeSetValidateChangeSetExecuteChangeSetPersistChangeSet
You can also override the Submit method, which encompasses each of these phases, in order to hook into that, too. While in a phase, the logic for that phase will be run over every object in the changeset. If an exception is thrown on any of these objects during any of these phases, the entire changeset submission will be cancelled.
Example Insert/Update/Delete Operations
If you have enabled editing on the Product entity in the Add New Domain Service Class wizard, you will find that insert, update, and delete operations have been created and implemented for you in the
ProductService domain service.
The following code performs an insert operation:
public void InsertProduct(Product product)

{

    if (product.EntityState != EntityState.Added)

    {

        if (product.EntityState != EntityState.Detached)

        {

            this.ObjectContext.ObjectStateManager.ChangeObjectState(product,

                                                           EntityState.Added);

        }
        else

        {

            this.ObjectContext.AddToProducts(product);

        }

    }

}
The following code performs an update operation:
public void UpdateProduct(Product currentProduct)

{

    if (currentProduct.EntityState == EntityState.Detached)

    {

        this.ObjectContext.Products.AttachAsModified(currentProduct,

                                this.ChangeSet.GetOriginal(currentProduct));

   }

}
The following code performs a delete operation:
public void DeleteProduct(Product product)

{

    if (product.EntityState == EntityState.Detached)

    {

        this.ObjectContext.Attach(product);

    }

    this.ObjectContext.DeleteObject(product);

}
Invoke Operations
An invoke operation is a nonspecific domain operation, and behaves the same way as a service operation in a standard WCF service. As a general rule, invoke operations don't return or act upon entities. They either initiate an action on the server-for example, requesting the server to send an e-mail-or request data from the server, which returns a simple value or data for which changeset tracking is not required-for example, requesting the current currency exchange rate.
Like query operations, invoke operations are methods that the client application can call directly. These operations are called immediately, unlike custom operations, which are queued and only called when a changeset is submitted to the server.
Naming/Signature Convention
Invoke operations do not need to adhere to any naming or method signature convention, and essentially any operation in a domain service that does not fall into any of the other operation categories via its name or method signature is considered by RIA Services to be an invoke operation. To explicitly define a method as an invoke operation, apply the Invoke attribute to the method.
An Example Invoke Operation
The following code is an example of an invoke operation:
public decimal GetExchangeRate(string fromCurrency, string toCurrency)

{

    return ExchangeRates.GetRate(fromCurrency, toCurrency);

}
Custom Operations
Custom operations perform an action on an entity. For example, you might have an operation that discontinues a product, with all the logic to do so to be performed on the server. However, whereas an invoke operation is called immediately from the client, custom operations have their execution on the server deferred until the client submits a changeset to the server and are treated in the same way as insert/update/delete operations.
When a custom operation is generated in the client project, it will be created as a method on the entity that it acts upon. In addition, it will also be created as a method on the domain context associated with the domain service.
![]() Note Custom operations are called after any insert or update operations are called on the server. If a custom operation is called on an entity that is later deleted and before the changes are submitted to the server, the custom operation will not be called and will be discarded when the changes are submitted.
Note Custom operations are called after any insert or update operations are called on the server. If a custom operation is called on an entity that is later deleted and before the changes are submitted to the server, the custom operation will not be called and will be discarded when the changes are submitted.
Naming/Signature Convention
Custom operations do not having a naming convention; however, they must not return a value, and they must accept an entity as their first parameter. (Any number of additional parameters is permitted.) There is no specific attribute for identifying a custom operation, but instead you should use the Update attribute and set its UsingCustomMethod property to true.
An Example Custom Operation
The following code is an example of a custom operation:
public void DiscontinueProduct(Product product)

{

    // Logic to discontinue the product...

}
Decorating Entities
Decorating entities is the process of applying attributes to entity classes and properties to convey a certain intention. There are three primary reasons why you would want to decorate your entities with RIA Services attributes and data annotations. They are as follows:
- So you can control how the entity is created on the client (i.e., the properties from the server entity class that will be created on the client entity), and hence what data is passed over the wire
- To apply validation rules to the entity and its properties, validating what values are acceptable
- To apply miscellaneous data annotations, such as whether the property is a key that uniquely identifies the entity, whether the property should be used for concurrency checks, to display options for how the property should be presented on the client, and so on
You can decorate entities with the required attributes directly or via metadata classes.
![]() Note If you have used the ASP.NET Dynamic Data scaffolding framework, you will be quite familiar with these attributes, as RIA Services uses the same attributes (defined in the
Note If you have used the ASP.NET Dynamic Data scaffolding framework, you will be quite familiar with these attributes, as RIA Services uses the same attributes (defined in the System.ComponentModel.DataAnnotations namespace).
Metadata Classes
As previously described, metadata classes enable you to decorate your entity with attributes without actually modifying the entity class itself, which is useful when you code-generate your entities and a regeneration re-creates the entity class. A metadata class is associated with an entity using an attribute on the entity class. In order to not have to modify the entity class to apply this attribute, the usual method is to create a partial class for the entity and apply the attribute to it instead.
Open up the ProductService.metadata.cs metadata class that was created for the Product entity (from your Entity Framework model) to see how it is structured. This file contains a partial class that extends the Product entity. This is merely so the MetadataType attribute can be applied to the Product entity, designating its corresponding metadata class (Product.ProductMetadata). This provides the link between the entity class and the metadata class, which is used by RIA Services to associate the two together.
[MetadataTypeAttribute(typeof(Product.ProductMetadata))]

public partial class Product

{

    internal sealed class ProductMetadata

    {

        // Field definitions (removed for the purposes of brevity)

    }

}
![]() Note It's not essential to use a nested class as your metadata class; you can actually use a class anywhere that can be referenced, but by default the metadata classes created by RIA Services are created as nested classes. You can then treat the metadata class as if it were the actual entity class, and decorate it with the required attributes.
Note It's not essential to use a nested class as your metadata class; you can actually use a class anywhere that can be referenced, but by default the metadata classes created by RIA Services are created as nested classes. You can then treat the metadata class as if it were the actual entity class, and decorate it with the required attributes.
The metadata class that was created by the Add New Domain Service Class wizard contains a public field representing each property on the associated entity, which you can decorate with attributes as required. Let's look at the various types of attributes you might like to decorate these properties (and the class itself) with.
Controlling Client Entity Generation
You might not necessarily want the entity that is created in the client project by the RIA Services code generation to be exactly the same as the entity that is in your entity model. For example, the entity might consist of properties that shouldn't be transferred to the client and/or made accessible to it, such as password properties, images, calculated properties, credit card numbers, and so on. Let's look at customizing what's generated on the client-side entity and what data is transferred to the client from the server.
Properties Included/Excluded in Generated Client Entity by Default
By default, all public properties on an entity that return simple types (such as string, int, and bool), or a small predefined group of complex types (such as byte arrays), will be automatically created as properties on the client entity unless they have the Exclude attribute applied. However, this means that other complex values, such as an entity collection associated with each requested entity being returned (i.e., entities associated with the associated entities via a foreign key relationship), will not be transferred to the client when the entity is transferred, and the collection property providing the association will not be created on the client's corresponding entity.
For example, take the following random subset of properties from the Product entity:
public string ProductLine { get; set; }

public EntityCollection<ProductInventory> ProductInventory;

public ProductModel ProductModel { get; set; }

public Nullable<int> ProductModelID { get; set; }
By default, when the RIA Services code generator creates the Product entity on the client, it will only create properties for the ProductLine and ProductModelID properties because they return “simple” types, whereas the ProductInventories and ProductModel properties return “complex” types.
Including/Excluding Properties
Although properties are automatically included or excluded on the client entity based upon their return types, you can explicitly specify that a given property is created on the client by decorating it with the Include attribute, or not created by decorating it with the Exclude attribute, both found in the System.ServiceModel.DomainServices.Server namespace.
For example, we can change the default generation behavior by specifying that the ProductModelID property should not be included as part of the client entity, and that the ProductModel and ProductInventories properties should, by decorating them (in the entity's metadata class) with the Include/Exclude attributes like so:
public string ProductLine { get; set; }


[Include]

public EntityCollection<ProductInventory> ProductInventories;


[Include]

public ProductModel ProductModel { get; set; }


[Exclude]

public Nullable<int> ProductModelID { get; set; }
![]() Note Despite the
Note Despite the ProductModel and ProductInventories properties being created on the client-side entity now, their value will always be null. You also need to request the ProductModel and ProductInventory properties in the LINQ to Entities query, as described in the next section.
Including Data for Associated Entities
As just noted, the ProductModel and ProductInventories properties are null by default when the Product entity or a collection of Product entities is requested from the server. You've seen how to ensure that corresponding properties are created on the client-side entity using the Include attribute, but now you need to ensure that they are populated with data, because the following default query will not do so:
public IQueryable<Product> GetProducts()

{

    return ObjectContext.Products;

}
You will need to explicitly request (using LINQ to Entities) that the data for the ProductModel and ProductInventories properties on each Product entity are retrieved from the database, using the Include method in the query, like so:
public IQueryable<Product> GetProducts()

{

    return ObjectContext.Products.Include("ProductModel")

                                      .Include("ProductInventories");

}
![]() Note Here, we are chaining
Note Here, we are chaining Include methods, and you can do this for as many associated entities that you want returned with the query.
Enabling Associated Entities to Be Editable
Although the ProductModel entity and ProductInventories collection are now populated with data for the Product entity on the client, you will not be able to edit their data without specifically adding support to enable this in the domain service. That is, you won't be able to change the description of the product model, or add/update/delete entities in the ProductInventories collection. In practice, there's no need for the description of the product model to be updatable on the client, but you might like to be able to maintain the product inventory. So we'll focus on this scenario only.
Currently, if you were to attempt to instantiate a ProductInventory entity on the client, the following exception would be thrown:
This EntitySet of Type 'AdventureWorks.Web.ProductInventory' does not support the 'Add' operation.
And if you were to attempt to change the value of a property on an existing ProductInventory entity in the collection, the following exception would be thrown:
This EntitySet of Type 'AdventureWorks.Web.ProductInventory' does not support the 'Edit' operation.
To make the ProductInventories collection editable and prevent these exceptions, you will need to create the insert/update/delete operations for the ProductInventory entity on the ProductService domain service, like so:
public void InsertProductInventory(ProductInventory productInventory)

{

    if ((productInventory.EntityState != EntityState.Detached))
    {

        this.ObjectContext.ObjectStateManager

            .ChangeObjectState(productInventory, EntityState.Added);

    }

    else

    {

        this.ObjectContext.ProductInventories.AddObject(productInventory);

    }

}


public void UpdateProductInventory(ProductInventory currentProductInventory)

{

    this.ObjectContext.ProductInventories

        .AttachAsModified(currentProductInventory,

                         this.ChangeSet.GetOriginal(currentProductInventory));

}


public void DeleteProductInventory(ProductInventory productInventory)

{

    if ((productInventory.EntityState != EntityState.Detached))

    {

         this.ObjectContext.ObjectStateManager

             .ChangeObjectState(productInventory, EntityState.Deleted);

    }

    else

    {

        this.ObjectContext.ProductInventories.Attach(productInventory);

        this.ObjectContext.ProductInventories.DeleteObject(productInventory);

    }

}
Validation
One of the important problems that RIA Services tries to resolve is where validation logic needs to be written and executed on both the server and the client. Not only is it a duplication of code and effort to write the same logic in both places, but this logic can easily get out of sync with a change being made in one place but not the other. It's important to execute the validation logic in both places because you want to have a responsive user interface, without waiting for the server to tell the user that something is invalid, but you also want to validate the data on the server because there is no guarantee that the data came from your own client application and that its rules weren't circumvented. By enabling you to define your validation logic on your entities on the server, and automatically applying the same validation attributes when it generates the corresponding entities in the client project, RIA Services overcomes this problem. Your validation logic only needs to be written and maintained in a single location, and is kept synchronized by the code generation of the entities in the client project.
Predefined Validation Attributes
You can apply a number of basic validation rules to your properties via attributes (from the
System.ComponentModel.DataAnnotations namespace), including the following:
- The
Requiredattribute enables you to specify that the property must have a value (non-null). It also enforces, by default, that a string must not be empty, although theAllowEmptyStringsnamed property allows you to disable this behavior. - The
Rangeattribute lets you specify the minimum and maximum values permissible for the property. - The
StringLengthattribute allows you to set a minimum and maximum number of characters permissible for a string property. The default constructor accepts a maximum length, with a default minimum length of 0 characters, and you can also specify the minimum length using theMinimumLengthnamed property. - The
RegularExpressionattribute enables you to validate the value of the property with a regular expression. For example, you might want to validate that an e-mail address conforms to a valid e-mail address format using one of the many commonly used regular expressions for that purpose, of which many aren't perfect but are considered acceptable.
Examples of these rules are shown in the following code:
[Required]

[StringLength(50)]

[RegularExpression(@"(?<user>[^@]+)@(?<host>.+)")]

public string EmailAddress;


[Range(0, 150)]

public int Age;
Custom Property Validation Attributes
Of course, these are only basic validation rules, so what if you need a validation rule that isn't included in the ones provided? In that case, you can write your own. However, in writing the code for a validation rule, you will need it to be available on the client too. Luckily, RIA Services helps because it contains code-sharing functionality (between the server and the client), where code written on the server can be duplicated on the client by the RIA Services code generator. This feature is covered later in this chapter, but in the meantime, let's take a look at what's required to write a validation rule.
You have two ways of creating your own validation rule. One way uses the CustomValidation attribute to decorate the property or class to be validated, to which you can pass a type (class name) and the name of the method in the class that does the validation. This method isn't ideal, because it requires you to pass the method name as a string, which is likely to cause problems when refactoring.
A better and much neater way is to create your own custom validation attribute. You do so by creating a class that inherits from the ValidationAttribute class (found in the System.ComponentModel.DataAnnotations namespace), and overriding the IsValid method. The value of the property to be validated will be passed in as a parameter to this method, along with a validation context-which contains information about the property being validated, the entity instance that the property belongs to, and so on. This method must return either a result of ValidationResult.Success, if the validation rule is passed, or an instance of the ValidationResult class to which you've passed an error message as the constructor parameter value. Let's create a custom validation attribute now.
Workshop: Creating a Custom Property Validation Attribute
Let's create a simple validation attribute that ensures the value of the Class property is restricted to a small set of predefined values. The valid values for this property are validated in a database using check constraints; however, ideally, we'd like to validate the property value before it gets to this stage.
- Create a new folder in your Web project, named
ValidationRules. - Add a new class to the
ValidationRulesfolder, namedProductClassValidationAttribute.shared.cs. The “.shared” part of the file name is important, as the RIA Services code generator needs to know that this code should be copied into the Silverlight project. We'll discuss sharing code/logic between the server and the client later in this chapter.using System;
using System.Collections.Generic;
using System.Linq;
using System.Web;
namespace AdventureWorks.Web.ValidationRules
{
public class ProductClassValidationAttribute
{
}
} - Remove the
usingstatement for theSystem.Webnamespace, as Silverlight does not have this namespace, and this code will be copied to the Silverlight project by the RIA Services code generator. - Add a
usingstatement to the top of the class for theSystem.ComponentModel.DataAnnotationsnamespace.using System.ComponentModel.DataAnnotations; - Make the class inherit from
ValidationAttribute.public class ProductClassValidationAttribute : ValidationAttributebr
{
} - Override the
IsValidmethod from the base class. Note that there are twoIsValidmethods that you can override in the Web project, but Silverlight only supports overriding the method that takes in aValidationContextparameter, so you must override that one. This code is copied to the Silverlight project by the RIA Services code generator.
public class ProductClassValidationAttribute : ValidationAttribute

{

    protected override ValidationResult IsValid(object value,

                                    ValidationContext validationContext)

    {

   return base.IsValid(value, validationContext);

    }

}
7. You can now write your validation logic in this method, and return either ValidationResult.Success, if the validation rule is passed, or an instance of the ValidationResult class to which you've passed an error message as the constructor parameter value. Add the code below (in bold) to the IsValid method.
using System;

using System.ComponentModel.DataAnnotations;

using System.Linq;


namespace AdventureWorks.Web.ValidationRules

{

    public class ProductClassValidationAttribute : ValidationAttribute

    {

        protected override ValidationResult IsValid(object value,

                                                    ValidationContext validationContext)

        {

            bool isValid = true;


            if (value != null)

            {

                string productClass = value.ToString();


                string[] validClasses = new string[] { "H", "M", "L", "" };

                isValid = validClasses.Contains(productClass.ToUpper());

            }


            return isValid ? ValidationResult.Success : new ValidationResult(

                                                "The class is invalid");

        }

    }

}
8. The custom validation attribute is now complete. You can now apply the attribute to the property or properties to be validated using this rule. Add a using statement to the top of the metadata class for the Product entity, pointing to the AdventureWorks.Web.ValidationRules namespace. Now find the Class property in that class and decorate it with the attribute, like so:
[ProductClassValidation]

public string Class;
![]() Note By convention, all attributes should have “Attribute” appended to their name. However, you don't need to specify this suffix when using the attribute. For example, although the name of our custom validation attribute class is
Note By convention, all attributes should have “Attribute” appended to their name. However, you don't need to specify this suffix when using the attribute. For example, although the name of our custom validation attribute class is ProductClassValidationAttribute, we do not need to specify this suffix when we decorate properties with it, as just demonstrated.
Custom Class Validation Attributes
Sometimes, a validation rule involves two or more properties on an entity. For example, you might want to validate that the finish date property's value is later than the start date property's value. In this scenario, you don't want the validation rule to run as soon as you modify one of the properties, because it will prove frustrating to users to raise a validation error when they make a change to one, but have yet to make a change to the other.
To solve this problem, you can create a custom validation rule and apply it to the entity as a whole, rather than at the individual property level. Specifying a validation rule at the entity level validates the entity when it is saved or navigating to another one. When the validation rule is run, the entire entity is passed into the value parameter. You can then cast this to the type of entity you expect it to be applied to, and access its properties to perform the validation.
Workshop: Creating a Custom Class Validation Attribute
Creating a validation rule to validate an entity is done in much the same way as creating the ProductClassValidation attribute. Let's create a custom validation rule for ensuring that the sell finish date on a Product entity is later than the sell start date.
1. Follow steps 2 to 6 from the previous workshop, but name the file SellDatesValidationAttribute.shared.cs instead.
2. Add the following code (in bold) to the attribute's IsValid method. Note how we cast the value parameter that was passed in to a Product entity type, and use its property values to perform the validation rule.
using System;

using System.Linq;

using System.ComponentModel.DataAnnotations;


namespace AdventureWorks.Web.ValidationRules

{

    public class SellDatesValidationAttribute : ValidationAttribute

    {

        protected override ValidationResult IsValid(object value,

                                            ValidationContext validationContext)

        {

            Product product = value as Product;

            return product.SellEndDate == null ||

                   product.SellEndDate > product.SellStartDate ?

                        ValidationResult.Success : new ValidationResult(

                 "The sell end date must be greater than the sell start date");

        }

    }

}
Presentation
Decorating your entities, which are essentially middle-tier components, with information for the presentation tier is somewhat controversial—it can make creating forms in your application very easy, by using the drag-and-drop features in Visual Studio 2010, but it blurs the line between the middle tier and the presentation tier. Ideally, the middle tier should know nothing about how the presentation tier will display the data. Despite your feelings on this issue, some attributes are available that enable you to provide presentation information on your entities—whether you use these attributes or enforce a strict separation of concerns is up to you.
The primary attribute used for this purpose is the Display attribute. The DataForm control from the Silverlight Toolkit uses this attribute, if available, when it is automatically creating a data entry form from an entity, and the DataGrid control uses it when creating a data grid with automatically generated columns. The Display attribute has a number of properties that suggest to the presentation tier how the property should be displayed. Some of these properties control the following:
- Whether a column should be created in a
DataGridcontrol, and a field created in aDataFormcontrol for this property (AutoGenerateField) - A “friendly” name for the property that will be used as the label of a corresponding field/column in a
DataFormorDataGridcontrol (Name/ShortName) - A description for the property that will be displayed in a
DataFormcontrol as a tooltip when the user moves the mouse cursor over an information icon next to the field (Description) - The order in relation to the other properties in which a property will be displayed in a
DataFormorDataGridcontrol (Order) - What grouping the field for this property should be displayed under in a
DataFormcontrol (GroupName)
The following code shows an example of the Display attribute being applied to the ProductID and Name properties on the Product entity. With these attributes applied, when the Product entity is bound to a DataForm control, a field will not be created for the ProductID property, the label for the Name field will be “Product Name:”, and the description for the Name field will display “The name of the product.”
[Display(AutoGenerateField = false)]

public int ProductID { get; set; }


[Display(Name = "Product Name:", Description = "The name of the product.")]

public string Name { get; set; }
Miscellaneous Data Annotations
A number of important miscellaneous data annotations don't fit into either of the previous annotation type categories, but are used to control how RIA Services manages the entity, or to provide information to the presentation tier on how this entity should be displayed.
Some of the more important data annotations used by RIA Services are as follows:
- The
Keyattribute is used to specify that a property or multiple properties on an entity uniquely identifies that entity (i.e., represents a primary key). - The
Editableattribute is used to specify whether a property should be editable or not. By default, properties are editable, but you can decorate a property with this attribute, passing a value offalseto itsallowEditconstructor parameter to specify that the value of the property should not be able to be altered. Any attempt to do so will raise an exception on the client. You would typically apply this to the property that contains the entity key. - The
ConcurrencyCheckattribute is used to specify that a property should be used when performing concurrency checks back on the server before updating or deleting the entity in the database. The original value of the property, as retrieved from the server, will be passed back to the server when performing an update/delete operation so that it can be used in the concurrency check. Identifying and handling concurrency violations is discussed later in the chapter, in the “Handling Data Concurrency Violations” section. - The
RoundtripOriginalattribute is used to specify that the original value of the property, as retrieved from the server, will be passed back to the server when performing an update/delete operation. - The
Timestampattribute is used to specify that the property is a binary number (not a date/time) that is being used to version the entity, and is often used in concurrency checks. The original values of properties with this attribute will, like those with theConcurrencyCheckorRoundtripOriginalattributes, be passed back to the server when performing an update/delete operation. - The
Associationattribute is used to provide an association between a parent entity and its child—for example, theProductentity and theProductModelentity are associated, joining on their respectiveProductModelIDproperties. Entities from your Entity Framework model will already have the parent/child associations configured, but you might need to use this attribute when returning presentation models from a domain operation. TheAssociationattribute's constructor takes as its parameters a name for the association (of your own choosing), and the property names that link the parent and the child together. We'll look at an example of using this attribute when we discuss presentation model types later in this chapter. - You can configure your entity association as a compositional hierarchy by decorating the property representing that association with the
Compositionattribute. This will cause the parent entity to be marked as updated when one of its children's entities is modified, and will send all the children entities, regardless of whether they have been modified, back to the server when performing an update—effectively treating both the parent and child entities as a single unit. You can then handle updates of the children in the parent entity's update operation rather than requiring them to have their own update operations. For example, you could apply theCompositionattribute to theProductInventoriesproperty on theProductentity. This means that all theProductInventoryentities associated with aProductentity will be passed back to the server when theProductentity is modified on the client and changes are submitted, regardless of whether they have been modified. You will then need to persist theProductInventoryentities to the database in theProductentity's update domain operation. - When your entities are a part of an inheritance hierarchy, and you want to return various derived types of a base entity type from a domain operation, you can decorate the base entity with the
KnownTypeattribute (from theSystem.Runtime.Serializationnamespace) to associate it with these derived types, and use this as the type in your domain operations. For example, say you have an entity namedPerson, which acts as the base forEmployeeandCustomerentities. You can decorate thePersonentity with theKnownTypeattribute, passing it theEmployeeandCustomertypes, but have your domain operations only reference thePersonentity (although they can return/accept the derived types). Going into this in depth is beyond the scope of this book, but you can find more information in this MSDN article:http://msdn.microsoft.com/en-us/library/ee707366(v=vs.91).aspx.
Presentation Model Types
The examples so far have passed entities from an Entity Framework model on the server to the client. Sometimes, however, this practice will not suit your needs. For example:
- You might not be using an Entity Framework (or LINQ to SQL) model in your application.
- You don't want to share data access layer objects with your presentation layer, instead wishing to maintain a clean separation of concerns.
- The entities in your model just don't match one-to-one what is required to be displayed in the presentation tier. That is, the data to be displayed needs to be aggregated from multiple entities.
- You want summarized/totaled data.
- You need to denormalize the data so that it's suitable for display to the user.
Fortunately, RIA Services is not limited to just transferring entities from an entity model. You can solve these issues by creating custom objects to be passed between the server and the client instead of entities. You can populate these objects on the server from your data access layer, and then, if these objects are editable, manually persist the changeset returned from the client back to the data access layer. You may think of these objects in traditional terms where they might be called data transfer objects (DTOs) or POCO types. Generally, when using them with RIA Services, they are termed presentation model types.
![]() Note Once upon a time, a common practice was to return data from Web services in DataSets. Despite being a “heavy” way of exposing data, many developers liked to use DataSets for their simplicity and ability to modify the data structure being returned without needing to update references to the services exposing them. However, time has shown that the use of DataSets is a source of numerous problems in projects, and their use is now considered bad practice. Thus, many developers have turned to exposing data using lightweight, strongly typed DTOs instead. If no other reason compels you to stop using DataSets, the fact that Silverlight has no support for DataSets puts the final nail in their coffin. Therefore, don't try to expose DataSets from your domain service in an attempt to return an untyped object whose structure you can modify at will. Neither RIA Services nor Silverlight has any support for DataSets—consider them finally dead!
Note Once upon a time, a common practice was to return data from Web services in DataSets. Despite being a “heavy” way of exposing data, many developers liked to use DataSets for their simplicity and ability to modify the data structure being returned without needing to update references to the services exposing them. However, time has shown that the use of DataSets is a source of numerous problems in projects, and their use is now considered bad practice. Thus, many developers have turned to exposing data using lightweight, strongly typed DTOs instead. If no other reason compels you to stop using DataSets, the fact that Silverlight has no support for DataSets puts the final nail in their coffin. Therefore, don't try to expose DataSets from your domain service in an attempt to return an untyped object whose structure you can modify at will. Neither RIA Services nor Silverlight has any support for DataSets—consider them finally dead!
The process of exposing presentation model types from a domain service involves the following steps:
- Create a class with the properties required to be sent to the client.
- Create a domain service class that inherits from
DomainService. - Manually implement the get/query domain operations that expose the presentation model type.
- Manually implement the insert/update/delete operations if the presentation model type should be editable.
Let's take a look at how to implement a domain service that passes a presentation model type between the server and the client.
Workshop: Creating the Presentation Model Class
In this series of workshops, we'll expose a presentation model class from a domain service, which can be used to populate a product summary list in your Silverlight application. (We'll use this domain service in the workshops in Chapter 6.) The data to populate this presentation model class will be sourced from multiple entities in your entity model, demonstrating a scenario in which you would commonly expose presentation model types instead of entities. For the purpose of demonstration, we'll then enable the client application to edit this data and update the database with the changes accordingly.
Take note of the following when creating a presentation model class:
- At least one property must be decorated with the Key attribute, indicating that the value of the property uniquely identifies the object. Otherwise, you will receive a compilation error, because the changeset manager on the client cannot manage the changes without it.
- You can decorate this class and its properties with the various attributes described in the “Decorating Entities” section of this chapter. If you don't want to or cannot decorate the class and its properties with attributes directly, you can create a corresponding metadata class, as previously described, and apply the attributes in that manner.
- RIA Services does not require your presentation model class to be defined in the Web project or even in a WCF RIA Services Class Library project, described later in this chapter. For example, you may have the objects you want to expose from your domain service in a referenced assembly for which you don't have the code, and this is possible because RIA Services simply reflects over the given object and generates the code it requires accordingly in the client project—no source required.
In this first workshop, we'll create a presentation model class containing the properties that should be transferred between the client and the server, including the following:
- A key property that will be used to drill down on the record
- Various properties from the product record (name, number, etc.)
- A thumbnail image of the product, which is obtained from a different entity in the entity model on the server than the core
Productentity, hence demonstrating combining data from multiple entities into a single object - The total quantity of that product available from all the inventory locations, demonstrating summarizing/totaling related data
- The denormalized descriptions of the product's category, subcategory, and model, which are each stored in their own table, and referred to by a foreign key on the
Productentity
The steps required to create this class are as follows:
1. Create a new class under the Models folder in your Web project, named ProductSummary.
2. Add the following properties to the class:
public int       ID                { get; set; }

public string    Name              { get; set; }

public string    Number            { get; set; }

public decimal   ListPrice         { get; set; }

public byte[]    ThumbnailPhoto    { get; set; }

public int?      QuantityAvailable { get; set; }

public string    Category          { get; set; }

public string    Subcategory       { get; set; }

public string    Model             { get; set; }

public bool      MakeFlag          { get; set; }

public DateTime  ModifiedDate      { get; set; }
3. Add a using statement for the System.ComponentModel.DataAnnotations namespace to the top of the file.
using System.ComponentModel.DataAnnotations;
4. Decorate the ID property with the Key attribute. Also decorate the ID property with the Editable attribute, passing it's constructor a value of false. This will prevent the client application from changing its value.
[Key]

[Editable(false)]

public int ID { get; set; }
5. Here is the complete code you should now have for the class:
using System;

using System.ComponentModel.DataAnnotations;


namespace AdventureWorks.Web.Models

{

    public class ProductSummary

    {

        [Key]

        [Editable(false)]

        public int       ID                   { get; set; }

        public string    Name                 { get; set; }

        public string    Number               { get; set; }

        public decimal   ListPrice            { get; set; }

        public byte[]    ThumbnailPhoto       { get; set; }

        public int?      QuantityAvailable    { get; set; }

        public string    Category             { get; set; }

        public string    Subcategory          { get; set; }

        public string    Model                { get; set; }

        public bool      MakeFlag             { get; set; }

        public DateTime  ModifiedDate         { get; set; }

    }

}
Workshop: Populating and Exposing Your Presentation Model Types
In this workshop, we'll create a domain service containing a domain operation that exposes a collection of ProductSummary objects. Unfortunately, the Add New Domain Service Class wizard only generates the CRUD operations in your domain service when you are using entities from the Entity Framework or objects from a LINQ to SQL model—it doesn't allow you to select objects of other types, because the CRUD logic for these objects does not necessarily follow a specific model. Therefore, we must create the domain service ourselves from scratch. Let's do this now.
1. Add a new item to the Services folder in your Web project named ProductSummaryService, using the Domain Service Class item template. Since our data will be sourced from an entity model, select your AdventureWorks-Entities entity model as the object context. Don't select any entities from the entity list, however; simply click OK. This creates an empty domain service to which we can add the required domain operations.
namespace AdventureWorks.Web.Services

{

    using System;

    using System.Collections.Generic;

    using System.ComponentModel;

    using System.ComponentModel.DataAnnotations;

    using System.Data;

    using System.Linq;

    using System.ServiceModel.DomainServices.EntityFramework;

    using System.ServiceModel.DomainServices.Hosting;

    using System.ServiceModel.DomainServices.Server;

    using AdventureWorks.Web;


    // Implements application logic using the AdventureWorksEntities context.

    // TODO: Add your app logic to these methods or in additional methods.

    // TODO: Wire up authentication (Windows/ASP.NET Forms) and uncomment the

    // following to disable anonymous access.

    // Also consider adding roles to restrict access as appropriate.

    // [RequiresAuthentication]

    [EnableClientAccess()]

    public class ProductSummaryService :

                           LinqToEntitiesDomainService<AdventureWorksEntities>

    {


    }

}
![]() Note If the data to populate your presentation model class comes from an Entity Framework or LINQ to SQL model, select that model from the Available DataContexts/ObjectContexts drop-down in the wizard dialog, as we did here. If the data is being sourced from elsewhere, select <empty domain service class> instead. When you do this, the domain service inherits from
Note If the data to populate your presentation model class comes from an Entity Framework or LINQ to SQL model, select that model from the Available DataContexts/ObjectContexts drop-down in the wizard dialog, as we did here. If the data is being sourced from elsewhere, select <empty domain service class> instead. When you do this, the domain service inherits from DomainService, instead of the generic LinqToEntitiesDomainService class that the previous domain services (that served up entities from the Entity Framework model) inherited from.
2. Add a using statement to the AdventureWorks.Web.Models namespace—that is, the location of the ProductSummary class that we are exposing from this domain service.
3. Now we need to add the query operation to the domain service. Because the data is coming from a query to the Entity Framework model, we can still take advantage of the benefits of returning an IQueryable expression by projecting data from the Entity Framework model onto a collection of the presentation model objects, and returning this query from the operation. Therefore, the client can specify any additional sorting/filtering/grouping/paging that it requires, and have that query run on the server. The following code returns an IQueryable expression that populates a collection of ProductSummary objects with data from the entity model:
public IQueryable<ProductSummary> GetProductSummaryList()

{

    return from p in this.ObjectContext.Products

           select new ProductSummary()

           {

               ID = p.ProductID,

               Name = p.Name,

               Number = p.ProductNumber,

               ListPrice = p.ListPrice,

               ThumbnailPhoto = p.ProductProductPhotoes.FirstOrDefault().

                                                ProductPhoto.ThumbNailPhoto,

               QuantityAvailable = p.ProductInventories

                                    .Sum(pi => pi.Quantity),

               Category = p.ProductSubcategory.ProductCategory.Name,

               Subcategory = p.ProductSubcategory.Name,

               Model = p.ProductModel.Name,

               MakeFlag = p.MakeFlag,

               ModifiedDate = p.ModifiedDate

           };

}
![]() Note Keep in mind that we're returning an image from the database in the
Note Keep in mind that we're returning an image from the database in the ThumbnailPhoto property of the ProductSummary object. Returning an image from the database for each item to display in a summary list results in increased network and bandwidth usage, so it's recommended to return images only if they add value to your application, and make sure that they are small, preferably less than 2 KB each.
When executed, this expression will populate and return a collection of our presentation model object (ProductSummary) to the client.
Workshop: Making Your Presentation Model Types Editable
You can also implement insert, update, and delete domain operations for your presentation model types. In this workshop, we'll implement these operations for our ProductSummary presentation model type, although in reality, it's unlikely you'd want the ProductSummary object to be editable, as we'll only be using it for displaying a list of products to the user.
![]() Note To keep things simple, we'll only support making the
Note To keep things simple, we'll only support making the Name, Number, and ListPrice properties of the ProductSummary class editable.
1. Let's start by adding stubs for the insert, update, and delete domain operation methods to the ProductSummaryService class, using the method signature convention, as described earlier in this chapter, which will allow RIA Services to recognize them as such:
public void InsertProductSummary(ProductSummary productSummary)

{


}


public void UpdateProductSummary(ProductSummary productSummary)

{


}


public void DeleteProductSummary(ProductSummary productSummary)

{


}
![]() Note Be aware that each domain operation method takes in a
Note Be aware that each domain operation method takes in a ProductSummary object.
2. We can now implement these operations. The Insert operation involves creating a new Product entity instance, setting its property values from the ProductSummary object passed into the method, and adding it to the collection of products in the entity model.
public void InsertProductSummary(ProductSummary productSummary)

{

    Product product = new Product();

    product.Name = productSummary.Name;

    product.ProductNumber = productSummary.Number;

    product.ListPrice = productSummary.ListPrice;
    product.ModifiedDate = DateTime.Now;


    // Need to set default values for these properties,

    // otherwise the save will fail

    product.SellStartDate = DateTime.Now;

    product.SafetyStockLevel = 1;

    product.ReorderPoint = 1;


    this.ObjectContext.Products.AddObject(product);

}
3. The Update operation involves getting the stored version of the given product, and updating its property values.
public void UpdateProductSummary(ProductSummary productSummary)

{

    Product product = this.ObjectContext.Products

        .Where(p => p.ProductID == productSummary.ID)

        .First();


    product.Name = productSummary.Name;

    product.ProductNumber = productSummary.Number;

    product.ListPrice = productSummary.ListPrice;

    product.ModifiedDate = DateTime.Now;

}
4. The Delete operation involves creating a Product entity with the given ID, attaching it to the object context, and telling the entity model to delete this entity.
public void DeleteProductSummary(ProductSummary productSummary)

{

    Product product = new Product();

    product.ProductID = productSummary.ID;

    product.ModifiedDate = productSummary.ModifiedDate;

    this.ObjectContext.AttachTo("Products", product);

    this.ObjectContext.DeleteObject(product);

}
![]() Note We're also setting the
Note We're also setting the ModifiedDate property value on the new Product entity. Although doing so is not required now, it will be required when we use this field to maintain concurrency checks later in this chapter.
Workshop: Returning Auto-Generated Property Values Back to the Client
When inserting (and sometimes updating) data on the server, you will generally want to return values that have been generated on the server back to the client, such as a primary key value generated by the database when inserting a row, or a timestamp value being used for row versioning in the database. You can do this using the Associate method on the domain service's ChangeSet object. Pass this method the presentation model object, the entity that was updated, and a callback method. After the database has been updated, the callback method will be called, at which point you can update the presentation model object as required from the entity.
This workshop will demonstrate updating the ProductSummary object with the ProductID and ModifiedDate assigned to the Product entity when inserting a new record into the database.
1. Add the following callback method to the ProductSummaryService class. This method will update the ProductID and ModifiedDate properties on the ProductSummary object, and return these values to the client:
private void UpdateProductSummaryValues(ProductSummary productSummary,

                                        Product product)

{

    productSummary.ID = product.ProductID;

    productSummary.ModifiedDate = product.ModifiedDate;

}
2. Now call the Associate method of the ChangeSet object, telling it to call the callback method after the Product entity has been persisted to the database.
public void InsertProduct(ProductSummary productSummary)

{

    Product product = new Product();

    product.Name = productSummary.Name;

    product.ProductNumber = productSummary.Number;

    product.ListPrice = productSummary.ListPrice;

    product.ModifiedDate = DateTime.Now;


    // Need to set default values for these properties,

    // otherwise the save will fail.

    product.SellStartDate = DateTime.Now;

    product.SafetyStockLevel = 1;

    product.ReorderPoint = 1;


    this.ObjectContext.Products.AddObject(product);

    this.ObjectContext.SaveChanges();


    ChangeSet.Associate(productSummary, product, UpdateProductSummaryValues);

}
Enabling Related Data to Be Editable
If your presentation model object contains a property exposing a collection of another object that you want to be passed to the client, as discussed earlier in the “Controlling Client Entity Generation” section of this chapter, you must explicitly specify that the property should be generated on the client by decorating it with the Include attribute. For example, you might want to expose the collection of product inventory objects associated with each product object, with the ProductSummary object containing a property representing a collection of related ProductInventoryPM objects, like so:
[Include]

public IEnumerable<ProductInventoryPM> ProductInventory { get; set; }
If the objects in the ProductInventory collection are to be editable, you will need to add corresponding insert/update/delete operations to the domain service for the object type, as demonstrated in the previous section. However, when you attempt to compile the project, you will find that you receive a compile error stating that you have an invalid Include specification. This is because you need to provide an association between the child object (ProductInventoryPM) and its parent (ProductSummary) by decorating the property that exposes the collection on the parent with the Association attribute. The Association attribute takes as its parameters a name for the association (of your own choosing) and the property names that link the parent and the child together. The following example demonstrates implementing a property that provides an association between the ProductSummary and ProductInventoryPM objects:
[Include]

[Association("ProductPM_ProductInventory", "ProductID", "ProductID")]

public IEnumerable<ProductInventoryPM> ProductInventory { get; set; }
![]() Note Entity models automatically have this
Note Entity models automatically have this Association attribute applied, indicating associations between entities, but you need to apply it manually for presentation model types.
Sharing Code and Logic Across Tiers
At times, you might want to share custom code between the middle tier and the presentation tier. For example, you might want to share custom validation logic and some types of business logic between the server and the client. RIA Services enables code to be written in the Web project, and the RIA Services code generator will copy specially marked code files from this project into the client project, effectively enabling the code to be maintained in one place, but used on both the server and the client.
Shared Code Files
There are many reasons why you'd want to share code between the server and the client. However, you'd generally use this method when you want to extend an entity, using a partial class, to add additional methods and computed properties; or you might want to share completely new classes, such as custom validation attribute classes, as discussed earlier in the “Validation” section of this chapter.
The RIA Services code generator enables code to be shared between the server and client projects by automatically copying any files in the server project with a .shared.cs extension into the client project (untouched). Therefore, you can write the code in one place (the server) and know that the client will be updated accordingly. Of course, because the shared code will be running on both platforms, you should ensure that the code you write will successfully run on both platforms, and that it doesn't use any platform-specific functions.
![]() Note If the property or method you are sharing is required only on the client, shared code might not be the most appropriate means of extending the entity. In this case, you would be better off writing the partial class in the Silverlight project directly, extending the entity with the required functionality on the client only.
Note If the property or method you are sharing is required only on the client, shared code might not be the most appropriate means of extending the entity. In this case, you would be better off writing the partial class in the Silverlight project directly, extending the entity with the required functionality on the client only.
Workshop: Creating a Shared Code File
You've already created a shared code file back in the workshop where you created custom property and class validation attributes. Let's implement a slightly different scenario in this workshop, by extending the Product entity in order to add a calculated property named ProfitMargin to it. This property simply calculates the expected profit to be made on the product by subtracting the StandardCost from the ListPrice. By writing the code in a shared file, this property will be able to be used on both the server and the client.
1. Create a new class in the ModelsShared folder of your Web project, named Product.shared.cs.
using System;

using System.Collections.Generic;

using System.Linq;

using System.Web;


namespace AdventureWorks.Web.Models.Shared

{

    public class Product

    {

    }

}
2. Remove the using statements from the top of the file. We don't need the first three, and the fourth will prevent the Silverlight project from compiling because that namespace doesn't exist in the Silverlight runtime.
3. We need to extend the Product entity from our entity model using partial classes. Therefore, you need to change the namespace of the class to the same namespace and name of your entity, and make it a partial class.
namespace AdventureWorks.Web

{

    public partial class Product

    {

    }

}
4. Add the following code to implement the ProfitMargin property:
namespace AdventureWorks.Web

{

    public partial class Product

    {

        public decimal ProfitMargin

        {

            get { return ListPrice - StandardCost; }

        }

    }

}
This file will automatically be copied to the Silverlight project and, thus, extend the Product entity accordingly in both the server and client projects.
Encapsulating Logic in a Separate WCF RIA Services Class Library
By default, when using RIA Services, your Silverlight project is linked directly to your Web project, which is what the examples so far have demonstrated. You are defining your business objects and business logic in your Web project, and this is being copied directly into your Silverlight project. However, from a design perspective, this is possibly not an ideal structure for your solution, depending on the nature and scale of your Web application, because this tightly couples both your Silverlight project and your business objects/logic to your Web project and limits their reusability.
It is possible, however, to move the business logic out of the Web project and into a separate class library, using the WCF RIA Services Class Library project template. Unfortunately, the process to do so is not particularly straightforward, but let's first look at the structure that using RIA Services class libraries gives us.
WCF RIA Services Class Libraries
The WCF RIA Services Class Library project template was designed to be added to an existing Silverlight project solution rather than to provide a full solution template. When you add a new project to your solution using this template, it will actually add two projects to your solution, one with .Web appended to the name you specified. Both get placed into a solution folder that the project template creates, as shown in Figure 4-6. These two projects will share a RIA Services link, meaning that you can now remove the link directly between the Web project and the Silverlight project, removing the tight coupling between the two. Now you can move your domain services, entity model, metadata classes, presentation model classes, and shared code into the .Web class library, and RIA Services will generate the corresponding code into the Silverlight class library, in the same way it previously did into the Silverlight application.

Figure 4-6. The structure of the RIA Services Class Library projects
Now it should simply be a case of adding a reference to the .Web class library to your Web project, and adding a reference to the other class library to your Silverlight project. Unfortunately, however, this will most likely not be the case. If you are using the authentication features of RIA Services (which will be discussed in Chapter 8), you will find that by putting the AuthenticationService in the class library, the WebContext object will not be generated by RIA Services in the Silverlight application, which is required to access the authentication service. You can work around this problem, however, by manually implementing the WebContext class and setting the AuthenticationContext when the application starts.
Workshop: Using WCF RIA Services Class Libraries
In this workshop, we're going to implement RIA Services class libraries in our solution, and move the business logic from our Web project into these libraries. The Web project will then be used purely for serving up the XAP file to the client.
![]() Note Future workshops in this book will assume that your solution has not separated out the business logic into RIA Services class libraries, as shown here.
Note Future workshops in this book will assume that your solution has not separated out the business logic into RIA Services class libraries, as shown here.
1. Add a new project to the solution named AdventureWorksMiddleTier, using the WCF RIA Services Class Library project template. Two projects will actually be created in your solution, one for the server and one for the client, as shown in Figure 4-6. The client project will automatically have a RIA Services link to the server project.
2. Remove the existing RIA Services link between the AdventureWorks and the AdventureWorks.Web projects, by opening the project properties for the AdventureWorks project, and selecting the <No Project Set> item in the WCF RIA Services link drop-down field.
3. Each class library project has a file named Class1.cs. Delete these files, as they are not required.
4. Open the project properties page for the AdventureWorksMiddleTier.Web class library, and change its default namespace from AdventureWorksMiddleTier.Web to AdventureWorks.Web.
5. Open the project properties page for the AdventureWorksMiddleTier class library, and change its default namespace from AdventureWorksMiddleTier to AdventureWorks.
![]() Note Changing the default namespaces for these class library projects saves you the need to update all the
Note Changing the default namespaces for these class library projects saves you the need to update all the using statements in files that you move between the projects. If you prefer to leave these namespaces as is, you will simply need to update the using statements in the files from AdventureWorks.* to AdventureWorks-MiddleTier.*.
6. Now move all your domain services, entity model, resources, metadata classes, presentation model classes, and shared code from the AdventureWorks.Web project into the AdventureWorksMiddleTier.Web class library. You can do this by dragging the files/folders between the projects, holding down the Shift key while you do so (holding down the Shift key will move the files/folders instead of copying them).
7. Add references to the following assemblies in the AdventureWorksMiddleTier.Web class library:
System.ComponentModel.DataAnnotationsSystem.ServiceModel.DomainServices.EntityFrameworkSystem.ServiceModel.DomainServices.ServerSystem.ServiceModel.DomainServices.HostingSystem.WebSystem.Web.ApplicationServices
You can also remove these assembly references from your AdventureWorks.Web project if you wish.
8. Confirm that you can now successfully build the AdventureWorksMiddleTier.Web project.
9. Create a folder named Models in the AdventureWorksMiddleTier project. Move the RegistrationData.partial.cs and User.partial.cs files from the Models folder in the Silverlight project into this new folder.
10. A number of properties and methods in the RegistrationData.partial.cs class need to have their access modifier changed from internal to public: PasswordAccessor, PasswordConfirmationAccessor, CurrentOperation, and UserNameEntered. To prevent these properties from being generated as data entry fields in the registration screen in the Silverlight application, decorate them with the Display attribute, setting its AutoGenerateField property to false. For example:
[Display(AutoGenerateField = false)]

public Func<string> PasswordAccessor { get; set; }
11. You'll note that the linked .resx files in the WebResources folder in the Silverlight project now have icons indicating they can no longer be found because we moved the source files from the AdventureWorks.Web project to the AdventureWorksMiddleTier.Web project. Delete the Web folder and its contents; we'll re-create this structure in the AdventureWorksMiddleTier class library project.
12. Create a folder named Web in the AdventureWorksMiddleTier project, and a folder named Resources under the new Web folder.
13. Right-click on the Resources folder in the AdventureWorksMiddleTier project, and select Add ![]() Existing Item… from the context menu. Navigate to the
Existing Item… from the context menu. Navigate to the Resources folder under the AdventureWorksMiddleTier.Web project's folder. Select all the files in this folder. We want to add a link to these files. You can do this by clicking on the drop-down icon on the Add button, and selecting Add As Link from the menu.
14. Confirm that you can now successfully build the AdventureWorksMiddleTier project.
15. Add a reference to the AdventureWorksMiddleTier.Web class library to your AdventureWorks.Web project, and add a reference to the AdventureWorksMiddleTier class library to your AdventureWorks project.
16. Create a new class in the AdventureWorks project named WebContext with the following content:
using System.ServiceModel.DomainServices.Client.ApplicationServices;

using AdventureWorks.Web;


namespace AdventureWorks

{

    public sealed partial class WebContext : WebContextBase

    {

        partial void OnCreated();


        public WebContext()

        {

            this.OnCreated();

        }


        public new static WebContext Current

        {

            get

            {

                return ((WebContext)(WebContextBase.Current));

            }

        }


        public new User User

        {

            get

            {

                return ((User)(base.User));

            }

        }

    }

}
17. The final step is to set the authentication context when the application starts. Open the App.xaml.cs file in the AdventureWorks project. Add the following line of code in bold to the Application_Startup method:
private void Application_Startup(object sender, StartupEventArgs e)

{

    ((WebAuthenticationService)WebContext.Current.Authentication)

             .DomainContext = new AdventureWorks.Web.AuthenticationContext();


    this.Resources.Add("WebContext", WebContext.Current);

    WebContext.Current.Authentication

                      .LoadUser(this.Application_UserLoaded, null);


    this.InitializeRootVisual();

}
18. We're finally done! Your solution should now compile and run successfully.
Handling Errors
When errors occur on the server, it's useful to log them—for example, write them to the event log, the database, or a text file—to help track down the problem that led to the exception. Often, you might also wish to perform some other tasks when an error occurs, such as sending an e-mail notification to the system administrator. You could handle this in each domain operation, but that would mean repetitive exception-handling code in each operation. An easy way to handle errors at a domain service level with RIA Services is to simply override the domain service's OnError method, like so:
protected override void OnError(DomainServiceErrorInfo errorInfo)

{

    // Log exception here.

}
This method will be called each time an exception is thrown anywhere in the domain service. You can then log the error, and add in any additional error-handling logic you want. Useful information that you should include with any logged error includes the following:
- When the error occurred (i.e., the date and time)
- Who encountered the error (if the user is logged in)
- Where the error occurred (i.e., the method)
- The error message
- A stack trace
- Any associated data—such as the current changeset, which can be obtained simply using the
ChangeSetproperty on the domain service—that could help identify the cause of the issue
You will find most of these as properties on the errorInfo object. To test your error logging and simulate something going awry in your domain service, you can simply throw an exception in one of the domain operations, which will then call your OnError override method, enabling you to log the error.
![]() Note You can choose whether to directly propagate these exceptions to the client, or sanitize them first to avoid exposing the potentially sensitive details of the inner workings of your service and the stack trace to the client. The steps to configuring your Web project to sanitize the exceptions are detailed in Chapter 8.
Note You can choose whether to directly propagate these exceptions to the client, or sanitize them first to avoid exposing the potentially sensitive details of the inner workings of your service and the stack trace to the client. The steps to configuring your Web project to sanitize the exceptions are detailed in Chapter 8.
Handling Data Concurrency Violations
When you have multiple users updating data in your application, you are sure to eventually be faced with data concurrency violations. Say you have two users who retrieve an entity representing the same product in the database at roughly the same time, such that the Product entity returned to both is identical. If both of those users decide to update that product, however, then you face a conundrum. If one user were to submit their changes, followed later by the other user, the first user's changes would be overwritten by the second user's changes, leading to the first user's updates being lost, and creating potential data integrity issues in your database.
This scenario is what is known as a concurrency violation. Ideally, you want the second user to be informed that the product has changed on the server, since they retrieve the data when they attempt their update, and to be able to respond to that situation accordingly, which may differ from application to application, or even based upon the particular data being modified.
![]() Note Although concurrency violations are rare, you must cater for them accordingly in your code. Otherwise, you will find people complaining that the system is “losing data,” with no idea why.
Note Although concurrency violations are rare, you must cater for them accordingly in your code. Otherwise, you will find people complaining that the system is “losing data,” with no idea why.
Methods of Identifying Concurrency Violations
To appropriately handle this type of scenario, you will need to create and design a strategy to identify, handle, and resolve these concurrency violations, on both the server and the client. RIA Services uses optimistic concurrency (i.e., the record in the database isn't locked from being updated by other users after being retrieved), so you will need to design your strategy within these boundaries. Optimistic concurrency violations are generally identified by comparing given properties on the original version of an entity, before it had been modified on the client, with those on the stored version of the entity as it currently exists in the database, immediately before persisting data to the database. Therefore, concurrency checks generally involve the following three versions of the entity:
- The original version containing the state of the entity as originally retrieved from the server
- The current version, which generally consists of updates made on the client to the original version of the entity, and is now being sent back to the server to be committed to the database
- The stored version, which can be currently found in the database prior to being updated
A common strategy to identify concurrency violations is to have a column on your database table that is updated whenever the row is changed. Common column types for this purpose include the following:
- A
timestamp/rowversioncolumn - A
uniqueidentifier(i.e., GUID) column - A
datetimecolumn
When performing an update operation on an entity, RIA Services will retrieve the entity as it is currently stored in the database, and compare the original value of the given concurrency check property (sent back from the client) with its stored value as found in the database. If the values are different, then a concurrency violation has been identified. The reason why the value of this property has changed since it was retrieved from the database is because another user has updated the entity since the original version had been retrieved from the server.
Alternatively, if you don't have a single property on the entity that you can use for concurrency checks, then you may compare a number of (or all) properties on the entity between its original version and the stored version, and raise a concurrency violation if any of the values are different. This method is far more cumbersome than the single-column method, although it does let you pick and choose which properties whose changes you don't want to be lost, while ignoring changes to others whose changes might be unimportant.
Implementing Concurrency Violation Checks
By default, RIA Services and the Entity Framework will simply update an entity without performing any concurrency checks. You will need to configure it to perform these checks before updating/deleting data in the database. This involves ensuring the following:
- You have a property on the entity whose original and stored versions can be compared to check for a concurrency violation.
- The original value of this property is returned by the client, along with the updated entity.
When the client sends an entity back to the server, it only sends it the updated (current) version of the entity. However, the original value of any properties decorated with the ConcurrencyCheck attribute, the TimeStamp attribute, or the RoundtripOriginal attribute will be sent back to the server when performing an update operation. You will generally apply the ConcurrencyCheck attribute to the property or properties that will be used as part of the concurrency check, which will ensure that you have its original value in addition to its current value returned from the client. This means you have the data required to perform the concurrency check, but RIA Services doesn't actually provide the logic to implement the concurrency checks itself. Instead, it leaves the task of identifying concurrency violations to the data access layer.
If you are using the Entity Framework as your data access layer (as we are in this book), you can simply configure the entities in your entity model to perform concurrency checks prior to an update, specifying which of the entity's properties will participate in the comparison check. In your entity model, select one of these properties on the entity, and from the Properties window change its Concurrency Mode property from None to Fixed. If you need to compare more than one property on the entity for a concurrency violation, then repeat this for each property that should participate in the comparison. A handy side-effect of doing this is that the property will automatically have the ConcurrencyCheck attribute applied to it behind the scenes, leaving nothing else to be done to implement concurrency checks for the entity.
Now, prior to any update of that entity, the stored version of the entity will be loaded from the database, and the stored value of each property in the concurrency check will be compared to its corresponding current value as returned from the client. A concurrency violation exception will be thrown if any of the values being compared are different.
![]() Note The
Note The OnError method, as discussed earlier in the “Handling Errors” section of this chapter, is thrown when a concurrency violation has been identified. If you are logging errors, you will probably want to ignore the OptimisticConcurrencyException exception, as the errors do not indicate a failure in the system and, thus, are of little value being logged.
Workshop: Configuring an Entity Model to Check for Concurrency Violations
The Product entity contains a property called ModifiedDate, of type DateTime. We can use this property to perform concurrency checks, like so:
1. Open your AdventureWorksModel entity model.
2. Find the Product entity.
3. Select the ModifiedDate property, and set its Concurrency Mode property to Fixed (using the Properties tool window).
4. The ModifiedDate field on the Products table in the AdventureWorks database is not automatically updated by a database trigger when the record is updated. Therefore, we need to explicitly update this property when the Product entity is being added/updated. Find the update domain operation in the ProductService domain service created earlier.
public void UpdateProduct(Product currentProduct)

{

    this.ObjectContext.Products.AttachAsModified(currentProduct,

                                this.ChangeSet.GetOriginal(currentProduct));

}
5. Update the ModifiedDate property on the currentProduct entity that has been passed into the method as a parameter with the current date/time.
public void UpdateProduct(Product currentProduct)

{

    currentProduct.ModifiedDate = DateTime.Now;


    this.ObjectContext.Products.AttachAsModified(currentProduct,

                                this.ChangeSet.GetOriginal(currentProduct));

}
![]() Note You should always set this value on the server, not the client side, as doing so on the client side would assign the client PC's date/time, which can vary greatly based upon the user's time zone or if they have the incorrect date/time set on their machine—potentially misrepresenting the actual time that the record was updated. The value you set here will be automatically passed back to the client.
Note You should always set this value on the server, not the client side, as doing so on the client side would assign the client PC's date/time, which can vary greatly based upon the user's time zone or if they have the incorrect date/time set on their machine—potentially misrepresenting the actual time that the record was updated. The value you set here will be automatically passed back to the client.
The entity is now configured to perform concurrency checks when it's being updated.
Testing Your Solution
Assuming you have implemented functionality in your Silverlight application to retrieve and update Product entities, you can test it using two copies of your Silverlight application that are open at the same time in different browser windows. Retrieve a given Product entity from the server in one instance of the application, and retrieve exactly the same entity in the other. Make a change to the entity in one instance, and send it to the server to update the database with the change. Now make a change to the entity in the other instance and send the update to the server. Because you updated the entity in the first instance, the ModifiedDate property of that entity on the server will have changed from its original value that is being sent through with the update in the second instance. Therefore, when the Entity Framework compares these values and finds that they are different, it will throw a concurrency exception.
Implementing Concurrency Violation Checks for Presentation Model Types
As mentioned earlier, a little more work is required if you are exposing presentation model objects to the client instead of entities. In this case, you will need to specify which properties should have their original values sent back to the server when updating an object, and then perform the concurrency check logic yourself when updating the database.
The first step will be to decorate the properties on the presentation model object that will participate in the concurrency check (generally in the object's metadata class) with one of the attributes that ensure that the original value of that property will be sent back with any update of the object to the server (i.e., ConcurrencyCheck, TimeStamp, or RoundtripOriginal). For example:
[ConcurrencyCheck]

public DateTime ModifiedDate { get; set; }
You then need to compare the original value of this property with its stored value in the update operation of the domain service. However, you will find that only the updated version of the entity is passed into the operation as a parameter, whereas you also need the original version of this entity for your comparison. You can retrieve the original version of the object using the GetOriginal method of the ChangeSet object. Note that on this “original” object, only the properties specified to be round-tripped will have values.
var originalProduct = ChangeSet.GetOriginal<ProductSummary>(productSummary);
The next step depends on how you have implemented your data access layer. If your data access layer already performs concurrency checks, then no additional work is required. Otherwise, your update domain operation will need to manually retrieve the stored version of the entity from the database and compare the values of the properties between this and the original version to identify a concurrency violation. If one is found and you want to notify the client, you will need to get the ChangeSetEntry object for the object being updated, and assign values to its ConflictMembers, StoreEntity, and IsDeleteConflict properties. For example:
var originalProduct = ChangeSet.GetOriginal<ProductSummary>(productSummary);

ProductSummary storedProduct = GetProduct(productSummary.ProductID);


if (storedProduct.ModifiedDate != originalProduct.ModifiedDate)

{

    ChangeSetEntry entry =

        ChangeSet.ChangeSetEntries.Single(p => p.Entity == productSummary);


    List<string> conflicts = new List<string>();

    conflicts.Add("ModifiedDate");

    entry.ConflictMembers = conflicts;


    entry.IsDeleteConflict = false;

    entry.StoreEntity = storedProduct;

}
else

{

    // Save ProductSummary...

}
Resolving Conflicts in the Domain Service
In this sort of scenario, your domain service will inherit from LinqToEntitiesDomainService, which provides the ResolveConflicts method that you can override, which will be called when a concurrency conflict has occurred, and enable you to handle it using some custom logic on the server side if you wish. This method returns a Boolean value—if it returns false, the client will simply be notified of the conflicts. If your method returns true, the changeset will be resubmitted to the database once again (this will happen only once).
![]() Note We'll discuss resolving concurrency conflicts on the client in Chapter 5.
Note We'll discuss resolving concurrency conflicts on the client in Chapter 5.
Transactions
Transactions are often used when updating data in a database, such that if an update fails (if a concurrency violation is identified, for example), the updates made since the transaction was started will be rolled back, leaving the database in the same state as it was before the transaction started. The use of transactions ensures that the database doesn't get into an unknown or inconsistent state because some changes but not others have been written to the database, potentially compromising its integrity.
Often, you will want to encapsulate the changes being submitted to the database within a transaction, particularly when using a data access layer other than the Entity Framework or LINQ to SQL, because these both already automatically implement transactions when submitting changes. You can do so in a domain service by overriding the Submit method from the base class, and encapsulating the call to the Submit method in the base class in a transaction scope, as demonstrated here:
public override bool Submit(ChangeSet changeSet)

{

    bool result = false;


    TransactionOptions transactionOptions = new TransactionOptions();

    transactionOptions.IsolationLevel =

        System.Transactions.IsolationLevel.ReadCommitted;


    using (TransactionScope transaction = new TransactionScope(

                TransactionScopeOption.Required, transactionOptions))

    {

        result = base.Submit(changeSet);

        transaction.Complete();

    }


    return result;

}
![]() Note You will need to add a reference to the
Note You will need to add a reference to the System.Transactions assembly and a using statement to the System.Transactions namespace in your class in order to implement the preceding example.
WCF RIA Services Toolkit
The WCF RIA Services Toolkit consists of a number of out-of-band features that are not included in the core RIA Services framework. These typically are features that haven't quite reached the maturity required to be full-fledged members of the core RIA Services framework, but are updated frequently and made available for you to use while they gain maturity (albeit without any guarantees that they will work as required, or won't radically change and/or break your code with future updates). By making them available in the toolkit, Microsoft is able to garner feedback from developers and update them accordingly in a timely manner without needing to wait for a new release of the full framework. In turn, Microsoft is providing new features on a regular basis for you to use, much earlier than you would otherwise be able to.
At the time of writing, the following features can be found in the WCF RIA Services Toolkit:
- LinqToSqlDomainService: Unfortunately, there is currently no support for LINQ to SQL models out of the box in the RIA Services framework. However, to provide this support, you can find the
LinqToSqlDomainServiceclass in the toolkit, similar to theLinqToEntitiesDomainServicein the framework, but for LINQ to SQL. - MVVM Support: Provides a
DomainCollectionViewclass that enables you to easily consume data from RIA Services and expose it from a view model. We'll discuss this class further in Chapter 5, and also Chapter 13 when we discuss the MVVM design pattern in depth. - T4 Templates: Allows you to customize the code generated in the client project.
- SOAP Endpoint: Enables you to expose a SOAP endpoint for your domain services.
- JSON Endpoint: Enables you to expose a JSON endpoint for your domain services.
- jQuery Support: Provides a jQuery client that enables you to communicate with domain services from jQuery, with support for both querying data and submitting changes to the server.
- Entity Framework Code-First Support: Provides a
DbDomainServiceclass that your domain services can inherit from, enabling them to support the Entity Framework 4.1's code-first andDbContextfeatures. - Windows Azure Table Storage: Provides a
TableDomainServiceclass that your domain services can inherit from, enabling them to use Windows Azure table storage as the data layer. - ASP.NET DomainDataSource and DomainValidator Controls: Provides a data source control that enables you to communicate with your domain services in an ASP.NET application or web site.
You can find a link to download the WCF RIA Services Toolkit on the WCF RIA Services page on the Silverlight web site, at www.silverlight.net/getstarted/riaservices. Alternatively, much of the toolkit is available as a series of NuGet packages, all prefixed with RIAServices.
The WCF RIA Services Contrib Project
The WCF RIA Services Contrib project is a collection of tools for RIA Services, contributed by the community, and coordinated by Colin Blair.
Contents of note include the following:
- Combo box extensions, with support for cascading combo boxes, asynchronous loading of items, and support for entity associations
- An alternative data validation framework to that provided by RIA Services
- Extension methods that add additional functionality to entities
- T4 templates to generate domain services, metadata, and localization for an entity model
- A tool to scaffold DbDomainServices for your Entity Framework Code-First model
You can get the WCF RIA Services Contrib project from http://riaservicescontrib.codeplex.com, or as NuGet packages (their names all starting with RiaServicesContrib). Blog posts and documentation for the project are available on Colin's blog at www.riaservicesblog.net/Blog/.