1. Open the list of identifiers via the Model menu 3. If necessary, customize the list to display the Entity property 4. Rename the existing primary identifiers that will become alternate identifiers · replace the name of the identifiers with the name Alternate (or another name if you prefer), highlight the new name, and copy it into the Windows clipboard · use the arrow keys to move up or down the list of identifier names, pasting the new name into each using <Ctrl+V> · de-select the P column for each identifier you need to change 5. Click <OK> to commit the changes After preparing the existing identifiers, create the surrogate identifiers, but don’t adjust the relationships just yet. After creating all your surrogate identifiers, it’s time to adjust your relationships. To do this, open the list of relationships via the Model menu, and customize it to include the Parent Identifier property, as shown in Figure 14.10. Using the drop-down lists, you can select the identifier for each relationship – click <OK>, and the changes are applied. If it helps, sort the list by the value of ‘Parent Identifier’ – just click on the column heading. Figure 14.10 Choosing a different identifier
Instead of a list of relationships, you could also use a List Report of Relationship Joins, making sure that you include the property Parent Identifier under the Parent group (see Figure 14.11). |
Figure 14.11 Selecting the Parent Identifier property in a list report
|


Naming Your Identifiers
Within a CDM or LDM, the names of identifiers only really matter for two reasons:
1. You have more than one identifier for an entity, and you need to tell them apart
2. You intend to generate a PDM.
When you generate a PDM from a CDM or LDM, PowerDesigner will convert your entity identifiers into table keys. The default identifier names (such as Identifier_1) are converted into default key names (such as Key_1), which are used to form the names of the constraints on the database. Save yourself work in the PDM; name your entity identifiers in such a way that they generate acceptable database constraint names.
Attributes and Columns in Identifiers and Keys
As ever, the place to look for ways in which an attribute or column has been used (apart from being a sub-object within an entity or table) is the ‘Dependencies’ tab on the property sheet. Figure 14.12 shows the ‘Dependencies’ tab for an attribute called Attribute A, which has been migrated into two other entities, as Attribute A and Inspect Attribute A.
Figure 14.12 The attribute ‘Dependencies’ tab

The sub-tabs provide the information shown in Table 14.5 by default – the contents can be customized in the usual way.
Table 14.5 Sub-tabs for dependencies
Sub-tab | Content |
Identifiers | Links to the identifier(s) that contain Attribute A |
Primary Relationship Joins | Links to the relationship joins that result in Attribute A being migrated to other entities – the name of the join includes the names of the parent and child attributes. In Figure 14.12, we can see that one of the child attributes is called Inspect Attribute A. |
 A key point to remember about the ‘Dependencies’ tab is that it will never contain empty sub-tabs. For example, the presence of the two tabs shown in Figure 14.12 tells us that the attribute is referenced by at least one identifier, and by at least one relationship join.
EXERCISE 13: Constructing Identifiers
Figure 14.13 shows a simple model, similar to the model in Chapter 7. The bottom portion of each entity symbol is where the identifiers would be shown; they are all empty, because no identifiers have been defined yet.
Figure 14.13 Data model before candidate keys have been identified

Our analysis identified the candidate identifiers shown in Table 14.6.
Table 14.6 Candidate Identifiers
Entity | Identifier Number | Candidate Identifiers |
Attendance | 1 | Composite identifier: |
Class | 1 | Class Full Name |
Class | 2 | Class Short Name |
Student | 1 | Student Number |
Student Enrollment Type | 1 | Student Enrollment Type |
In the following pages, you will create the candidate identifiers in a LDM, using the techniques marked  at the beginning of the chapter.
YOUR TURN TO PLAY
In the ‘Exercises’ workspace, create a new folder and LDM in the folder – call both ‘Exercise 13’. Create the entities and relationships shown in Figure 14.13. Ensure that you have selected Identifiers in the entity display preferences.
Create Identifiers via the Entity Property Sheet
1. Open the ‘Attributes’ tab on the property sheet for the entity Student, and then:
2. Select the attribute Student Number
3. Click on the Create Identifier tool  - a new identifier will be created, and the property sheet will be opened
4. Click <OK> to close the identifier’s property sheet, then click <OK> to close the entity’s property sheet
5. On your diagram, the Identifier name will appear in the Student symbol, and the attribute name will be suffixed with <ai>. The attribute will not be migrated to the entity Attendance, because the identifier has not been flagged as the Primary identifier.
6. On the diagram, open the contextual menu for Student Enrollment Type and select Identifiers. The entity’s property sheet will open at the ‘Identifiers’ tab. Click either the Add a Row  or Insert a Row
  tool. A new identifier will appear in the list – click on the Properties
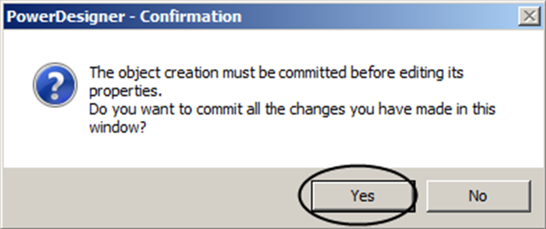
  tool to open the property sheet for the identifier. Click on <Yes> when you’re asked to commit changes as shown in Figure 14.14 – you can’t edit the identifier until it has been created.
Figure 14.14 Commitment Required