
CHAPTER 23
What other components in PowerDesigner
can be leveraged by data modelers?
Repository
Portal, check, compare and merge
Assess the Impact
By any measure, the data modeling features in PowerDesigner are comprehensive - the data model pyramid is fully supported. Along the way, we have fully described some features, and briefly mentioned others. The purpose of this chapter is to provide more information about some of the latter group of features.
Collaboration and Standardization
Very few data modelers work in isolation, although sometimes it may feel like it. How many times have you wanted to replicate a colleague’s diagram style, or share validation rules or other options, and felt that your modeling tool was part of the problem?
We all agree that we should establish and follow ‘best practices’. To do that, we have to make it easier to follow ‘best practices’ than not. That means we should push facilities out to modelers, so they don’t have to ask for them. In this section, we briefly describe how PowerDesigner helps.
Repository
If more than one person needs access to a model, then a repository is necessary. The repository provides a common location to store documents, models, and other files. The repository eliminates the necessity to locate the individual who might have a model locked, or who might have implemented some changes.
A repository supports collaborative modeling by managing versions of models, making them available for viewing, for comparison, and for impact analysis. A database administrator may need to implement a change in a physical model, but at the same time, a modeler needs to implement a change in the same model. Both people can extract a copy of the model from the repository, make changes, and then put the model back into the repository. Upon storing the model back into the repository, the differences are presented to the modeler consolidating the changes, through the standard PowerDesigner comparison feature (see later in this chapter).
The repository administrator can define users, groups, roles, and rights to manage access permissions for folders, projects, models, and packages in the repository. Depending on their rights, individual users can browse models in the repository and portal (see below), and check models in and out. They can also compare local and repository models, compare model versions, and carry out repository-based impact analysis. Via the web portal, users can carry out many of the same actions. Using the ‘Composer’ license, non-modelers can submit changes to certain text properties via the portal. Figure 23.1 shows a sample of the content of the repository as viewed in the Browser – note the Library and Glossary at the top of the list. The content of one model has been expanded in the same way as the content of local models can be expanded in the Browser.
Figure 23.1 Sample repository content

Sharing Resources
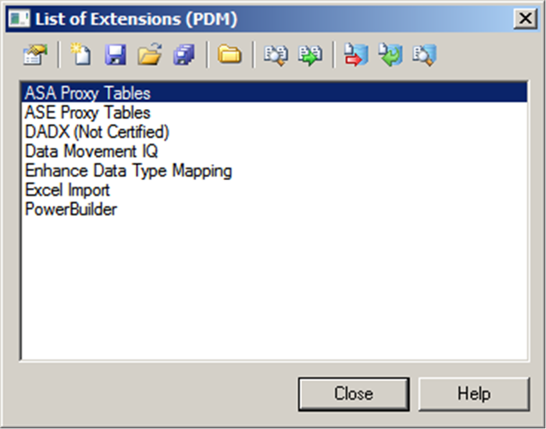
One of PowerDesigner’s secret weapons is the concept of a resource file. There are several types of resource files, each of which has the ability to tailor PowerDesigner capabilities in a particular fashion. Via the Tools menu, you have access to all the shared resource files. Figure 23.2 shows you just how many different types of resource file are available. Each of the options shown takes you to a list of the resources available, where you can modify or delete them, or create your own. For example, Figure 23.3 shows the list of extensions available for PDMs.
Figure 23.2 Resource files available Figure 23.3 DBMS list

 Some of the default actions taken when checking models into the repository can be changed. See the Repository section in Tools|General Options.
Deploying Shared Resource Files
You can store PowerDesigner resource files in the repository and automate their deployment to your team. Resource file sharing helps you ensure that all your teams are using the same DBMS or other target with any appropriate extensions.
![]() “Deploying Shared Resource Files” (Core Features Guide)
“Deploying Shared Resource Files” (Core Features Guide)
User Profiles
When setting your organization’s modeling standards, you’ll want to advise or enforce the use of general options, model options, display preferences, and various other options. In PowerDesigner, user profiles help you to standardize the look and feel of your models and to support standards. Profiles allow you to group options and preferences together for sharing and reuse across your organization. Various profiles are provided with PowerDesigner, or you can create your own.
User profiles can contain default values for:
· Display Preferences – to control the color, shape, size, etc. of your diagram symbols and the information that is displayed on them.
· Model Options – to control naming conventions, case sensitivity, notation, default values, etc.
· General Options – to control dialog preferences, environment variables, fonts, etc.
· Check Model options – to control which checks are applied, and which are errors, warnings, etc.
· Other options – such as the layout of toolbars and windows, favorite property tabs, default columns for object lists, etc.
To load a new profile, select Tools|Apply User Profile. The defaults, preferences, and options contained within the profile will overwrite the existing values for those defaults, preferences, and options, while leaving all others unchanged. Note that while general options take effect immediately, model options and display preferences only take effect when you create a new model. An administrator can prepare customized preference profiles, available to users on their first connection to the repository.
![]() “User Profiles” (Core Features Guide)
“User Profiles” (Core Features Guide)
Project and Model Templates
You can save a project as a template. If you choose to apply this template when you create a new project, the new project will be a carbon copy of the original. This is useful if you want to provide a default folder structure or distribute standard models (the Library is an alternative). Where it really shines is when the project contains a modeling framework.
A framework can be used to provide guidance regarding modeling tasks to be undertaken in a project, and to provide shortcuts to models (and parts of models) that have been created. They also allow you to define standard actions, such as creating or editing a list of subject areas, or generating the next model in the chain. It’s a simple workflow mechanism.
For example, Figure 23.4 shows the Federal Enterprise Architecture Framework (FEAF) framework supplied with PowerDesigner. The FEAF promotes shared development for US federal processes, interoperability, and sharing of information among US federal agencies and other governmental entities.
Figure 23.4 FEAF framework

Model Templates
You can create model templates with predefined targets, extensions, and first diagrams to help guide users through model creation. You can organize these templates in categories and share them with your team, supplementing, or even replacing the default New Model dialog with these categories.
The simplest way to create a model template is to save a model in the default template folder.
![]() “Creating a Model Category Set” (Core Features Guide)
“Creating a Model Category Set” (Core Features Guide)
Linking with Business Analysis
Capturing Requirements
PowerDesigner has a model dedicated to capturing requirements – the requirements model. You can import requirements from the headings or table rows in a Microsoft Word document (see Import|Word Document on the File menu), and keep the document and the model synchronized. You can then link objects in other models back to the requirements in your model, and also generate new model objects from requirements. For example, you could generate business rules or conceptual entities from requirements. If your requirements change, you can examine the impact on your other models, and even re-generate some of the objects you created.
![]() “Enable links to requirements” (Core Features Guide)
“Enable links to requirements” (Core Features Guide)
Business Rules in PowerDesigner
Business Rules are available in every type of model, and can also be shared via the Glossary. Any object or sub-object can link to any number of business rules, regardless of the model in which the rules are defined (subject to your license and access rights). This may sound open-ended, but it is deliberately so. Business Rules provide a flexible mechanism for defining rules that can be linked to the objects they impact and the objects designed to implement the rules.
To find out more about business rules in general, we suggest that you read the ‘Business Rules’ chapter in (Ross, 2009).
![]() “Business Rules” (Core Features Guide)
“Business Rules” (Core Features Guide)
Checking Spelling
The spelling checker is a PowerDesigner add-in that needs to be enabled.
- Select Tools|General Options to open the General Options dialog box.
- Click the ‘Add-Ins’ node in the Category view, and select the ‘Spell Checker’ checkbox.
- Click <OK> to return to the model diagram.
- Select Tools|Spell Checking Options to open the Spell Checking Options dialog box.
You can use the spelling checker at any time.
- Right-click an object or model node in the Browser, or a diagram symbol, and then select Spell Check in the contextual menu.
Spell checking starts. If an error is found, the Spell Checking dialog box opens. - For each error, you can:
· Click <Change> to accept the suggested replacement word, or
· Type your own replacement and click <Change>, or
· Click <Change All> to apply the change to the entire object or model, or
· Click <Add> to add the word to your custom dictionary
· Click <Options…> to change the language, and include or exclude standard object properties.
To check the spelling in the whole model, right-click the diagram background and select Spell Check.
![]() “Spell Checking” (Core Features Guide)
“Spell Checking” (Core Features Guide)
Repository Portal
The Portal is effectively a gateway into the repository, allowing users (who do not need PowerDesigner licenses) to browse, search, and compare models, and carry out impact analysis. Coupled with the ‘composer’ license introduced in Version 16, selected non-modelers can edit comments, descriptions, and annotations.
When models are checked in to the repository, you have the option to make the diagrams available in the portal. By default, this is disabled, but you can change this behavior via Tools|General|Options|Repository.
![]() “The PowerDesigner Portal” (Core Features Guide)
“The PowerDesigner Portal” (Core Features Guide)
Automation and Simplification of Common Tasks
Compare and Merge
 The ability to compare models, and to update a model with selected changes, is key to the management of our data model pyramid. There are several scenarios where such a comparison is required:
· Generating into an existing model
· Checking an updated model into the repository
· Comparing versions of a model
· Comparing two models of the same type
· Merging two models of the same type.
A single comparison engine in PowerDesigner supports all of these scenarios. Figure 23.5 shows a sample dialog – in this case, it was invoked by updating a PDM from a LDM using Generate Physical Data Model on the Tools menu.
The Toolbar in Figure 23.5 is almost the same as you would see when comparing models – the compare toolbar does not have the two icons on the left, which allow you to select or de-select changes to apply.
The merge and compare dialogs show three panes. The top two panes show you the content of each model, which can be filtered (see below). The bottom pane shows the changes to the properties of a selected object. In Figure 23.5, there has been a change to the code of an object. The display has been filtered to show objects that exist in both models but are not the same. PowerDesigner uses the icons on the objects and the color of each entry to indicate the type of change.
Right-click any of the headings or objects in the right-hand pane to choose types of actions to select or de-select. Alternatively, use the selection tools on the Toolbar.
Choose the objects and properties you want to compare using the ‘Comparison Options’ tool, which displays the dialog shown in Figure 23.6. Filter the display using the ‘Change Filter’ tool, which displays the selections shown in Figure 23.7.
Figure 23.5 Merge model view

![]() “Comparing and Merging Models” (Core Features Guide)
“Comparing and Merging Models” (Core Features Guide)
![]() “Synchronizing Objects Manually” (Core Features Guide)
“Synchronizing Objects Manually” (Core Features Guide)
![]() “Analyzing Differences in the Merge Models Window” (Core Features Guide)
“Analyzing Differences in the Merge Models Window” (Core Features Guide)
Figure 23.6 Filter options
| Figure 23.7 Comparison options
|


Checking a Model
Another standard feature is the ability to check the validity and completeness of a model. Each model has a standard set of checks, each of which will result in either a warning or a result. If you run the model check as part of model generation, errors will result in the generation being abandoned.
Initiate the model check by pressing <F4>, or selecting Tools|Check Model. The first thing you see is the Check Model Parameters window, shown in Figure 23.8. This is where you choose the checks you want to run. The icon next to each check indicates whether it produces a warning or an error; you can change this using the Toolbar. Some problems can be automatically fixed by PowerDesigner, which the Automatic Correction tool  on the toolbar allows you to enable. For example, in Figure 23.8, I have chosen to allow PowerDesigner to correct any issues with non-unique table names.
Click <OK> to run the model check, and watch the progress messages in the output window, then have a look at the results in the Result List. Figure 23.9 shows the result of the model check initiated in Figure 23.8. There are two errors visible; the remaining entries are warnings. Double-click one of the entries in the list to open the object properties. If you right-click an entry, you are presented with various options to help you deal with the problem – in Figure 23.9, the contextual menu refers to the highlighted Domain warning.
Figure 23.8 Check Model Parameters

Figure 23.9 Model check results

Impact and Lineage Analysis
Impact analysis, or the ability to understand the consequences of a model change, needs to be a function of the modeling tool. As part of the impact analysis, a modeler needs to be able to understand the object’s lineage (objects that form the basis for a particular object). Impact analysis includes more than just understanding where an object is used. It is also a requirement for proper impact analysis to be able to understand what has happened to an object since it was generated. Was a CDM entity’s attribute generated into the LDM? Was it then generated into a PDM? Was the data type changed by the DBA when working on that PDM? Did a modeler generate a set of classes from the LDM so that the developers would be able to start building applications? It is useful to be able to store these analyses for later review, as well as creating version documentation. It is a better use of resources to intelligently discuss the proposed change with the stakeholders, rather than make a change in the LDM, propagate it to the PDM and database, only to find that the application now fails.
PowerDesigner has true and extensive impact analysis. An object's lineage is stored with the object. When models and documents are stored in the repository, the impact analysis becomes more extensive. While viewing an object’s properties, clicking the ‘Impact and Lineage Analysis’ button will bring up a window similar to the one in Figure 23.10. The analysis results depend on the analysis rule sets you use. Rule sets allow you to tailor the impact analysis, determining the types of objects that are traversed in the impact analysis, and the properties that are displayed. There are several rule sets supplied, or you can create your own, if you need them, and share them via the repository.
Not only is impact analysis available for the data modeling functionality, but it is core to the tool, and is available in all modeling modules.
By default, impact and lineage analysis only examines local models that are open, which could limit the scope of the analysis more than you would like. Just select the ‘Use Repository’ option, and PowerDesigner will extend the analysis into the repository. Figure 23.10 shows the impact and lineage analysis for the City entity. Note the wealth of additional information shown, and the inclusion of links to requirements, business rules, and classes. Entries with the small database symbol on their icon were retrieved from the repository.
Each of the entries provides a shortcut to the actual definition in a local model, and to a summary of the information held in the repository. Generate a diagram from this analysis, and you will be able to view this hierarchy in the Browser.
PowerDesigner stores lineage and impact analysis information at both ‘ends’ of the relationship. For example, the LDM stores details of generated tables, and the PDM stores details of the entities that tables were generated from.
Figure 23.10 PowerDesigner impact and lineage analysis

Impact Analysis Model
The best way to fully appreciate the depth and breadth of the impact analysis capabilities of PowerDesigner is to generate an impact analysis diagram. Did you notice the ‘Generate Diagram’ button in Figure 23.10? If you click on that button, PowerDesigner will generate a diagram illustrating the results of the analysis. The diagram can be saved, providing point-in-time snapshots throughout the development life cycle. Remember, you can choose between different analysis rule sets, which will produce different results and, therefore, different diagrams. Right-click any object in the analysis results to change the paths you want to analyze (e.g. to ignore subtypes or add links to data objects in process models), and the analysis is re-run. Figure 23.11 shows the Impact Analysis Objects for a CDM entity.
Figure 23.11 Impact analysis selection

Figure 23.12 shows such a diagram, generated using the ‘conceptual impact analysis’ rule set and no lineage rules, resulting in a much smaller set of impacted objects. The left-hand entry is the City entity. Double-clicking a symbol will open the properties of that object.
Figure 23.12 PowerDesigner impact and lineage analysis diagram

Figure 23.13 shows the entries in the Browser for the Impact Analysis model shown above. This information can be saved as a model. If you have more than one Impact Analysis Model, you can compare them to see how the impact has changed over time.
Figure 23.13 PowerDesigner impact analysis model in Browser

To PowerDesigner, the Impact Analysis Model is like any other model – it keeps a record of the fact that the entity is present in the model, which you can see in the object’s ‘Dependencies’ tab, shown in Figure 23.14.
Besides changing the analysis parameters in the original analysis, you can also change them via the Impact Analysis diagram or in the Browser. Just right-click the symbol or Browser entry.
Figure 23.14 Impact analysis Dependencies

Customization and Extension
Extend the Scope of Model Information
Here’s where data modeling gets really abstract. Imagine the Logical Data Model that describes the objects supported by PowerDesigner. It would include entities like:
Model, Diagram, Entity, Attribute, Relationship, Column, Domain.
We refer to that data model as PowerDesigner’s ‘metamodel’. The metamodel is very rich, but we can always find reasons to extend it, such as adding a Plural Name property to entities, or stereotype values for tables. We make these changes to the metamodel using ‘model extensions’.
You have already seen an extension in Chapter 16, when adding stereotype values.
You can attach a model extension to your model at the time of creation of the model by clicking the <Select Extensions> button on the New Model dialog. You can subsequently attach an extension to your model at any time from the List of Extensions.
Each extension is valid for a single type of model, although some of them have been defined for multiple types of models. If, for example, the LDM supports the Plural Name property on entities, and the PDM supports the same property on tables, PowerDesigner will transfer the values of plural names between tables and entities during model generation.
You can extend the metamodel in the following ways:
1. Add or sub-classify new kinds of objects:
· Metaclasses – drawn from the metamodel as a basis for extension
· Stereotypes – to sub-classify objects
· Criteria – to evaluate conditions to sub-classify objects
· Extended objects, sub-objects, and links – to create new kinds of objects
9. Provide new ways of viewing connections between objects:
· Dependency matrices – to show connections between two types of objects
· Extended collections and compositions – to enable manual linking between objects
· Calculated collections – to automate linking between objects
10. Add new properties to objects and display them:
· Extended attributes – to provide extra metadata
· Forms – to display custom property tabs or dialog boxes
· Custom symbols – to help you visually distinguish objects
11. Add constraints and validation rules to objects:
· Custom checks – to provide data testing
· Event handlers – to invoke methods when triggered by an event
12. Execute commands on objects:
· Methods – to be invoked by other profile extensions such as menus and form buttons (written in VBScript)
· Menus – to customize PowerDesigner menus
13. Generate objects in new ways:
· Templates and generated files – to customize generation
· Transformations and Transformation profiles – to automate changes to objects at generation or on demand.
![]() “Extension Files” (Customizing and Extending PowerDesigner)
“Extension Files” (Customizing and Extending PowerDesigner)
Automatically Attaching Extensions to New Models
Extensions are just one example of common resources available to PowerDesigner. Like other resources, they’re available on the Tools menu, under Resources|Extensions.
In Chapter 10 we showed you how to add an extension to a model. If you have standard extensions that you need to apply to every new model of a given type, you can do that. One of the properties of an extension is Auto Attach; if this is enabled, the extension will always be included automatically whenever you create a new model of that type. The menu path required to access CDM extensions is shown in Figure 23.15.
Figure 23.16 shows the extensions available for CDMs (the active model was a Requirements model). The tools on the Toolbar allow you to open the property sheet for an extension, check extensions in and out of the repository, merge extensions, and compare them with the repository version.
Figure 23.15 Accessing available CDM extensions

Figure 23.16 Extensions for a CDM

Double-click an extension to open the property sheet. Figure 23.17 shows the property sheet for Relationship Assertion with Plural Entity Names.
Figure 23.17 Relationship Assertion with Plural Entity Names

The browser-like panel on the left shows the contents of the extension; we don’t need to know how it works to guess that it adds Plural Name to entities via a form called General (this form replaces the default ‘General’ tab), and that it adds some form of template to relationships.
The Toolbar at the top allows you to, among other things, save the extension in a new file – useful if you want to base a new extension on an existing one, or share the extension with other modelers.
The main property of interest in Figure 23.17 is Auto Attach; select this property to ensure that the extension is automatically added to all new models of this type.
Customizing Menus, Toolbars, and Toolboxes
To customize PowerDesigner menus, toolbars, and toolboxes, select Tools|Customize Menus and Tools.
![]() “Customizing Menus, Toolbars, and Toolboxes” (Core Features Guide)
“Customizing Menus, Toolbars, and Toolboxes” (Core Features Guide)
Modifying DBMS Support
PowerDesigner supports the peculiarities of different RDBMS’s via DBMS Definition Files, which are similar to extensions. To enable a new, unsupported, DBMS, or to add DBMS features that PowerDesigner does not currently support, you can create your own definition file and attach it to your PDMs. Use a copy of one of the definition files supplied with PowerDesigner to give you some help. See Tools|Resources|DBMS.
![]() “DBMS Definition File Structure” (Customizing and Extending PowerDesigner)
“DBMS Definition File Structure” (Customizing and Extending PowerDesigner)
Role-based UI
An administrator can create profiles in the repository to customize and simplify the PowerDesigner interface for users by hiding types of models, objects, and object properties, by reconfiguring menus, toolbars, and toolboxes, and by setting appropriate defaults for options and preferences. You can define multiple profiles to customize the interface in different ways for different kinds of users, and apply them as appropriate, to individual user accounts or to repository groups.
![]() “Using Profiles to Control the PowerDesigner Interface” (Core Features Guide)
“Using Profiles to Control the PowerDesigner Interface” (Core Features Guide)
Scripting
If you are prepared to indulge in some programming, you can alter or extend PowerDesigner behavior with scripts.
- “Scripting PowerDesigner” (Customizing and Extending PowerDesigner)
Key Points · Use the ‘composer’ license to share responsibility. · Share resources and best practices. · Standard approach? Develop a framework. · Save your Impact Analysis Model for great tracking abilities. · Automatically attach useful extensions to new models. |