
Blue Screen
Applications
Compositing, a technique used to superimpose footage onto other footage, is used extensively in movies from Star Wars to Titanic to Spider Man. Actors are filmed in front of a solid blue or green colored background (see figure 29-1).
In post-production, this background is eliminated and substituted with other footage (such as a miniature set or CGI rendering) with special software (see figure 29-2). The process is known by many names including blue screening, green screening, chroma-keying, and compositing. For simplicity, in the remainder of this chapter I’ll refer to this process as compositing.
Professional blue screens contain a specific hue of the color blue that’s known as Chroma Blue. Human skin contains none of this shade of blue, so when this color is removed from the final image, none of the actor’s skin is made transparent. Green has become more dominant because blues are more often desired than greens in sets, make-up, and wardrobe. Additionally, the color of an actor’s blue eyes may overlap the tonal range of the blue screen.
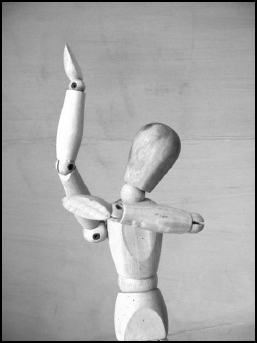
FIGURE 29.1 Actors are filmed in front of a solid blue- or green-colored background.
| TIP | If you know of a local TV station, you may want to visit and ask if you can use the screen normally used by the weather person. A friend of mine talked a local station into letting him use their screen (in the off hours) and obtained excellent footage – primarily because the station already had the screen perfectly setup and lit. |
Unfortunately, the shade of green used for a green screen is difficult to obtain in everyday items. In contrast, a blue color near the range of Chroma Blue is available in everything from tablecloths to tarps. For this reason, the project in this chapter will use a blue screen for a background.
PARTS
| Qty | Item |
| 1 | 100′ × 40˝ roll of blue table cover |
| 1 | Thumbtacks |
| 1 | Double-sided tape |

FIGURE 29.2 The background is eliminated and substituted with other footage.
General Instructions
Proper setup and photography of footage (video or film) is much more important to the realism of your final image than the software you use for compositing (Final Cut Pro, Adobe Premiere, Adobe After Effects, etc.). With this in mind, here are a few general suggestions to help you maximize the quality of your final image:
• Underexposure should be avoided It is better to overexpose your image which will provide the color range necessary to make the compositing screen transparent in post-production. Underexposure forces shadows into closer color proximity to the compositing screen.
• Avoid low-contrast lighting, fog, and smoke Low-contrast images make removal of the background more difficult. Fog and smoke make it nearly impossible. Effectively creating a believable composited image with a smoking cigarette is only possible with high-end equipment.
• Test the lighting Light up the blue screen and leave the actors in darkness. This will allow you to see if there is any spill onto the hair or shoulders of the actors in the scene. If there is spill, try to move your actors farther away from the screen.
• Highlight with the opposing color To minimize the effect of spill, you can cast colored light at the opposite end of the spectrum onto your actors to cancel some of the effect. Use magenta light to cancel spill for green screens and orange light for blue.
• Use mirrored surfaces for the actors to stand on If you need to do a wide shot and show the actor’s feet, have them stand on a mirrored surface (such as Mylar) rather than material with the composite color. The mirrored surface will reflect the surrounding composite color, yet minimize the amount of color spilled onto the actor.
• Eliminate reflective surfaces Surfaces such as chrome steel armrests on a chair can reflect the compositing screen color and will disappear when the background color is removed. Use colored tape or dulling spray (or hairspray) to reduce and eliminate the reflective surfaces of items.
• Light the compositing screen as uniformly as possible Having uniform lighting on your screen will be one of the more challenging tasks of compositing. The background should be lit uniformly across the surface. Any shadows or highlights make compositing much more difficult.
• Avoid finely stranded objects Did you notice that everyone had slicked hair in the Matrix movie? Sure the slicked hair looked cool, but it had a more important technical aspect – it minimized compositing artifacts. Fine, frizzy hair is one of the most difficult subjects to composite. Try to avoid hairstyles, wardrobe, or props that have fine strands including fur, splayed fiber-optic cable (such as those fiber effects lamps), angora sweaters, and trolls.
• Use light cues properly There are a variety of small cues that will tell the audience that the background is fake. The most obvious cues are the light sources and the shadows. If the background picture will show the sun streaming down from behind, a lack of backlight on the actor will make it obvious that he and the background have been shot separately.
• Match background to composite color If you composite a black background into the scene, fringing around the actor (in the color of your composite screen) will be difficult or impossible to avoid. To minimize the visibility of the fringe, make your background match the color range of your blue screen. A background scene that contains blues will make it harder to see any blue screen fringe. Likewise a green background will help footage shot using a green screen.
• With a green screen, use fluorescent lights Fluorescent lights are perfect for properly and evenly lighting the compositing screen. Green screens generally require less light to generate a solid hue, so the lower fluorescent output is not a problem. The light output is also a flat light that will reduce any highlights. Additionally, fluorescent lights have a slight green tinge, so they won’t muddy your screen color (as orange tungsten lights might).
Following the above guidelines should help you obtain better compositing footage. Keep in mind that besides lighting, the other primary determining factor in the quality of the footage is the grade of the camera. Unfortunately, DV cameras are one of the worst types of cameras to shoot compositing footage.
The reason for the poor DV performance is not resolution, but color space. The compression used by the MiniDV format loses a significant amount of the color information from the picture. Most of the compression takes place in the color space, meaning that information that can help produce a crisp composite is lost as the image is recorded to the MiniDV tape. Because the color information is used to separate the picture from the background, this loss is catastrophic for good blue screen work.
If you have a small amount of compositing work in your film, try to rent a DigiBeta or BetaSP camera to record those scenes. The results are substantially better than those you’ll create using a DV camera.
Construction
The needs of a compositing screen are different for different people. Guerilla filmmakers are getting advanced with their compositing work and the software technology is falling in price so rapidly that I’m already surprised at the fantastic quality of some no-budget work. Therefore, I’ve organized the following sections to provide you with a variety of construction methods.
Advanced compositing goes well beyond simply standing in front of a colored screen. Now even low-budget films are using props and actors that contain compositing color (famously Sgt. Dan’s missing legs in the movie Forest Gump). You can mix and match some of these techniques and color matching to fit most of your needs.
It is important to realize that compositing colors of Chroma Blue and Chroma Green are not the only colors or tints that can be used for compositing. In fact, any color or even no color can be the composite color. In the old days, something called ultra-black provided a color that stood apart from the normal footage spectrum that allowed it to be dropped for compositing. The Chroma colors are simply colors that have maximum reflectivity and minimize the tones that might be found in other materials.
That said, there are a large number of ways that you can create a compositing screen and you should use any material that you have available that will meet your needs. Since exact coloration in particular hues is not a prerequisite to the screen working properly, here are a few suggestions on materials that can be used for the blue screen application:
• Fluorescent green or blue posterboard for close-ups or small items These colors are actually very close to the Chroma colors. Making a large wall with this posterboard is problematic, however, because of expense and the shadows created by the seams between the board sheets.
• Shower curtains or tarps I’ve found shower curtains and tarps that almost match the hue of Chroma Blue. The shower curtain I have has the color specified as electric blue. The biggest problem with these surfaces (aside from the expense) is the semi-gloss finish. You want to try to avoid highlights of any type off the compositing screen itself.
• Custom mixed paint At your local paint store, you can have paint mixed that comes really close to the Chroma colors. Get a behind-the-scenes book (such as one on the movie Titanic) and take that to the paint store and have them mix to match that color. Sometimes a color close to Chroma Green can be found as Ultra Key Lime Interior Latex Flat. Check the swatches they have in the paint store to see if they have something pre-mixed that is close.
Setting up a compositing wall
One of the most difficult problems to avoid with compositing screen is shadows from the actors. Shadows cast by the actors onto the background screen are almost impossible to remove in post-production. Further, any spill light from the screen onto the actors will produce fringing around the actor in the final footage. Therefore, the actors must be a reasonable distance away from the screen. That in turn means that the compositing screen must be fairly large so that camera can get far enough away to capture the actor and the screen.
On a professional set, a large, lightweight frame is often used to host a large compositing cloth. Despite numerous tries, I haven’t been able to find an inexpensive and effective substitute for this frame. Therefore, I’ve found it easiest to temporarily dedicate a wall to holding the screen. This method works perfectly and can be setup temporarily and taken down without any major damage to the wall.

FIGURE 29.3 Restaurant supply stores and party stores sell rolls of matte plastic table covers.
First, you’ll need the blue screen material. With the help of a Smart & Final (a food service and restaurant supply store) salesman, I found an excellent blue screen material. Restaurant supply stores and party stores sell rolls of blue matte plastic (see figure 29-3) that are used for covering tables at banquet-type events. A roll of this blue plastic table cover roll contains 100 ft of the material with a 40 ft width, all for less than the price of an audio CD!
Check out your local stores to see if they have these rolls in blue (see figure 29-4). The color green at my local store was much to dark for use. If you can’t find it locally, check the Internet where it is often available under the brand name of Masterpiece. You’ll also need a box of about 100 thumbtacks and a roll of double-stick tape.
Since the roll is very long, but not very wide, make the runs horizontal. Therefore, cut two or more sheets that will cover the width of the wall you’ve chosen. Two sheets will provide a height of 6.5 ft, while three sheets will give you a 10-ft screen if your ceiling is high enough.
To construct a two-sheet (6.5 ft) blue screen, start by using two thumbtacks at the top corner of the lowest sheet. Place the tacks all along the top of the screen and make sure the length is tight. Don’t forget that any folds will create shadows that are terrible for compositing. Therefore, the sheet should be as tight as possible without tearing it. After you’ve tacked the top completely, do the left side. Progress to the right side of the sheet, pulling out any slack in the sheet. Finally tack down the bottom.
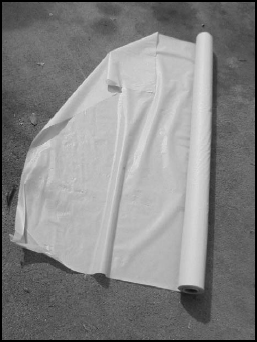
FIGURE 29.4 Check out your local stores to see if they have these rolls in blue.
For the next sheet, you’ll probably need a ladder to put it up. If you can get someone to give you a hand, that will make placement much easier. Before you put in the first thumbtack, make sure at the bottom that there is enough overlap to cover the thumbtacks of the other sheet. When you have the top of the second sheet tacked up, get out the double-sided tape. Run a length of tape over the thumbtacks on the bottom sheet. Pull the bottom of the second sheet tight and push it onto the double-stick tape. Finish by tacking down the left and right sides of the second sheet.
You should now have a screen that is almost 6 ft tall with only a single minor seam. Add as many other sheets using the same method until you have the size of screen that you desire. When filming is complete, you can take down the screen and the only damage to the wall will be the thumbtack holes.
Using still camera backgrounds
You are already aware of the fact that MiniDV severely compresses the color space for each frame. DV also has limited resolution. Many people have digital still cameras that have much greater resolution and do an excellent job of preserving the color space of a picture.
If you’re using a blue screen with a still subject (such as a miniature or model) and you have a good digital camera, you might consider taking the image against the blue screen with the still camera. This image will most likely have better color range and therefore have a better chance of properly dropping out when using compositing software. This is especially true with fine details such as fur or small antennas.