

Boom Mount
Applications
When you attach the microphone directly to the boom pole, any jars or bumps to the pole itself will be picked up by the microphone. To avoid this problem, professionals use a boom mount such as the one shown in figure 45-1. The boom mount suspends the microphone in an elastic cradle, so any jars are absorbed by the mount itself without being transferred to the microphone.
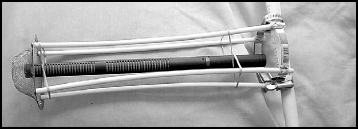
FIGURE 45.1 A boom mount suspends a microphone in an elastic cradle, so any jars are absorbed by the mount itself.
Additionally a boom mount allows for a fake fur windscreen to be placed over it. When wind blows against a microphone, it can be heard very plainly. The windscreen absorbs and deflects the wind, yet only muffles the incoming sound slightly. The windscreen is an essential accessory when shooting exterior scenes on even a slightly windy day.
PARTS
| Qty | Item |
| 4 | Plastic hangers |
| 4 | Self-tapping wood screws |
| 8 | Rubber bands |
| 1 | 4″ screw-adjustable metals band |
| 2 | 3″ screw-adjustable metals bands |
| 1 | 4″ diameter strainer |
| 1 | Sheet of fake fur |
| 1 | 6″ length of |
General Instructions
A professional boom mount can be extremely expensive, despite the simplicity of its construction. You can make one of your own with almost the same functionality for a fraction of the cost. The windscreen does block some of the sound, so it shouldn’t be used except on exterior shoots. The boom mount, however, provides excellent protection from bump sounds, so it can be used at any time.
To begin construction, you’ll need to create the four rods that form the body of the mount. You can cut wooden dowels for the support rods. However, I’ve found lengths of lightweight plastic are strong enough yet far lighter than wooden supports. Plastic rods can be easily obtained by cutting apart simple plastic hangers (see figure 45-2). You can use a saw to cut the four identical rods or use a PVC cutter to make them. The length will depend on the length of your boom mic. For my mount, I cut the rods to 14![]() .
.
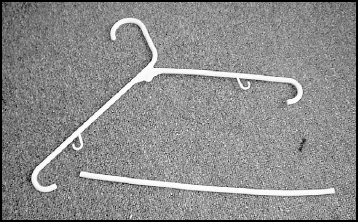
FIGURE 45.2 Plastic rods are obtained by cutting apart simple plastic hangers.
For the end cap of the boom mount, a kitchen strainer is used. Use an inexpensive kitchen strainer with the 4″ diameter as it forms a perfect half sphere to cap the end of the mount. I found a mesh drain strainer (see figure 45-3) that worked very effectively. The grid mesh blocks very little sound, but provides a useful structural mount for the windshield.
Use the self-tapping screws to attach the four rods to the strainer (see figure 45-4). Put the four screws at approximately four corner positions of the strainer. Tighten the screws, so the strainer won’t move in relation to the rods.
You’ll need to add rubber bands for the suspension of the microphone before you continue construction. Slip two rubber bands so that they encircle the top two rods. Add two more rubber bands to encircle the bottom two rods. Finally add one rubber band to each rod (four bands in total).
Use a saw or a knife to cut a 1![]() slit into the end of each of the rods. These slits will allow the rods to slip over the edge of the adjustable metal band. You can hold the band up to the ends of the rods to get a general idea of the angle that each cut should be made. Once the cuts have been made, slip the metal band into the slits.
slit into the end of each of the rods. These slits will allow the rods to slip over the edge of the adjustable metal band. You can hold the band up to the ends of the rods to get a general idea of the angle that each cut should be made. Once the cuts have been made, slip the metal band into the slits.
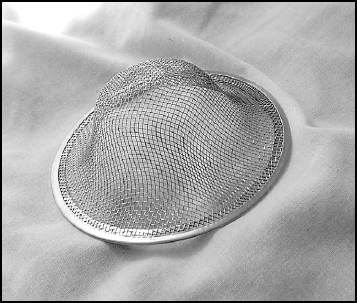
FIGURE 45.3 An inexpensive kitchen strainer makes a perfect half sphere to cap the end of the mount.
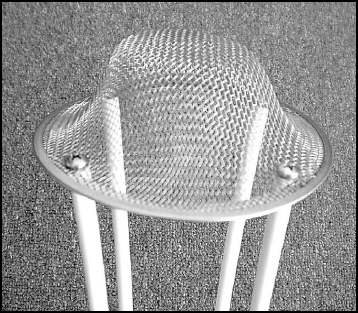
FIGURE 45.4 Use the self-tapping screws to attach the four rods to the strainer.
Now you’re going to use a wrapping technique on each of the individual rubber bands that you put on each rod. Start by pulling a rubber band to the edge where the rod inserts into the slit (see figure 45-5).
Twist the rubber band around back and down around the band (see figure 45-6). Pull the band back up and around (see figure 45-7). Keep twisting around until the rubber band is taut. When the band is tight, slip the rubber band on the top of the post (see figure 45-8).
Cut a length of PVC pipe that can connect to the boom pole from the last chapter. This pole will be attached to the metal band. Because the microphone is suspended in the boom mount, it cannot be removed easily and quickly like it could from the standard mic clip. For this reason, I find it most convenient to attach the mount to a small 6″ section of PVC.
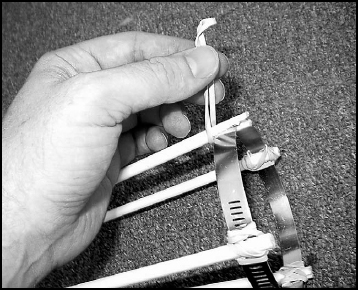
FIGURE 45.5 Pull the rubber band to the edge where the rod inserts into the slit.
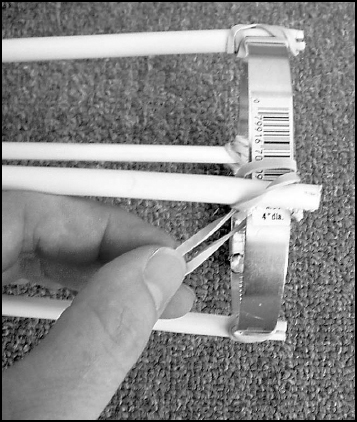
FIGURE 45.6 Twist the rubber band around back and down around the metal band.
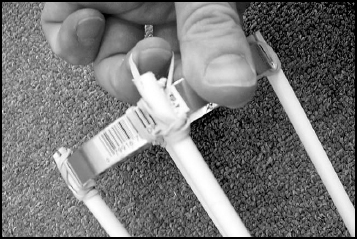
FIGURE 45.7 Pull the rubber band up and around.
The 6″ section is then connected to the end of the boom with a simple joining segment. That way, even if you’re going to leave some equipment on the set overnight, you can easily and conveniently take your expensive microphone with you without having to either remount it or wrangle the entire boom pole off the set.
Hold the PVC pipe up to the metal band and make two cuts into the pole that matches the diameter of the band (see figure 45-9).
Use the 3″ adjustable metal bands to secure the PVC pipe into place (see figure 45-10). You can accomplish putting the bands around both the PVC pipe and the band by first turning the screw counter-clockwise until the band has come free of the adjustment mechanism. You can then wrap the band around the pipe and band until the band slips back into the mechanism. Tighten down both bands until the pipe is secure.
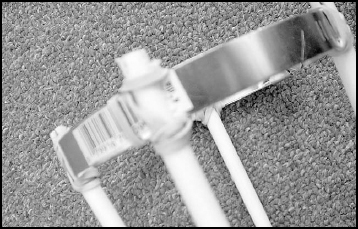
FIGURE 45.8 Keep twisting around until the rubber band is taut and then slip it on the top of the post.
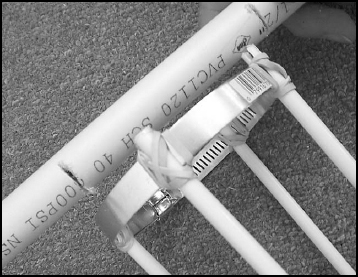
FIGURE 45.9 Make two cuts into the pole that match the diameter of the band.
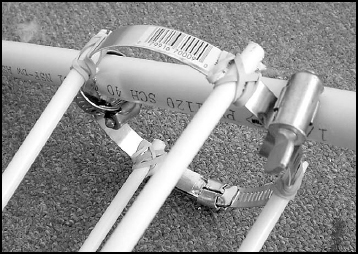
FIGURE 45.10 Use adjustable metal bands to secure the PVC pipe solidly into place.
Now is the time to mount your boom microphone. Pull the rubber band on the bottom rods over the front of the mic, and then pull the top rubber band over the top of the mic (see figure 45-11). This will suspend the mic between the bands.
Do the same suspension procedure for the back of the mic (see figure 45-12). The boom mount itself is complete. When you attach the mic cable, be sure to leave some slack between the back of the mic and the point where the cable begins wrapping around the boom pole. Otherwise the cable can tug the microphone creating jarring noise and defeating the purpose of the boom mount.

FIGURE 45.11 Pull the bottom rubber band over the front of the mic and then pull the top rubber band over the mic.
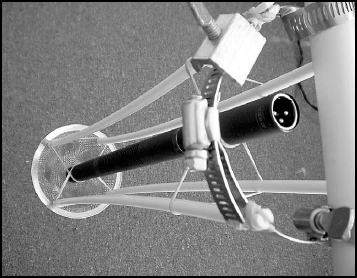
FIGURE 45.12 Perform the same suspension procedure for the back of the mic.
To create the windshield, cut an area of fake fur (see figure 45-13) that is big enough to create a cylinder that will cover the boom mount. Remember that it should be long enough to cover the mount itself and have enough material for flaps on the front and back.
If you have sewing skills, you can sew the proper cover. I found it easier to staple the cover together. I did sew some buttons onto the shield for the front and back flaps. On professional windshields they commonly use zippers and occasionally Velcro. I always try to avoid Velcro near my sound equipment since even a little of the tearing sound (caused by the wind, a bump, etc.) will destroy your soundtrack.
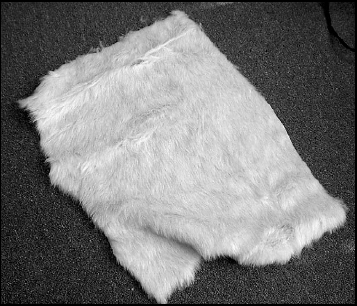
FIGURE 45.13 Cut an area of fake fur big enough to create a cylinder that will cover the boom mount.
Suggestions
Here are a few suggestions to help you get the best use from the boom mount:
• Get a mount transport box I bought a transparent plastic container at a dollar store and used it as a boom mount transport box. While not fragile, it is easy for the mount to be twisted and damaged by other heavy equipment. You should get or make some type of transportation container.
• Remove your mic when not in use Although you would probably store your microphone separately anyway, it is important to save the elasticity of the rubber bands. Eventually you’ll have to replace the bands anyway, but removing the mic and letting them remain slack for storage will maximize the lifespan of each band.
• Make a windshield from a stuffed animal If you can’t find fake fur for an inexpensive price, you can always skin a stuffed animal. One soundman I know found a large bear at a thrift shop and made three or four windshields from the toy.