
Defining Source Systems in ER/Studio
Data sources can originate from the model you are working in, from external sources imported into the active diagram, or from data sources created on the Data Lineage tab. The source can be imported from other ER/Studio files, databases, or SQL files.
If you are using the Repository, to add a new source, click on the Data Lineage tab, and then choose the following command:
|
Menu |
Toolbar |
Explorer |
Shortcut Key |
Shortcut Menu |
|
n/a |
n/a |
Right-click on Other Sources and then select New Source… |
n/a |
n/a |
You may receive the pop up window in Figure 12.3 which warns you that the list of changes you made up to this point will be erased from the undo history, meaning once you proceed, you will not be able to undo any changes you made previously. You can click <Yes> and also suppress this message from appearing in the future by clicking Do not display this dialog again.
Figure 12.3 Undo/Redo Warning pop up

The Data Source Properties editor appears, as in Figure 12.4.
Figure 12.4 Data Source Properties editor

There are two tabs on this screen:
|
Tab |
Here’s what you need to know: |
|
General |
The name you provide here will be displayed as a data source in the Other Sources node within the Data Lineage tab. Select from the drop down the type of source it is (whether Logical, Physical, Flat File or Other). You can also add a definition for the source on this tab. Connectivity Properties are useful to enter when connecting to a database. You can leave this section on the screen empty for ER/Studio files that you are sourcing from. |
|
Model Usage |
This is a read-only display of the source defined on the General tab. Ensure that it matches your intentions. |
If you are not using the Repository, to add a new source, click on the Data Lineage tab, and then choose the following command:
|
Menu |
Toolbar |
Explorer |
Shortcut Key |
Shortcut Menu |
|
n/a |
n/a |
Right-click on Other Sources and then select Import New Source… |
n/a |
n/a |
The first of a five page wizard appears. See Figure 12.5 for Page 1 of 5.
Figure 12.5 Import Source – Page 1 of 5
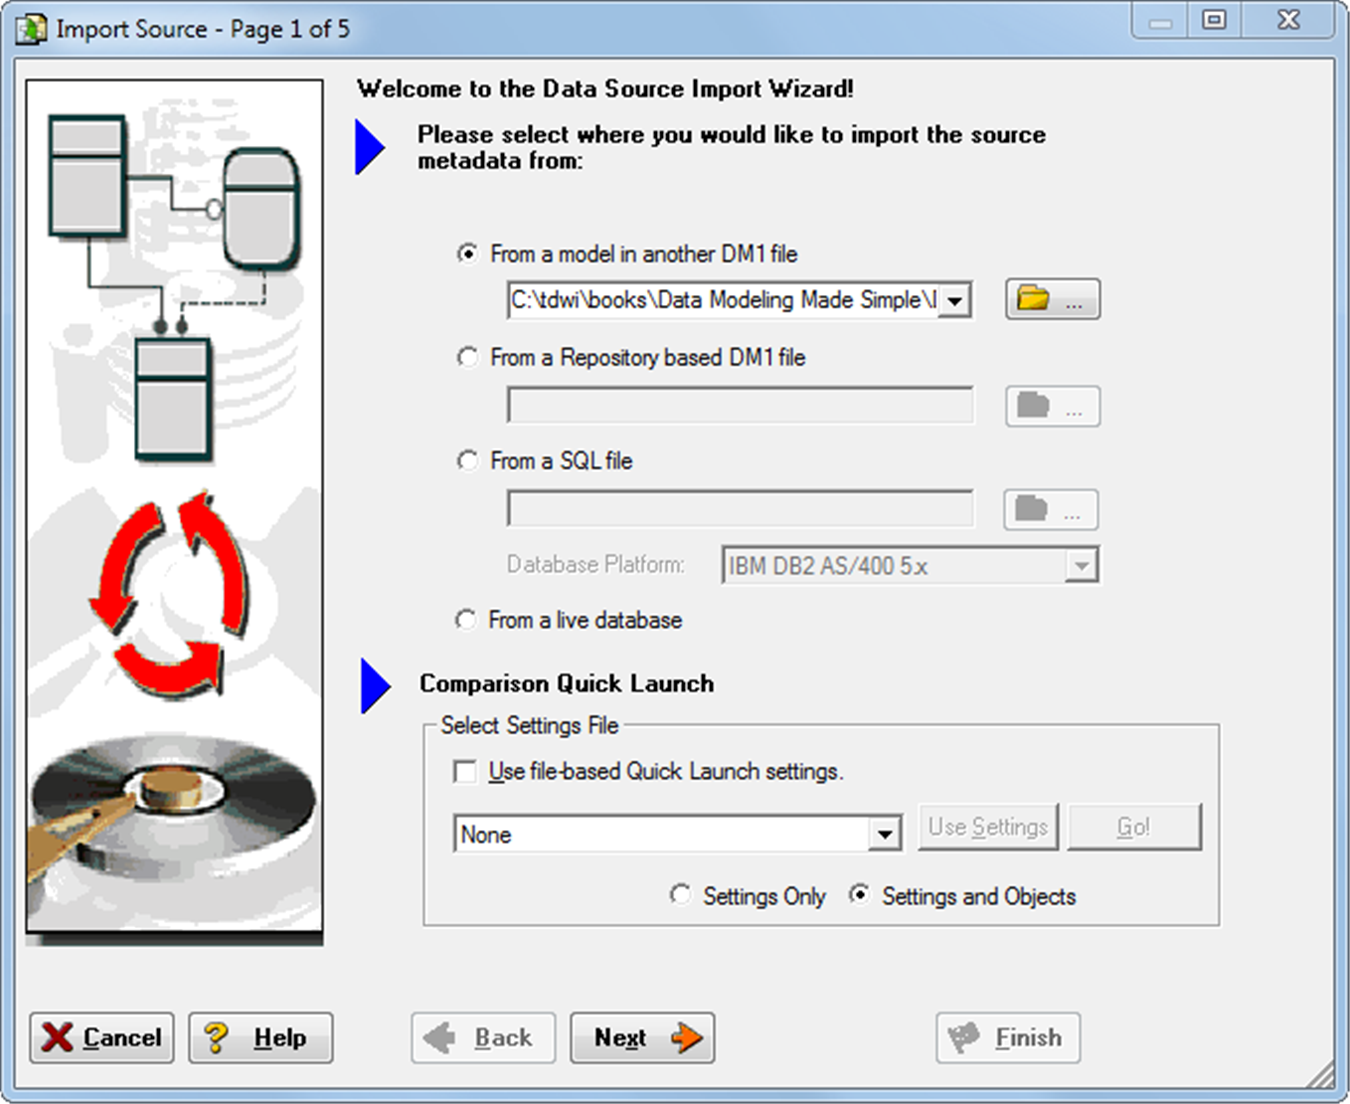
I created a data model just containing the Person entity from Figure 12.2 and I selected this model by clicking on the yellow folder to the right of From a model in another DM1 file. As with other wizards, you are given the option to load settings from a prior import source operation. Click <Next> to go on to Page 2 of the wizard, as shown in Figure 12.6.
Figure 12.6 Import Source – Page 2 of 5

On this screen, you can select the model you would like to import. I chose the Person physical data model. Click <Next> to go on to Page 3 of the wizard, as shown in Figure 12.7.
Figure 12.7 Import Source – Page 3 of 5

On this screen, select the types of metadata you would like imported. The default is to bring in everything. Click <Next> to go on to Page 4 of the wizard, as shown in Figure 12.8.
Figure 12.8 Import Source – Page 4 of 5

On this screen you can select the entities you would like to import. Because our model in this example has just the single entity Person, it is an easy screen to complete. You can also optionally save your settings so you can load them to save time the next time you import a source. Click <Next> to go on to Page 5 of the wizard, as shown in Figure 12.9.
On this screen, we can go through each source entity and decide what to do if an entity with that same name already exists in our model. In this case it is easy, as the Person entity does not exist in our model. We can also run a report to review these results in HTML or RTF format. Click <Finish> to complete the wizard, and you will notice the new source appearing in the Other Sources folder.
Figure 12.9 Import Source – Page 5 of 5
