The Out Of Office Assistant is great for generating automatic replies to messages that arrive in your Inbox when you’re out of the office. However, the Out Of Office Assistant sends an Out Of Office response only the first time a message arrives from a given sender. Subsequent messages go into the Inbox without generating an automatic response.
In some cases, you might want Outlook 2007 to generate automatic replies to messages at any time or for other types of accounts that do not use Exchange Server. Perhaps you’ve set up an Internet e-mail account to take inquiries about a product or service you’re selling. You can create a rule to automatically send a specific reply to messages that come in to that account. Or you might want people to be able to request information about specific products or topics by sending a message containing a certain keyword in the subject line. In that case, you can create a rule to generate a reply based on the subject of the message.
Note
In Web jargon, applications or rules that create automatic responses are often called autoresponders.
You create automatic responses such as these not by using the Out Of Office Assistant, but by creating custom Outlook 2007 rules with the Rules Wizard. As with other rules, you specify conditions that incoming messages must meet to receive a specific reply. For example, you might specify that an incoming message must contain the text Framistats in its subject to generate a reply that provides pricing on your line of gold-plated framistats.
Note
You aren’t limited to specifying conditions only for the subject of an incoming message. You can use any of the criteria supported by the Outlook 2007 rules to specify the conditions for an automatic response.
When you use a custom rule to create an automatic response, you don’t define the reply text in the rule. Rather, you have two options: specifying a template on your local computer or setting up a specific message on the server. If you opt to use a template on your local computer, you create the message in Outlook 2007 and save it as a template file.
Follow these steps to create the template:
Begin a new message, and then enter the subject and body but leave the address boxes blank.
Click the Microsoft Office Button, and then choose Save As.
In the Save As dialog box, specify a path and name for the file, select Outlook 2007 Template (*.oft) in the Save As Type drop-down list, and then click Save.
Using a template from your local system causes the rule to function as a client-side rule. As a result, Outlook 2007 can use the rule to process accounts other than your Exchange Server account (such as a POP3 account), but Exchange Server can’t generate automatic responses when Outlook 2007 isn’t running or is offline.
Troubleshooting
Your autoresponse rule executes only once
When you create a rule using the Reply Using A Specific Template rule action, Outlook 2007 executes the rule only once for a given sender in each Outlook 2007 session. Outlook 2007 keeps track of the senders in a list and checks incoming messages against the list. For the first message from a given sender that matches the rule conditions, Outlook 2007 generates the response; for subsequent messages, Outlook 2007 doesn’t generate the response. This prevents Outlook 2007 from sending repetitive responses to a person who sends you multiple messages that satisfy the rule conditions. Closing and restarting Outlook 2007 refreshes the sender list, and the next message from that sender that meets the criteria generates a response. The Out Of Office Assistant uses the same process—and this behavior is by design.
If you create a server-side rule that uses Have Server Reply Using A Specific Message, Exchange Server creates an autoresponse for all messages that meet the specified conditions, regardless of whether the message is the first from a particular sender.
Follow these steps to create a client-side rule that responds to incoming messages with a reply from a template stored locally on your computer:
Using Outlook 2007 as your e-mail editor, compose the reply message and save it as a template (.oft) file.
Choose Tools, Rules And Alerts to open the Rules And Alerts dialog box.
Click New Rule.
Select Check Messages When They Arrive, and then click Next.
Specify the conditions for the rule (such as Sent Only To Me or Where My Name Is In The To Box), and then click Next.
Select Reply Using A Specific Template, and then in the rule description area, click the A Specific Template link.
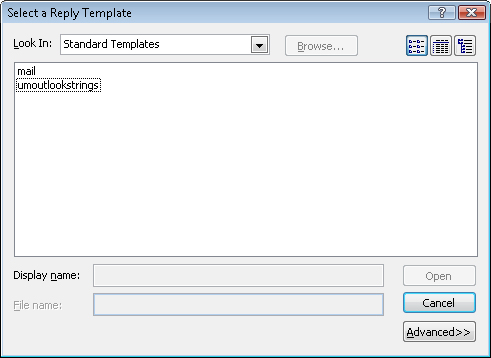
In the Select A Reply Template dialog box, shown in Figure 13-4, select the template that you want to use for the reply, and then click Open.
Click Next, and then specify exceptions, if any, for the rule.
Click Next, specify final options for the rule, specify a name for the rule, and then click Finish.
Follow these steps to create a server-side rule to generate automatic responses using a message stored on the server:
Choose Tools, Rules And Alerts to open the Rules And Alerts dialog box.
Click New Rule.
Select Check Messages When They Arrive, and then click Next.
Specify the conditions for the rule, and then click Next.
Select Have Server Reply Using A Specific Message, and then in the rule description area, click the A Specific Message link.
Create the message using the resulting message form, specifying the subject and text but no addresses (unless you want to copy the reply to a specific address), and then click Save and Close.
Click Next, and then specify exceptions, if any, for the rule.
Click Next, specify final options for the rule, and then click Finish.

