
If you often send messages to groups of people, adding all their addresses to a message one at a time can be a real chore, particularly if you’re sending the message to many recipients. Distribution lists in Outlook 2007 help simplify the process, enabling you to send a message to a single address and have it broadcast to all recipients in the group. Instead of addressing a message to each individual user in the sales department, for example, you could address it to the sales distribution group. Outlook 2007 (or Exchange Server) takes care of sending the message to all the members of the group.
You can create distribution lists in the OAB. You can’t create distribution lists in the GAL or other Exchange Server address lists—only the Exchange Server system administrator can create the distribution lists on the server. However, you can modify distribution lists on the Exchange Server computer if you’re designated as the owner of the list.
Setting up a distribution list in your OAB is a relatively simple procedure. You can create a distribution list using addresses from multiple address books, which means, for example, that you might include addresses from the GAL on the Exchange Server computer as well as personal addresses stored in your Contacts folder. You can also include addresses of different types (for example, Exchange Server addresses, Internet addresses, and X.400 addresses). In general, it’s easiest to set up a distribution list if all the addresses to be included already exist, but you can enter addresses on the fly if needed.
Follow these steps to create a distribution list:
Open the address book.
Choose File, New Entry or right-click in any area of the address list field and click New Entry.
Select from the drop-down list the address book in which you want to store the distribution list.
In the Select The Entry Type list, select New Distribution List, and then click OK to display the Distribution List dialog box, as shown in Figure 6-12.
In the Name box, specify a name for the list. This is the distribution list name that will appear in your address book.
Click Select Members to open the Select Members dialog box (see Figure 6-13).
Add members as needed or manually enter the e-mail address in the Members dialog box to enter new addresses if the addresses don’t already exist in one of your address books. Click OK when you finish adding members to the list. Remember to separate each entry by a semicolon if you are adding members manually.
Set other options as needed for the distribution list—for example, you can assign categories to the list.
Click OK and Save And Close in the Distribution List dialog box.


Note
Select the Advanced Find option in the Distribution List dialog box to search all your address books for members. Enter a name or partial name to display all address book matches to find the desired contact.
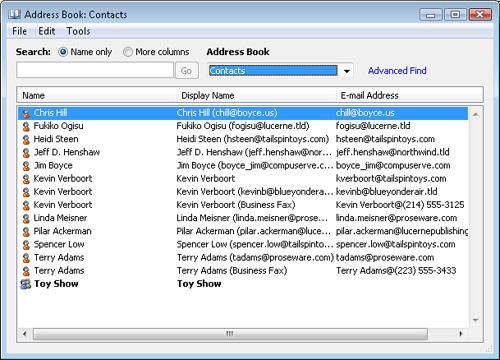
Distribution lists appear in the address book with a group icon and a boldface name to differentiate them from individual addresses (see Figure 6-14).
Over time, you will add or remove names from your distribution lists. To modify the contents of a list, locate the distribution list in the address book or in your Contacts folder, open the list, and then use the Select Members button to modify the list. You can also remove members from the list by selecting the member and then clicking the Delete button on the toolbar, or by pressing Delete on your keyboard.
You can change the name of a distribution list any time after you create it to reflect changes in the way you use the list, to correct spelling, or for any other reason. To rename a distribution list, locate the list in the address book, open it, and then change the name in the Name box. Click Save And Close to apply the change.
You can delete a distribution list the same way you delete an address. Locate the distribution list in the address book or Contacts folder, select it, and then click the Delete button on the toolbar or press Delete. Alternatively, you can right-click the list and choose Delete from its shortcut menu.
If you include a distribution list in the To or Cc field of a message, all the recipients of your message—whether members of the distribution list or not—can see the addresses of individuals in the list. Outlook 2007 doesn’t retain the list name in the address field of the message but instead replaces it with the actual addresses from the list.
In some cases, you might not want to have their addresses made public, even to other members of the list. In these situations, add the distribution list to the Bcc (blind carbon copy) field instead of the To or Cc field. The Bcc field sends copies of the e-mail to all addresses and distribution lists but keeps the addresses hidden from the other recipients.
Regardless of where you create a distribution list, you can’t allocate some addresses in the list to the To field and other addresses to the Cc or Bcc field. You can, however, place the distribution list address in either the Cc or Bcc field, if needed.
If you often need to separate addresses from distribution lists into different address fields, you can use a couple of techniques to simplify the process. First, consider splitting the distribution list into two or three separate lists. This approach works well if the To, Cc, and Bcc fields generally receive the same addresses each time. A second approach is to create a template with the addresses already filled in:
Start a new mail message.
To view the Bcc field, click the Options tab on the ribbon and then click Show Bcc.
Fill in the addresses in the appropriate fields as needed.
Click the Office button and choose Save As.
In the Save As dialog box, choose Outlook Template from the Save As Type drop-down list.
Specify a name and location for the template and click Save.
When you need to send a message using the template, browse to the folder in which the template is stored and double-click the file to open the message template. Add any additional addresses, text, or attachments; then send the message as usual.
You can use distribution lists on Exchange Server—which are set up by the system administrator—the same way you use local distribution lists to simplify broadcasting messages to multiple recipients. (As mentioned earlier, you can’t create distribution lists in the GAL or other Exchange Server address lists from Outlook 2007, although you can modify such a list if you are designated as the list owner.)
You can use a server-side distribution list the same way you use a local distribution list. Select the list from the appropriate address list on the server. The list name is converted to addresses when you send the message, just as a local distribution list is.
If you prefer working through your local address books instead of the server address lists, you might want to add a server-side distribution list to your local Contacts folder. You can easily do so through the address book or the list’s dialog box. Open the address book, select the distribution list, and then choose File, Add To Contacts.
Note
If you have the list’s dialog box open, click Contacts on the General tab. Outlook 2007 then adds the list to your Contacts folder.
When Outlook 2007 displays the distribution list, you can then modify the group, assign categories, send a meeting request or e-mail, mark it as private, or even use the Proof button to run spell-check or use the thesaurus (see Figure 6-15). Make any necessary changes to the distribution list and then click Save And Close.
