
You can work with toolbars as they’re provided in Outlook 2007, or you can customize their location and contents to suit your preferences. This section explains how to relocate toolbars, add and remove commands, and configure custom options.
Outlook 2007 includes the menu bar and three toolbars by default: Standard, Advanced, and Web. You can also create your own toolbars (see "Creating Custom Toolbars" later in this chapter). Outlook 2007 makes it easy to rearrange your screen by displaying or hiding toolbars. You also can move toolbars to different locations in the Outlook 2007 window.
You probably use the same one or two toolbars on a regular basis but sometimes need to display or hide a particular toolbar. By default, Outlook 2007 always displays the menu bar—you can’t turn it off. Outlook 2007 also displays the Standard toolbar by default, although you can turn it off if you don’t use it.
To display or hide a toolbar, choose View, Toolbars, and then select the toolbar in question.
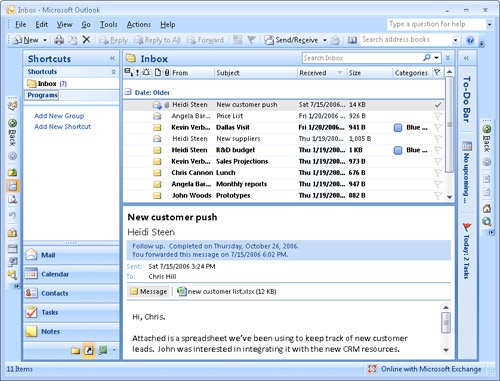
All Outlook 2007 toolbars—including the menu bar—are dockable. This means that you can attach the toolbar to any of the four sides of the Outlook 2007 window. You can also float a toolbar. Figure 26-9 shows toolbars docked at the left and right edges of the Outlook 2007 window. Figure 26-10 shows a toolbar floating on the desktop.

On the left in each toolbar (if the toolbar is displayed at the top or bottom of the Outlook 2007 window) or at the top (if the toolbar is docked at the right or left edge of the window) is an anchor that you can use to move the toolbar. Just click and drag the toolbar to the desired location.
Outlook 2007 gives you considerable control over the appearance and content of its toolbars. Because menus and toolbars are very similar, you use a similar process to modify menus and toolbar items. The following sections explain how to make several types of changes to your toolbars, including adding new ones.
Note
If you wreak havoc with the default toolbars in your zeal to customize them, you can restore them with relative ease. For details, see "Recovering the Default Toolbars" later in this chapter.
You can modify the existing toolbars, but in many cases, you’ll probably want to create your own. For example, you might want to create a toolbar for remote mail. Perhaps you use another group of commands to which you’d like quick access.
After you add a new toolbar, you can add buttons and menus to it (as explained in the following section). Because menus and toolbars are both considered toolbars in Outlook 2007, the process for creating a menu is the same as the one for creating a toolbar.
Follow these steps to create a toolbar:
In Outlook 2007, right-click any toolbar, and then choose Customize to open the Customize dialog box. Alternatively, choose View, Toolbars, Customize.
In the Customize dialog box, click the Toolbars tab, and then click New.
Type a name for the toolbar, and then click OK. Outlook 2007 opens a blank toolbar.
In the following section, you’ll learn how to add commands to your new toolbar.
The default toolbars provided in Outlook 2007 cover the most commonly used commands, but they are not all-inclusive. Therefore, you might want to add frequently used commands to the existing toolbars or create custom toolbars.
In either case, you need to know how to add buttons to a toolbar. Just follow these steps:
In Outlook 2007, right-click any toolbar, and then choose Customize to open the Customize dialog box. Alternatively, choose View, Toolbars, Customize.
Click the Commands tab, shown in Figure 26-11.
In the Categories list, select the command category containing the command you want.
In the Commands list, locate the command and drag it to the appropriate toolbar.
Repeat steps 3 and 4 to add other commands as needed, and then click Close to close the Customize dialog box.

If you don’t use certain commands on a toolbar, you might want to remove them to make room for others or to simplify the Outlook 2007 window.
To remove a button, follow these steps:
You can also rearrange the buttons on a toolbar. The key point to understand is that whenever the Customize dialog box is open, any action you take on a toolbar modifies that toolbar. For example, if you drag a button or command off the toolbar, Outlook 2007 removes that button or command.
Therefore, the basic method of reorganizing a toolbar is to open the Customize dialog box and then simply drag the buttons or commands, as follows:
Outlook 2007 inserts items on a toolbar using a set of default characteristics. However, you can change these characteristics for any toolbar item. For example, you can change the name of a menu, its shortcut key, or the icon assigned to a button. Following is a list of the modifications you can make:
Change an item’s name, reset it to its default properties, or delete the item.
Modify the button image assigned to a toolbar item by selecting a different image or editing the existing image.
Change the style of the item so that it appears as text only, image only, or a combination of image and text.
Assign a hyperlink to an item. When you click the item in Outlook 2007, the document or site referenced by the link opens.
Follow these steps to modify an existing toolbar item:
In Outlook 2007, open the Customize dialog box.
Right-click the command button or menu item that you want to change. Outlook 2007 presents a shortcut menu from which you can choose one of the following commands:
Reset. Resets the item to its default properties.
Delete. Removes the item from the toolbar.
Name. Changes the name of the item. Precede with an ampersand (&) the key that you want to use as the keyboard shortcut (the key you press instead of clicking the item). Note that some objects do not display their names by default.
Copy Button Image. Copies the button image of the selected item to the Clipboard for use on a different button or in another program (or for documentation).
Paste Button Image. Pastes the contents of the Clipboard on the item for use as the button image.
Reset Button Image. Resets the button to display its default image.
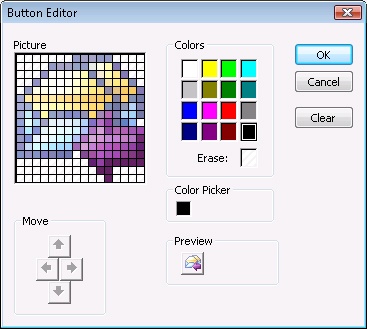
Edit Button Image. Opens the Button Editor dialog box, shown in Figure 26-12, so that you can edit the button image.
Change Button Image. Selects a different button image from a set of predefined images.
Default Style. Resets the button to its default style, such as image only or text only.
Text Only (Always). Shows the item as text without an image regardless of whether the item is on a toolbar or a menu.
Text Only (In Menus). Shows the item as text only (without an image) if it’s used on a menu.
Image And Text. Shows the item as an icon with a text description beside it.
Begin A Group. Inserts a separator above a selected menu item or to the left of a selected toolbar button.
Edit Hyperlink. Assigns to the selected item a hyperlink that opens the linked site or document when you select the toolbar item in Outlook 2007.
Click Close to close the Customize dialog box.
Some Outlook 2007 toolbar items use a drop-down list to display a list of information or to allow you to type information such as a search phrase or an address. If the drop-down list isn’t wide enough to adequately display its information, you can widen it. You can also shrink lists that are too wide.
You can configure toolbars to display their buttons using either small icons (the default) or large icons. If your monitor is configured for a relatively high resolution, which can make the toolbar buttons hard to distinguish, configuring the toolbars for large icons can considerably improve their readability.
Follow these steps to configure button size:
In Outlook 2007, open the Customize dialog box.
Click the Options tab, shown in Figure 26-13.
Select the Large Icons check box to turn on large icons, or clear the check box if you want to use the default small icon size. The change occurs immediately when you select or clear the option.
Click Close to close the Customize dialog box.

Troubleshooting
Add or Remove Separators on Toolbars
Toolbars can include separators between groups of toolbar buttons. Separators are purely an aesthetic element—they serve no other purpose than to provide a visual separation between items on a toolbar or menu.
No obvious feature in the user interface gives you the ability to drag separators into position or remove them. Actually, adding and removing them is easy, but you have to know the secret.
Follow these steps to add or remove a separator on a toolbar:
In Outlook 2007, open the Customize dialog box.
Locate the two items that you want to separate. Drag the item on the right slightly to the right. Outlook 2007 inserts a separator to the left of the item you dragged.
To remove a separator, drag the item just to the right of the separator slightly to the left.
Click Close to close the Customize dialog box.
You can also add a separator to a toolbar by using an item’s shortcut menu. Open the Customize dialog box, right-click an item, and choose Begin A Group. Outlook 2007 inserts a separator to the left of the item.
Follow these steps to add or remove a separator on a menu:
In Outlook 2007, open the Customize dialog box.
Locate the two menu items that you want to separate. Drag the lower of the two items slightly downward. Outlook 2007 inserts a separator just above it.
To remove a separator, drag the menu item just below the separator slightly upward.
Click Close to close the Customize dialog box.
If you’ve made quite a few changes to the default toolbars, the time might come when you want to reset them to their default state.
You can do so easily, as the following steps illustrate:
Although Outlook 2007 doesn’t allow you to rename the default toolbars, you can rename any custom toolbars that you’ve created.
Follow these steps to rename a custom toolbar:
You can turn off any toolbar to hide it. However, if you no longer need a custom toolbar that you’ve created, you probably want to delete it.
Follow these steps:
Outlook 2007 stores your toolbar definitions in the Outcmd.dat file. The data stored there includes changes that you make to the default toolbars as well as custom toolbars that you create. Outlook 2007 maintains a separate Outcmd.dat file for each user. If you share your computer with others who also use Outlook 2007, there are probably multiple Outcmd.dat files stored on the system. By default, Outlook 2007 stores the file in the Application DataMicrosoftOutlook folder of your profile (Windows XP) or AppDataRoamingMicrosoftOutlook (Windows Vista™).
If you’ve spent quite a bit of time customizing the toolbars and want to share those changes with others, you can do so by sharing your Outcmd.dat file by e-mail, file share, or similar method. If someone else has customized such a file for you, you can easily install it on your system. Just keep in mind that if you import someone else’s Outcmd.dat file, you will lose any customized toolbars that you have created previously on your computer.
If you’ve received a customized Outcmd.dat file from another user, follow these steps to install it on your system:
Obtain the customized Outcmd.dat file from the other user (or if you’re sharing yours, give the file to others who need its customized toolbars).
Exit Outlook 2007, and then locate the Outcmd.dat file in your profile folder on your system.
Rename the existing Outcmd.dat file as Outcmd.old.
Copy the other user’s Outcmd.dat file to your profile folder where the original Outcmd.dat file was located.
Restart Outlook 2007.
As mentioned, Outlook 2007 stores toolbar customization settings in the Outcmd.dat file. If your Outcmd.dat file becomes corrupted, you can restore the default toolbars by deleting or renaming the existing Outcmd.dat file. This process is also handy when you’ve made extensive changes to your toolbars and want to restore them to their defaults.
Follow these steps:
Outlook 2007 lets you configure a handful of properties that control the way your toolbars appear and function. To set these properties, start Outlook 2007, and then choose View, Toolbars, Customize. Click the Options tab in the Customize dialog box (shown earlier in Figure 26-13).
The Options tab provides the following settings:
Show Standard And Formatting Toolbars On Two Rows. Shows the Standard and Formatting toolbars on two rows when both toolbars are displayed.
Always Show Full Menus. Turns off adaptive menus (those that show only the most frequently used commands) and shows all menu items. Clear this option to turn on adaptive menus.
Show Full Menus After A Short Delay. Shows all menu items after you position the mouse pointer on a menu for a short delay period.
Reset Menu And Toolbar Usage Data. Resets the usage data for adaptive menus. This command has no effect on the location of a toolbar or on customized toolbars (that is, toolbar modifications remain as they are).
Large Icons. Shows large toolbar icons.
List Font Names In Their Font. Displays font names in their actual font to give you a sample of the font.
Show ScreenTips On Toolbars. Shows ScreenTips when you position the mouse pointer over a toolbar button.
Show Shortcut Keys In ScreenTips. Includes with the ScreenTip text the shortcut key (such as a function key), if any, assigned to each toolbar item.
Menu Animations. Lists a menu on which you can select a menu animation effect for Outlook 2007 to use when you open a menu. Select the (System Default) option to use your operating system’s default menu effect.
Note
You can configure the operating system’s menu animation effect on the Effects tab in the Display dialog box. Right-click the desktop, and then choose Properties to display this dialog box. Click the Appearance tab, click Effects, and then configure the system for no animation to turn off animations in Outlook 2007.