
Information Rights Management (IRM) technology, introduced in Microsoft Office 2003, has been improved in Microsoft Office 2010. IRM lets you, the creator of an Excel (or other Office) document, specify which users or groups of users are permitted to read, edit, print, or copy that document. As a means of preventing unauthorized access to or use of your work, it’s a more robust mechanism than traditional firewall methods because the access controls remain with your file, even if your file is moved to a different storage medium. It’s also more convenient and more robust than file-level password protection. Rather than distributing passwords to authorized users, you can simply name those users when you set the permissions associated with your document. And you can control the use of your document in a granular fashion, allowing some users to only read, others to read and print, still others to edit (with or without printing permission), and so on.
To set up IRM in your organization, you need to install the Microsoft Windows Rights Management Services (RMS) on a server running Windows Server and Internet Information Services (IIS). This server must be part of an Active Directory domain. In addition, you need a client/server database application such as Microsoft SQL Server.
Before you can apply IRM permissions to a document or use a protected document, you need to have the client-side IRM component installed on your computer. The first time you use IRM in any manner, you’re prompted to download and install this component (it’s free) from a Microsoft site if the component is not already in place. If you’re using Windows Live ID authentication, you’re also prompted (if necessary) to sign on—or to acquire a Windows Live ID if you don’t already have one.
Full use of IRM requires Office 2003 or a more recent version. Users with older versions can, however, read protected documents for which they have appropriate permission by downloading the free IRM Viewer from www.microsoft.com.
When you open a file that has been protected using IRM, Excel prompts you to download the RMS client if it is not already installed. But you don’t need to wait: You can install the RMS client and use IRM at any time.
To protect a document with IRM, click the File tab, and then click Info. Click Protect Workbook, Restrict Permission By People, and then select Restricted Access. If you have not yet set up IRM on your computer, the dialog box shown in Figure 25-15 appears. After you have an account set up, the dialog box shown in Figure 25-16 appears.

Click the Next button in the Service Sign-Up dialog box to set up free IRM services through Windows Live, whether or not you already have a Windows Live account. (You can register for one right away if needed.) This wizardlike dialog box steps you through the process, allowing you to specify whether you are using a private or shared computer and to select a user account if more than one are available.
After an IRM account has been established, click the File tab, Info, Protect Workbook, Restrict Permission By People, and select Restricted Access to open the Permission dialog box shown in Figure 25-16. Select the Restrict Permission To This Workbook check box. In the Read and Change boxes, specify the e-mail addresses of those users to whom you want to grant read and change permissions. (Separate addresses with semicolons.) Alternatively, click the Read and Change buttons to the left of the boxes to select names from your address book.

The Read and Change options in the dialog box shown in Figure 25-16 apply default settings for those two permissions levels. To refine your permissions settings and take advantage of additional options, click More Options, and fill out the dialog box shown in Figure 25-17.
The list at the top of this dialog box shows the people to whom you have granted permission to read or change your document. The first address in the list should be your own, and you should set your access level to Full Control. Your address should appear again in the Users Can Request Additional Permissions From box. Users who are denied permission to use your document or who want a higher level of access are given this link as a means to request an adjustment. You can type a different address in the Users Can Request Additional Permissions From box if you want their appeals to go elsewhere. (You can also clear this check box if you don’t want to be bothered with change requests.)

Figure 25-17. Clicking More Options in the Permission dialog box takes you to this dialog box, where you can fine-tune your permissions settings.
If you want your document to be accessible only for a particular period of time, select the This Workbook Expires On check box, and specify a date. No one but you will be allowed to open the document after it expires.
Printing is not allowed for any user except you by default. To allow other users to print the document, select the Print Content check box in the dialog box shown in Figure 25-17. This setting affects both the read and change access levels.
By default, users with change access are allowed to use the Copy command in your workbook, and users with read access are not. To allow read-only users to click the Copy command, select the Allow Users With Read Access To Copy Content check box. Be aware that allowing users to copy content means those users can replicate formulas and values in unprotected documents. On the other hand, even with the Copy command not available, users can avail themselves of screen-capture utilities to replicate images of your work.
Programmatic access to protected documents—for example, using a Visual Basic for Applications (VBA) macro in another Excel or Office document to read the contents of your protected document—is ordinarily not allowed for anyone but you. To turn on programmatic access (for both the read and change access levels), select the Access Content Programmatically check box.
To make the current settings the default for all future IRM-protected documents, click Set Defaults in the dialog box shown in Figure 25-17. When prompted, click OK to confirm that you want to make your current settings the default settings for IRM.
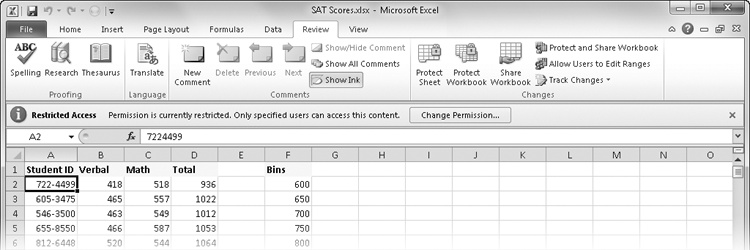
To modify the permissions of a document for which you have Full Control access, simply click the Change Permission button in the Message bar, as shown in Figure 25-18. (This appears only if you have configured permissions on the workbook.) When you click Change Permission, the dialog box shown in Figure 25-16 reappears.
To work with an IRM-protected document, simply open it in the usual manner. If necessary, the IRM client will contact the server to authenticate you, and you might experience a short delay. After the file is open, if you have only read access, you will find that nearly all the Excel commands and buttons on the ribbon are not available. Attempts to click the formula bar or press F2 will be met with a beep and an error message, the keyboard’s alpha keys will be inert, and the message bar tells you that the document is protected.
To see what you are permitted to do, click the Permission button at the left end of the status bar (next to the Ready indicator), or click the Change Permission button displayed in the Message bar. A dialog box appears listing your permissions. If you need a higher level of access, you can click Request Additional Permissions.
If you do not have permission to open the workbook, a dialog box notifies you and asks whether you want to request additional permission. If you click Yes, your default e-mail program opens a message addressed to the person whose e-mail address is in the Users Can Request Additional Permissions From box for the workbook.
Alternatively, if you have another Windows Live ID available to you—one with higher permissions—you can click Change User and specify the necessary authentication information. The same recourses are available to you if you try to open a document while logged on as an unauthorized person.