
To successfully plan and carry out a meeting, you’ll usually need to schedule resources as well as people. Resources are items (such as computers and projectors) or locations (such as a meeting room) that are required for a meeting. You select resources in much the same way you select attendees.
The ability to schedule resources is typically most useful when you need to set up a meeting, but you might find other occasions when this capability comes in handy. For example, you might want to schedule laptop computers for employees to take home for the weekend or schedule digital cameras to take to building sites.
You schedule a resource by sending a meeting request, adding the resource as a third type of attendee. (The other two types of attendees are Required and Optional, as previously mentioned; see "Selecting Attendees" earlier in this chapter.) Because a resource is scheduled as a type of attendee, it must have a mailbox and a method of accepting or rejecting meeting requests. When you use Outlook 2007 and Exchange Server 2003, a resource is almost identical to any other Exchange Server user except that it is configured to allow another user (the resource administrator) full access to its mailbox. In Exchange Server 2007, unlike user mailbox accounts, all resource mailbox accounts are automatically disabled (yet are still accessible as resources from within Outlook 2007).
The first step in setting up a resource for scheduling is to create (or have your system administrator create) a mailbox and an account for the resource. In many cases, resource account names are preceded by a symbol, such as # or &, so that the names, when alphabetized, appear as a group at the top or bottom of the GAL.
How resources are assigned on the mail server running Microsoft Exchange Server is dependent on which version of Exchange Server you are using. When you set up resource accounts on a server running Exchange Server 2003, you have to go into Active Directory Users And Computers (within the domain in which the server running Exchange is operating) and create and configure user accounts and the subsequent mailboxes. You then have to modify the Mailbox Rights and assign Full Mailbox Access to the resource administrator. The resource administrator has to create a new profile and use the profile to access the mailbox and configure (using the Scheduling Resources option) the Automatically Accept Meeting Requests And Process Cancellations option, which allows the resource scheduling to work. To avoid schedule conflicts, it’s also necessary to select Automatically Decline Conflicting Meeting Requests.
When you are using Exchange 2007, you can use new features to schedule both room and equipment resources. In Exchange 2007, instead of using the Active Directory Users And Computers console to add users and their mail accounts, you use the Exchange Management Console. To add a user account and mailbox to Exchange 2007, you browse to the Recipients Configuration container and then select the New Mailbox link. The New Mailbox dialog box provides four options for mailbox creation:
User Mailbox. The User mailbox is associated with a user account, enabling the user to send, receive, and store e-mail messages, calendar items, tasks, and other Outlook 2007 items.
Room Mailbox. The Room mailbox is reserved as a resource-type mailbox, and the associated account in the Active Directory® directory service is disabled.
Equipment Mailbox. The Equipment mailbox is also reserved as a resource-type mailbox, and the associated account in Active Directory is disabled.
Linked Mailbox. The Linked mailbox is employed for users that will access the mailbox from a separate trusted forest.
To assign resources for use in Outlook 2007, you add a new mailbox, select the resource type (either Room or Equipment), and then complete the required information (which is essentially the same information you would provide for any user account—name, logon name, password, and alias). After you have created a Room mailbox, for instance, when you click the Rooms button in an Outlook 2007 meeting form, all of the rooms associated with Room mailboxes will be displayed. Equipment resources (as well as rooms) are displayed in the Select Attendees And Resources list and can be included in the meeting request by selecting the desired equipment and clicking the Resources button.
To schedule a resource after you have configured it, create a meeting request and fill in the details. When you add attendees to the meeting request using the Select Attendees And Resources dialog box, select the resource you want to add from the list, and then click Resources, as shown in Figure 21-15. Resources are added to the Resources box instead of to the Required or Optional box. When you have finished adding resources, click OK. Then complete and send the meeting request as you normally would.

Note
For details about creating and sending meeting requests, see "Sending a Meeting Request" earlier in this chapter.
After you send the meeting request, Outlook 2007 (when used in an Exchange Server 2003 environment) responds with a message about the resource’s availability. If the resource is available during the time slot proposed for the meeting, Outlook 2007 notifies you that the resource has been booked successfully, as shown in Figure 21-16.
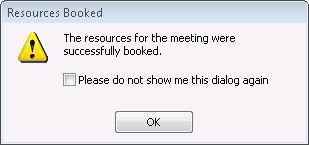
Figure 21-17 shows the message that appears when you try to book a resource in a time that overlaps with an existing meeting in that resource’s calendar (when in an Exchange Server 2003 environment). Click OK to return to the meeting form, where you must reschedule the meeting or choose a different resource.

Figure 21-17. When resources are already booked, you must change the meeting time or choose another resource.
Figure 21-18 shows the calendar for the resource being scheduled in the preceding examples. The meeting shown has been scheduled automatically.
