 Using Symbols in a Message
by Doug Sheresh, Beth Sheresh, Jim Boyce
Microsoft® Office Outlook® 2007 Inside Out
Using Symbols in a Message
by Doug Sheresh, Beth Sheresh, Jim Boyce
Microsoft® Office Outlook® 2007 Inside Out
- Microsoft® Office Outlook® 2007 Inside Out
- SPECIAL OFFER: Upgrade this ebook with O’Reilly
- A Note Regarding Supplemental Files
- Acknowledgments
- We’d Like to Hear from You!
- Introduction
- Who This Book Is For
- How This Book Is Organized
- Part 1—Working with Outlook
- Part 2—E-Mail and Other Messaging
- Part 3—Working with Contacts
- Part 4—Managing Your Time and Tasks
- Part 5—Customizing Outlook
- Part 6—Managing and Securing Outlook
- Part 7—Collaboration
- Part 8—Working with Office Server and SharePoint Services
- Part 9—Using Outlook with Exchange Server
- Part 10—Mobility
- Companion CD
- About the CD
- Conventions and Features Used in This Book
- 1. Working with Outlook
- 1. What’s New in Outlook 2007
- 2. Outlook Overview and Startup
- 3. Configuring Outlook Profiles and Accounts
- 4. Working in and Configuring Outlook
- Understanding the Outlook Folders
- Working with the Standard Outlook Views
- Using Other Outlook Features
- Configuring Outlook Options
- Using Outlook on the Web
- Accessing Your Mail Through a Browser
- Configuring Windows Settings for Outlook
- Using Add-Ins
- Using Outlook Effectively
- 5. Creating and Using Categories
- 2. E-Mail and Other Messaging
- 6. Managing Address Books and Distribution Lists
- Understanding Address Books
- Configuring Address Books and Addressing Options
- Finding People in the Address Book
- Using AutoComplete for Addresses
- Using Distribution Lists
- Automatically Adding Addresses to the Address Book
- Using the Mobile Address Book
- 7. Using Internet Mail Accounts
- 8. Sending and Receiving Messages
- Working with Messages
- Opening a Standard Message Form
- Addressing Messages
- Including Carbon Copies and Blind Carbon Copies
- Copying Someone on All Messages
- Using Templates and Custom Forms for Addressing
- Specifying Message Priority and Sensitivity
- Saving a Message to Send Later
- Setting Sending Options
- Controlling When Messages Are Sent
- Requesting Delivery and Read Receipts
- Using Message Tracking and Receipts Options
- Sending a Message for Review
- Replying to Messages
- Forwarding Messages
- Using Other Reply and Forwarding Options
- Deleting Messages
- Controlling Synchronization and Send/Receive Times
- Configuring Other Messaging Options
- Managing Messages and Attachments
- Working with Messages
- 9. Beyond Simple Text Messages
- 10. Finding and Organizing Messages
- 11. Processing Messages Automatically
- 12. Managing Junk E-Mail
- 13. Automatically Responding to Messages
- 14. Securing Your System, Messages, and Identity
- Configuring HTML Message Handling
- Protecting Messages with Digital Signatures
- Signing Messages
- Understanding S/MIME and Clear-Text Options
- Adding Your Digital Signature
- Setting Global Security Options
- Creating and Using Security Profiles
- Reading Signed Messages
- Changing Certificate Trust Relationships
- Configuring CA Trust
- Configuring CA Trust for Multiple Computers
- Viewing and Validating a Digital Signature
- Encrypting Messages
- Protecting Data with Information Rights Management
- 15. Receiving Messages Selectively
- 16. Using RSS Feeds
- 17. Using LDAP Directory Services
- 6. Managing Address Books and Distribution Lists
- 3. Working with Contacts
- 18. Creating and Managing Your Contacts
- Working with the Contacts Folder
- Creating a Contact Entry
- Creating Other Contacts Folders
- Working with Contacts
- Associating a Contact with Other Items and Documents
- Assigning Categories to Contacts
- Resolving Duplicate Contacts
- Phoning a Contact
- Sending an E-Mail Message to a Contact
- Connecting to a Contact’s Web Site
- Scheduling Appointments and Meetings with Contacts
- Assigning a Task to a Contact
- Flagging a Contact for Follow-Up
- Finding Contacts
- Making a Common Change to Multiple Contacts
- Viewing Contacts
- Printing Contacts
- Working with Distribution Lists
- Sharing Contacts
- Setting Contact Options
- Using Contacts Effectively
- 19. Using Microsoft Business Contact Manager
- Understanding What Business Contact Manager Can Do
- Using the Business Contact Manager Interface
- Working with Business Contacts
- Creating and Using Accounts
- Creating and Using Business Projects
- Working with Project Tasks
- Creating and Using Opportunities
- Creating Marketing Campaigns
- Tracking Item History
- Attaching Items
- Creating Reports
- Importing and Exporting Information
- Managing Your Business Contact Manager Data
- 18. Creating and Managing Your Contacts
- 4. Managing Your Time and Tasks
- 20. Scheduling Appointments
- Calendar Basics
- Working with One-Time Appointments
- Working with One-Time Events
- Creating a Recurring Appointment or Event
- Modifying an Appointment or Event
- Using Categories and Colors
- Printing Calendar Items
- Customizing the Current Calendar View
- Creating a Custom View
- Backing Up Your Schedule
- Managing Time Zones
- Managing Your Calendar Effectively
- 21. Scheduling Meetings and Resources
- 22. Managing Your Tasks
- 23. Tracking Documents and Activities with the Journal
- Understanding the Outlook Journal
- Using Automatic Journaling
- Adding Journal Items Manually
- Creating and Using Custom Entry Types
- Changing Journal Entries
- Connecting Journal Activities to Individual Contacts
- Viewing the Journal
- Printing Journal Items
- Sharing Journal Information
- Using the Journal Effectively
- 24. Making Notes
- Understanding Outlook Notes
- Configuring Note Options
- Working with Notes
- Viewing Notes
- Creating New Notes Folders
- 20. Scheduling Appointments
- 5. Customizing Outlook
- 25. Using Templates
- 26. Customizing the Outlook Interface
- Customizing the Navigation Pane
- A Quick Tour of the Navigation Pane
- Showing and Hiding the Navigation Pane
- Changing the Number of Buttons on the Navigation Pane
- Adding a Shortcut to an Outlook Folder or a Public Folder
- Adding a File Folder or Document to the Navigation Pane
- Adding a Web Site to the Navigation Pane
- Removing a Shortcut from the Navigation Pane
- Renaming a Shortcut in the Navigation Pane
- Working with Groups in the Navigation Pane
- Customizing the To-Do Bar
- Customizing Toolbars
- Working with Toolbars
- Creating Custom Toolbars
- Adding Items
- Removing Items
- Reorganizing Items
- Modifying Toolbar Items
- Changing the Width of the Drop-Down List
- Changing the Button Size
- Resetting Individual Toolbars
- Renaming a Custom Toolbar
- Deleting a Custom Toolbar
- Sharing a Custom Toolbar
- Recovering the Default Toolbars
- Controlling Toolbar Appearance and Behavior
- Customizing Outlook Today View
- Customizing the Navigation Pane
- 27. Creating Custom Views and Print Styles
- 28. Designing and Using Forms
- Overview of Standard Forms, Item Types, and Message Classes
- Creating Custom Forms from Standard Forms
- Creating Custom Forms from Scratch
- Creating Multipage Forms
- Adding and Arranging Controls
- Adding Graphics to Forms
- Adding User-Defined Fields
- Using Office Documents to Create Outlook Forms
- Publishing and Sharing Forms
- Using Forms Effectively
- 29. Automating Common Tasks
- 6. Managing and Securing Outlook
- 30. Managing Outlook Folders and Data
- Understanding Outlook Folders
- Working with the Folder List
- Using and Managing Folders
- Using a Folder
- Creating a Folder
- Adding a Folder Shortcut to the Navigation Pane
- Working with Favorite Folders
- Renaming a Folder
- Copying and Moving a Folder
- Deleting a Folder
- Setting Folder Properties
- Configuring General Folder Properties
- Configuring Home Page Properties for a Folder
- Configuring AutoArchive Properties for a Folder
- Configuring Administration Properties for a Folder
- Configuring Form Properties for a Folder
- Configuring Permissions for a Folder
- Configuring Synchronization Properties for a Folder
- Configuring Properties for a Contacts Folder
- Using Web Views with Folders
- Using Multiple Personal Folders
- Managing Data
- 31. Archiving, Backing Up, and Restoring Outlook Data
- 32. Moving Data in and out of Outlook with Import/Export
- 33. Finding and Organizing Outlook Data
- 34. Security and Virus Protection
- Providing Virus Protection
- Protecting Against Viruses in Attachments
- Configuring Blocked Attachments
- Opening Blocked Attachments
- Protecting Against Office Macro Viruses
- Enabling Applications to Send E-Mail with Outlook
- Tips for Securing Your System
- 30. Managing Outlook Folders and Data
- 7. Collaboration
- 35. Delegating Responsibilities to an Assistant
- 36. Sharing Calendars
- Sharing Your Calendar
- Managing Your Shared Calendar Information
- Working with Group Schedules
- Creating Your Own Free/Busy Server
- Publishing Your Calendar as a Web Page
- 37. Integrating Outlook with Other Office Applications
- 38. Integrating Microsoft Outlook and Microsoft Project
- 39. Collaborating Online with Office
- New Collaboration Features: Beyond Microsoft Office Outlook 2007
- Using the Correct Collaboration Tools
- Using Microsoft Office Live Communications Server
- Using Microsoft Office Communicator
- Using Microsoft Office Live Meeting
- The Microsoft Office Live Services
- 8. Working with Office Server and SharePoint Services
- 40. Collaboration with Outlook and Windows SharePoint Services
- Understanding Windows SharePoint Services Collaboration
- Setting Up Alerts
- Working with Shared Documents
- Working with Shared Contacts
- Linking a Team Calendar to Outlook
- Configuring Alerts in Outlook
- Using Outlook to Work with SharePoint Libraries and Files
- Connecting a SharePoint Library to Outlook
- Downloading Files from a SharePoint Library to Outlook
- Opening Files from a SharePoint Site in Outlook
- Editing Files from a SharePoint Site in Outlook
- Removing SharePoint Files in Outlook
- Removing SharePoint Folders in Outlook
- Using E-Mail to Add a File to a SharePoint Library
- 40. Collaboration with Outlook and Windows SharePoint Services
- 9. Using Outlook with Exchange Server
- 41. Configuring the Exchange Server Client
- 42. Using Outlook with Exchange Server
- 43. Working Offline and Remotely
- 10. Mobility
- 44. Accessing Your Outlook Items Through a Web Browser
- Overview of Outlook Web Access
- Using Outlook Web Access
- Connecting to the Server
- Sending and Receiving Messages
- Sorting Messages
- Copying and Moving Messages
- Deleting Messages
- Working with Other Folders
- Working with Calendar, Contacts, and Other Items
- Configuring the Out Of Office Assistant in Outlook Web Access
- Configuring Other Options for Outlook Web Access
- 45. Making Outlook Mobile
- Why Mobility Is Important
- Overview of Mobility Features in Exchange Server
- Using Outlook Anywhere for Remote Access to Exchange Server
- Using Outlook Mobile Service Accounts
- 44. Accessing Your Outlook Items Through a Web Browser
- A. Index to Troubleshooting Topics
- B. About the Authors
- C. Choose the Right Book for You
- Index
- SPECIAL OFFER: Upgrade this ebook with O’Reilly
A few other options are available on the Insert tab for you to use in your e-mail messages. You can also insert math equations, symbols (such as © or ™), and horizontal lines used for visual separation.
To insert an equation in a message, follow these steps:
On the Insert tab, in the Symbols group, click Equation to create an empty equation box in your message.
Use the commands on the Equation Tools Design tab, shown in Figure 9-29, to create the equation, as follows:
Tools. You can specify how the equation is displayed: Linear is one-dimensional for easy editing, whereas Professional is two-dimensional for display. (These two commands are unavailable until you have entered some data in the equation.) You can enter plain text by clicking Normal Text. Clicking Equation displays the Equation gallery and lets you save new equations to it. Click the dialog box launcher to view the Equation Options dialog box.
Symbols. To add a symbol to the equation, click the symbol. (Click the More arrow to display the entire gallery.)
Structures. You can easily insert a number of mathematical structures into your equation by selecting a structure from the Structures group. You can choose a structure from these sets: Fraction, Script, Radical, Integral, Large Operator, Bracket, Function, Accent, Limit And Log, Operator, and Matrix. Each set has a number of selections, including many commonly used options.

On the Insert tab, in the Symbols group, click Symbol. Select the symbol from the display of commonly used symbols, or click More Symbols to open the Symbol dialog box. In the Symbol dialog box, select the symbol, click Insert, and then click Close. (You can insert multiple symbols by clicking Insert after selecting one, then selecting the next symbol and clicking Insert again, and so on.)
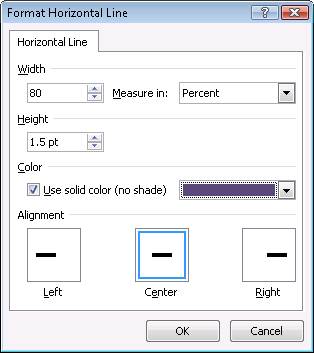
On the Insert tab, in the Symbols group, click Horizontal Line. Outlook 2007 will insert a line at the insertion point location. To format the line, right-click it, and then choose Format Horizontal Line. In the Format Horizontal Line dialog box, shown in Figure 9-30, you can set the size, color, and alignment of the line. (Outlook 2007 uses the most recent settings in this dialog box when you create new lines.)
-
No Comment