
Chapter 7
Managing the Solutions Gallery
Besides being a very powerful and full-featured collaboration tool out of the box, SharePoint is also a development platform. When you need to add capabilities to SharePoint that are not part of the deployed product, there is a mechanism for delivering that capability, formally called solutions.
The solutions gallery is used to hold elements of a SharePoint site that are repeatable and can be reused across sites. The gallery exists at the site collection level; therefore, anything placed in it is available on any site within the collection, but not in any sites outside the site collection. Items that can be placed in the solutions gallery include site templates created using the Save as Site Template command on the Site Settings page, and custom solutions written by developers that extend the capabilities of SharePoint. Once the element is created, it is deployed to the solutions gallery and becomes useable anywhere within the site collection. In this lesson we will be examining the ways a site collection administrator can use the solutions gallery.
The solutions gallery can be found on the Site Settings page under the heading Galleries. The main advantage of the solutions gallery is that it allows individual site collection administrators to deploy customizations that will not affect other site collections. This is a big deal because in days gone by, before this was possible, farm administrators would often disallow all site customization.
The solution framework in SharePoint has been around since the 2007 version of the product. It was created to provide a rational method for deploying customizations to SharePoint. Solutions are made up of various files such as programming code, style sheets, images, and any other resources used to create the functionality that the solution provides. All the files are packaged into a single file that ends with the extension .wsp. In the previous version of SharePoint, only farm administrators could deploy solution files. In addition, it was possible for poorly written code to wreak havoc on the entire SharePoint farm or for solutions to create customizations that, while intended for one particular site or site collection, could contain elements that caused changes to the entire farm.
In SharePoint 2010, sandbox solutions enabled solutions that could be deployed by a site administrator to affect only the site collections in which they were installed. These solutions are limited in some ways compared to those deployed at the farm level by farm administrators. However, these limitations are the concerns of developers. As a site collection administrator, what you need to know is how to deploy a .wsp file and understand the role of a resource quota.
One thing to note about sandbox solutions is that they are possible only if the farm administrator activates the feature. Some farms may not want to enable site collection administrators to publish custom solutions, or enable any custom solutions in the farm at all. The rest of the content in this lesson assumes that the option is enabled at the farm level.
Farm administrators use resource quotas to limit the impact that site collection–level solutions can have on the rest of the farm. Each site collection is assigned a number of “points” that the administrator spends by activating and using the elements of a solution in the solutions gallery. Once the pool of points for that site collection is expended for the day, no more solutions can be run. You can track your daily point use on the solutions gallery page, as shown in Figure 7.1.

Some commonplace occurrences which result in the expenditure of points include:
- Code that generates errors
- Code that taxes the server's processor
- Code that uses the database a lot
These criteria can be modified by a farm administrator but the underlying idea is that code that taxes the farm is going to be limited in how long and hard it can run. Again, most of the problems of point usage are concerns for developers rather than SharePoint administrators, but you should be aware of what these points mean and why a solution might use them too quickly.
Deploying a custom solution is a simple process. A developer will provide a file having a .wsp extension. This file can then be uploaded into the solutions gallery. Deploying a solution is a two step process. Step one involves uploading the file, while step two involves deploying the solution. Once deployed, the solution will be made available via the solutions gallery. Activating the solution is what makes its features available in the site collection. Figure 7.2 shows the toolbar commands used in the solutions gallery for uploading, activating, and deactivating a solution.

In this lesson you will be creating a very basic Web Part and deploying the solution to the solution gallery. Unfortunately, the code produces an unhandled exception. Unhandled exceptions burn a lot of points. You will see the effect of using up daily a resource quota.
Lesson Requirements
To complete this Try It exercise, you need the following:
- A SharePoint site.
- Visual Studio 2010, to build the Web Part. If you don't own a Visual Studio 2010 license, consider using Visual Studio Express Edition for this exercise, as the license is free.
Hints
This exercise does contain some coding, but does not really require any programming skills. You can cut and paste. In addition, if you are not familiar with Visual Studio, viewing the accompanying video with this lesson will be especially helpful.
Step-by-Step
1. Open Visual Studio 2010.
2. Select New Project.
3. From Installed Templates, under Visual C#, select SharePoint 2010.
4. Select the “Empty SharePoint Project” type. Leave the default name set to SharePointProject1. Figure 7.3 shows a project being added in Visual Studio.

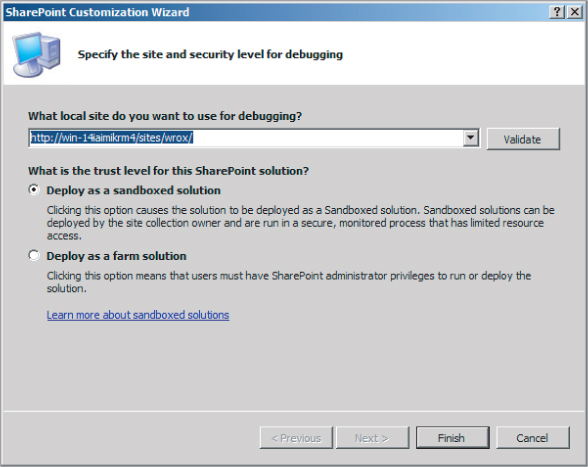
5. In the dialog that pops up, make sure the site collection listed is the one you are using. Select the sandboxed solution with the radio button. Figure 7.4 shows this dialog.
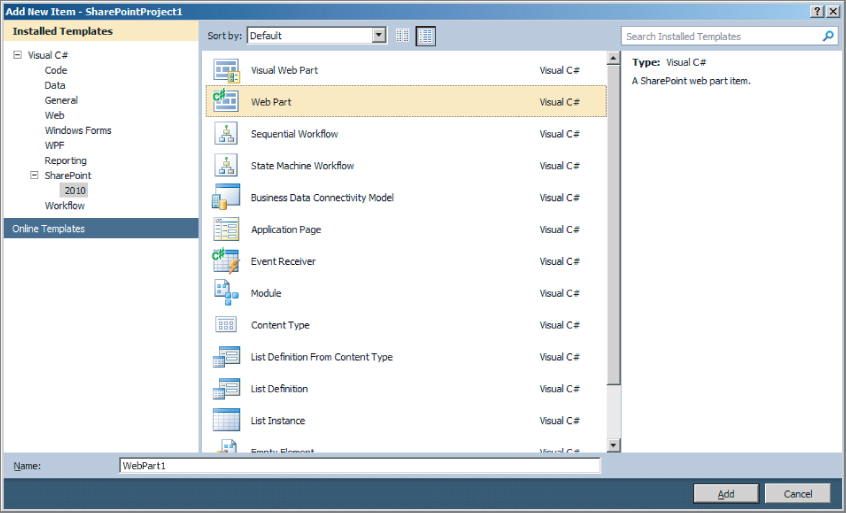
6. Right-click the project name and select Add. From the templates, select Visual C# and SharePoint 2010. From the list of projects, select Web Part. Figure 7.5 shows how to add a Web Part project.
7. Copy and paste the following code. Some code will start on the screen. Overwrite everything on the screen from the word namespace to the final curly bracket (}). This code creates a button on the screen, and throws an error when you click it:
namespace SharePointProject1.WebPart1
{
    [ToolboxItemAttribute(false)]
    public class WebPart1 : WebPart
    {
        protected override void CreateChildControls()
        {
            var button = new Button();
            button.Text = "Create Error";
            button.Click += new EventHandler(button_Click);
            this.Controls.Add(button);
            base.CreateChildControls();
        }

        void button_Click(object sender, EventArgs e)
        {
            throw new NotImplementedException();
        }
    }
}
8. Right-click the project title and select Deploy. The code will run for several seconds and then, barring any errors, will be deployed to the solutions gallery. Figure 7.6 shows the title of the project as it appears in the solution explorer on the right side of the screen. If you do not see the solution explorer, you can open it in the view menu on the menu bar at the top of the screen.

9. Now browse to Site Settings ⇒ Galleries ⇒ Solution Gallery. You should see your project in the Solutions Gallery. At this point it has consumed no resources, as indicated by the two white lines. Figure 7.7 shows the resource usage of 0.0 in the rightmost column.

10. Now we will add the Web Part to a web page. Browse to a page on your SharePoint site that can have a Web Part added to it. (The home page of a test site would be a good choice.) To add a Web Part to the page, use the site actions menu and select the edit page option. This will put the page in edit mode and the Editing Tools section will appear on the ribbon. In the Editing Tools section, select the insert command. The ribbon will change to show the toolbar items that you can insert on the page. Select the web part option and insert the web part onto the page. It should look like the screen as represented in Figure 7.8. Figure 7.8 below shows the toolbar and the Web Part added to the page.
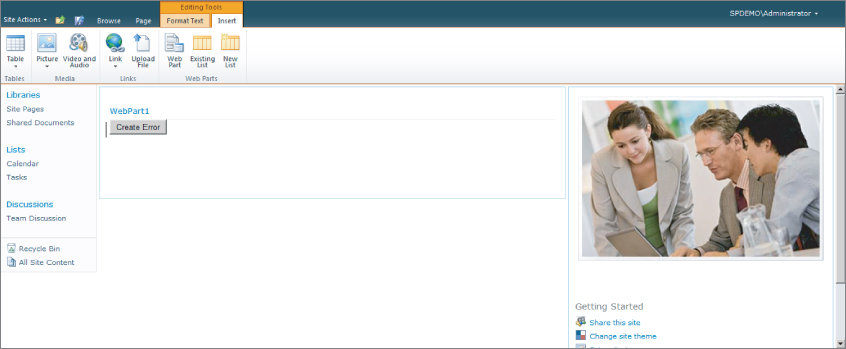
Figure 7.9

In this example you can see the Web Part, represented by a simple button that will create an error. After creating this error a few times, and waiting a few minutes, you can revisit the gallery to see how many resources an unhandled error consumes.
11. Click the Create Error button. You should see an error message show up on the Web Part. Click the button a few times to use up points. You may have to refresh or revisit the page several times.
12. Return to the solutions gallery. By default, every 15 minutes the statistics for resource usage will be updated. It is possible for farm administrators to manually process these statistics or to update them more often. Figure 7.10 shows how the gallery page will look after you have used all your daily resources and the statistics have been updated. Your screen may look slightly different, or the orange bar may be of a different length, depending on the resource quota created by your farm administrator. In this case, it is set to the unrealistically low number of 2 to show a more dramatic usage bar. More common is a quota of several hundred points or more.

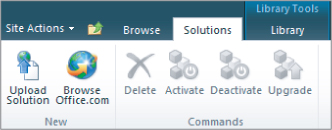
13. Although in this example Visual Studio was used to automatically deploy the solution, another scenario is that a developer hands you a .wsp file for you to deploy to the gallery. In that case browse to the gallery and, after clicking the Solutions tab in the ribbon, select the Upload Solution command, browse to the .wsp file, and click OK.
14. Once the file is uploaded, use the Activate command on the Solutions tab to activate the solution. Figure 7.11 shows the solution-deployment commands on the ribbon. Deactivate is used to remove solutions from the site collection.
Please select Lesson 7 on the DVD or visit www.wrox.com/go/sp2010-24 to view the video that accompanies this lesson.