
Chapter 34
Creating a Business Connectivity Service
The Business Connectivity Service (BCS) is one of the features in SharePoint that can take business-centric data out of the hands of the IT professional and put it into the hands of the user. BCS enables you to connect to business data stores, for example SQL Server and Oracle databases, in a secure manner. For the first time, SharePoint 2010 puts features in the reach of non-IT users through the external content type.
BCS is a server-level service that needs to be made available on your SharePoint farm by being enabled and configured by your SharePoint Administrators. It is normally set up and configured by a server administrator and it provides all the services required to connect with and use line-of-business data. A similar service was available with SharePoint 2007 but was complex and confusing to use and normally required a programmer to make any sense of it at all. Several third-party tools became available to simplify its use but with SharePoint 2010, these are no longer needed. If you find you are unable to use external content types, notify your SharePoint administrator to ensure that BCS has been enabled on the farm.
External content types (ECTs) are used to work with and expose data held outside the SharePoint system, such as SQL Server or Microsoft Access 2010 data stores. An external list enables you to expose that data within SharePoint. For this lesson, you work with both SharePoint Designer 2010 and a team site. SharePoint Designer 2010 is required to create the ECTs and for the examples in this lesson, data held within an SQL Server 2008 database system is used. External lists are discussed in Lesson 35, where we extend the example ECT used here.
ECTs are likely to be provided for you by your SharePoint administrators, and you can use them to expose company data in team sites as SharePoint lists. If you are using another data source, such as a SQL Server database, remember to change the options to suit your information. However, you as a site collection administrator may be required to create your own ECTs, and even if that's not the case, an understanding of how they are constructed can prove useful.
ECTs are created and managed using SharePoint Designer 2010. It's a tool that creates dread for administrators, as in the hands of a user it can create chaos in SharePoint. SharePoint Designer 2010 is available as a free download from the Microsoft Download Center located at Microsoft.com.
ECTs are a powerful feature of SharePoint 2010, and in this lesson, we take only an introductory look at their configuration. It is possible to connect ECTs based on relationships in the database. A basic understanding of databases, particularly of how relationships are created and enforced, is required. For example, provided access to data held in a corporate database, you could display a list of customers and, when a customer name is clicked, show the orders he or she has placed. You set all of this up within a secure SharePoint site and build using SharePoint Designer 2010, including help from its configuration wizards. The one major drawback to the use of Designer in this scenario is that if two or more tables are required for the relationship then it is not supported, and Visual Studio 2010 is required. In the preceding example, if you wanted to display product data in addition to orders you would need to use Visual Studio 2010 to create the associations. In database-speak this particular relationship is normally referred to as many-to-many relationships.
In this exercise, you use SharePoint Designer 2010 to create the external content type connected to a Microsoft SQL Server database.
Lesson Requirements
To complete this Try It exercise, you need the following:
- SharePoint Designer 2010.
- Access to your site collection enabled for SharePoint Designer 2010.
- A SQL Server database containing at a minimum a Customer table. I simply copied the table from the Northwind Microsoft Access 2010 example database.
- SharePoint team site.
Hint
If you have access to an instance of SQL Server, in either a test or a development environment, you can create a simple database quickly by upsizing the Northwind Access 2010 database to SQL Server. In the following exercise, that's exactly the tool used to move the Access Northwind Customer table to SQL Server.
Step-by-Step
To begin the process you will need to use Microsoft SharePoint Designer 2010.
1. Open SharePoint Designer 2010.
2. Click Open Site.
3. Enter the URL to your team site.
4. Click Open.
If you have not used Designer before you can carry out a quick search for SharePoint Designer 2010 tutorials to reach the designer portal containing tutorials and overviews of the software.
Figure 34.1 shows the initial screen of Designer. If ECTs are already available in your site collection, they will be displayed in SharePoint Designer when you click External Content Types in the Navigation tab.
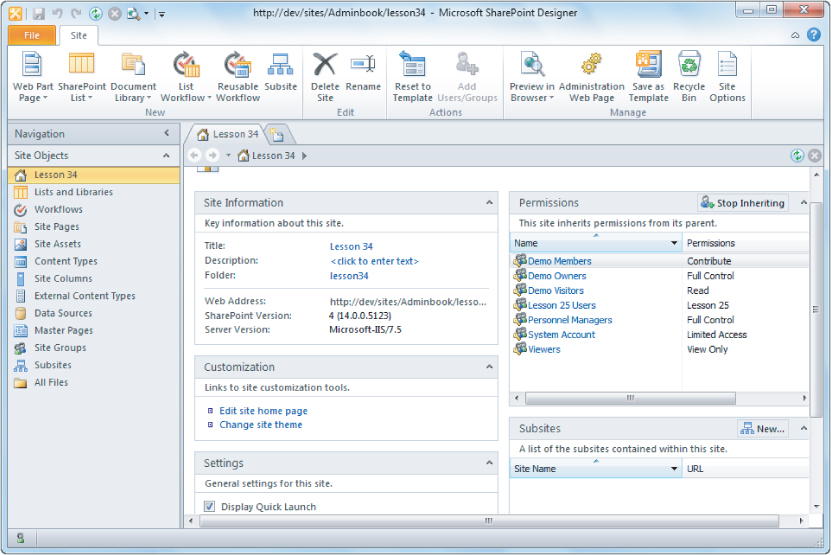
5. Click External Content Types in the site navigation. If ECTs are already defined, SharePoint Designer will return them from the BCS as defined on the server.
6. On the Ribbon, click External Content Type to open the configuration page. Figure 34.2 shows the ECT design window.

You must set multiple configuration settings when defining the ECT. This section assumes you are using an SQL Server customer table. If you are not, please adjust the lesson instructions to match your server and database names. The configuration settings available include:
- Name: Click the Name hyperlink and enter a name for the new ECT. In this case, use Customers.
- Display Name: Enter Customers as the Display Name by clicking the hyperlink Display Name.
- Identifiers: These are used to uniquely identify items returned by the ECT. For this example, they are not required.
- Office Item Type: This drop-down list enables you to select how your ECT will interact with offline clients, for example Microsoft Outlook 2010 and SharePoint Workspace. For this example, accept the default of generic list. However, you can map your ECT to an Outlook appointment, contact, task, or post.
- Offline Sync for External List: Enables you to synchronize the list with offline clients. The default is enabled; leave it there for this example. If you disable it you will be unable to sync the list with Outlook or SharePoint Workspace. The ability to take line-of-business data offline and sync later is a powerful feature of external content types.
At this point, you have set up some of the minor features of the content type. Next, you need to either connect it to an existing data source or create a new data source to a corporate system, for example SQL Server databases. You will do one or the other depending on the permissions you have for such systems and how the BCS application is made available to you. For this example, assume you have access to the data held on SQL Server and can go ahead and create the data source to return the required information. To create a new connection, proceed as follows:
External Content Type Operations: This area will enable you to reuse an existing data source, create a new data source, and define how the user will interact with the data set returned. You can define standard data operations using the ECT, add, edit, delete, and of course read. Click the hyperlink Click Here to Discover External Data Sources and Define Operations. This will open the Operations Designer shown in Figure 34.3. The main options in the designer are as follows:
- Add Connection: This button enables you to create a new connection to a data store.
- Refresh All: Refreshes all existing data connections.
- Remove Connection: Deletes the selected connection.
- Data Source Explorer: This tab displays existing connections that can be used when available.
- Search Results: This tab displays the results of data source searches.
- External Content Type Operations: Displays the allowed operations (read, write, update, delete) for the ECT which you have created, or will display operations set on an already existing ECT. Note that initially it will contain a warning message that you must define at least one operation, which will be a read operation.

7. Define a data source by following these steps:
1. Click the Add Connection button.
2. Select SQL Server from the External Data Source Type Connection drop-down list.
3. Click OK.
4. Enter the name of your SQL Server instance into the Database Server text box.
5. Enter the database name into the Database Name text box.
6. Accept the default security account. Connect with the user's identity.
7. Click OK to validate the accounts and create the connection to your database.
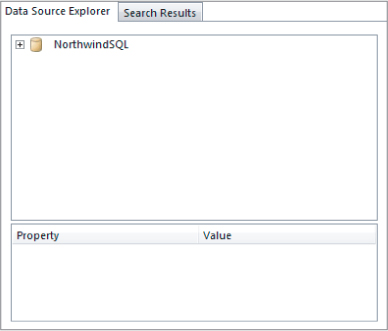
Figure 34.4 shows the Data Source Explorer tab after a valid connection has been added to the ECT.
8. To view the tables and views in the connection, click the plus symbol beside the database name. This expands the view to display tables, views, and routines.
9. Expand the Tables sub-folder by clicking its plus symbol. In this case I have a single table called Customers. If you have multiple tables they will be shown in the Designer window.
10. Expand the Columns item by clicking the plus symbol. This will display the individual columns available within the database table.
11. Click on the table named Customers.
12. Right-click Customers to open the Operations shortcut menu. This menu is used to define the database operations that are allowed on the Customers table. For this example you are going to allow all operations (read, add, edit, and delete records) on the external content type. Figure 34.5 shows the menu for the Customers table.
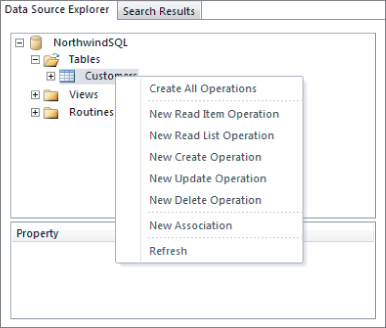
13. Select Create All Operations from the shortcut menu to open the wizard, which will walk you through the process of creating an operation.
14. Click Next on the first page of the wizard.
15. Deselect all fields other than ID, Company, LastName, FirstName, and EmailAddress. For this example, you do not need all fields available in the Customers table.
16. Click Next.
17. We do not require a filter, so simply click Finish to move ahead. However, it is worth remembering that when you are working with large data sets a filter may be required to restrict the number of records retrieved from the database to SharePoint.
18. Select File ⇒ Save All to save all changes, including the new content type.
In Lesson 35, you use the external content type to display data within SharePoint.
Please select Lesson 34 on the DVD or visit www.wrox.com/go/sp2010-24 to view the video that accompanies this lesson.