
Chapter 2
Using the Site Actions Menu
The Site Actions menu is another collection of administrative links on the Site Settings page and is open only to users with the Manage Web Site permission level. By default, this permission level is assigned to the Site Owner's group. It is also possible to assign this permission level separately, a topic we explore in Lesson 25. Most users typically have only Read or Contribute permissions and cannot access this menu.
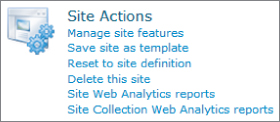
The Site Actions menu contains a handful of important site-related functions that you need to learn just as you did the options in the Site Administration menu in Lesson 1. In this lesson we examine each of the features made available through the Site Actions menu. Figure 2.1 shows the Site Actions menu.
Clicking the Manage Site Features link takes you to the managefeatures.aspx page. See Figure 2.2.

On the left side of the screen you can see the names and descriptions of various features, and on the right side is a toggle button for each feature that activates or deactivates it. If the feature is active, you see a blue box with the word Active in white text next to the button. The button displays the text Deactivate. If the feature is not active, the button text reads Activate.
As with everything else in SharePoint, the items you see in the feature list vary greatly based on the version of SharePoint you are running, how it is configured, and a host of other factors.
What is a Feature
A feature is a piece of functionality in SharePoint that can be activated (turned on) at different levels of the SharePoint farm. The concept of the feature was introduced in the 2007 version of SharePoint and it enables site owners to turn on certain functions on their sites and leave others off. Each time you activate a feature you turn on additional functionality. Site Features only affect the site where they are located. Other features can affect entire site collections or the whole SharePoint installation. Features in the Site Actions menu, however, only apply to a single individual site. In addition to the features supplied by SharePoint, developers can deploy their custom solutions using this same framework. Creating custom features and deploying them is a subject for a more developer-oriented book. Here the goal is merely to make you familiar with what features are and why you need to understand them.
One of the most important things to understand about features is the effects of turning them on or off. When features are activated, or when active features are deactivated, they can create a variety of changes on your site. One typical change is displaying menu items that were previously hidden. Another change is displaying previously inactive, gray items on the ribbon. These changes may affect the choices a user has when selecting, for example, the type of list to create on a site. Turning on certain features increases the list or site templates available to a user creating new content. As we discuss different functionalities we will mention which features need to be turned on to enable those functionalities.
If you cannot find links, list choices, or ribbon options that you have seen on other sites or expect to see on your site, one of the most likely culprit is a disabled feature. If you find yourself missing functions or links, always visit the Site Features page to determine if this is the problem. (If that doesn't work, visit Lesson 25, which discusses permissions. It may be you don't have rights to see the feature.)
To obtain a better understanding of how a feature works, you will turn one on and off as part of the Try It section at the end of this chapter.
Save Site as Template
Save Site as Template is a link on the Site Actions menu. The Save Site as Template link is used to create a site template out of the current site. Before we look at the details of this process, it is important to understand why you would want to create a site template.
When you create new sites you have a range of default options for site types. Each site type contains different pre-loaded lists, libraries, and other elements. However, most sites require additional elements to meet users' needs. Templates allow you to create sites with your own combinations of elements that you anticipate users will want and allow them to create a site that is pre-configured with those items. Items that users often want to recreate include:
- Custom lists
- Custom icons and company logos
- Page layouts
- Combinations of lists and libraries in a site
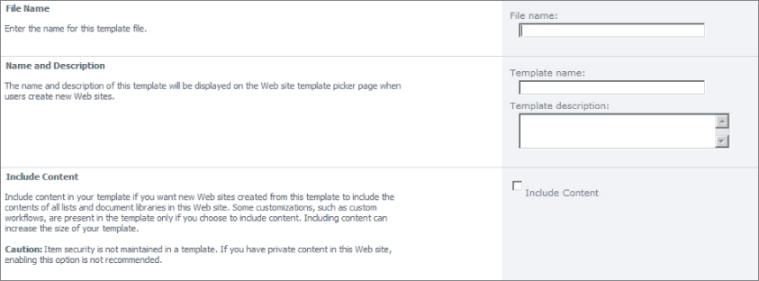
Site templates are used to save a site that can then be recreated with its layouts, lists, and other elements already present. Without templates, these elements would have to be manually recreated for each new site. Figure 2.3 shows the form used when saving a site as a template, the items on the form are discussed below.

- File Name: The template is saved as a file with the extension of .wsp. Enter the name for the file here.
- Template Name: When users create a new site using this template, the template name is what they see on the page where the new site is created and the list of available templates is displayed.
- Template Description: Next to the template name, users can see a description of what the template is for and what elements it contains. Fill out this item to provide the description. Figure 2.4 shows where the title and description are displayed on the Create Site dialog using a custom template.

- Include Content: Check this box if you want the list items added to lists and the documents added to libraries to be present in any new sites created from this template. Usually content is specific to the site on which it is created and you don't want to use this option. However, there are some scenarios where it makes sense:
- For lists that contain elements for drop-down options. Each site created from the template uses the same drop-down options.
- For custom pages you have created with custom branding.
- For other instances in which you want to keep Web Parts, list items, documents, or branding elements intact on each site.
Reset to Site Definition
The purpose of the Reset to Site Definition link is to remove customizations that have been made to the site using SharePoint Designer. It is beyond the scope of this book to discuss the architectural implications of customizing a site with SharePoint Designer. Suffice it to say that if the farm administrators enable the use of SharePoint Designer on a SharePoint site, it is possible to create a wide range of customizations to that site. Sometimes these customizations cause unforeseen problems or the attempt just doesn't work out as planned. If you decide you want to revert to how the site looked when you first created it, clicking this link undoes any changes made to the site definition.
Note that not every change to a site is a customization that is undone by this command. Common changes to a site that can be reset this way include:
- Changes to the underlying layout pages and master pages of the site
- Data views
Examples of changes that cannot be undone by this command are:
- Web Parts added to pages
- Custom lists or libraries you have created
- Themes
- Changes made using the SharePoint UI
Using the Site Analytics Web Analytics Reports
Site analytics simply tell you how many people are looking at your site. SharePoint keeps statistics on how many pages are viewed, how many unique users visit the site, and various other metrics. To view these reports, an administrator has to turn on a service that collects the data. If this service is not set up, you will see the error in Figure 2.5.
In this case the SharePoint farm administrator needs to provision the Web Analytics service application. This function is beyond the rights level assigned to the average user in most SharePoint deployments. Once the service is provisioned, you will see the page in Figure 2.6.

In this lesson we will review the items in the Site Actions menu and how they affect a SharePoint site.
Lesson Requirements
To complete this lesson, you will need the following:
- Access to a SharePoint site
- Administrator rights to the site
Hints
This lesson is a survey of the menu items in the Site Actions menu. The features you see in the video walkthrough and screenshots may be different from what you will see in your SharePoint farm. It is common for feature sets to differ from farm to farm.
Step-by-Step
First you will activate a site feature and see how it affects other elements of the site. Select the Site Settings option from the Site Actions drop-down menu in the upper left corner of the screen. Under the Site Actions header, select the Manage Site Features link.
1. Find the feature called Group Work Lists and click the Activate button. This feature creates some lists with some functionality for team and resource scheduling. Figure 2.7 shows this feature.
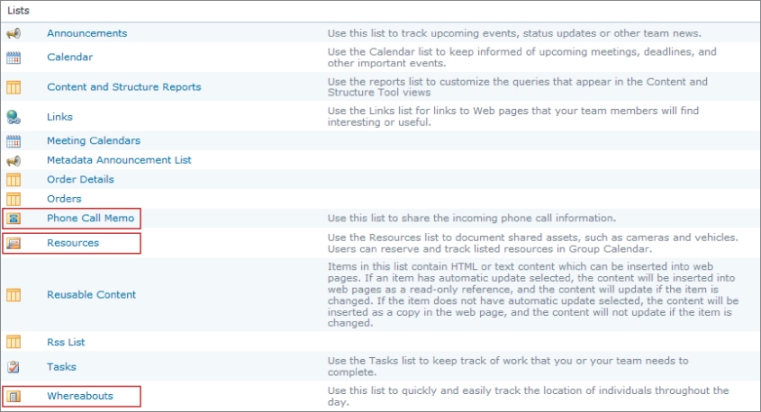
2. Select the View All Site Content link in the Site Actions drop-down menu, which remains in the upper-left corner of the screen. Notice in Figure 2.8 how three new lists have been created as a result of the feature's activation: Phone Call Memo, Resources, and Whereabouts. Every feature is different, but activating a feature frequently creates these kinds of changes to a site — creating new elements, adding new options to the toolbar, and so on.
3. The next action in the Site Actions menu is to save a site as a template. To save a site as a template, click the Save Site as Template link in the Site Actions menu.
4. Fill out the form and click OK. The site and all of its settings, lists, and options will now be available as a choice when you create new sites. The file is also available in the Solutions gallery as a .wsp file. The Solutions gallery is introduced in Lesson 7. You can take this file and use it in other areas of the SharePoint farm or upload it into completely separate SharePoint installations. Figure 2.9 shows the template form you must fill out to save a site as a template. Galleries are discussed in more detail in Lesson 7.
5. The next link in the Site Actions menu is the Reset to Site Definition link. This command will give you two options for resetting any customizations you have made to the page. The first option is to reset an individual page whose address you provide. The second option is to reset the entire site. Figure 2.10 shows this page.

6. Click the View the Web Analytics reports link.
There are two sets of analytics reports, one for the site and one for the site collection. You will see the site collection link only if you have Site Collection Administrator rights. If you are an owner for this site only and not for the site collection (the difference is discussed in Lesson 8) you will see only one link for the site-level reports.
Please select Lesson 2 on the DVD or visit www.wrox.com/go/sp2010-24 to view the video that accompanies this lesson.