When you run a report by using Microsoft SQL Server Reporting Services in Microsoft Dynamics CRM, the report runs in real time and reflects the current data in the system. This works very well for most of your reporting needs, but it can also pose challenges. For instance:
Users who run the report at different times can communicate conflicting information, which leads to confusion and data integrity concerns.
Real-time reports provide no historical perspective for comparison or trending purposes.
For example, you might want to run a monthly pipeline report to understand how the pipeline looks at the beginning of each month and to compare to previous months. Microsoft Dynamics CRM provides a Report Scheduling Wizard to address this need. The wizard allows you to generate report snapshots either on demand or at a regularly scheduled time.
In this exercise, you will schedule a report to run once a month at midnight.
Note
USE your own Microsoft Dynamics CRM installation in place of the Adventure Works Cycle site shown in this exercise, and use a user account that has a security role with privileges to add reporting services reports.
BE SURE TO use the Internet Explorer Web browser to navigate to your Microsoft Dynamics CRM Web site, if necessary, before beginning this exercise.
In the Workplace area, click Reports.
Select Active Opportunities by Owner without opening the report.
In the grid toolbar, click More Actions, and then click Schedule Report.
Troubleshooting
If the Schedule Report option does not appear in the More Actions menu, you do not have rights to schedule reports. Contact your system administrator about adding the Add Reporting Services Reports privilege to your security role.
The Report Scheduling Wizard opens. Here you can specify when you would like a snapshot to occur.
Select On a Schedule, and click Next to proceed to the next step of the Report Scheduling Wizard.
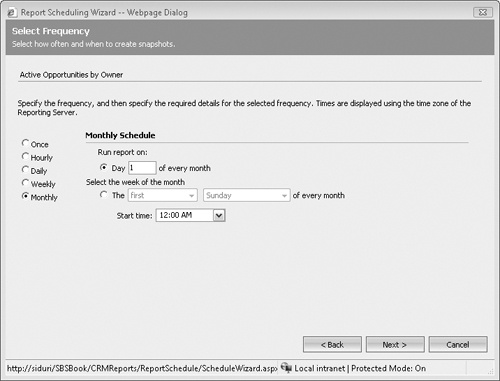
On the Select Frequency page, select Monthly and leave the default settings for the monthly schedule.
The default settings schedule the report for the first day of the month at midnight.
Click Next to proceed to the next step of the Report Scheduling Wizard.
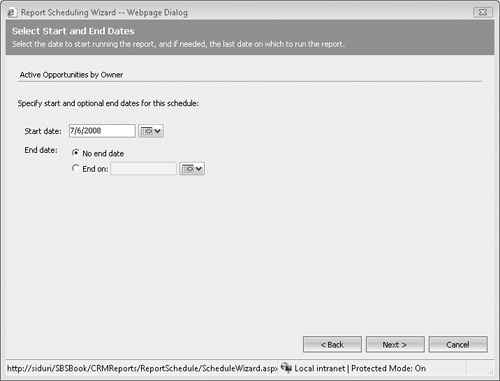
On the Select Start and End Dates page, leave the current date as the default start date, and leave No end date selected.
Click Next to proceed to the next step of the Report Scheduling Wizard.
The Define Report Parameters page opens, indicating that there are no parameters for the selected report.
Click Next to proceed to the final step of the Report Scheduling Wizard.
The Review Snapshot Definition page opens.
Verify that the settings are correct, and click Create to schedule your report.
A Completing The Report Scheduling Wizard confirmation page displays when the scheduling process is complete.
On the confirmation page, click Finish to exit the Report Scheduling Wizard.
You have successfully scheduled the report. On the first day of the next month, the report snapshot will be taken and will be available for all users who have access to the report. When the report is run, an additional report will appear in the list with a name similar to the original report that includes a timestamp of the report’s run date.