Chapter at a Glance

✓ | Create a report with the Report Wizard. |
✓ | Modify a report. |
✓ | Share a report. |
✓ | Schedule a report. |
✓ | Categorize a report. |
In Chapter 15, you learned how to use the Advanced Find tool to create and format data into reports. Although those options are powerful and will meet many of your reporting needs, Microsoft Dynamics CRM also uses Microsoft SQL Server Reporting Services for advanced reporting capabilities. Programmers can create advanced reports by working directly within Microsoft SQL Server Reporting Services, but Microsoft Dynamics CRM also includes a Report Wizard that provides users of all skill levels with a tool to create Microsoft SQL Server Reporting Services reports. The following table compares the features of Advanced Find with those of the SQL Server Reporting Services Report Wizard.
Microsoft Dynamics CRM includes 24 standard SQL Server Reporting Services reports in the base product. You can find these reports by navigating to the Workplace area and clicking the Reports link.

You will find that these reports solve some of your reporting needs and will probably serve as a solid starting point for your organization. The reports also give you a high-level understanding of the possibilities that exist with Microsoft SQL Server Reporting Services. The following table summarizes the reports and their applicability within the Marketing, Sales, Service, and Administrative areas of Microsoft Dynamics CRM.
Report Name | Marketing | Sales | Service | Administrative |
|---|---|---|---|---|
Account Distribution | X | X | X | |
Account Overview | X | X | X | |
Account Summary | X | X | X | |
Activities | X | |||
Campaign Activity Status | X | |||
Campaign Comparison | X | |||
Campaign Performance | X | |||
Case Summary Table | X | |||
Competitor Win Loss | X | |||
Invoice | X | |||
Invoice Status | X | |||
Lead Source Effectiveness | X | X | ||
Neglected Accounts | X | |||
Neglected Cases | X | |||
Neglected Leads | X | |||
Order | X | |||
Products By Account | X | |||
Products By Contact | X | |||
Quote | X | |||
Sales History | X | |||
Sales Pipeline | X | |||
Service Activity Volume | X | |||
Top Knowledge Base Articles | X | |||
User Summary | X |
In this chapter, you will learn how to create, modify, and format reports by using the Microsoft Dynamics CRM Report Wizard. You will also learn how to share a report with other users, schedule delivery of a report, and categorize a report. Finally, you will learn to use the advanced features of the Report Wizard to create complex reports.
Troubleshooting
Graphics and operating system–related instructions in this book reflect the Windows Vista user interface. If your computer is running Windows XP and you experience trouble following the instructions as written, please refer to the "Information for Readers Running Windows XP" section at the beginning of this book.
Important
The images used in this book reflect the default form and field names in Microsoft Dynamics CRM. Because the software offers extensive customization capabilities, it’s possible that some of the record types or fields have been relabeled in your Microsoft Dynamics CRM environment. If you cannot find the forms, fields, or security roles referenced in this book, contact your system administrator for assistance.
Important
You must know the location of your Microsoft Dynamics CRM Web site to work the exercises in this book. Check with your system administrator to verify the Web address if you don’t know it.
The Report Wizard allows you to create sophisticated reports within the Microsoft Dynamics CRM interface by guiding you through a step-by-step process that is easy to understand. It allows you to produce grouped, summary-level data in addition to record-level data. Consider the following scenarios:
You need to create an Opportunity Pipeline report that shows all opportunities by owner and includes the sum of all estimated revenue across those opportunities.
You need to compare the number of accounts assigned to each user to determine account distribution levels.
With the Report Wizard, you can get the aggregated summary numbers for these types of reports.
In this exercise, you will use the Report Wizard to create a report that shows active opportunities by owner.
Note
USE your own Microsoft Dynamics CRM installation in place of the Adventure Works Cycle site shown in this exercise, and log in as a user that has privileges to create reports.
BE SURE TO use the Windows Internet Explorer Web browser to navigate to your Microsoft Dynamics CRM Web site before beginning this exercise.
In the Workplace area, click Reports.
In the grid toolbar, click the New button to launch the New Report form.
In the Source section of the form, click the Report Wizard button.
The Report Wizard Get Started page opens.
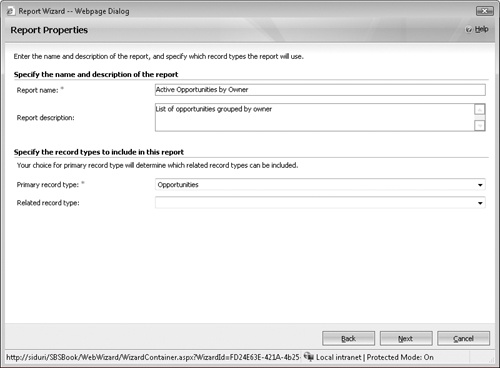
In the Report Wizard, leave Start a new report selected, and then click Next to move on to the Report Properties page.
In the Report name field, enter Active Opportunities by Owner, and in the Report description field, enter List of opportunities grouped by owner.
In the Primary record type field, select Opportunities.
Click Next to move on to the Select Records to Include in the Report page.
In the Report Filtering Criteria section, replace the default Modified On search parameter by choosing Status instead of Modified On in the Select list.
Leave Equals in the operator field, and in the Enter Value field, select Open.
Click Next to move on to the Lay Out Fields page.
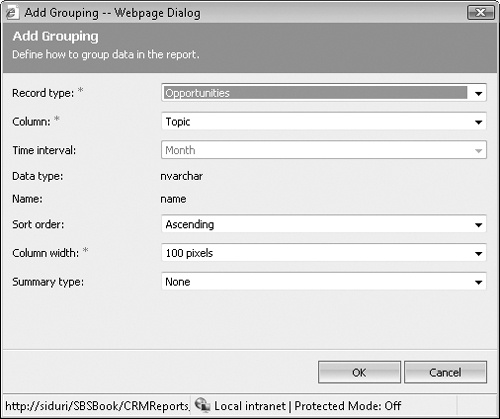
Click in the Click here to add a grouping field.
The Add Grouping dialog box opens.
In the Summary Type field, select Count, and then click OK to add this grouping to your report.
This summary type allows you to see how many active opportunities exist for each owner.
Click Click here to add a column.
The Add Columns dialog box opens.
In the Column field, select Potential Customer. Set the Column Width to 150 pixels, and click OK to add the column to your report.
To the right of Potential Customer, click in the Click here to add a column field to add another column to your report. Continue this process to add the following fields and related information:
Column
Column width
Summary type
Topic
300 pixels
None
Probability
75 pixels
None
Est. Close Date
100 pixels
None
Est. Revenue
100 pixels
Sum
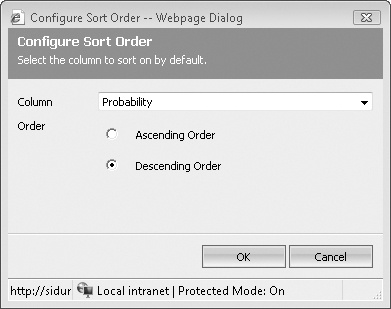
In the Common Tasks pane, click Configure Sorting.
The Configure Sort Order dialog box opens.
In the Column field, select Probability, and then click Descending Order.
Click OK, and then click Next to move on to the Format Report page.
Leave Table only selected for your report format, and then click Next.
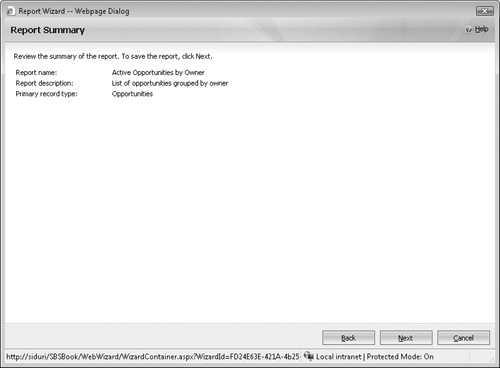
The Report Summary screen displays your report selections.
Review the report details, and then click Next.
The Report Successfully Created confirmation page opens, indicating that you have successfully created a report.
On the confirmation page, click Finish to exit the Report Wizard and return to the New Report form, which automatically updates to reflect the details of your report. To see the results, you need to run the report.
On the form toolbar, click the Run Report button.
Your report displays within SQL Server Reporting Services. The resulting report provides insight into how many open opportunities exist for each owner.