Even though you can create and send Microsoft Dynamics CRM e-mail messages with the Web client, most users prefer to create and reply to their e-mail messages by using Outlook. Copies of your Outlook e-mail messages can be saved to Microsoft Dynamics CRM so that you can go back later and see a complete history of the communications. Much like creating contacts, tasks, and appointments in Outlook, you can create e-mail messages as you normally would in Outlook and save a copy of each message to Microsoft Dynamics CRM by clicking the Track In CRM button. When processing the e-mail message, Microsoft Dynamics CRM for Outlook reviews the list of message participants and automatically looks for matching e-mail records in the Microsoft Dynamics CRM database. If it finds matching e-mail addresses, the system appends the e-mail message to the matching records as a completed e-mail activity. This e-mail matching process searches for matching e-mail addresses across those record types that contain e-mail addresses in Microsoft Dynamics CRM, such as contacts, accounts, leads, queues, users, and facilities/equipment.
Troubleshooting
If Microsoft Dynamics CRM cannot find a matching e-mail address for your message participants, you will need to manually resolve the participant to an existing record to get the message to appear in the record’s history.
In addition to linking the e-mail message to the participants, you can specify which Microsoft Dynamics CRM record the e-mail message is regarding. For example, you might send multiple e-mails to a single customer, but one e-mail might be about an existing order, whereas a different e-mail might be about a customer service issue. By specifying the Regarding field of each message (one is regarding an order, and one is regarding a service issue), you can split up the communication history to the appropriate records. This will save you time when viewing the activity history related to each record. Microsoft Dynamics CRM for Outlook saves a list of your recently used Regarding values so you can quickly track e-mail messages regarding recent topics.
See Also
For more information about tracking e-mail messages and other activities in Microsoft Dynamics CRM, see Chapter 4.
When you create an e-mail message in Outlook, Microsoft Dynamics CRM for Outlook also allows you to access an Outlook address book that contains your Microsoft Dynamics CRM records. The Microsoft Dynamics CRM address book provides you quick access to the e-mail addresses of your Microsoft Dynamics CRM records directly in Outlook, without forcing you to look up their e-mail addresses from the Web client. In addition, the Microsoft Dynamics CRM address book can include e-mail information about non-contact records, which you cannot synchronize to Outlook.

Tip
You can configure additional settings for the Microsoft Dynamics CRM address book in the Microsoft Dynamics CRM for Outlook options.
In addition to tracking e-mail messages sent from Outlook, Microsoft Dynamics CRM for Outlook allows you to track e-mail messages that you receive. To track these types of messages, you can open the message and click the Track In CRM button, or you can select the e-mail message in your Inbox and then click the Track In CRM button in the CRM group on the menu bar. You can set the Regarding value of the message by using the Set Regarding button in the CRM toolbar.
Important
You can select up to 20 e-mail messages at a time and click the Track In CRM button. Depending on your e-mail system and your Microsoft Dynamics CRM tracking configuration, Microsoft Dynamics CRM can automatically track all of the e-mail messages in a subject thread so that you don’t have to manually track every message. Contact your system administrator to determine your exact system configuration.
In this exercise, you will create an e-mail message in Outlook and track it in Microsoft Dynamics CRM. You will also manually resolve an unmatched e-mail address to an existing record.
Note
USE the Chris Perry contact record you created earlier in this chapter and the Sonoma Partners account record you created in Chapter 3. If you cannot locate the Sonoma Partners record in your system, select a different account record for this exercise.
BE SURE TO start Outlook with Microsoft Dynamics CRM for Outlook installed, if necessary, before beginning this exercise.
In the Outlook menu bar, click the New button, and select Mail Message.
A blank e-mail message opens.
In the To field, enter any e-mail address that does not already exist in your Microsoft Dynamics CRM database. You need to use a new e-mail address to complete steps 11 through 14 of this exercise.
In the Subject field, enter Test Message.
In the menu bar, click the Track in CRM button.
Click the Set Regarding button, and then select More.
A Microsoft Dynamics CRM lookup window opens.
In the lookup window, click the list to see the possible entities you can link to the e-mail message. Select Account.
In the search box, enter Sonoma Partners, and press
 to search for the account in Microsoft Dynamics CRM. Select the appropriate account in the results, and then click OK.
In the e-mail message, move your mouse over the View Regarding button to preview the Regarding value of the message. You can see that this message is regarding the Sonoma Partners account.
Click the Send button.
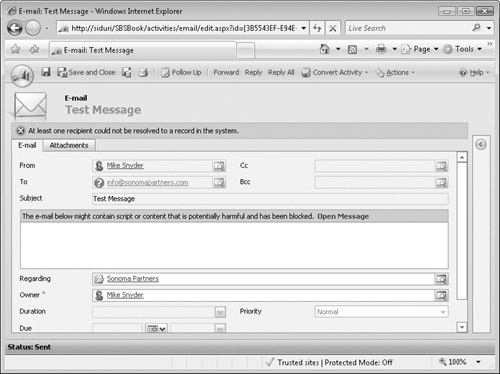
Click the Sent Items link in the folder list to display a list of your sent e-mail messages. Double-click the test e-mail message you just sent. When the message opens, click the View in CRM button.
The e-mail message now opens in the Web client. Assuming that you entered an e-mail address not already in your database, the sample e-mail address is colored red in the To field. This record color indicates that Microsoft Dynamics CRM could not find a matching e-mail address in your system.
To manually resolve this e-mail message to a particular contact record, click the red e-mail address.
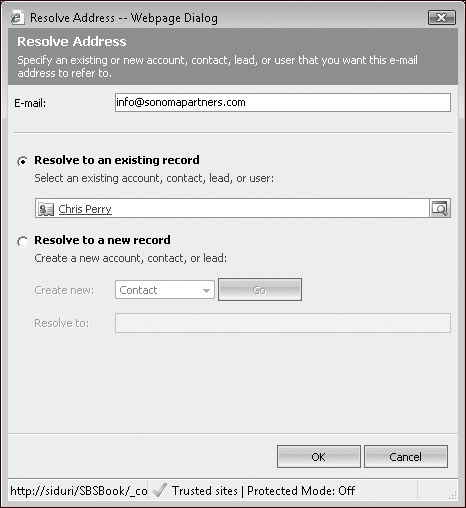
A Resolve Address dialog box opens. From this dialog box, you can resolve the e-mail participant to an existing record or create a new record. Let’s assume that you want to resolve this message to the Chris Perry contact record you created earlier in this chapter.
In the text field under Resolve to an existing record, type Chris Perry, and then press the
 key.
key.Microsoft Dynamics CRM formats the text you entered as blue and underlines it, indicating that it has successfully found the matching record.
In the e-mail message, Microsoft Dynamics CRM replaced the sample e-mail address with the Chris Perry contact.
In the menu bar, click the Save button.
Now if you view the history of the Chris Perry contact or the Sonoma Partners account, you can view a copy of this e-mail message.