It is certainly powerful and exciting to have the ability to create a list of records that match your specific criteria. The ability to take action on those records to strengthen your Microsoft Dynamics CRM database and adapt it to your business as it evolves is equally important. With Microsoft Dynamics CRM, you can take many actions on the results of an Advanced Find query. For example, you can perform the following actions:
Export the data to Microsoft Office Excel.
Bulk edit the records.
Bulk assign the records.
Deactivate the records.
In this section, we focus on the bulk edit and bulk assign functionalities. With the Microsoft Dynamics CRM bulk edit functionality, you can make a change to many records at one time from any grid. For example, you might use bulk edit or bulk assign if:
You realize that data has been entered incorrectly for several records.
You add a new attribute that you would like to populate for all records.
An employee decides to leave your company, and you need to distribute the records that the employee owns to other team members.
Important
Bulk edit rights might not be available for every user. Your ability to use bulk edit is configured by the system administrator in your security role.
In this exercise, you will edit the Address 1: City field of multiple records by using the bulk edit tool. In addition, you will use the bulk assign functionality to assign ownership of multiple records to another user.
Note
USE your own Microsoft Dynamics CRM installation in place of the Adventure Works Cycle site shown in the exercise.
BE SURE TO use the Internet Explorer Web browser to navigate to your Microsoft Dynamics CRM Web site, if necessary, before beginning this exercise.
In the Workplace area, click Accounts.
The default view appears in the grid.
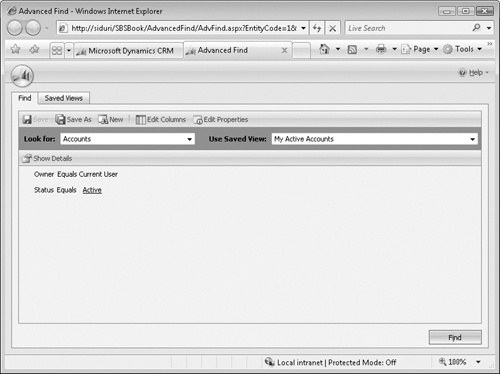
On the application menu toolbar, click Advanced Find.
The criteria from the current view populates the Show Details section.
Click the Show Details button to view the details of the query, and then add a new search field by choosing Address 1: City in the Select field.
Leave the operator as Equals, and enter NY in the Enter Value field.
Click Find.
All active accounts that you own with a city value of NY are displayed. Next you will update the city to New York by using the bulk edit tool.
Select several records by holding the
 key while clicking the records you want to update.
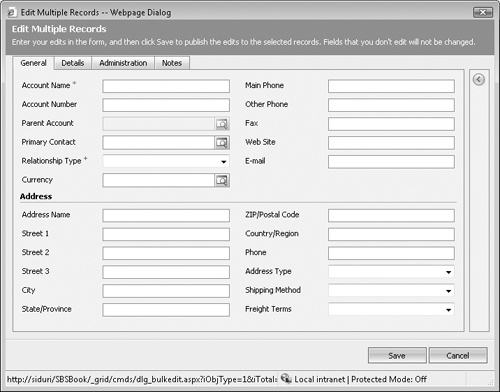
On the grid toolbar, select More Actions, and then choose Edit.
The Edit Multiple Records dialog box opens. It resembles a blank Account form.
Enter New York in the City field, and then click Save.
After you have clicked Save, the underlying records are updated. If you refresh the grid, you will no longer see these records.
In the results grid, select at least two additional records by pressing the
key while clicking them.In the grid toolbar, click the Assign button.
The Assign Accounts dialog box opens.
In the dialog box, click Assign to me to assign the selected records to yourself.