As you work with various records in a view, you might want to update the data in multiple records at one time. Microsoft Dynamics CRM includes a bulk edit feature that allows you to select multiple records in a view and edit them with one form instead of having to modify each record individually. This tool can provide a significant time savings if you need to modify a large number of records. Although this bulk edit feature is very convenient, it does contain a few notable restrictions:
If a particular field contains programming script behind the scenes (as configured by your system administrator), you cannot edit the data in that field with the bulk edit tool.
You cannot use the bulk edit tool to remove values from a field. You can only modify or add data to a field.
You cannot use the bulk edit tool to edit certain fields in Microsoft Dynamics CRM, such as the Parent Customer field of an account or contact record.
The bulk edit tool updates only the selected records on the page; you cannot use it to update all of the records in the view if the records span multiple pages.
If a data field is read-only on the form, you cannot edit it with the bulk edit tool.
Tip
Even though you cannot edit the owner of a record by using the bulk edit tool, you can easily change the owner of multiple records at one time by using the Assign feature located in the entity menu toolbar.
In this exercise, you will use the bulk edit tool to update the State/Province field for multiple contacts.
Note
BE SURE TO use the Internet Explorer Web browser to navigate to your Microsoft Dynamics CRM Web site, if necessary, before beginning this exercise.
OPEN a view of Contacts that contains more than one record.
While holding down the
 key, click two or more of the contact records.
Microsoft Dynamics CRM highlights the records you click to indicate that they are selected.
In the entity menu toolbar, click More Actions, and then click Edit.
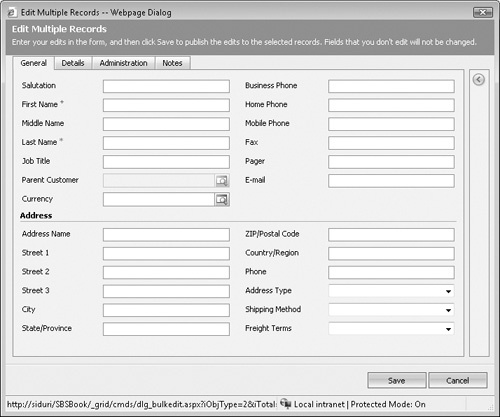
The Edit Multiple Records dialog box opens. This dialog box is very similar to the contact form, with the same layout and fields.
Click the Save button.
Microsoft Dynamics CRM updates the State/Province field of the selected records and closes the Edit Multiple Records dialog box.