When you track activities related to your customers, you and other employees can reference that information to understand the complete history of interactions with those customers. Imagine a scenario in which a customer has been working with one person from your office, but that employee leaves for a week’s vacation. If the customer calls your office when that person is out, you could look up the customer’s record in Microsoft Dynamics CRM and read the activity history to get up to speed on the customer.
As you learned earlier in this chapter, all of the activity types share some common data fields. One of the shared data fields across all activity types is the Status field. The default status values for activity records are:
Open
Scheduled
Completed
Canceled
Closed
When you look up activities related to a customer, you will notice that Microsoft Dynamics CRM splits the activities into two categories: Activities and History. The Activities section displays all of the activities related to the record that need to be completed. Only activities with a status of Open or Scheduled appear in the Activities display. The History section lists all of the completed, closed, or canceled activities related to the record.
Tip
If your view contains a large number of records, you can use the Filter On list to show only those activities within a specific date range. You can also sort the columns in the record list just like you can sort the other grids.
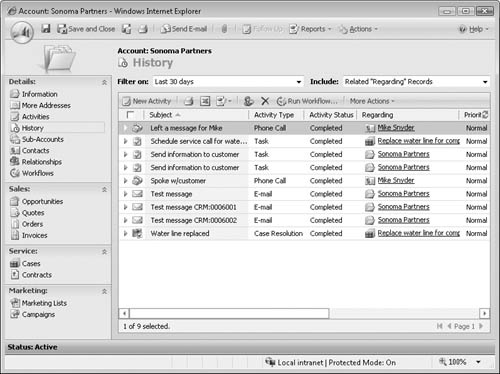
In addition to displaying a view of all activities related to the record, Microsoft Dynamics CRM performs an activity rollup so that you can see the activities of records related to the record you’re viewing. For example, the Sonoma Partners account lists nine different closed activities, but only five of those activities are regarding the Sonoma Partners account. The other completed activities are regarding records that are related to the Sonoma Partners account. For example, two phone calls are regarding the Mike Snyder contact. They appear in this view because Mike Snyder’s parent account is Sonoma Partners. In addition, this view lists two completed activities regarding a case opened by Sonoma Partners. If you want to see only the activities regarding the Sonoma Partners account, you can use the Include list to select the This Record Only value. The Microsoft Dynamics CRM activity rollup works on both open and closed activities.
In this exercise, you will create two activities with different Regarding values to see how Microsoft Dynamics CRM displays those records in the Activities and History sections.
Note
USE the Sonoma Partners and Contoso account records you created in Chapter 3. If you cannot locate these records in your system, select two different account records for this exercise.
BE SURE TO use the Internet Explorer Web browser to navigate to your Microsoft Dynamics CRM Web site before beginning this exercise.
Navigate to the Accounts view and open the Sonoma Partners account record.
In the menu toolbar, click Actions, select Add Activity, and then click Phone Call.
A new window opens.
In the Subject field, enter Open Phone Call Due 2 Months from Now.
Note that because you created this phone call from the Sonoma Partners record, Microsoft Dynamics CRM automatically populates the Regarding field with the Sonoma Partners account.
In the Due field, select a date two months from today.
Click the Save and Close button.
The window closes and you are returned to the Sonoma Partners account record.
In the Parent Account field, select the Contoso account record that you created in Chapter 3, and then save the Sonoma Partners account. (Remember, if you cannot locate the Contoso record in your system, select a different account record.)
Click the account you selected in the Parent Account field to view the details of the parent account record.
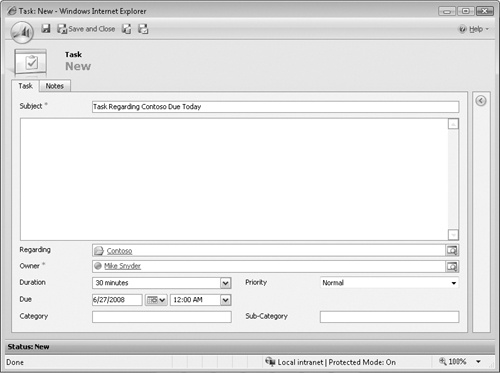
In the menu toolbar, click Actions, select Add Activity, and then click Task to launch the New Task form.
Note that, because you created this task from the parent account record, Microsoft Dynamics CRM automatically populates the Regarding field with the parent account.
In the Subject field, enter Task Regarding Contoso Due Today.
In the Due field, select today’s date.
Click Save and Close.
The window closes, and you are returned to the parent account record.
In the left navigation pane, click Activities.
The activity list displays the task that you just created, but the phone call record does not appear. By default, Microsoft Dynamics CRM shows activities within the next 30 days for open activities, or the previous 30 days for closed activities. Because you entered a due date two months from today for the phone call, that record doesn’t fit the filter criteria.
To view the phone call, click the Filter On list arrow, and select All.
The view updates to show the phone call.
This example shows the activity rollup in action. You created two activities regarding two different records, but you can see them in a single view because the Sonoma Partners record lists Contoso as its parent.
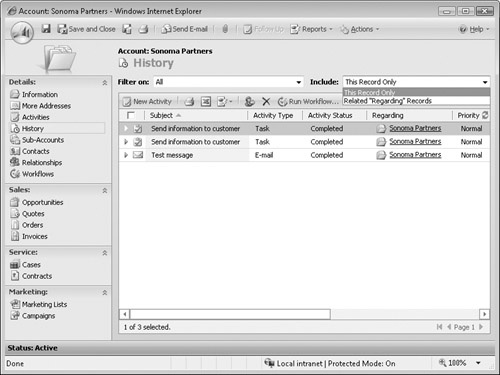
To view only those activities regarding the parent account, click the Include list arrow, and select This Record Only.
The view updates again to display only the task regarding Contoso.
Double-click the task regarding the parent account to open that record. Click Save as Completed to mark the task as completed.
Click Activities in the left navigation pane of the parent account record.
The task record does not appear anymore because you just closed it.
To view the closed task, click History in the left navigation pane.
The view shows the task you just completed.