

426 Publishing a Website
10 Press Command-B to make the text bold.
11 Choose File > Save or press Command-S.
NOTE
iWeb saves all your pages and sites in a single file in your user
account’s Library folder: (user folder)/Library/Application Support/iWeb/
Domain. You may want to copy this file to a backup location periodically.
If you’re using Time Machine, then your file should already be backed up.
Adding Your Photos to the Page
Now that the title is done, let’s add some great photos to this page. The goal
here is to choose some of your best travel pictures to the homepage so the
website’s visitors are intrigued enough to explore the entire site.
Because iWeb is part of iLife, it’s very easy to access your iPhoto library right
from iWeb. The Media Browser shows you your entire iPhoto library. If you
have Aperture (Apple’s professional image management and enhancement
software) installed, its entire library is also available.
1 Click the Photos button at the top of the Media Browser.
2 Click Events to see all your iPhoto Events.
NOTE
If you don’t see a list below iPhoto, click the disclosure triangle
next to the word iPhoto. If needed, there’s a folder called Bhutan in the
Lesson_15 folder that you can import into iPhoto to use for this lesson.
3 Double-click the Bhutan thumbnail.
NOTE
If you completed the iPhoto lessons, your screen should look like
the one on the right. If your Events appear differently, you can skim the
Events you see by moving the pointer over the thumbnail. The Bhutan
Event contains photos of traditional dancers and countryside shots.

Adding Your Photos to the Page 427
The Event opens to show you all of the available photos. Let’s use some
photos to replace the media placeholders used by the iWeb template.
To quickly check if an element is a media placeholder, position
your pointer over it until a help tag appears. If there’s no help tag, or if
the help tag doesn’t identify the element as a media placeholder, then it
isn’t one.
4 Locate the file PA116936.jpg in the Media Browser.
5 Drag the file onto the large placeholder image of the desert.

428 Publishing a Website
The image updates with your photo.
6 Drag the file PA137360.jpg onto the small placeholder image of the sunset.
The photo is masked to the new shape. Let’s adjust it so we see a different
part of the photo.
7 Double-click the image you just added to adjust the image’s mask.
Drag the photo upward to match the previous figure, and then press
Return.
Let’s replace the final image on the page.
Adding Your Photos to the Page 429
8 Drag the file PA147540.jpg to replace the last media placeholder.
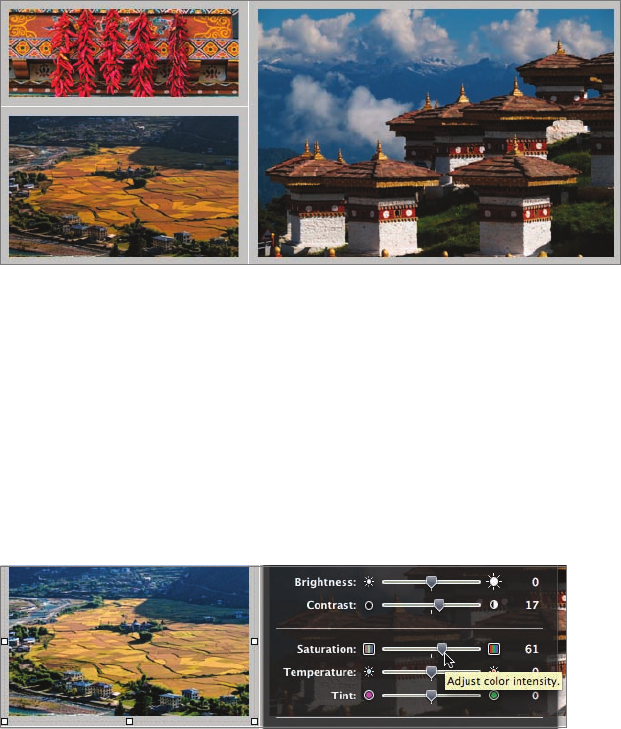
The pictures look pretty good, but the one of the open fields is a little
dark and the big image on the right could be a little more saturated.
Fortunately, you can fix these pictures without ever leaving iWeb.
9 Select the open fields shot and click the Adjust button in the toolbar.
10 Click the Enhance button.
11 Drag both the Saturation and Contrast sliders to the right to increase their
values. A contrast value near 17 and Saturation near 61 should work well.
12 Select the horizon photo, and click Enhance. iWeb attempts to fix the
image automatically.
..................Content has been hidden....................
You can't read the all page of ebook, please click here login for view all page.