
Precision Editing 179
4 Press Delete to remove the frames, then move your pointer to the begin-
ning of the clip and press the spacebar.
The beginning of the next clip also has a few frames that are out of focus.
Now you’ll use a different technique to shave off those few bad frames.
5 Position your pointer over the beginning of the last clip and hold down
the Command and Option keys.
An orange border appears around the edge of the clip, and the adjacent
clips temporarily scoot out of the way.
6 Click the orange handle, and while watching the Viewer, drag to the right
until the shot comes into focus. Then release the mouse button.
The bad frames are removed.
Precision Editing
One of the best new features in iMovie ’09 is the Precision Editor. You’ll learn
the ins and outs of this powerful tool in Lesson 8, but for now we’ll open it
briefly to make one additional edit.
1 Position your pointer over the fourth clip from the end, as pictured below,
and press the spacebar.

180 Instant Moviemaking: Creating Your First iMovie
Play this clip
This is a great moment, as the girl’s face lights up when she realizes what
the present is, and then she says, “That was just what I wanted!”
Unfortunately, the videographer was so taken by her cuteness that he
stopped paying attention to the camera, leaving us with great sound but
useless picture. (Thanks, Dad!)
You’ll fix this by removing the boring video frames but leaving the audio
to overlap the next shot.
2 Double-click the space after this shot ends and before the Christmas tree
shot begins. (Click the gray area to the right of the clip.)
The Precision Editor opens, covering the Event Browser.
The Precision Editor is like a zoomed-in view of the edit point
between the two clips, and it allows you to make fine adjustments
to each of the clips.
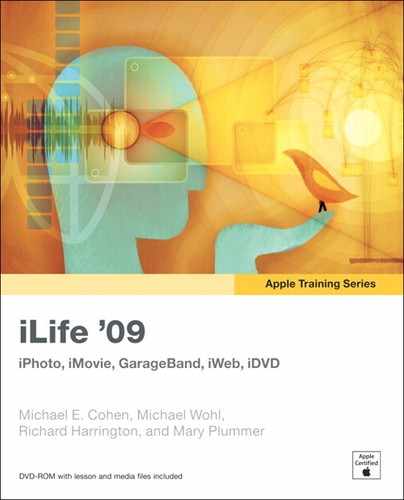
3 Position your pointer over the end of the first (upper) clip and drag left,
watching the Viewer.
Precision Editing 181
4 Drag until just before the blond girl’s face moves out of the frame (about
6 seconds).
Time Offset Indicator
When you release the mouse button, the clip is shortened.
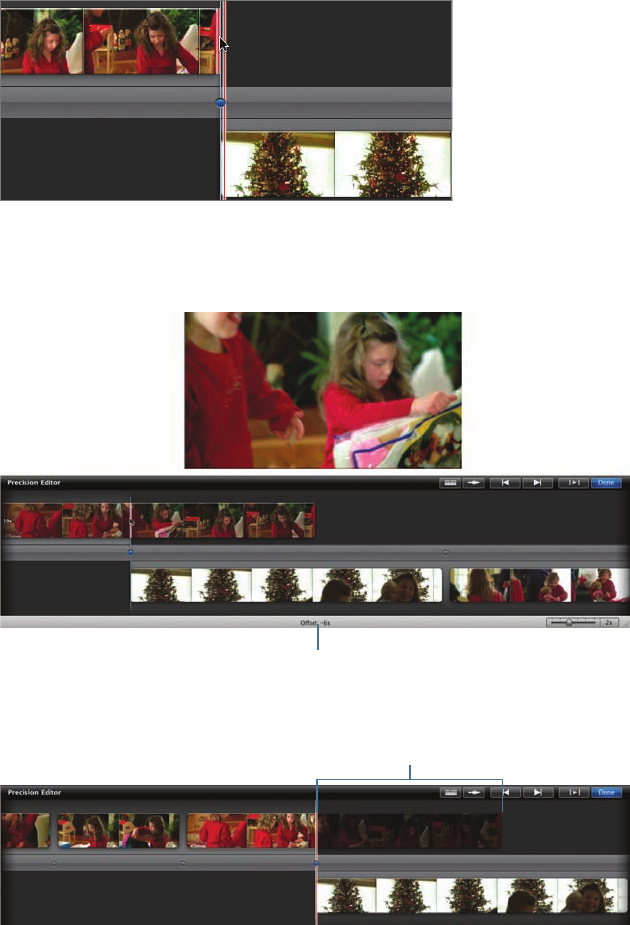
Removed frames

182 Instant Moviemaking: Creating Your First iMovie
The edit point updates back to the center of the screen. The darkened
thumbnails to the right show the frames you removed from the shot.
5 Move your pointer to the beginning of the left clip and press the spacebar
to see the new edit.
The clip is shorter, which is great, but you also cut off the audio that
was so cute. Next you’ll add that audio back in, on top of the Christmas
tree clip.
6 Click the Show Audio Tracks button.
Show Audio Tracks button
Blue bars indicating the audio tracks appear above and below the video
clips. The darkened portion to the right of the playhead contains the
audio we want to hear, but currently it’s turned off.
7 Position your pointer over the edit point on the upper audio clip and drag
right until you reach the end of the clip.
The audio is added back to the project, overlapping the beginning of the
Christmas tree shot.
..................Content has been hidden....................
You can't read the all page of ebook, please click here login for view all page.