
In the world of business and commerce, certain documents need to be signed and, often, witnessed. When a document is transmitted electronically, not only does it need to be signed, but the signature must be verifiable. Word and Excel take care of this in two ways. Each provides an easy way to set up an electronic document for a signature by either typing the signature or using a scanned image of the signature inserted as a picture. Additionally, both Word and Excel attach a digital certificate that has been issued to the signer from a reliable source. The digital certificate verifies the identity of the signer. With the digital certificate attached, the document or workbook is considered digitally signed. To prevent any alterations to the file after it has been signed, the digital signature is invalidated if any changes are made.
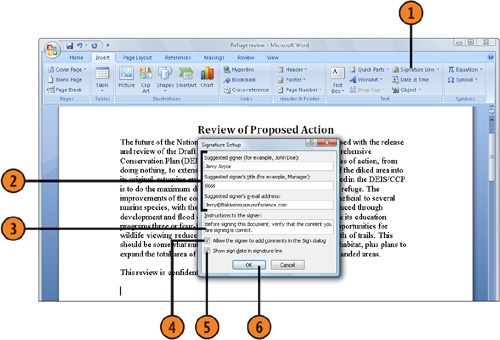
 On the Insert tab, with your document or workbook completed and saved, and with the insertion point where you want the signature to appear, click the Signature Line button to display the Signature Setup dialog box.
 Enter the name and, optionally, the title and e-mail address of the suggested signer.
 Specify whether you want to allow the signer to add comments when signing the file.
 Specify whether you want to include the date on which the file was signed.
 Click OK. Save and close the document or workbook. If the file is intended for someone else’s signature, send it to that person.
Tip
The typed or scanned image of a signature is used only to visually indicate who signed the document. It’s the digital certificate that accompanies the document that provides the proof that the document is digitally signed.
Tip
You need a digital certificate (also called a digital ID or a digital signature) to be able to digitally sign a document. If you try to sign a document without one, you’ll be prompted either to purchase one from a third party or create your own. If you create your own certificate, it will be available to validate your signature on your computer only.
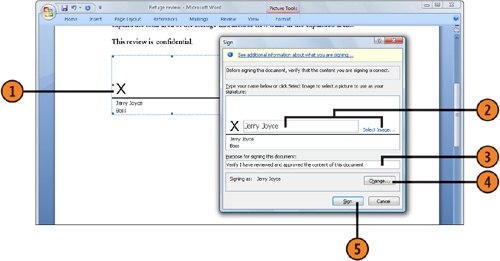
- Open the file that has been prepared for your signature, and double-click the signature line.
- In the Sign dialog box that appears, do either of the following:
Type your name in the box.
Click Select Image, and use the Select Signature Image dialog box to locate the picture file that contains your signature. Click Open in the dialog box to insert the signature image.
 If the text box that states the purpose of signing is shown, click in the box, and enter any information you want.
- Verify that this digital signature name is the name of the digital certificate you want to use to verify your identity. If it isn’t, click Change, and, in the Select Certificate dialog box, select the digital certificate you want. Click OK.
- Send the digitally signed file to whoever required you to sign it. The digital certificate will accompany the file, and the recipient will be able to examine the certificate to verify that you signed it and that the file hasn’t been altered since you signed the certificate.
See Also
"Signing a Document, Workbook, or Presentation with a Digital Certificate" for information about verifying that the digital signature is valid in a digitally signed document you’ve received.