
Data Syncing Settings
When you add an account—whether it's Twitter, Facebook, Exchange, or Gmail—you'll have a few choices to make about what data syncs with your tablet and how often. Follow these steps to get to Accounts & Sync; this feature enables you to adjust your syncing options:
- Tap the Notification bar on the bottom right of the Home screen.
- Tap the Settings button, which will bring up the quick settings.
- Tap the Settings button again to bring up the full settings menu.
- Tap Accounts & Sync.
The first two choices are under General sync settings, and they're both enabled by default: Background data and Auto-sync.

The Background data option determines whether your applications can sync in the background while you're using other apps or even when you're not using the tablet at all. If you disable this feature, some apps will still sync in the background, but most will not. Disabling this option will save battery life, but it will also make it take longer to use some apps because they'll have to sync data as soon as you launch them.
The second choice, Auto-sync, allows apps to fetch data on the schedule that the app developer has determined. Disabling this option means that you'll have to manually request a data sync by tapping the Sync refresh button next to the account.
NOTE: General settings apply to all accounts.
If you want to change the sync settings for a specific app, tap the name of that app under Manage accounts, as shown in Figure 5–5.

Figure 5–5. Managing your syncing options
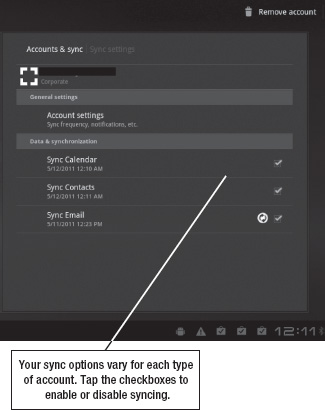
What you see will depend on the type of account you've selected. The only syncing option for a Skype account is whether it syncs your contacts. Exchange accounts, as shown on the left, can sync Email, Calendar, and Contact information. You can individually enable or disable the sync options one-by-one. If you're using a different method to sync your calendar with Google Calendar, you may want to disable calendar sync, for instance.
You may see the option on the upper right to Remove account. While that option works fine for most accounts, do not use it to remove Exchange accounts.
Using this option doesn't cleanly remove an Exchange email account. Removing an Exchange account from the Email app itself (as shown earlier) is the best way to go.