
Exploring Widgets
Widgets are small, continually running app windows. Widgets from different developers can check your mail, display your calendar, show your music selection, check off your grocery list, display pictures, and notify you of new Twitter posts. They can have transparent backgrounds, and some are designed to have different windows stacked on each other that you can swipe to rearrange. Often, tapping a widget launches the full app.
Figure 7–2 shows some of the widgets available by default in Honeycomb. You can download many more widgets, and many developers package widget views with their apps.

Figure 7–2. The default Honeycomb widgets
Adding Widgets
Follow these steps to add widgets to your Home screen:
- Press the + symbol on the upper-right corner of the screen or press your finger down on an empty section of the screen. You’ll see something resembling Figure 7–3. This is Honeycomb’s holographic interface for adding Home screen elements.
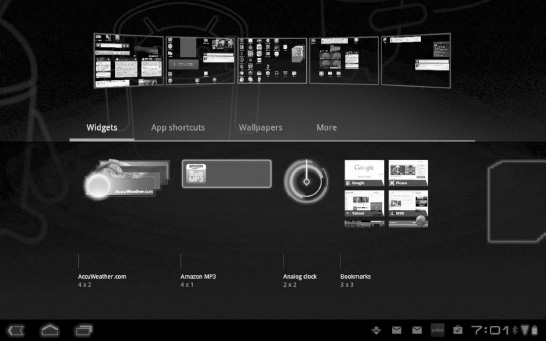
- By default, Widgets should be selected; but if it isn’t, tap the Widgets selection on the left-middle section of the screen.
- The next step is to swipe your finger along the bottom half of the screen to find the widget you want to add.
- Once you find it, just press and drag the widget to the screen where it should go, as shown in Figure 7–4.

Figure 7–4. Drag and drop your widget to the correct screen
- Once your finger is over the correct screen, you can lift your finger, and the widget will be added.
NOTE: Widget sizes are listed on the bottom of each widget in the interface with numbers like “4×2” or “3×3.” The number refers to how many app icons would fit in the same space. Thus, 4×2 is four app icons wide by two app icons high.
REMOVING WIDGETS
What if you want to get rid of a widget? You can remove widgets even more easily than you can add them. Follow these steps to do so:
- Long press the widget until the screen changes. One thing you may notice is that + symbol on the upper-right corner is now a Trash Can icon.
- With your finger still pressing down, drag the widget to the Trash Can icon on the upper-right corner of the screen, as shown in Figure 7–5.

Figure 7–5. Removing a widget
Removing a widget does not uninstall it from the tablet. It merely removes it from display on your Home screen. You can add a widget again anytime you choose.
Moving and Resizing Widgets
Now that you’ve added and removed widgets, it’s time to rearrange and resize them. This process is pretty similar to removing them. All widgets can be repositioned, as long as there’s available space on the Home screen:
- Long press the widget until the screen appearance changes. You’ll see a light blue grid form.
- Drag the widget to the new location.
- Lift your finger.
Resizing widgets uses a similar process, but there’s a caveat: not all widgets can be resized. Resizing widgets is a feature of Android 3.1, and widgets must be specifically programmed to take advantage of it. Follow these steps to resize a widget:
- Long press the widget until the screen appearance changes. If you see a light blue outline around the widget with diamond control points, you can resize it (see Figure 7–6).
- Drag the widget by the diamonds to resize it either smaller or larger in a given direction. Not all widgets are resizable in both directions; and in some cases, you may not have enough room to make the widget larger.

Figure 7–6. Resizing widgets