
Front End and User Migration to Lync Server 2013
The Front End Server migration is where you will start your migration process to Lync Server 2013. The first step is to prepare Active Directory for Lync Server 2013. In fact, all the necessary steps to build a Lync Server 2013 Front End are covered in Chapter 5, “Microsoft Lync Server 2013 Front End Server.”
Note
After a Lync Server 2013 pilot pool is deployed, you cannot use Lync Server 2010 Topology Builder or Lync Server 2010 Control Panel to manage any Lync Server 2013 resources. You must use Lync Server 2013 tools to manage Lync Server 2013 and Lync Server 2010 resources. In general, you must use the administrative tools that correspond to the server version you want to manage. Lync Server 2010 and Lync Server 2013 administrative tools cannot be installed together on the same computer.
Before you begin the migration process, it is important to ensure that you have the latest Lync Server 2010 updates applied to the environment. As with any major migration, it is also prudent to back up the Lync Server 2010 environment. You should back up the SQL databases, export user configuration, and content using the dbimpexp.exe tool, and the CMS from the Lync Server 2010 pool. Configuration of the Lync Server 2010 clients should be considered as well. It is recommended that a Client Version Filter to only allow clients with the most current updates to connect. The Client Version Filter is found in the Lync Control Panel under the main heading “Clients” and the subheading “Client Version Policy.”
Any experienced Architect will understand that if the existing environment is having problems, those problems should be resolved before migration. A migration is not going to fix things that were not working correctly to begin with. Here is a high-level overview of items to check:
• Verify that the Lync Server 2010 services are started.
• Verify the federation and Edge Server settings.
• Verify XMPP services and federated partners.
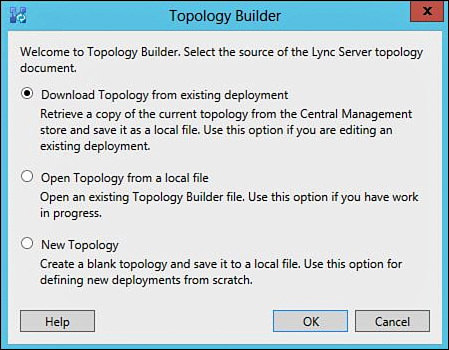
After the forest and domain have been prepared, you need to download the existing topology using the Lync Server 2013 Topology Builder from the Lync Server 2010 homed Central Management Server (CMS). After this has been completed, you will be able to define the new Lync Server 2013 servers. This is shown in Figure 16.1.
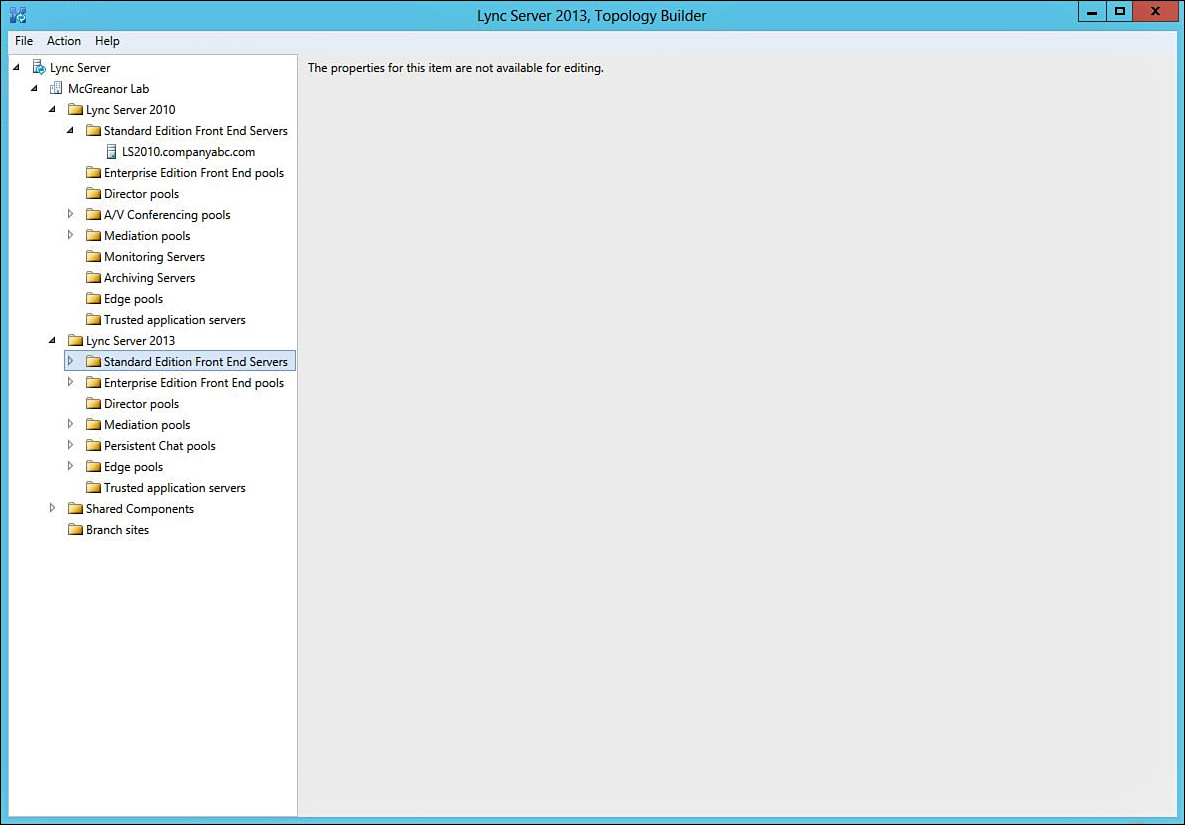
The Central Management Server was introduced in Lync Server 2010 to hold important configuration information related to the entire Lync environment. Since Lync Server 2013 also uses the Central Management Server architecture, there is no need to import any configuration from the Lync Server 2010 environment. When you open Topology Builder, you will see your Lync 2010 environment and right below you will see the Lync 2013 node, as shown in Figure 16.2. You add servers to the topology the same way you did with the legacy Lync 2010 Topology Builder.
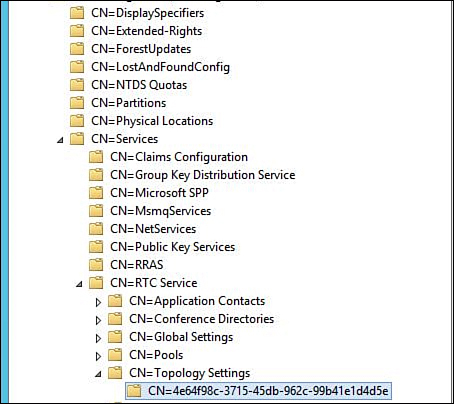
You might see references to the Central Management Server and Central Management Store. The main difference is that the Central Management Server is the Front End responsible for the read/write copy of the Central Management Store, which is the actual data in the database. The master database location is referenced by a service connection point (SCP) in Active Directory Domain Services (AD DS). Connect to the correct context, whether Configuration or System. Below I am showing the configuration context. Expand CN=Services, CN=RTC Service, CN=Topology Settings. The location in Active Directory is shown in Figure 16.3.
After you have deployed the Lync Server 2013 pool, it is important to verify coexistence with the legacy Lync Server 2010 pool. Here are the tasks that should be completed:
• Verify that the Lync Server 2013 servers have started, navigate to the Administrative ToolsServices applet, and verify that all services that begin with “Lync Server” are in the started state.
• Open the Lync Server 2013 Control Panel. Open the Control Panel from the Front End Server in your Lync Server 2013 deployment. Select the Lync Server 2013 pool.
Note
On Lync Server 2013, Silverlight version 5 needs to be installed before the Lync Server Control Panel is used.
• In the topology section of the Lync Server 2013 Control Panel, the Topology now includes the Lync Server 2010 and Lync Server 2013 roles.
After a successful Lync Server 2013 pool installation, the next step is to set the Lync Server 2013 pool to use the legacy Lync Server 2010 Edge Server. This allows a period of coexistence, which is necessary so that you can maintain full external functionality while you are in coexistence mode. Later you will transition to the Lync Server 2013 Edge for external connectivity. To finish this process, you need to complete the following steps:
1. Open Topology Builder and select your site, which is directly below the Lync Server node.
2. Under the Actions menu, select Edit Properties.
3. In the left pane, select Federation Route.
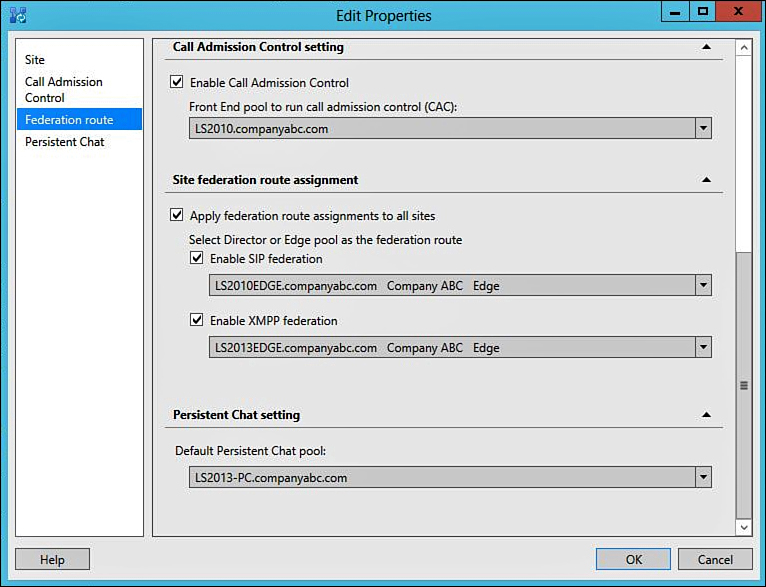
4. Under Site Federation Route Assignment, select Enable SIP Federation, as shown in Figure 16.4, and then select the Lync Server 2010 Edge Server (this can be a Lync Server 2010 Director if a Director exists in the legacy environment).
5. Click OK to close the Edit Properties page.
6. In Topology Builder, under the Lync Server 2013 node, navigate to the Standard Edition server or Enterprise Edition Front End pools, right-click the pool, and then click Edit Properties.
7. Under Associations, select the check box next to Associate Edge Pool (For Media Components). This is shown in Figure 16.5.
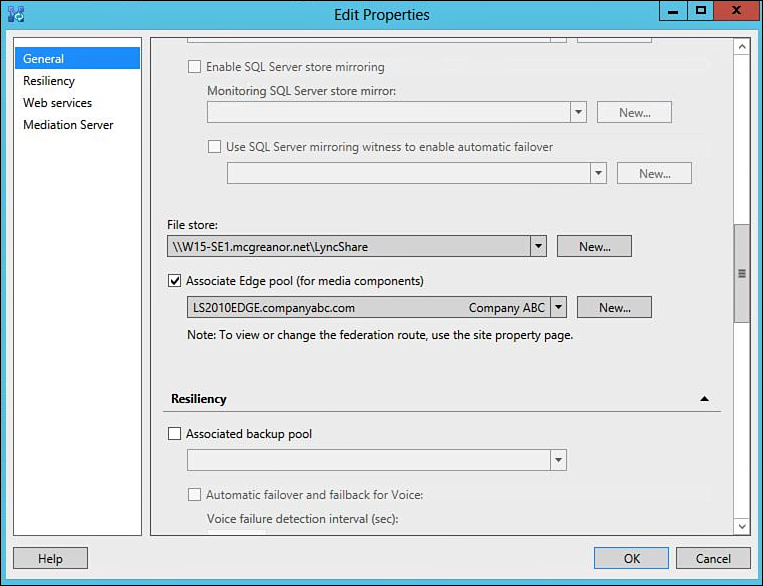
8. From the list, select the Lync Server 2010 Edge Server.
9. Click OK to close the Edit Properties page.
10. In Topology Builder, select the topmost node, Lync Server.
11. From the Action menu click Publish Topology, and then click Next.
12. When the Publishing Wizard completes, click Finish.
Now that you have a Lync Server 2013 pool, and a Lync Server 2010 pool, you can move pilot users to the new Lync Server 2013 pool to verify functionality between pools. To move a user between pools, you can use the Lync Server 2013 Control Panel or Lync Server 2013 Management Shell. Let’s go over using the Lync Server 2013 Control Panel first.
1. From the Lync Server 2013 Front End, open the Lync Server 2013 Control Panel. Click on Users, click Search, then click Find.
2. Select a user that you want to move to Lync Server 2013.
3. On the Action menu, select Move Selected Users to Pool.
4. From the drop-down list, select the Lync Server 2013 pool. Click OK.
A Force option is present in the Move Users dialog box. Force should be used only in a failure scenario. Never use the Force option unless you are confident you know you should.
Verify that the Registrar Pool column for the user now contains the Lync Server 2013 pool. If you see the Lync Server 2013 pool, the move was successful.
Now that you know how to move a user in the Lync Server 2013 Control Panel, let’s take a look at moving a user using the Lync Server 2013 Management Shell. Use the following commands to move a user using the Lync Management Shell:
1. Open the Lync Server 2013 Management Shell.
2. At the command line, type the following:
Move-CsUser -Identity "Chad McGreanor" -Target "pool02.companyabc.com"
3. Next, to verify that the move was successful, type the following:
Get-CsUser -Identity "Chad McGreanor"
4. The RegistrarPool identity now points to the Lync Server 2013 pool.
Note
At this point in the migration process, you are in a coexistence configuration. You have a Lync Server 2010 pool and a Lync Server 2013 pool configured. For external Edge services you are using the legacy Lync Server 2010 Edge Server. In the next section you will complete the migration process to Lync Server 2013 for the Edge services.
It is recommended that you test functionality between users in both the Lync Server 2010 pool and the Lync Server 2013 pool before moving all users and services Run the following tests:
• Users from at least one federated domain, an internal user on Lync Server 2013, and a user on Lync Server 2010. Test instant messaging (IM), presence, audio/video (A/V), and desktop sharing.
• Users of each public IM service provider that your organization supports (and for which provisioning has been completed) communicating with a user on Lync Server 2013 and a user on Lync Server 2010.
• Verify that anonymous users are able to join conferences.
• A user hosted on Lync Server 2010 using remote user access (logging in to Lync Server 2010 from outside the intranet but without VPN) with a user on Lync Server 2013, and a user on Lync Server 2010. Test IM, presence, A/V, and desktop sharing.
• A user hosted on Lync Server 2013 using remote user access (logging in to Lync Server 2013 from outside the intranet but without VPN) with a user on Lync Server 2013, and a user on Lync Server 2010. Test IM, presence, A/V, and desktop sharing.
So that’s it for the Front End pool. The next section covers Lync Server 2010 Edge to Lync Server 2013 Edge migration.