
5 Navigation
Navigating around a project in any DAW software is key to working quickly and effectively. I find that most of my day is spent just moving around the project in order to edit things and mix. Nobody wants to wait around while you rewind back to the first verse to redo a vocal take. While I miss the forced break you got when working with 2” tape during winding, I’d rather spend that time doing something productive or coming up with creative ideas.
To that end, I have put together some tips on how I navigate Nuendo projects quickly and without too much setup time. Some users may find that using a large list of markers can help them move around; I like having a roadmap of the project too, but my technique involves just a few key commands and a preference setting or two to get you flying around a project with ease.
Pro Tools User Tip: Navigation versus Nuendo Navigation Here’s one area that differs a good bit from the way Pro Tools normally operates. If you are migrating from Pro Tools to Nuendo, take a bit of time here to really get the hang of locating and moving around as this is such a large part of working with any DAW. I am confident that once you’ve got a basic set of tools for moving around in the project, you will find it fast and easy.
The most obvious difference is that in Nuendo, the selection of events or range is not tied to the cursor position. Pro Tools, by default, has the cursor’s position locked to the current timeline selection. When you make a selection and start playback, playback will start right at the beginning of the selection (perhaps with pre-roll).
In Nuendo, the cursor’s position is always independent and can start anywhere you’d like regardless of your current selection. I find this to be much more convenient for my workflow as playback is more independent of editing tasks.
Of course, Pro Tools can be configured to have the selection separate from the cursor position, but then locating becomes a bit more difficult. Nuendo can also be configured to have the selection determine the cursor position in the special Edit mode (designed for video post-production), discussed in Part III, “Editing.”
Let’s start by importing a song from a CD into a blank project for practice and demonstration:
1. Create a new, empty project.
2. From the File menu, choose Import>Import from Audio CD.
3. Make sure your favorite CD is in the drive.
4. Up pops the Import from Audio CD dialog box, shown in Figure 5.1 Select the track you wish to import.
Figure 5.1 The Import from Audio CD dialog box.

5. By double-clicking the name, you can change it, making it more relevant than Track 01.
6. Click Copy in order to extract the audio file and put it in the project’s Audio folder.
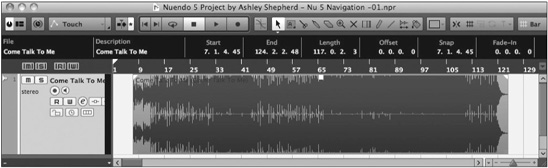
7. Click OK and the audio file will be placed on a newly created stereo audio track for you. (See Figure 5.2.)
Figure 5.2 Newly created audio track with CD audio on it.
Caution Make sure not to skip step 6 as it is tempting to just hit OK once you have selected a track to import. Multiple tracks may be selected, but they must be copied into the project folder before being used in the project window as an audio event.
Hit the spacebar to start playback. You should see the cursor moving across the project window, and you should hear your favorite tune of the moment. Hit the spacebar again to stop playback.